Metal shelf brackets often need trimming to fit properly, especially when they extend past countertops, don’t align with cabinetry, or were installed incorrectly. Whether you’re modifying a single bracket in place or fabricating multiple supports from raw stock, knowing how to cut metal shelf brackets safely and cleanly is essential. This guide walks you through the best tools, precise techniques, and expert-backed strategies for cutting metal brackets without damaging your space or compromising structural integrity.
From hacksaws to portable band saws, we’ll break down what works best for different situations, what to avoid, and how to finish like a pro. You’ll learn how to minimize vibration, prevent sparks indoors, and even repurpose scraps for added value.
Choose the Right Cutting Tool

Selecting the correct tool depends on bracket type, installation status, and workspace safety. Using the wrong tool can cause damage, injury, or unsightly cuts.
Match Tool to Bracket Type
Solid steel brackets around 3/8 inch thick require aggressive tools like angle grinders or portable band saws. Wire shelving brackets cut best with bolt cutters or fine-tooth jigsaws. L-shaped or fabricated sheet metal responds well to hacksaws, circular saws, or band saws. Glued and screwed brackets demand low-vibration tools to avoid joint failure.
Always assess thickness and access before choosing your method. A tool that works in a workshop may be dangerous or impractical in a kitchen.
Avoid High-Risk Tools Indoors
Never use an angle grinder inside living spaces unless fully isolated. Sparks can ignite dust or wood, and molten metal can damage flooring. The burning odor lingers and may contaminate food prep areas. Reserve grinders for outdoor or shop use only.
Use a Hacksaw for Precision and Safety
When vibration must be minimized, the hacksaw is the top choice, especially for brackets glued with PL Premium or near finished surfaces.
Pick the Correct Blade
Use a fine-tooth metal-cutting blade with 18 to 32 TPI. More teeth mean smoother cuts and less burring. Ensure at least three teeth contact the metal at once to prevent chattering and blade breakage.
Cut with Control
Clamp the bracket if possible. Apply steady, even pressure and let the blade do the work. Don’t force it. Support the cut-off end to prevent snagging.
This method takes time but delivers clean, safe results. It’s ideal for kitchen installations where sparks or shaking could ruin cabinetry.
Finish with a File
After cutting, deburr edges with a metal file. Smooth sharp corners to prevent cuts during handling or future use. For wire brackets, cap ends with vinyl tips immediately.
“Any vibration from any power tool will shake the whole thing, and cause the glue to rip out, so be warned the slow manpower way is best.” — de-nagorg
Try a Portable Band Saw for Fast, Clean Cuts
The portable band saw, also called a Porta-Band, is the gold standard for in-place metal bracket cutting, offering speed, precision, and near-zero vibration.
Why It’s the Pro Choice
This tool operates quietly with minimal vibration that preserves adhesive bonds. It cuts fast on solid steel, often completing multiple brackets in under 15 minutes. The clean finish reduces the need for filing. Rental units are widely available and cost-effective for one-time jobs.
How to Use It Safely
Mark the cut line clearly. Secure the bracket with a helper if loose. Guide the blade straight without forcing it. Use a vacuum to capture filings.
This tool excels when brackets are too embedded to remove but need exact trimming.
“The cleanest, fastest, quietest, minimum if any vibration, is to use a porta band.” — TheEplumber
Cut In Place with a Reciprocating Saw

A reciprocating saw works well when access is tight and speed matters, but only with proper setup.
Use a Fine Metal-Cutting Blade
Install a high-tooth-count blade designed for steel. Coarse blades tear metal and increase vibration. Replace dull blades promptly.
Cut Widthwise to Reduce Vibration
Instead of slicing through the bracket’s thickness, cut across its width from the top down. This minimizes side-to-side motion, reducing stress on screws and glue.
Stabilize the Bracket
Have a helper hold the bracket firmly during cutting. Unstable movement can damage surrounding wood or cause kickback.
“Or a sawzall with a fine metal cutting blade and someone holding the piece to dampen shaking.” — Old Thomas
Skip the Angle Grinder Indoors
While powerful, the angle grinder is often the wrong tool for home environments.
Risks Outweigh Benefits
Sparks fly, creating fire hazard near wood, drywall, or insulation. Molten metal droplets can pit floors or scorch cabinets. Fumes and odor linger, especially in kitchens. High vibration risks breaking glued joints.
When It’s Acceptable
Only use outdoors or in a ventilated workshop. Wear a face shield, respirator, and flame-resistant clothing. Keep a fire extinguisher nearby.
“A grinder would work outside but that does not look like a kitchen that will appreciate the lingering smell of burning steel…let alone showers of molten sparks.” — oggy bleacher
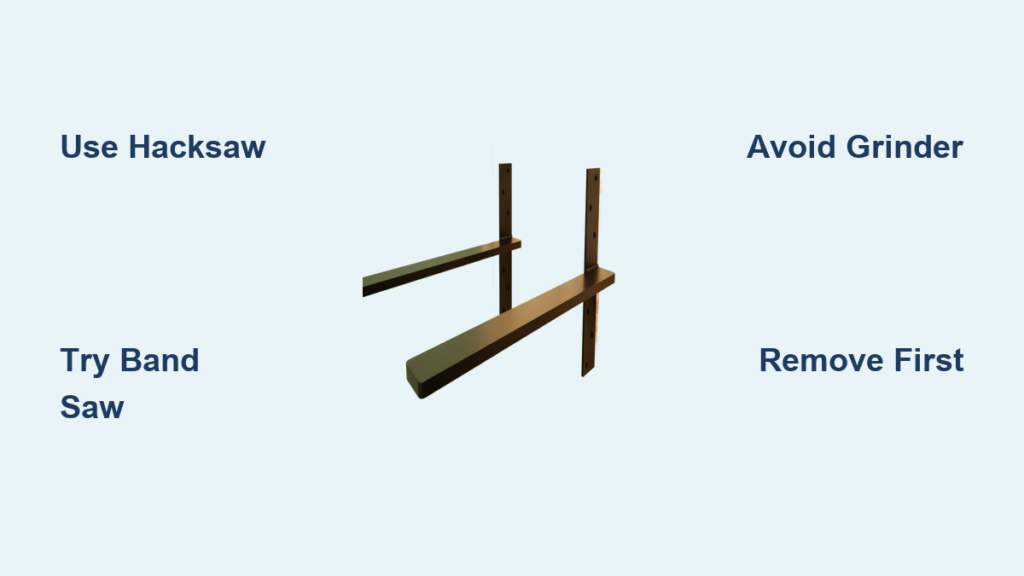
Fabricate Brackets from a Single Metal Sheet
Maximize material by cutting multiple brackets from one metal sheet.
Step-by-Step Layout
First cut: Make two side cuts and one top cut, which yields two brackets. Remove the outer pieces, flip them, and reuse them. Now you have four brackets. Save the top off-cut for use as a shelf backer. Repurpose corner scraps to reinforce workshop jigs or build small fittings.
This method doubles output and reduces waste.
Upgrade Your Setup
Use two sharp blades for straight, clean cuts. Upgrade to a Polish drop bar or precision cutoff tool for thick sections. Add camera fittings or small brackets as assembly hardware.
Work Safely on Any Surface
Protect yourself and your environment with proper setup and gear.
Build a Stable Work Platform
Use a truck tailgate as a mobile base. Create DIY sawhorses with ladders and a plank. Reinforce with scrap metal to prevent shifting.
A stable surface ensures straight cuts and reduces injury risk.
Protect Finished Surfaces
Place cloth or padding under wire shelving to prevent scratches. Cover flooring and cabinets when cutting in place. Use a shop vacuum during and after cutting to remove metal dust.
Filing debris is sharp and can track through the house. Clean thoroughly.
Follow Post-Cut Finishing Steps
A clean cut isn’t complete until edges are safe and smooth.
Deburr All Edges
Run a metal file over every cut edge. Remove burrs that could cause injury or snag materials. For curved cuts, use a deburring tool or sanding block.
Cap Wire Bracket Ends
Immediately install vinyl caps on exposed wire ends. This prevents wall punctures, clothing snags, and fingertip cuts. Keep a pack on hand. They’re inexpensive and critical for safety.
Reinstall or Repurpose
If removed, reattach brackets with fresh screws and adhesive. If repurposing scraps, label them for future use as backer strips, spacers, or workshop jigs.
Remove Brackets Before Cutting If Possible
Whenever feasible, take brackets out before cutting.
Why It’s Better
Work in a bench vise for maximum control. Avoid risk to cabinetry, flooring, or countertops. Achieve cleaner, more accurate cuts. Reduce stress on glued joints.
“If at all possible, remove it and put it in a vise on a solid workbench.” — SPS-1
How to Remove Glued Brackets
Unscrew all fasteners. Use an adjustable wrench or vise grips to gently twist and pull. PL Premium doesn’t bond well to steel, so brackets often release cleanly.
Even if glued, many brackets come off easier than expected.
“They’re just wooden boxes. Far easier to work on metal in a good vise…” — Domo
Prevent Mistakes and Maximize Results
Avoid common pitfalls with these expert-backed tips.
Measure twice and cut once. Double-check dimensions before marking. A mis-cut bracket may not support weight properly. Use a square and marker for straight lines.
Rent instead of buying. Tools like portable band saws are expensive but often available for rent. Low cost, high payoff for one-time jobs.
Test reverse blade trick. On thin metal, try installing a fine-tooth wood blade backwards in a circular saw. Reverse rotation reduces grabbing. Test on scrap first.
Hold installers accountable. If a cabinetmaker installed oversized brackets, have them fix it. You shouldn’t bear the risk or labor for someone else’s error.
“If a cabinet installer made the error, have them correct it.” — Half-fast eddie
Tool Comparison at a Glance
| Tool | Best For | Vibration | Sparks | Indoor Safe? |
|---|---|---|---|---|
| Hacksaw | Precision in place | Very Low | None | Yes |
| Portable Band Saw | Fast, clean cuts | Very Low | None | Yes |
| Reciprocating Saw | Tight spaces | Moderate | None | With helper |
| Angle Grinder | Thick steel removal | High | High | No |
| Circular Saw | Long straight cuts | Moderate | None | Off-site |
| Jigsaw | Curved cuts | Moderate | None | Thin metal only |
| Bolt Cutters | Wire shelving | Low | None | Yes |
Final Tips for Success
Cutting metal shelf brackets doesn’t have to be risky or messy. Follow these key takeaways for the best results.
First choice: Portable band saw, which is fast, clean, and safe. Second choice: Hacksaw, which is slow but vibration-free. Never use grinders indoors due to fire and fume risk. Remove brackets if possible and cut in a vise for best results. Always file and cap edges for safety. Repurpose scraps as backers, spacers, or workshop aids. Rent tools for cost-effective occasional use.
With the right tool and technique, you can trim or fabricate metal shelf brackets cleanly and confidently, whether in a workshop or a tight kitchen corner. Prioritize safety, protect your space, and finish strong.
Frequently Asked Questions About Cutting Metal Shelf Brackets
What is the best tool for cutting metal shelf brackets in place?
The portable band saw is the best tool for cutting installed brackets. It offers the cleanest, fastest cuts with minimal vibration and no sparks, making it safe for indoor use near cabinetry and finished surfaces.
Can I use a hacksaw to cut steel shelf brackets?
Yes, a hacksaw works well for cutting steel brackets, especially when vibration must be minimized. Use a fine-tooth blade with 18 to 32 TPI. This method takes more time but produces clean cuts without risking damage to glued joints.
Why should I avoid angle grinders indoors?
Angle grinders produce intense sparks and molten metal that can ignite nearby materials, pit flooring, or scorch cabinets. They also generate burning odors that linger in enclosed spaces. Use them only outdoors or in well-ventilated workshops.
How do I cut shelf brackets that are glued and screwed in place?
Try removing the brackets first by unscrewing fasteners and gently prying. If removal isn’t possible, use a portable band saw or hacksaw. Avoid high-vibration tools that could loosen the adhesive bond.
Should I remove brackets before cutting or cut them in place?
Whenever possible, remove brackets before cutting. Working in a bench vise provides maximum control and achieves cleaner, more accurate cuts. It also reduces risk of damage to cabinetry or countertops.