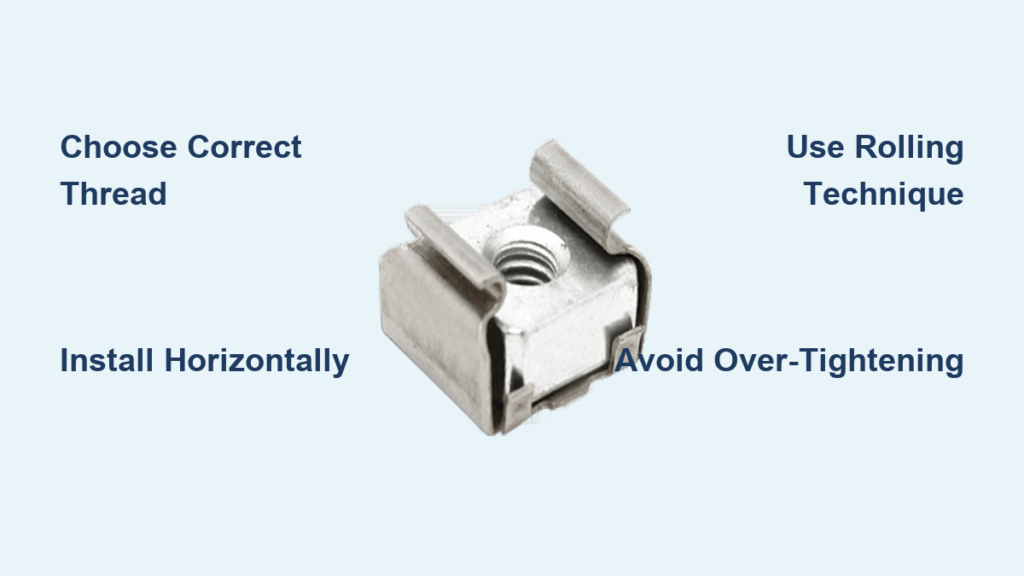
Installing cage nuts in a server rack is essential for securing servers, switches, patch panels, and PDUs in standard 19-inch racks. These small components create stable mounting points in square holes, allowing equipment to be fastened securely without pre-threaded rails. Without proper installation, equipment can become unstable, leading to potential hardware damage or downtime.
This guide covers everything you need to install cage nuts correctly, from selecting the right hardware and tools to mastering the rolling technique that professionals use for fast, safe installations. You’ll learn how to avoid common mistakes and maintain reliable rack integrity over time.
Choose the Right Cage Nut Type for Your Rack

Match Thread Size to Your Equipment
Cage nuts come in three main thread types: #10-32, #12-24, and M6. The #10-32 UNC is the most common in North American IT racks and fits virtually all servers, switches, and PDUs from vendors like Cisco, Dell, HP, and APC. M6 is standard in international or industrial systems, while #12-24 appears in older or specialized equipment.
Always match the cage nut thread to your equipment specifications. A #10-32 screw won’t fit properly in an M6 nut and will cause cross-threading or complete failure. If you’re unsure, start with #10-32 as your default choice.
Verify Your Rack Has Square Holes
Cage nuts only work in square mounting holes measuring 0.625 inches by 0.625 inches. These are standard in modern 19-inch racks. Older racks with round threaded or unthreaded holes won’t accept cage nuts. For those situations, use threaded rail adapters or retrofit with square-hole rails for full compatibility.
Gather Essential Installation Tools

Use a Dedicated Cage Nut Tool
A cage nut installation tool is the fastest and safest method for installing multiple nuts. These tools grip the nut securely, allow controlled insertion, and often feature magnetic tips to prevent drops. Technicians report up to 70% faster installation compared to manual methods.
To use the tool, slide the nut into the slot, align with the square hole, push until the spring clips snap behind the rail, and release. These tools also assist with removal by compressing the clips from the front.
Keep Backup Tools Handy
When no dedicated tool is available, needle-nose pliers can grip and insert cage nuts. Squeeze the spring clips slightly, guide one corner into the hole, then push through. Be cautious because sharp edges and spring tension increase the risk of pinched fingers or dropped nuts.
A magnetic pickup tool is essential for retrieving dropped nuts in deep racks. Pair it with a headlamp or flashlight for better visibility in enclosed cabinets. Always keep cut-resistant gloves and safety glasses within reach when working with cage nuts.
Install Cage Nuts with Correct Orientation
Always Orient Horizontally
Install cage nuts horizontally with spring flaps facing left and right. This alignment reduces the chance of the nut settling into adjacent U-spaces and allows easier screwdriver access when equipment is mounted above or below. Horizontal orientation also provides better structural stability under load.
Vertical installation poses several risks. The lower flap can bend inward under load, causing the nut to dislodge. Adjacent equipment can block access during service. The chance of misalignment increases in tight 1U gaps. APC and RackSolutions both recommend horizontal placement for long-term reliability.
Verify Orientation Before Insertion
Ensure the threaded nut faces forward and the spring clips face inward toward the rack. Reversing this means the nut won’t seat properly and may fall out during use. Take a moment to verify the orientation, especially when working quickly across multiple rails.
Master the Two-Finger Rolling Technique
Insert by Rolling, Not Shoving
The rolling technique gives superior control, especially in tight spaces. Instead of forcing the nut straight in, use two fingers to squeeze and roll it into position. Reach behind the rail or through the rack frame, squeeze the spring clips gently between thumb and index finger, guide one corner into the square hole, and rotate the nut until it clicks.
This method minimizes slippage and keeps the nut aligned during insertion. It also reduces dropped nuts by up to 90% compared to pushing or using tools in confined areas.
Remove by Rolling Outward
To remove a cage nut, place your thumb on top and index finger underneath. Curl other fingers back to catch the nut. Apply downward pressure with your thumb while lifting with your index finger, rolling the nut smoothly out into your palm. Never push from the front because this eliminates control and can send the nut flying into the rack.
Insert from the Correct Side Based on Your Equipment
For Mounting Rails, Insert from the Rear
When attaching mounting rails or shelves, install cage nuts from the back of the rack. This positions the spring clips behind the rail, facing forward, so screws can engage from the front. You may feel slight play before the rail is tightened, which is normal and disappears once the equipment is secured.
If rear access is restricted, reach through side openings or remove side panels temporarily to complete the installation.
For Thumb Screws, Insert from the Front
For front-access-only installations such as enclosed cabinets or wall-mount racks, insert cage nuts from the front with spring clips facing away from you. This allows thumb screws to lock into place without requiring backside access. This method is common with servers using tool-less retention brackets or requiring frequent servicing.
Avoid Common Installation Mistakes
Don’t Over-Tighten Mounting Screws
Even with a properly installed cage nut, over-tightening can strip threads or deform the cage. Use a torque wrench set to 6 to 9 in-lbs as recommended by most equipment manufacturers. This provides secure fastening without damaging components.
Never Reuse Damaged Cage Nuts
Inspect used cage nuts for bent or cracked spring clips, loss of tension, or corrosion in threads. Replace any damaged cage nuts immediately. A fatigued cage nut may hold initially but fail under vibration or thermal cycling, especially in high-density environments.
Prevent Rail Misalignment
Always double-check U-space alignment on both front and rear rails. A mismatch of even one U can prevent equipment from seating properly. Use a rack ruler or tape measure to confirm positions before installing nuts.
Optimize Your Rack for Future Deployments
Pre-Install Common U-Spaces
Save time during future deployments by pre-installing cage nuts in frequently used U-heights like 1U, 2U, 4U, and 10U on both rails. Label unused spaces with tags or colored markers to avoid confusion.
Keep Spares On-Site
Store a labeled container of spare #10-32 cage nuts and screws near each rack. Include a small tool like a magnetic pickup or rolling tool. This prevents delays during emergency replacements or upgrades.
Maintain Cage Nuts Over Time
Inspect During Routine Maintenance
During scheduled checks, look for loose or missing cage nuts, corrosion in humid environments, and dust buildup interfering with threading. Clean rails with compressed air and replace worn components promptly.
Use Color-Coded Nuts for Organization
Some vendors offer color-coded cage nuts in blue, red, or black. Use them to identify departments, mark racks or zones, or track replacement cycles. This adds minimal cost but improves serviceability in complex environments.
Recommended Tools and Kits
Invest in quality tools for faster, safer installations. The StarTech.com Cage Nut Tool with 100-Pack offers an affordable, durable solution with reliable nuts. The Tripp Lite N201-010-CAGE Kit provides enterprise-grade quality with a tool and 100 cage nuts, widely used in data centers. A magnetic installation tool doubles as a pickup for screws and nuts, ideal for deep racks.
Frequently Asked Questions About Installing Cage Nuts in a Rack
What size cage nut do I need for a standard server rack?
The #10-32 UNC cage nut is the standard for most North American server racks and fits virtually all servers, switches, and PDUs. Check your equipment specifications to confirm before purchasing.
Can I install cage nuts without a dedicated tool?
Yes, you can use needle-nose pliers or the two-finger rolling technique. However, a dedicated cage nut tool reduces installation time by up to 70% and minimizes dropped nuts.
Should cage nuts be installed horizontally or vertically?
Always install cage nuts horizontally with spring flaps facing left and right. This orientation provides better structural stability and easier access for screwdriver engagement.
How do I remove a stuck cage nut without dropping it?
Use the two-finger rolling technique. Place your thumb on top, index finger underneath, and roll the nut outward into your palm. Never push from the front.
What torque should I use when fastening screws into cage nuts?
Apply 6 to 9 in-lbs of torque as recommended by most equipment manufacturers. Over-tightening can strip threads or deform the cage nut.
Can cage nuts be reused after removal?
High-quality cage nuts can withstand 50 to 100 insertion/removal cycles if undamaged. Inspect spring clips for fatigue, bending, or corrosion before reusing.
Key Takeaways for Installing Cage Nuts in Your Rack
Proper cage nut installation is foundational to secure, reliable rack mounting. Always choose the correct thread type for your equipment, typically #10-32 for standard IT racks. Install nuts horizontally with spring clips facing inward, and use the two-finger rolling technique for both insertion and removal to minimize dropped nuts andfinger injuries.
Apply proper torque of 6 to 9 in-lbs when fastening equipment, and replace any damaged or fatigued cage nuts immediately. Pre-install common U-spaces and keep spare nuts and tools on-site to speed up future deployments. With these practices, your rack infrastructure will remain stable, safe, and ready for changes.