

If you’ve ever wasted time digging through a toolbox for the right socket, you know how frustrating disorganized tools can be. Learning how to make a socket organizer transforms clutter into clarity, giving you instant access, reducing wear on tools, and turning your workspace into a precision zone. Whether you’re a weekend DIYer or a full-time mechanic, a custom socket holder keeps your drives sorted, visible, and secure. This guide covers five proven DIY methods, from simple foam trays to durable wooden racks, each designed for real-world performance.
Build a Wooden Dowel Socket Rack for Permanent Storage
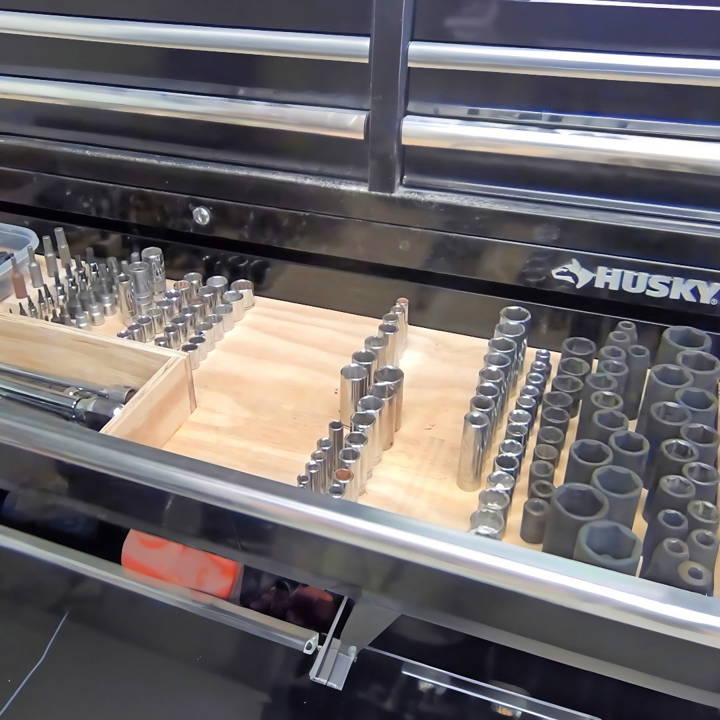
Create a permanent, wall-mounted socket organizer using solid wood and precision-drilled dowels. This method offers excellent visibility and durability for garage or benchtop use.
Cut and Prepare the Base Board
Start with a 1×5 pine or hardwood board (maple or oak recommended for longevity). Cut it to length based on your socket count, typically 24 to 36 inches for a full set. Rip the board widthwise to about 2.25 inches to allow side access when mounted. Sand all surfaces with 120 to 220 grit paper until smooth. Draw a centerline down the face to guide socket placement.
Mark Socket Positions Accurately
Begin with your largest socket to maintain symmetry. Place it on the centerline and mark its center point. Use calipers to measure the socket’s outer diameter by wrapping blue tape around one jaw to prevent slippage and lock the measurement. Transfer this distance along the centerline to position the next socket, ensuring tight, gap-free alignment. Repeat in descending order for a clean, progressive layout.
Drill and Install Dowels
Use a 3/8-inch Forstner bit in a drill press with a depth stop. Drill holes at each marked center, with depth equaling socket depth plus 1/4 to 1/2 inch protrusion. Cut 3/8-inch dowels to length using a crosscut sled with a stop block for consistency. Apply one drop of aliphatic wood glue per hole, insert the dowel, and let cure 2 to 4 hours. Sand flush after curing.
Finish for Long-Term Protection
Seal the entire rack with a protective finish. Oil-based polyurethane provides maximum durability, tung oil offers a natural look, and paste wax works for indoor low-exposure areas. Allow 24 to 72 hours to fully cure before mounting. Optional chamfer edges with a router for a refined look.
Create a Plywood Grid with Square Dowels for Drawer Storage
Build a low-profile drawer insert that holds sockets securely and fits neatly in standard toolboxes.
Cut Precision Square Dowels
Rip 2×4 lumber into 1/4-inch-wide strips. Joint and plane them to ensure square edges. Then plane each strip down by 1/32 inch to create an interference fit in socket drive holes. Cut into 3/8-inch-long segments using a table saw sled. Bundle same-sized pieces with painter’s tape to lift them slightly above the sled for clean cuts.
Assemble the Socket Grid
Lay out sockets face-down in your preferred sequence. Apply wood glue to one end of a square dowel and insert it into the socket’s square drive. Place the socket on a 1/4 to 1/2 inch plywood base where it will sit. Thread a bolt matching the drive size through the socket’s other end to press the dowel fully in, adding mechanical pressure for a stronger bond.
Cure and Optimize Drawer Fit
Let the glue cure at least 4 hours. Once set, the tray can slide into any drawer. Add routed channels along one edge to hold ratchets, extensions, or universal joints. Label compartments with paint markers or engraved tags for quick identification.
Make a Layered Foam Socket Tray for Portability
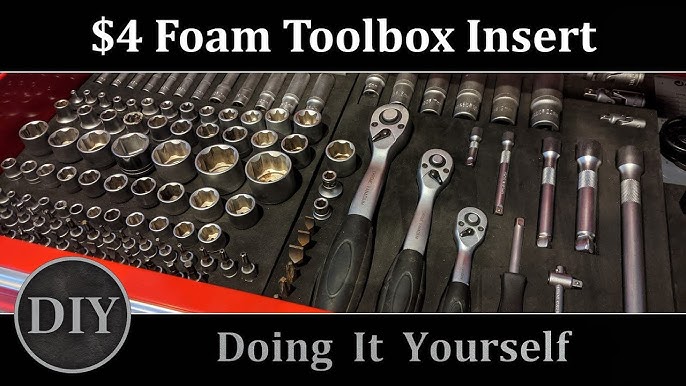
Design a lightweight, portable socket organizer using foam. This method works perfectly for travel kits, mobile mechanics, or hobbyists.
Bond Two Foam Layers
Use two 6mm black EVA or polyethylene foam sheets. Clean surfaces, then spray Loctite middleweight adhesive on one side. Press sheets together, align edges, and place a light weight on top for 10 minutes. Work in a ventilated area since adhesives emit fumes.
Trace and Cut Socket Outlines
Arrange sockets on the foam. Trace around each with a pencil and straight edge. Choose slot orientation based on your needs. Horizontal slots work for side-insertion in drawers, angled slots at 30 to 45 degrees allow easier removal, and circular cutouts let sockets stand upright like pegs.
Cut with Perforation or Grooving
Use one of two safe methods. The perforation technique involves making shallow punctures along the line, then deepening gradually. The grooving method scores lightly, then makes successive deeper passes until the cut completes. Test fit each socket and trim excess foam until you achieve a finger-tight friction fit. A hot knife speeds cutting but must be used outdoors due to toxic fumes.
Add Red Backing and Labels
Cut a 2mm red foam sheet to match the base. Apply adhesive only to the back of the black foam to avoid clogging slots. Press the red layer on and clamp lightly for 5 to 10 minutes. For labeling, use a toothpick dipped in acrylic paint to write sizes like “10mm” or “7/16”. Alternatives include fine-tip paint markers, gel pens, or permanent markers.
Install a DIY Magnetic Socket Strip for Mobile Use
Build a shock-resistant rail that keeps sockets secure, even in moving tool carts.
Prepare and Position Magnets
Use US General 18-inch magnets (priced $2 to $5 each) and a Harbor Freight #68102 magnetic strip base. Remove the paper liner from each magnet. If stuck, use a small piece of aluminum foil as a lever to peel it off gently.
Glue Magnets with Weighted Cure
Apply high-strength grill glue or equivalent to the magnet back. Space them evenly along the rail. Place four empty sockets on the rail during curing to keep magnets flat and prevent warping. Let cure overnight for full bond strength.
Test for Magnetic Repulsion
After curing, check for issues. Half-inch and quarter-inch drives usually hold securely. Three-eighth-inch versions may show slight repulsion, so adjust spacing if needed. Total cost stays under $30, much cheaper than commercial modular systems.
Build a Bolt-and-Copper Tubing Socket Holder
Use threaded bolts and flared copper tubing to create a mechanical socket rack for stacked storage.
Mount Bolts to Base
Drill holes in a wood, plastic, or metal base to match bolt diameter. Countersink one side for bolt heads and the other for nuts. Insert bolts, secure with nuts, and leave enough thread exposed for sockets and tubing.
Install and Flare Copper Tubes
Slide copper tubing over the exposed threads. Use a flaring tool to peen over the top and bottom ends, creating stops that lock the tubing in place. For extra stability, apply epoxy adhesive around the base of each tube.
Stack Sockets Securely
This system allows deep and shallow sockets to share the same bolt. It’s ideal for drawers or wall panels where vertical space is available. It requires more tools but delivers industrial-grade retention.
Use Commercial Rails in Hybrid Builds
Combine off-the-shelf rails with custom backings for fast, professional results.
Choose Compatible Socket Rails
Popular brands include Ares, Tekton, ABN, Princess Auto, and Harbor Freight. Most use standardized clips and are cross-compatible. Short rails cost $3 to $5, and three-packs often sell for under $10.
Customize Layout with DIY Mounting
Cut rails to length with a hacksaw or angle grinder. Then screw them to wood or metal backings, rivet for permanent attachment, or use silicone or double-sided tape for vibration resistance. Users report that cutting PA rails to size and mounting them on plywood gave them the exact layout needed with no wasted space.
Compare Methods by Use Case
Pick the Right Build for Your Needs
| Use Case | Best Method | Why It Works |
|---|---|---|
| Permanent garage setup | Wooden dowel rack | Durable, dust-resistant, great visibility |
| Tool drawer storage | Plywood grid with square dowels | Low profile, integrates accessories |
| Mobile or travel kit | Layered foam tray | Lightweight, customizable, cheap |
| Towed tool cart | Magnetic strip with cured adhesive | Shock-resistant, holds during transport |
| High-density storage | Bolt-and-copper tubing | Allows stacking, secure retention |
| Fast, reliable solution | Hybrid commercial rail + custom backing | No guesswork, perfect fit, easy |
Maintain Your Socket Organizer
Extend Lifespan with Simple Care
Wooden racks need reapplication of polyurethane every 2 to 3 years. Magnetic strips require annual adhesive checks, and replacement if loose. Foam trays should be replaced every 12 to 24 months if degraded by oil. Metal rails need clip inspections for breakage, with swaps to compatible brands when needed. Labels fare best with permanent markers or engraved tags to avoid fading. Wipe down your organizer regularly to remove oil, dirt, and metal shavings.
Safety Tips for Building
Wear safety glasses and cut-resistant gloves when working with power tools and sharp materials. Use push sticks and guards on table saws to prevent injury. Work in well-ventilated areas when using adhesives or finishes. Pre-drill wood near ends to prevent splitting. Use sharp blades on foam since dull tools cause tearing and imprecise cuts.
Frequently Asked Questions About Making a Socket Organizer
What is the easiest method for beginners?
The layered foam tray method ranks as the easiest for beginners. It requires minimal tools, uses inexpensive materials, and offers straightforward steps. Foam cutting needs only an exacto knife and straight edge, making it accessible for anyone with basic crafting skills.
How long does a DIY socket organizer last?
A properly finished wooden organizer lasts 10+ years with maintenance. Foam trays last 1 to 2 years before oil degradation. Magnetic strips with quality adhesive endure 3 to 5 years with annual checks. The bolt-and-copper tubing method provides permanent durability when properly installed.
Can I combine different methods in one organizer?
Yes, hybrid builds work excellently. Many users mount commercial rails onto custom wooden backboards or combine foam trays with magnetic strips in toolboxes. The key is matching your primary need (portability versus permanence) and building around that priority.
What tools are absolutely required for building?
Basic requirements include a drill or drill press, measuring tools (calipers or ruler), cutting tools appropriate to your chosen material, and adhesives or finishes. Wooden builds need a saw and sandpaper. Foam builds require sharp knives. Magnetic builds need high-strength adhesive. Start with the simplest method matching your skill level.
Is DIY cheaper than buying commercial organizers?
DIY builds cost $10 to $30 for most methods, comparable to mid-range commercial options. The wooden dowel rack and foam tray are the most budget-friendly at under $15. Magnetic strips run about $30. Premium commercial systems can cost $50 to $100+, making DIY attractive for budget-conscious builders.
Key Takeaways for Building Your Socket Organizer
Successfully building a socket organizer comes down to matching the method to your workspace and needs. For a professional, long-lasting build, the wooden dowel rack delivers durability and excellent visibility. If you need drawer integration, the plywood grid with square dowels proves unbeatable. On a budget or for portability, the foam tray delivers fast results. For mobile use, a magnetic strip with overnight-cured adhesive won’t let you down. And if you want plug-and-play reliability with custom layout, hybrid rail builds offer the best of both worlds.
Pro tips to remember include grouping metric and SAE sockets separately, labeling every compartment, designing for 20% more sockets than you currently own, and test fitting every socket before final assembly. With the right materials and attention to detail, your DIY socket organizer will outperform foam inserts and streamline your workflow for years. Start building today, and your tools will thank you.


