

Shelf pin holes that have worn out or stripped over time can turn a sturdy bookcase or cabinet into a wobbly hazard. When the holes no longer grip shelf pins securely, shelves sag, tilt, or even collapse, especially under heavy loads. This is especially common in ready-to-assemble (RTA) furniture made from particleboard or MDF, where repeated adjustments and poor material quality accelerate wear. The good news? You don’t need to replace the entire unit. With the right tools and techniques, you can fix shelf pin holes quickly and effectively, whether you’re looking for a temporary patch or a permanent upgrade.
In this guide, we’ll walk through every proven method to repair or reinforce damaged shelf pin holes. From simple toothpick shims to professional brass sleeves and full hardware upgrades, you’ll learn which solution fits your skill level, budget, and furniture type. By the end, you’ll know exactly how to restore strength, maintain adjustability, and extend the life of your cabinetry or shelving, no matter the damage.
Assess the Damage Before Choosing a Fix
Before selecting a repair method, inspect each hole closely. The technique you use depends entirely on how much wear has occurred.
Slight Wear vs. Severe Damage
Slight wear means the holes are slightly enlarged but still grip pins loosely. This is ideal for quick fixes like toothpick shims. Severe damage means holes are oval-shaped, cracked, or completely stripped. This requires structural repair with dowels or hardware upgrades. If multiple holes are compromised across a single shelf, consider upgrading to metal shelf standards entirely.
Check Your Cabinet Material
The panel material determines which repair will hold best. Particleboard crumbles easily and glue bonds weakly, so dowels or surface-mounted standards work best. MDF holds shims for light use but splits under stress, so use dowels for heavy-duty repairs. Plywood is stronger and more stable, accepting all repair types well. Solid wood is the most durable and can be redrilled multiple times or upgraded with brass inserts.
Quick Fix: Toothpick and Glue for Minor Wear
This is the fastest, cheapest method for slightly loose shelf pin holes. It works by filling gaps with compressed wood and glue to restore a snug fit.
Gather Basic Repair Supplies
You will need wooden toothpicks, wood glue (PVA-type like Titebond), a utility knife or pliers, a small awl or nail, and sandpaper (120-220 grit). No special tools are needed. These items are commonly found in any home toolkit.
Fill Holes Step by Step
Clean the hole using a dry cloth, brush, or canned air to remove dust and debris. A clean hole ensures better glue adhesion. Apply a small amount of wood glue into the hole using a toothpick or syringe. Avoid flooding the hole because too much glue can delay drying. Insert full-length toothpicks one at a time, breaking them off as needed. Push them deep until the hole feels tight and fully filled. Snap or cut protruding ends flush with the surface using pliers. Let the glue cure overnight for maximum strength. Finally, gently tap the shelf pin back in. It should fit snugly without wobbling.
Avoid These Common Mistakes
Do not overfill the hole and expand the cavity. Do not use glue alone without wood filler because it shrinks and won’t hold. Do not install shelves too soon before the glue cures. For larger holes, switch from toothpicks to small wooden dowels (1/8″ or 3/16″) cut to length. They offer more surface area and strength.
Strong Repair: Wooden Dowel Replacement for Stripped Holes
:max_bytes(150000):strip_icc()/102038157a-d300e7f4a4d540c19c972d9a7c0299e4.jpg)
When holes are badly stripped, replacing the damaged section with a solid hardwood dowel restores structural integrity and allows you to drill a fresh hole.
Choose the Right Dowel Size
Use 5/16″ or 3/8″ diameter hardwood dowels (birch, oak, or maple). The length should be 1-1.5 inches per hole. Match the drill bit to the dowel size for a tight fit.
Drill and Insert Dowels Correctly
Enlarge the hole using a drill bit matching the dowel diameter. Drill straight in about 1 inch deep. Keep the drill perpendicular to avoid angled holes. Cut the dowel to length with a fine-tooth saw and lightly sand the ends for smooth insertion. Apply wood glue inside the hole and on the dowel, then insert it and tap gently with a hammer and scrap wood block until flush. Hold in place with tape or a clamp if it protrudes. Let dry for at least 6-8 hours, though 24 hours is best. Once dry, mark the original position and drill a new 1/4″ hole using a drill guide for accuracy. Test fit the pin. It should slide in smoothly but require slight pressure.
Why This Method Works Long Term
Solid wood resists compression better than particleboard. It can be redrilled multiple times if needed. This method is ideal for high-traffic cabinets or heavy bookshelves. If you cannot access the back of the panel, don’t drill too deep. Stop before breaking through the other side.
Professional Upgrade: Installing Brass Sleeves for Premium Durability
Upgrade worn holes with brass sleeves to prevent future wear while keeping full shelf adjustability. This professional fix is perfect for frequently adjusted or high-use furniture.
Get the Right Brass Components
You will need brass sleeves with 5/16″ outer diameter, 1/4″ inner diameter, and 1″ length. You also need compatible shelf pins that are 1/4″ diameter and the same length as originals. A setting punch or flat rod is needed for tapping sleeves flush. These components are available from specialty retailers like Lee Valley Tools.
Enlarge and Fit Sleeves Properly
Drill out old holes gradually using a 5/16″ bit (or the size specified by the sleeve manufacturer). Drill in 1/32″ increments to prevent splintering, especially in MDF. Clean out dust by wiping or blowing debris from the hole. Any obstruction prevents full seating. Place the sleeve into the hole and use a hammer and punch (or wooden dowel) to tap it until flush with the surface. Optionally, add a tiny drop of wood glue around the rim to secure the sleeve permanently, but skip this if you want removable inserts. Finally, slide pins into the brass-lined holes. They will glide smoothly and stay secure.
Benefits Over Standard Holes
Brass sleeves provide metal lining that resists wear from repeated adjustments. They maintain a clean, professional look. They support heavier loads, up to 50 lbs per shelf. They work with existing shelf designs.
Heavy-Duty Solution: Surface-Mount Metal Shelf Standards
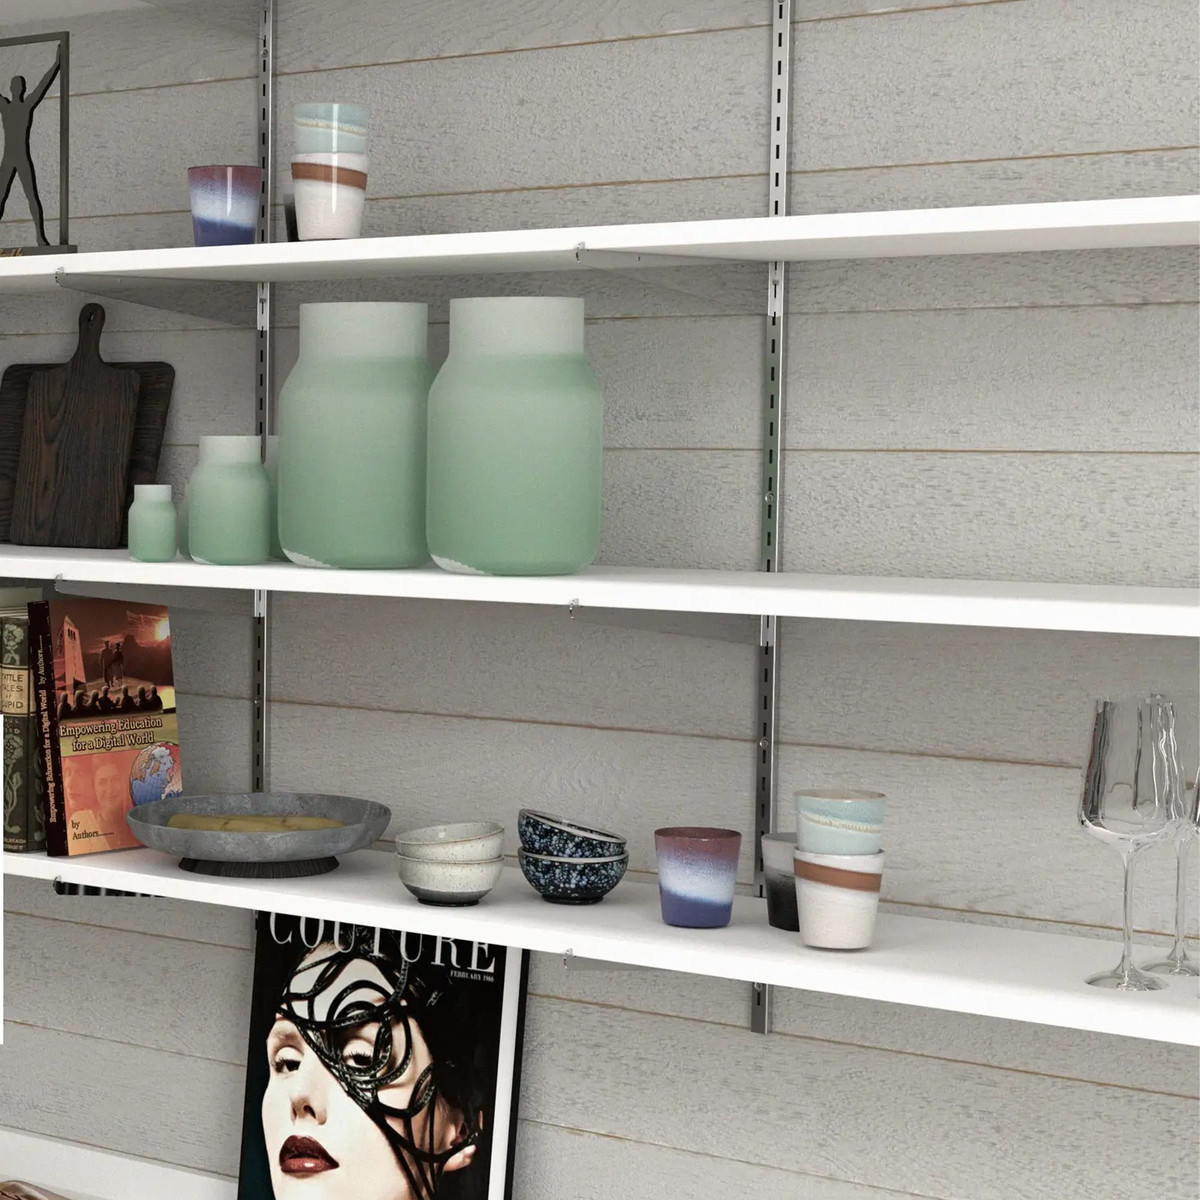
When pin holes are beyond repair, replace the system entirely with surface-mounted shelf standards (pilasters). This offers maximum strength and infinite adjustability.
Select Compatible Shelf Tracks
Choose steel or aluminum standards that match your cabinet height (common sizes: 12″, 24″, 36″). Select plastic or metal clips rated for 25-50 lbs per pair. Available at Lee Valley, Rockler, or Woodcraft.
Mount Standards Accurately
Hold each standard against the cabinet side and use a level to ensure it is perfectly plumb. Position standards so screw holes don’t overlap damaged areas. Offset if necessary. Mark and drill pilot holes slightly smaller than the screw diameter (#6 or #8 screws recommended). This prevents splitting in particleboard. Attach using 3/4″ to 1″ screws, ensuring standards sit flush and don’t wobble. Slide clips into slots at desired heights and double-check alignment across both sides. If standards encroach on shelf space, trim shelves slightly with a circular saw or table saw.
When to Choose This Method
Choose this method when panels are too damaged to repair. Choose it when you need to support heavy items like encyclopedias, appliances, or tools. Choose it when you want full vertical adjustability without worrying about hole wear.
Compare Repair Methods Side by Side
Choosing the right fix depends on your needs. Here is how the top methods stack up.
| Method | Skill Level | Time per Hole | Cost | Best Use Case |
|---|---|---|---|---|
| Toothpick & Glue | Beginner | 5-10 min | $ | Slight wear, temporary fix |
| Wooden Dowel | Intermediate | 20-30 min | $$ | Severe damage, long-term repair |
| Brass Sleeves | Intermediate+ | 10-15 min | $$$ | Preserve adjustability, frequent use |
| Shelf Standards | Intermediate | 30-60 min | $$$-$$$ | Permanent upgrade, heavy loads |
Load Capacity by Method
Toothpick shims support 10-20 lbs per shelf. Wooden dowels support 25-40 lbs per shelf. Brass sleeves support 30-50 lbs per shelf. Shelf standards support 50+ lbs per shelf with proper clips. Always use at least two supports per shelf and distribute weight evenly to prevent sagging.
Prevent Future Shelf Pin Hole Damage
Once repaired, protect your work with these simple maintenance habits.
Use Shelf Liners and Upgraded Pins
Felt or rubber liners reduce vibration and lateral movement that loosen pins over time. Switch to solid steel pins instead of plastic. They resist bending and wear longer.
Avoid Overloading and Misalignment
Do not exceed 80% of the shelf’s rated capacity. Always insert pins straight because angled insertion wears holes faster. Recheck alignment every few months, especially in homes with kids or frequent rearranging.
Apply These Long-Term Tips
Drill new holes at least 1″ away from old ones if relocating. Use a drill guide to ensure perpendicular holes. Label shelf heights with a pencil mark for consistent reassembly.
Choose the Right Fix for Your Furniture
Not all repairs are equal, and the best choice depends on your specific situation.
For Light-Use Shelves
Try toothpick and glue. It is quick, invisible, and effective for occasional adjustments. Great for guest room bookshelves or display cabinets.
For Kitchen or Utility Cabinets
Use wooden dowels. They handle daily use and moderate weight. Ideal for spice racks, pantry units, or bathroom vanities.
For Home Offices or Libraries
Install brass sleeves. They preserve adjustability while resisting wear from frequent changes. Perfect for evolving storage needs.
For Garages, Workshops, or Pantries
Upgrade to shelf standards. They are built to last under heavy loads. Best for tools, canned goods, or bulky items.
Frequently Asked Questions About Fixing Shelf Pin Holes
Can I fix shelf pin holes without removing the shelf?
Yes, you can repair most shelf pin holes with the shelf in place. The toothpick and glue method works directly in the existing hole. For dowel repairs, you may need to remove the shelf temporarily, but the process is relatively quick.
Which method works best for particleboard furniture?
Particleboard crumbles easily, so glue alone won’t hold. The wooden dowel method works best because it replaces the damaged particleboard with solid wood. Alternatively, surface-mounted shelf standards bypass the fragile material entirely.
How long do toothpick repairs last?
Toothpick and glue repairs are considered temporary fixes. They typically last 1-3 years depending on use. For a permanent solution, use wooden dowels, brass sleeves, or shelf standards.
Are brass sleeves worth the extra cost?
Brass sleeves are worth it for frequently adjusted shelves or high-value furniture. They prevent future wear, maintain smooth operation, and can last the lifetime of the furniture. The upfront cost is higher, but the long-term benefits often outweigh the investment.
Can I use this repair on kitchen cabinet shelves?
Yes, but consider the load. Kitchen cabinets often hold heavy items like appliances and canned goods. Wooden dowels or shelf standards are recommended over simple toothpick repairs. Brass sleeves also work well if you want to maintain adjustability.
What if my holes are oval-shaped from wear?
Oval-shaped holes indicate severe damage. Toothpick shims won’t fill the irregular shape adequately. Use the wooden dowel method to replace the damaged section entirely, or upgrade to brass sleeves or shelf standards for a more permanent solution.
Key Takeaways for Fixing Shelf Pin Holes
Fixing shelf pin holes doesn’t require replacing the whole unit. With the right technique, you can restore stability, extend furniture life, and avoid costly replacements. Whether you’re patching a minor gap with toothpicks or installing professional-grade brass sleeves, each method brings your shelves back to full function.
Start with a careful assessment. Match the repair to your material and load needs. Follow through with preventive care. Your bookcase, cabinet, or closet system will stay strong and adjustable for years to come.
Quick Recap: Minor wear calls for toothpick and glue. Stripped holes call for wooden dowel replacement. Frequent adjustments call for brass sleeves. Heavy loads or total failure call for metal shelf standards.
Now that you know how to fix shelf pin holes the right way, grab your tools and give your furniture a second life.


