

Hanging a heavy shelf might seem straightforward, but when that shelf holds books, ceramics, or electronics, the stakes are high. A poorly mounted shelf can collapse, damaging your walls and valuables or even causing injury. The secret to success lies in understanding your wall type, choosing the right hardware, and anchoring into structural support rather than relying on plastic anchors or guesswork.
This guide covers proven methods for how to hang heavy shelf safely so it supports hundreds of pounds without failing. You will learn how to locate studs accurately, use high-strength anchors like SnapToggles for drywall, install invisible floating shelf systems, and avoid common mistakes that lead to failure.
Find Wall Studs for Maximum Support
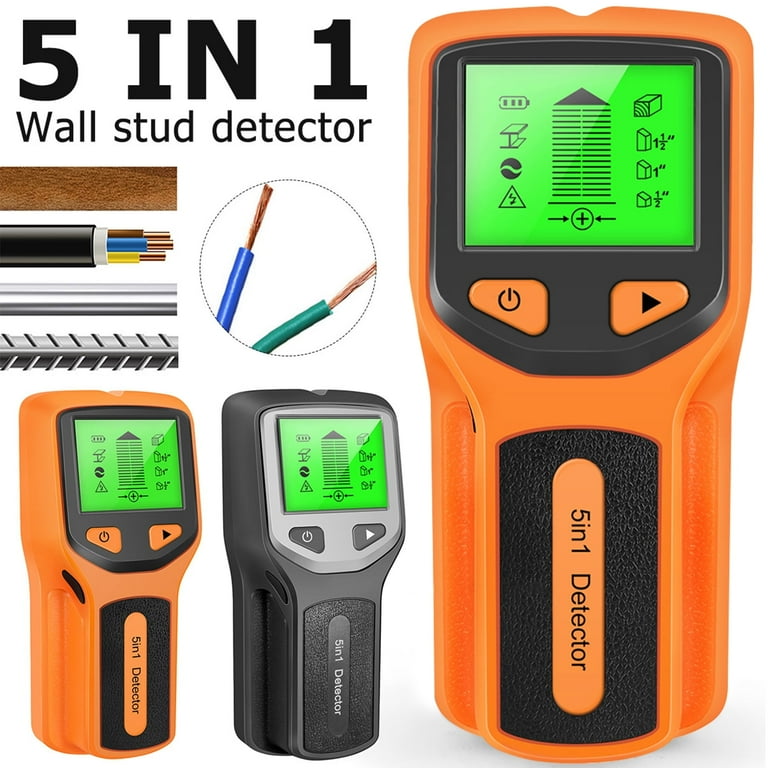
Locate Studs with the Right Tools
Wall studs provide the strongest anchoring point for any heavy shelf. Use a magnetic or electronic stud finder to detect wood or metal studs behind drywall or plaster. Move slowly across the wall, marking both edges of each stud, then find the center. Most residential walls have studs spaced 16 or 24 inches apart, so once you locate one, you can predict where others sit.
Verify findings by tapping the wall. A solid sound indicates a stud, while a hollow sound means empty space. Drill a small pilot hole and probe with a bent wire to confirm you have hit solid wood before committing to bracket positions.
Check for Hidden Obstructions
Some studs have metal protective plates covering wiring or plumbing. If your drill bit suddenly stops or hits metal, stop immediately. Shift the bracket a few inches left or right to avoid damaging utilities. Never force a screw through metal, as this can cut wires or puncture pipes.
Choose the Right Mounting Method
Mount Directly Into Studs
When studs align with your shelf position, this is the strongest option. Stud-mounted shelves can support over 300 pounds with proper brackets and fasteners. Use heavy-duty steel L-brackets or floating shelf brackets at least 1/8 inch thick. Pair these with #8 or #10 wood screws, 2.5 to 3 inches long, and pre-drill pilot holes to prevent splitting the stud.
Screws must penetrate at least 1.5 inches into the stud for maximum pull-out resistance. This depth ensures the shelf stays secure even under heavy loads.
Use High-Strength Drywall Anchors
When no studs are available, rely on mechanical wall anchors designed for heavy loads. Never use plastic anchors for heavy shelves. They fail under loads over 25 pounds and are a common cause of shelf collapse.
Install SnapToggle Anchors for Hollow Walls
SnapToggle anchors offer the highest holding power in drywall, supporting up to 265 pounds in 5/8-inch drywall. The slim design fits narrow bracket flanges, and one-handed installation means you do not need to reach behind the wall.
How SnapToggle Anchors Work
The anchor consists of a metal toggle that expands behind the drywall, distributing weight across a larger surface area than plastic anchors. Drill a 3/8-inch to 1/2-inch hole, insert the toggle, and secure with the provided machine screw. The anchor locks in place and can be reused if needed.
Other hollow-wall options include toggle bolts, which hold 50 to 100 pounds but require more clearance, and molly bolts, which hold 50 to 75 pounds. Avoid using these near wall edges, as they need space to expand properly.
Use the Threaded Rod Method for Heavy Floating Shelves
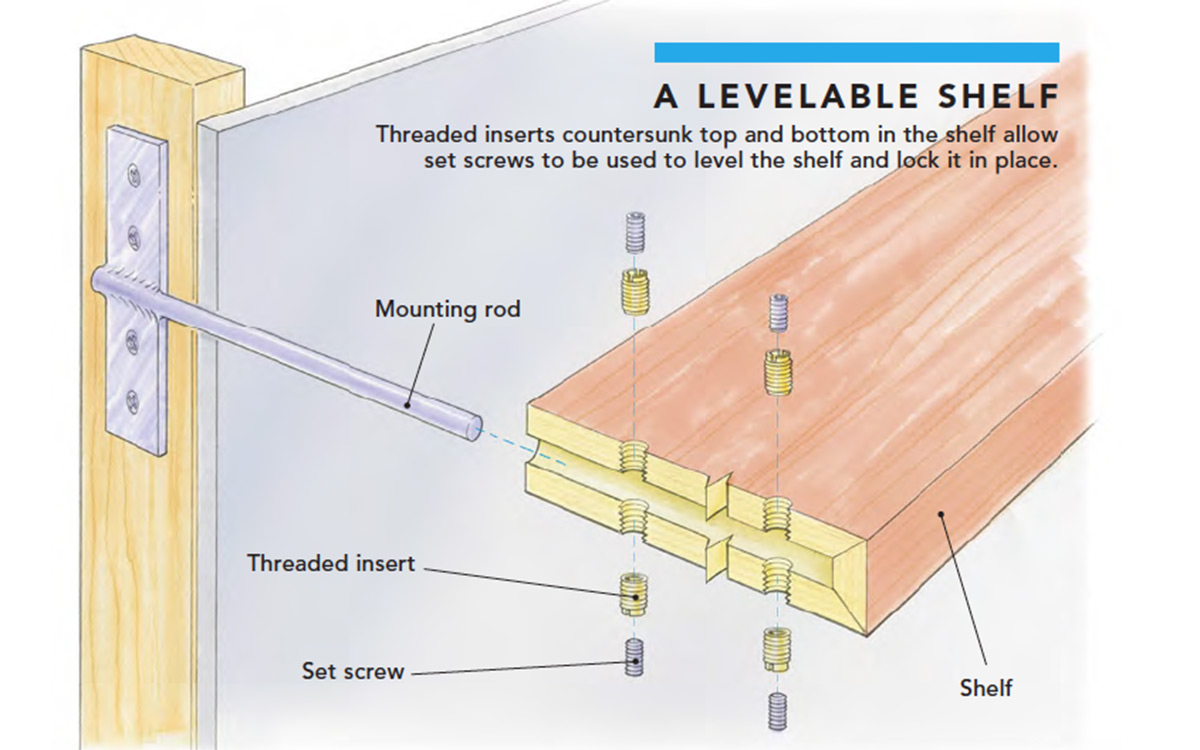
This user-developed technique delivers industrial-grade strength with a clean floating appearance. The method uses threaded rods screwed directly into wall studs, creating invisible support that eliminates sagging.
Materials Needed
Gather 5/16-inch threaded rod cut to 7 to 8 inches long, two nuts per rod for turning leverage, a drill with a 1/4-inch bit, and a rubber mallet.
Installation Steps
Drill 2-inch deep holes into wall studs using a 1/4-inch bit, which is slightly undersized for a tighter grip. Screw the threaded rod into the stud by tightening two nuts against each other to create a handle for turning. Once fully seated, remove the nuts. Drill matching 5/16-inch holes into the back of the shelf, approximately 5 inches deep. Slide the shelf onto the rods and tap gently with a rubber mallet to seat it fully.
This method has been user-verified with 2×10 lumber shelves under heavy loads, with no sagging or movement after six months.
Install French Cleats for Maximum Strength
A French cleat system uses two 45-degree beveled strips that interlock, distributing load across the entire contact surface. One strip mounts to the wall, the other to the shelf back. The shelf slides down to lock in place.
Why French Cleats Excel
When properly installed into studs or high-strength anchors, French cleats support 300 pounds or more. They work with wood or steel and allow easy removal. For thick hardwood shelves, shape the top back edge into a cleat instead of adding separate hardware.
Build Corner Shelves with Rabbet Joints
For L-shaped or corner shelves, a rabbet joint creates a seamless 90-degree connection. Cut a 1/2-inch rabbet on the mating edges using a 3/4-inch router bit, with depth equal to half the board thickness. Clean the joint with a chisel for a tight fit.
Secure the Corner
Mount the main shelf first. The corner shelf rests on the rabbet lip and a wall bracket. If gaps remain, use wood glue and shims, then secure with hidden screws. Drive screws downward from the upper shelf and upward from the lower shelf to keep fasteners invisible.
Level and Align Your Shelf Perfectly
Check Studs Before Mounting
Even with perfect bracket alignment, uneven studs can make your shelf crooked. Use a long level across multiple studs to verify they are level before mounting brackets.
Use a Reference Bracket
Install the first bracket perfectly level, then use it as a template for others. A laser level ensures consistent alignment across long spans. Check front-to-back level to prevent items from sliding off.
Test Under Load
After mounting, apply gentle downward pressure to check stability. Re-check the level, as some settling may occur in the first few weeks.
Avoid These Common Mistakes
Using plastic anchors for heavy loads ranks as the number one mistake. These anchors pull out easily and are rated for under 25 pounds. Never use them for shelves holding books, glassware, or electronics.
Skipping pilot holes in studs causes wood to split, especially with hardwood or long screws. Always pre-drill before driving structural screws.
Not cleaning drilled holes prevents full seating. Sawdust in rod holes or anchor slots creates friction and prevents proper engagement. Blow out debris with compressed air before mounting.
Ignoring vibration from electronics like printers or speakers causes micro-movement that loosens fasteners over time. Use SnapToggle anchors or stud-mounted rods for these installations.
Trusting hardware store advice blindly leads to inappropriate recommendations. Staff often suggest plastic anchors or undersized screws. Verify specifications online before purchasing.
Select the Right Method for Your Wall Type
Match your mounting method to your specific situation for the best results.
For heavy hardwood shelves with visible studs, the threaded rod method provides maximum strength and invisible support. For floating shelves in drywall with no studs available, SnapToggle anchors offer the highest holding power. For L-shaped kitchen shelves, a rabbet joint combined with hidden brackets creates a strong corner connection and clean appearance. For decorative shelves holding medium weight, keyhole fittings provide no visible screws with easy installation. For tile wall installations, use wide concealed brackets that allow tile to be laid around them for a seamless look.
Frequently Asked Questions About Hanging Heavy Shelves
Can I hang a heavy shelf on drywall without hitting a stud?
Yes, but you must use high-strength anchors like SnapToggles, which hold up to 265 pounds in 5/8-inch drywall. Plastic anchors are not adequate for heavy loads.
How much weight can a shelf mounted in studs hold?
A shelf mounted directly into studs with proper brackets and screws can hold over 300 pounds, depending on the fastener size and bracket strength.
What is the strongest method for hanging a floating shelf?
The threaded rod method provides the strongest support for floating shelves. Rods screw directly into studs, and the shelf slides over them, creating invisible support that handles very heavy loads without sagging.
Do I need to find studs for every shelf installation?
Finding studs provides the strongest anchor. If studs do not align with your desired shelf position, use high-quality drywall anchors or consider installing horizontal blocking between studs from an adjacent room or ceiling.
How do I hide screws on a floating shelf?
Use keyhole router bits to cut keyhole-shaped slots in the shelf back, or use keyhole fittings that hide screws completely. The threaded rod method also eliminates visible hardware entirely.
Key Takeaways for Installing Heavy Shelves
Hanging a heavy shelf securely comes down to three essential principles. First, always prioritize structural integrity by anchoring into studs whenever possible, or using high-strength mechanical anchors like SnapToggles when studs are unavailable. Second, choose hardware rated for your actual load, adding a 25 to 50 percent safety margin for heavy items like books and ceramics. Third, take time to level and verify before finalizing. Check level before and after mounting, and test under gentle pressure before loading your shelf.
When in doubt, over-engineer your installation. Use more brackets or anchors than the minimum, and periodically check fasteners in the first few weeks for any loosening. Your safety and your valuables depend on getting this right the first time.


