

If your squat rack wobbles every time you unrack the bar, you’re not just dealing with an annoyance. You’re training on a setup that could lead to imbalances, poor form, and long-term injury. Most home gyms are set up in garages where floors slope slightly for drainage, which is great for preventing water damage but terrible for strength training. An unlevel squat rack forces one side of your body to work harder, creating muscle imbalances and increasing spinal stress over time.
The solution is to level your squat rack using simple, cost-effective materials you likely already have. You do not need precision tools or professional help. This guide walks you through diagnosing the imbalance, choosing the right materials, and securing a stable platform for squats, bench presses, and more.
Assess the Floor Slope First
Before placing any boards, determine how uneven your floor really is. A visual guess will not cut it. Accuracy prevents overcorrection and wasted materials.
Use a Reliable Level Tool
Grab a 24-inch bubble level or a digital level app on your smartphone. Place it across the footprint where your squat rack will sit. Check both front-to-back and side-to-side alignment.
Watch for a bubble shifted more than half a line off center, which indicates a significant slope. Many smartphone levels show degrees of tilt, and anything over 1° needs correction. Test multiple spots because garages often have inconsistent dips. Measure at all four rack feet.
Identify the Low Side
Mark the lower corner or corners with tape. This tells you exactly where to add support. Most garage slopes run toward the door, so the back corners are often higher.
Pro tip: Rock the rack gently. The direction it sways reveals the high side, so support goes under the opposite low foot.
Choose the Right Boards for Stability
Not all wood works for this task. You need sturdy, flat boards that will not compress under heavy loads.
Recommended Board Specifications
Select plywood or dimensional lumber like 2×6 or 2×8 scraps. The thickness should be approximately 3/4 inch, which is the standard nominal thickness for lumber. Cut boards to fit snugly under rack feet, typically around 6×6 inches. Avoid particleboard or warped wood because it crushes or shifts under pressure.
Note: Boards described as 3/4 inch often measure about 0.75 inches in practice, which is close enough to correct minor garage slopes.
Cut and Position Boards Under Rack Feet

Precision here ensures lasting stability without overcorrection. Take your time with this step.
Step-by-Step Board Placement
Lift the rack safely using a floor jack or enlist help. Never pry with hands. Slide boards under the low feet, starting with one board. Recheck the level after each addition. Add layers if needed by stacking a second or third board. Avoid stacking too high because more than three boards risks instability. If needed, switch to a thicker shim rather than adding more layers.
Find the Sweet Spot
There is a balance between leveling and over-leveling. Adding too much material can tilt the rack the other direction. Re-test after each addition. The goal is zero rock. Press down on each corner. No movement means you are done.
Secure Boards to Prevent Shifting
Even a slight shift during a heavy set can compromise safety. Prevent this with proper adhesion.
Glue Boards Together
Apply multipurpose construction adhesive like Liquid Nails between stacked boards. This prevents lateral slippage when stepping on or adjusting the mat. Do not glue to concrete because you may need to reposition later. Clamp the boards and wait for the adhesive to cure for 12 to 24 hours before use.
Expert note: The combined weight of the rack and rubber workout mat will pin everything down. Glue is just insurance during movement.
Lock Everything In Place With a Workout Mat
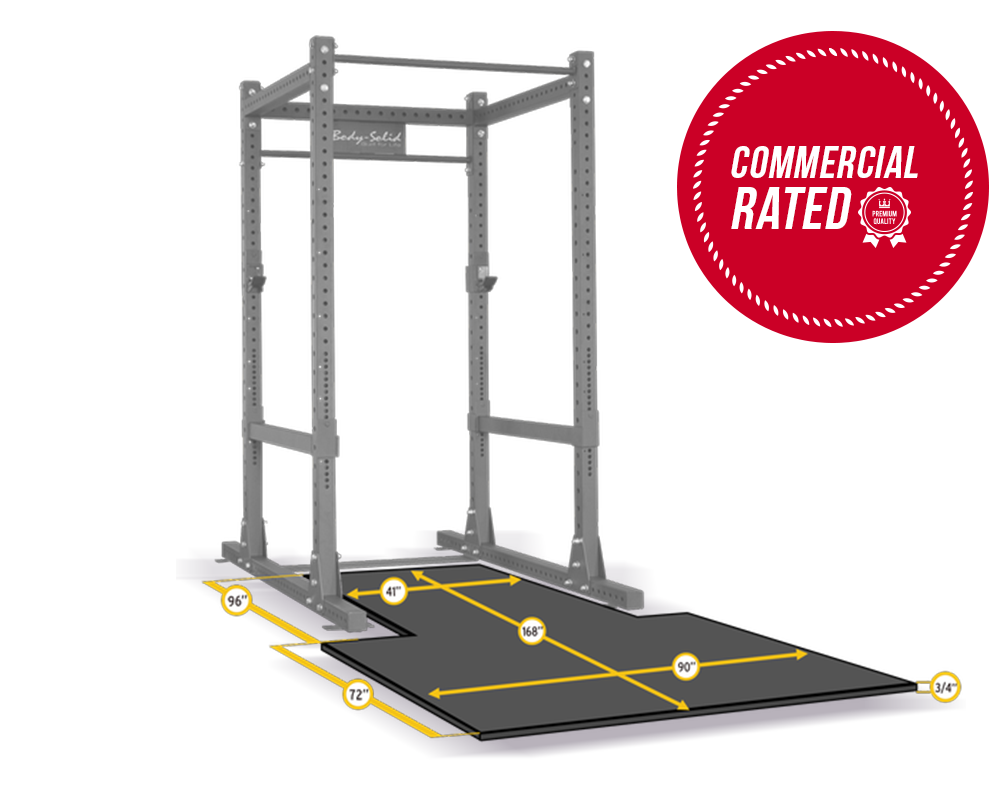
Your mat is not just for comfort. It is part of the stabilization system.
Use a Thick Rubber Mat
Select a minimum thickness of 3/8 inch or 8 mm. Choose a size of at least 6×8 feet to cover the entire rack zone. Use dense, non-slip rubber like gym flooring tiles or horse stall mats. Place the mat over the boards and rack. The downward pressure locks the shims in place and dampens vibration.
Bonus: Mats protect garage floors from dropped weights and reduce noise during workouts.
Test for Stability Before Lifting
Never skip the safety check. A few seconds now prevents injury later.
Perform a Rock Test
Stand facing the rack. Push down firmly on each upright. Move around and apply side pressure. If there is no rocking, creaking, or shifting, you pass. Any movement means recheck board placement or add more adhesive.
Load Test Gradually
Start with an empty barbell. Perform a few air squats while watching for uneven settling. Listen for creaks in the wood or rack joints. Once stable, increase weight in 25 to 50 pound increments.
Prevent Long-Term Issues
Leveling is not a one-time fix. Monitor your setup regularly to maintain stability.
Recheck Every 3-6 Months
Heavy drops and floor settling can shift boards over time. Re-level if you notice new sway. Replace cracked or compressed wood immediately.
Rotate Mats Periodically
Mats can compress unevenly. Flipping them extends their life and maintains even support across all feet.
Alternative: Adjustable Leveling Feet
If you hate shimming, consider upgrading your rack with threaded leveling bolts.
Install Threaded Leveling Bolts
Some squat racks offer optional bolt-on leveling feet. These let you dial in height per corner. They work best for frequent repositioning or multi-use garage spaces. The downside is cost, typically $60 to $120, plus installation time.
DIY hack: Weld or bolt threaded rods to existing feet for custom adjustability.
Key Takeaways for Leveling Your Squat Rack
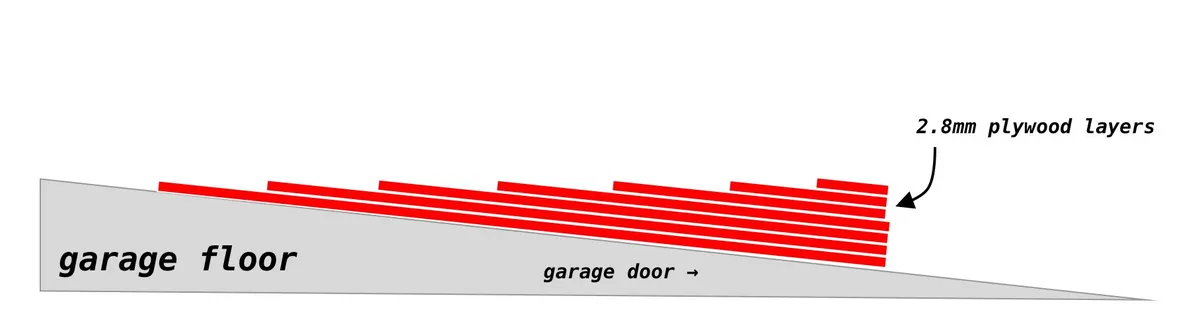
Squatting on an uneven surface does not just hurt performance. It rewires your movement patterns. One side of your core and spine adapts to carry more load, leading to asymmetry and potential spinal curvature over time. By leveling your squat rack, you ensure both sides of your body develop equally, protect your joints, and train with confidence.
A level rack equals balanced strength. Spend 30 minutes fixing the floor now to avoid years of joint pain later. Use the board method outlined above, test stability before each workout, and recheck your setup every few months. Your body will thank you every time you step under the bar.
Frequently Asked Questions About Leveling a Squat Rack
How do I know if my squat rack is unlevel?
Place a bubble level across the rack footprint. Check both side-to-side and front-to-back. A bubble more than half a line off center indicates a slope. You can also rock the rack gently. The direction it sways reveals which side is high.
What materials can I use to level a squat rack?
Plywood or dimensional lumber like 2×6 or 2×8 scraps work best. Use boards approximately 3/4 inch thick. Avoid particleboard or warped wood because it crushes or shifts under heavy loads.
How many boards do I need?
Start with one board under the low foot. Recheck the level and add more if needed. Most garage slopes require one to three boards. Stop once the rack sits level with zero rock when you press down on each corner.
Can I glue the boards to the floor?
Do not glue boards to the concrete floor. You may need to reposition later. Instead, glue boards together with construction adhesive to prevent lateral movement. The weight of the rack and mat will hold everything in place.
How often should I recheck my rack level?
Recheck every 3 to 6 months. Heavy drops and normal floor settling can shift boards over time. Replace any cracked or compressed wood immediately.
Are adjustable leveling feet a better option?
Adjustable leveling feet work well for permanent setups or frequently repositioned racks. They let you dial in height per corner without stacking boards. However, they cost $60 to $120 and require installation.


