
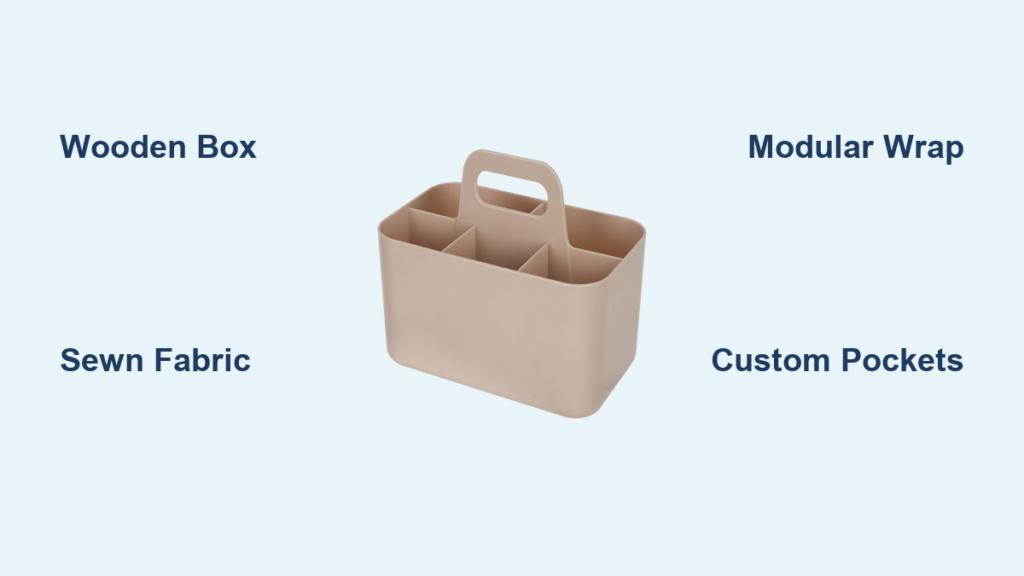
You have supplies scattered everywhere—scissors on the couch, thread on the floor, cleaning bottles under the sink. A caddy organizer fixes that clutter problem fast. Whether you craft, cook, or clean, a well-built caddy keeps essentials within reach and mess under control. The best part? You can build your own, customized to your space, style, and needs using wood, fabric, or upcycled containers.
This guide walks you through how to make a caddy organizer in three main styles: wooden, sewn fabric, and modular DIY. You will get exact materials, step-by-step construction, pro tips, and customization ideas. No fluff, just clear steps to build a durable organizer that works for your life.
Choose Your Caddy Type Based on Your Needs
Before gathering supplies, decide which caddy style fits your lifestyle. Each type serves different purposes and skill levels.
Wooden Storage Caddy
A wooden caddy works best for kitchens, workshops, or desks where you need a rigid box that holds heavy items. Pine or hardwood construction creates a durable, display-worthy organizer that handles mason jars, tools, or art supplies. This beginner-friendly woodworking project produces a box-style caddy with fixed compartments.
Sewn Fabric Caddy
A fabric caddy offers softness, portability, and full customization. This style suits crafters, sewists, or parents who need a lightweight organizer for travel, strollers, or couchside use. You can choose duck canvas for durability or quilting cotton for decorative appeal. These caddies feature pockets, dividers, handles, and reinforced bases.
Modular Container Caddy
Turn tin cans, mugs, or toilet paper rolls into decorative organizers by wrapping them in fabric. This approach creates a snug, stylish caddy perfect for pens, brushes, or kitchen utensils. It costs nearly nothing if you upcycle containers you already have.
Build a Wooden Storage Caddy (Beginner Woodworking Project)
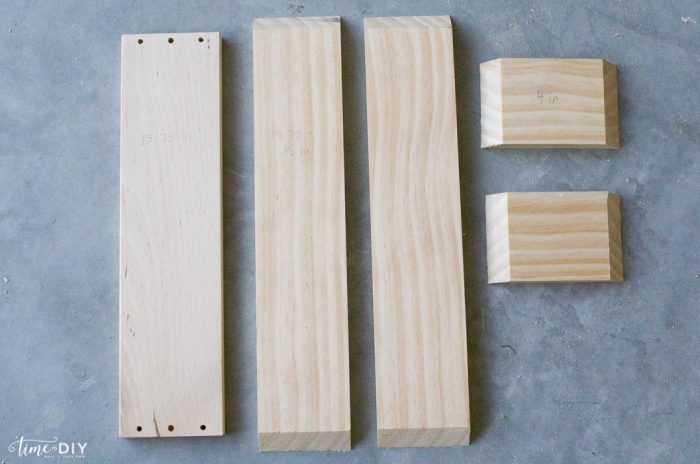
This wooden caddy measures 17 inches long by 9.5 inches wide by 3.5 inches high with three internal compartments of approximately 4⅝ inches by 7.5 inches.
Materials and Tools Needed
Gather these supplies before starting. You need 1×4 and 1×6 pine boards, wood glue (Titebond II or III), 18-gauge brad nails measuring 1 to 1¼ inches, wood filler or painter’s caulk, sandpaper in 120 and 220 grit, and optional paint, stain, or polyurethane finish.
Cut List for the Wooden Caddy
You need one bottom piece cut from 1×6 board at 17 inches long, two long side pieces from 1×4 board at 17 inches each, and four short pieces (two for short sides and two for dividers) from 1×4 board at 4 inches each. Remember that actual board thickness equals approximately 0.75 inch, with 1×4 measuring 3.5 inches wide and 1×6 measuring 5.5 inches wide.
Step 1: Cut and Sand All Pieces
Cut all pieces to size using a miter saw or circular saw with a stop block for identical cuts. Sand every surface starting with 120 grit, then move to 220 grit for a smooth finish. Pro tip: stain or paint interior pieces before assembly for complete coverage.
Step 2: Assemble the Base Box

Dry-fit the 17-inch and 4-inch boards into a rectangle shape. Apply wood glue to the end grains. Clamp corners at 90 degrees using corner clamps. Reinforce each joint with 2 to 3 brad nails. Wipe away excess glue with a damp cloth. Let dry for 20 to 30 minutes.
Step 3: Attach the Bottom Panel
Flip the box upside down. Place the 1×6 bottom board flush with the edges. Apply glue to the bottom edges of the side pieces. Nail every 4 to 6 inches using the brad nailer. Let cure for at least 30 minutes before continuing.
Step 4: Install the Dividers
Measure the interior width, which should be approximately 4⅝ inches. Dry-fit two 4-inch divider pieces across the box. Tap gently with a rubber mallet if the fit is snug. Nail through the top edges only, leaving the bottom un-nailed for easy cleaning. Ensure dividers are plumb and evenly spaced.
Step 5: Finish and Customize
Fill nail holes using wood filler if you plan to stain the project or painter’s caulk if painting. Sand smooth, then apply your final coat(s). Add polyurethane for durability if desired. Customization options include lining compartments with felt, using chalkboard paint to label sections, or adding leather handles or casters.
Sew a Fabric Caddy (Intermediate Sewing Project)
This sewn caddy creates a portable workstation perfect for carrying sewing tools, thread, scissors, and rulers.
Select Your Fabric and Stabilizer
Choose exterior fabric such as duck canvas, cotton, or quilting cotton. Pick lining fabric in a coordinating cotton or fusible fleece. Select stabilizer options like Soft and Stable, fusible fleece, or non-fusible foam. Pro tip: use spray basting adhesive (505 Spray and Fix) to prevent foam or batting from shifting during sewing.
Cut and Mark the Panels
Use a rotary cutter and mat for precision cutting. Cut the main panel at 15 inches by 7 inches for height and width. Cut lining to the same size. Cut pockets based on your item sizes, for example 4 inches by 6 inches for scissors. Cut handle strips at 2½ inches by 24 inches. Mark placement lines with a water-soluble pencil.
Construct Reinforced Handles
Cut two 2½-inch by 24-inch strips for exterior and lining. Fuse fusible fleece to the exterior piece only. Fold long edges to the center and press. Place right sides together and sew along the long edge. Turn, press flat, then topstitch ⅛ inch from both edges. Attach handles by measuring 3 inches from each side on the main panel. Position handle ends at the intersection of pocket top and divider line. Sew across, pivot, and stitch an X-reinforcement for strength.
Sew and Attach Pockets
For double-fold hem pockets, fold the top edge ¼ inch, fold again ¼ inch, and press. Clip in place. Stitch along the top fold. Fold the bottom edge up ¼ inch to hide the raw edge.
For clear vinyl pockets, cut vinyl at 4½ inches by 4 inches. Tape (do not pin) the vinyl to fabric to prevent sticking. Use masking tape on the presser foot to reduce drag. Topstitch close to the edge. Pro tip: use a denim needle to sew through thick layers without skipped stitches.
Add Internal Gusseted Dividers
Cut fabric and stabilizer to your desired size, for example 6 inches by 5 inches. Fuse stabilizer to the fabric, leaving ¼-inch margins. Place right sides together and sew ¼ inch across the top. Turn, press, then stitch ¼ inch along the open edge. Mark pleat lines every 4 inches, fold, and stitch ⅛ inch from the fold. Leave the bottom open for flexibility.
Bind the Edges
Use double-fold bias tape at 2¼ inches wide or make your own. Cut 2.5-inch strips from fabric and join at 45 degrees for a continuous length. Press in half. Align raw edges with the caddy top and sew a ¼-inch seam. Fold over, clip, and topstitch close to the fold. Miter corners for a clean, professional look.
Make a Couch or Stroller Caddy
This caddy attaches to furniture or strollers with ribbons or Velcro. It works for crafters, parents, or caregivers needing hands-free access to supplies.
Materials for the Catch-All Caddy
Gather quilting cotton at 14.5 inches by 25 inches, fusible fleece at 14.5 inches by 25 inches, satin ribbon at 4 pieces of 20 inches each, binding at approximately 80 inches of 2.5-inch strips, and wonder clips with spray adhesive.
Quilt the Base
Iron fusible fleece to the front fabric. Spray basting adhesive on the fleece side and press back fabric on top. Draw diagonal lines every 2.5 inches to create a diamond pattern. Quilt along the lines. Trim to 14 inches by 24.5 inches.
Add Pockets and Pin Cushion
For the short pocket at 7 inches by 14 inches, fuse fleece to one side and bind edges with bias tape. Attach to the base with perimeter stitching. For the larger pocket at 9 inches by 14 inches, center it 7 inches from the sides and sew around three sides, leaving the top open.
For the pin cushion, fold fabric lengthwise at 7.5 inches by 3.25 inches and sew the long edge. Press open and fold flat. Sew one end closed at ¼ inch. Stuff lightly with fiberfill and sew the second end closed. Attach near the top edge of the caddy.
Attach Satin Ribbons
Fold ribbon ends ½ inch to hide cut edges. Attach 2 inches down from the top on the back panel. Cross over the front with shiny side out. Secure ends temporarily with clips. Use these ribbons to loop around couch arms, stroller handles, or walker bars.
Finish with Binding
Cut approximately 80 inches of 2.5-inch binding strips. Press in half lengthwise. Start at a low-bulk corner and leave a 4 to 5-inch tail. Sew a ¼-inch seam around the edge, mitering corners. Overlap the tail and hand-stitch closed with a ladder stitch.
Customize Your Caddy for Maximum Functionality
Once you have the basic structure, add features that match your specific needs.
Add Clear Vinyl Pockets for Instant Visibility
Clear vinyl pockets let you see bobbins, clips, or tools without digging. Cut vinyl at 4½ inches by 4 inches. Tape in place rather than pinning to avoid punctures. Topstitch close to the edge.
Use Removable Bottom Inserts
Cut two pieces of non-fusible interfacing at 5 inches by 8¾ inches. Make a fabric sleeve by sewing three sides, turning, and pressing. Insert the stabilizer and slide into the caddy for structure. Remove for washing.
Reinforce Stress Points
X-stitch handles by sewing across, pivoting, forming an X, and sewing back. Use double stitching on pocket corners and base seams. Switch to a denim needle when sewing through thick layers to prevent breakage.
Personalize with Monograms
Embroider names or initials for a personal touch. Use iron-on labels with your name or theme. Choose fabrics that match your decor, whether floral, geometric, or speckled.
Maintain and Care for Your Caddy
Proper care extends the life of your caddy organizer for 3 to 5 years or longer.
Cleaning Tips
Spot-clean fabric caddies with a damp cloth after removing inserts. Wipe wooden caddies with a dry or slightly damp cloth and avoid soaking. Clean vinyl pockets with mild soap and store away from direct sunlight to prevent yellowing.
Storage Recommendations
Store caddies indoors, away from UV exposure. Remove contents when not in use for extended periods. Fold soft caddies flat for long-term storage.
Repair and Refresh
Re-stitch loose seams with matching thread. Replace worn handles or ribbons when needed. Reapply polyurethane to wooden caddies every 1 to 2 years to maintain protection.
Cost Comparison: DIY vs. Retail
Building your own caddy saves significant money while giving you complete control over size, color, layout, and durability.
| Feature | DIY Cost | Retail Price | Savings |
|---|---|---|---|
| Materials (fabric + stabilizer) | $20–$35 | — | — |
| Leather handle kit | $12–$18 | — | — |
| Average retail caddy | — | $25–$60 | 30–60% savings |
You also gain full customization that retail options cannot match.
Frequently Asked Questions About Making a Caddy Organizer
What is the easiest caddy organizer to make for beginners?
A wooden storage caddy is the easiest beginner project. It requires basic tools and straightforward assembly with wood glue and brad nails. The cuts are simple (mostly rectangles), and the tolerance for errors is higher than with fabric projects.
How long does it take to make a fabric caddy?
A basic fabric caddy takes 2 to 4 hours for beginners. More complex versions with multiple pockets, dividers, and quilting may take 4 to 6 hours. The couch or stroller caddy falls on the faster end at 2 to 4 hours.
What fabric is best for a durable caddy organizer?
Duck canvas offers the highest durability with semi-waterproof properties, ideal for high-use caddies. Quilting cotton works well for decorative or light-use organizers. For a balance of durability and aesthetics, choose a medium-weight cotton with fusible fleece stabilizer.
Can I make a caddy organizer without sewing?
Yes. Use the modular container method by wrapping tin cans, mugs, or toilet paper rolls in fabric secured with ribbon or elastic. Alternatively, use a wooden caddy built with wood glue and brad nails, requiring no sewing at all.
How do I choose the right size pockets for my caddy?
Measure your items first before cutting pocket sizes. Common measurements include 4 inches by 6 inches for scissors, 3 inches by 8 inches for rotary cutters, and 2 inches by 6 inches for pens. Leave pockets open at the top for quick access.
Key Takeaways for Building Your Caddy Organizer
How to make a caddy organizer depends on your needs and skill level. A sturdy wooden box suits workshops and kitchens, a soft quilted caddy works for couch crafting, and a modular fabric wrap transforms upcycled containers into organizers. Each style offers durability, customization, and real function.
With the right materials, tools, and techniques, your caddy will last 3 to 5 years or longer while saving 30 to 60% compared to retail prices. You control every dimension, color, and feature. Now you have the dimensions, materials, step-by-step builds, and pro tips. Pick your style, gather supplies, and start building. Your clutter-free space is one caddy away.


