
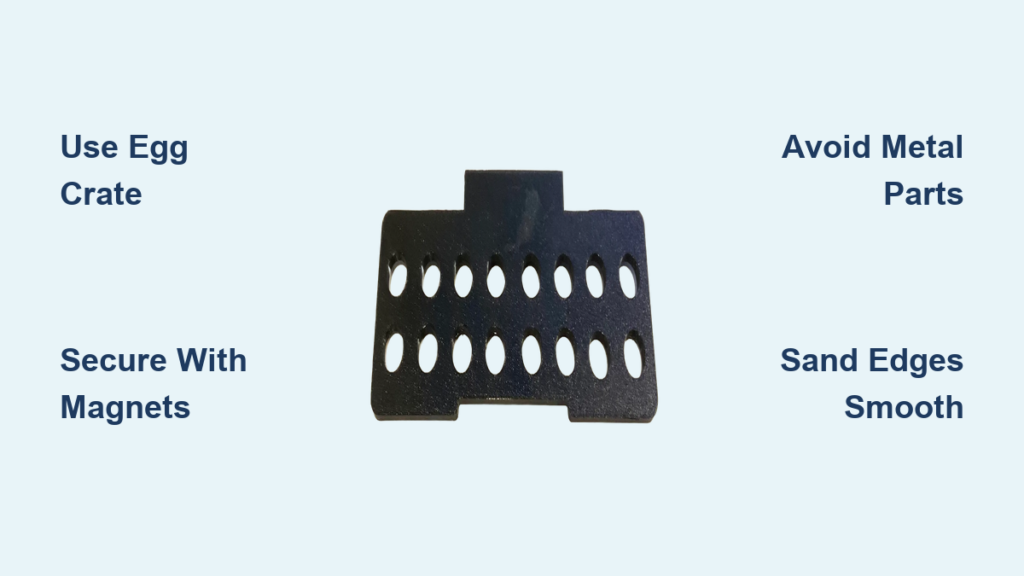
Coral propagation is a cornerstone of reef aquarium success, and a frag rack makes it easier, safer, and more efficient. Whether you’re a beginner or a seasoned hobbyist, learning how to make a frag rack opens the door to low-cost, customizable coral cultivation. These racks hold coral fragments securely in place while maximizing light exposure and water flow, critical for fast, healthy growth.
Most reefers use frag racks to organize their propagation zones, prevent frags from being buried or knocked over, and simplify acclimation. The best part? You can build a fully functional, reef-safe frag rack for under $20 using materials from your local hardware store. This guide walks you through every step, from choosing materials to installation, using only proven, safe methods backed by real-world reef keepers.
Choose the Right Base Material
The foundation of any good frag rack is the base panel, and egg crate remains the gold standard for beginners and experts alike. Egg crate is a lightweight, porous plastic grid sold as a ceiling light diffuser. It is inert, buoyant, and allows water to flow freely through its grid pattern, reducing detritus buildup.
Why Egg Crate Works Best
Egg crate offers several advantages that make it ideal for frag rack construction. It is inexpensive, typically costing around $13 per 2′ × 4′ sheet. The material is easy to cut and modify using tin snips or a jigsaw. The grid pattern provides natural grip for frag plugs, and the open structure resists algae buildup. It is lightweight, so magnets or suction cups can support it easily.
Prepare the Panel Correctly
After cutting your egg crate to size, proper preparation is essential for safe tank use.
Sand all edges with 300-grit sandpaper to remove sharpness and prevent scratching acrylic tanks. Dull any glossy surfaces to help glue bond better. Remove any melted styrene tabs from heat cutting using gloves. If your tank has curved walls, slightly curve the edges of the panel to conform to the shape.
One 2′ × 4′ sheet can yield multiple racks, cutting costs per rack to under $5. Typical frag shelf sizes include 5″ × 10″, 6″ × 10″, or 4″ × 4″ for nano tanks.
Pick a Secure Mounting Method
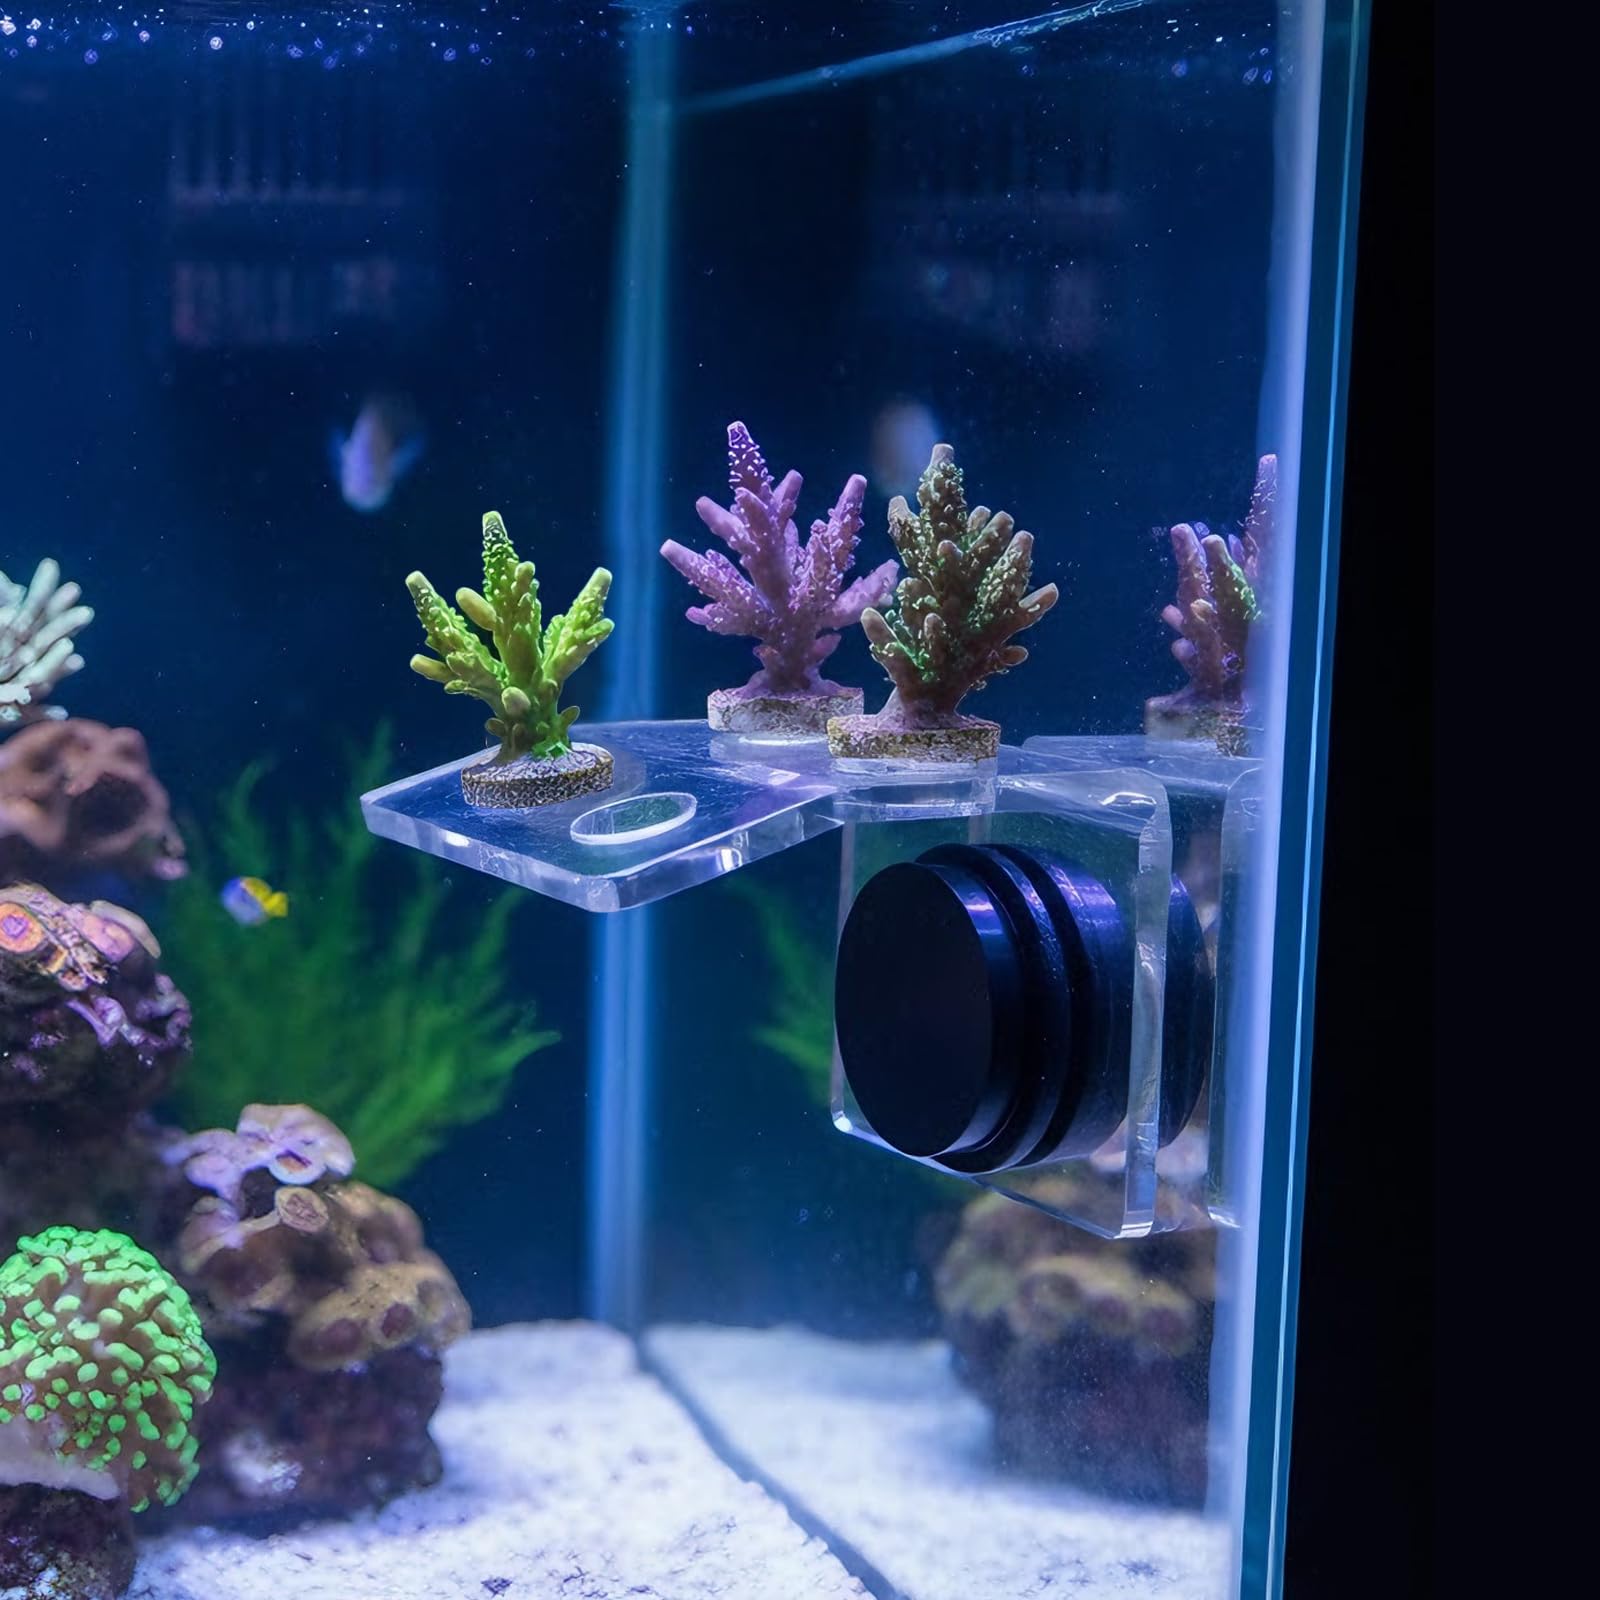
The mounting method you choose determines how stable your frag rack remains over time. Three main options exist, each with distinct advantages and drawbacks.
Neodymium Magnets: Strongest Hold
Epoxy-coated neodymium magnets offer the most secure mounting for most tank setups. These powerful, compact magnets are safe when fully encapsulated and can hold up to 25 pounds. Grades N48 or N52 provide the strongest pull, and 1″ diameter magnets work for most setups.
Only use fully coated magnets. Uncoated neodymium will rust and poison your tank. Source magnets from KJMagnetics.com or Amazon, and always test unknown magnets by submerging them in saltwater for 24 to 48 hours before use.
How to Attach Magnets Safely
Clean the egg crate cross-brace thoroughly before gluing. Apply Loctite Gel Super Glue in a plus-sign pattern on the surface. Press the magnet into place, ensuring it is flush with the edge. Reinforce with extra glue around the perimeter. Allow the assembly to cure for at least 2 to 3 hours, though overnight is preferred.
Gel glue works best on porous surfaces like egg crate and cures quickly underwater. Use spacer rings to reduce magnetic force and protect your tank glass. Place the inner magnet behind the grid, not directly on glass, and avoid slamming magnets together, as they can crack thick glass.
Suction Cups: Budget-Friendly Option
Plastic-hook suction cups from Walmart cost roughly $1.94 per 2-pack and offer a quick, adjustable mounting solution. They are easy to install and fully adjustable for positioning.
However, suction cups provide weak hold and degrade over time. They are not ideal for high-flow tanks or permanent installations. Avoid metal suction cups entirely, as they rust and release toxins into your reef.
Zip Ties: Perfect for Support Legs
Nylon zip ties provide a reliable way to attach support legs or braces to your egg crate. Cut two egg crate pieces into 4″ × 4″ grids and attach them vertically under the shelf. Align the top edge with the shelf for a flush fit.
Zip ties offer instant, reef-safe installation with no clamps or curing time required. They work especially well when combined with other mounting methods for added stability.
Build Alternative Rack Designs
Beyond the basic magnetic egg crate setup, several alternative designs suit different needs and preferences.
PVC Frag Racks: Durable and Customizable
PVC offers a long-lasting alternative, especially for larger or permanent setups. Half-inch PVC pipes can be cut to desired heights and attached to a crossbar or T-joint. File all ends smooth before installation.
Heat-bent 90-degree joints work well but can trap detritus and reduce water flow. Use them sparingly. For maximum flow, design with wider spacing between supports and consider black PVC, which hides algae better.
Drilled Live Rock Racks: Natural and Permanent
For a seamless aquascape, flat live rock serves as an excellent frag base. Select a stable, flat rock and mark evenly spaced holes at 1/2″ or 5/8″ diameter. Drill vertical holes using a masonry bit, rinse thoroughly, then place in tank and insert frag plugs.
This approach offers a biologically active, natural look that blends into your reef. One hobbyist reported still using a rock rack built years ago with no degradation and full coral integration.
Plug-Based Mobile System: No Rack Needed
Skip the rack entirely by using frag plugs mounted directly on sand or in temporary holders. Mount each coral on a ceramic, plastic, or calcium-based plug, then move them around to find the optimal “happy spot” for each specimen.
Coralline algae eventually covers the plug, making it invisible. Once you start doing this, you will never go back. This method eliminates rack requirements entirely and allows real-time adjustment based on coral response.
Avoid Common Safety Hazards
Safety should never be compromised when building equipment for your reef tank.
No Exposed Metal
Stainless steel will corrode in saltwater, even when marketed as rust-resistant. Metal suction cups, hooks, and brackets pose high-risk toxicity. Replace all metal components with plastic-only alternatives.
Commercial frag racks have failed due to magnet oxidation. Always test unknown magnets before permanent installation.
Protect Acrylic Tanks
Acrylic scratches easily, so sand all edges until completely smooth. Never drag the rack across tank walls. Use softer materials and reduce magnetic pressure to prevent stress fractures.
Install Your Frag Rack Step by Step
Follow this assembly sequence for a reliable, long-lasting frag rack.
Cut egg crate to your desired dimensions. Sand all edges thoroughly. Attach legs if using them with zip ties. Glue on magnets using reef-safe CA glue. Cure for at least 2 to 3 hours. Disinfect with vinegar solution. Rinse with RO/DI or dechlorinated water before tank installation.
When mounting in the tank, place the inner magnet on the far side of the grid. Position the outer magnet with a spacer ring. Align slowly to avoid snapping. Test stability by gently tilting the rack.
Start with the rack on the tank bottom, then raise it 1 inch every 2 to 3 days to acclimate corals to higher light. Full acclimation typically takes 2 to 3 weeks.
Optimize for Your Tank Type
Tank size and construction influence which frag rack design works best.
Thick Glass Tanks
Tanks with 3/4″ or thicker glass may not work with standard magnets. Use high-strength neodymium magnets rated N52 for reliable hold. Consider suction cups or internal PVC supports as alternatives.
Nano Tanks
For 10 to 30 gallon nano tanks, use a 4″ × 4″ egg crate piece with a single magnet. This size works ideal for soft corals and small LPS. It is easy to reposition and store when not in use.
Large Tanks
For 75 to 135 gallon setups, use drilled live rock or multi-magnet systems. Consider BlackRock Reef racks for commercial-grade durability.
Maintain and Extend Lifespan
Regular maintenance keeps your frag rack functioning safely for years.
Weekly Cleaning
Wipe down the rack with a soft brush or sponge. Remove algae or biofilm from grid holes. Check for snail or crab activity that might displace frags.
Monthly Inspection
Test glue joints for weakness. Check magnets for movement or corrosion. Look for cracks or warping in PVC or egg crate.
Replace When Necessary
Egg crate degrades over 1 to 2 years and should be replaced periodically. PVC lasts indefinitely if undamaged. Always replace rusted or failing components immediately.
Cost-Effective Build Options
Building your own frag rack costs significantly less than commercial options.
Budget Build
Egg crate sheet costs approximately $13. Plastic-hook suction cups run about $4. This totals roughly $17 for a basic setup. One sheet makes multiple racks, driving cost per rack below $5.
Upgraded Build
Egg crate costs $13. Neodymium magnets run $20 to $25. Loctite Gel Super Glue adds $5. Sandpaper costs under $1. Total comes to approximately $38 for a premium magnetic setup.
Troubleshoot Common Problems
Address issues quickly to prevent tank crashes.
Rusting Parts
Exposed metal or uncoated magnets cause rusting. Replace with plastic or fully encapsulated components immediately.
Rack Tilts or Wobbles
Weak magnets, poor balance, or mag-float instability cause movement. Add zip-tied legs, upgrade magnet strength, or switch to PVC supports.
Magnets Crack Glass
Too-strong magnets, missing spacers, or improper placement cause cracking. Use separator rings, recess the inner magnet, and avoid slamming magnets together.
Glue Fails
Poor surface prep or wrong adhesive causes bond failure. Sand surfaces thoroughly, use reef-safe gel CA glue, and apply two layers for reinforcement.
Frags Keep Falling Off
No containment or snail activity causes frag loss. Add raised edges using egg crate or acrylic, use snug-fit plugs, and monitor tank inhabitants.
When to Buy Instead of Build
Sometimes commercial options make more sense.
BlackRock Reef Frag Racks
BlackRock Reef racks cost approximately $15 and offer black color that blends into backgrounds. They feature strong magnets and durable construction. Users report these are the best commercial frag racks available, though they may struggle on very thick glass.
Frequently Asked Questions About Making a Frag Rack
What is the best material for building a frag rack?
Egg crate remains the best material for most frag rack builds. It is inexpensive, lightweight, provides excellent water flow, and is easy to cut and modify. The grid pattern naturally grips frag plugs while preventing algae buildup.
How much does it cost to build a frag rack yourself?
A basic frag rack costs approximately $17 using egg crate and suction cups. An upgraded magnetic version runs about $38. One egg crate sheet yields multiple racks, driving per-unit cost below $5.
Can I use magnets in an acrylic tank?
Yes, but with caution. Acrylic scratches easily and is more prone to stress fractures. Sand all edges smooth, use spacer rings to reduce magnetic force, and avoid dragging the rack across walls.
How do I prevent my frag rack from rusting?
Never use exposed metal components. Only use fully epoxy-coated neodymium magnets. Test unknown magnets by submerging in saltwater for 24 to 48 hours before use. Replace any component showing signs of corrosion immediately.
How often should I replace my frag rack?
Egg crate typically lasts 1 to 2 years before degrading. PVC lasts indefinitely if undamaged. Inspect monthly for wear, corrosion, or structural weakness and replace components as needed.
Key Takeaways for Building Your Own Frag Rack
Building your own frag rack is both cost-effective and empowering. Start with egg crate and neodymium magnets for the simplest beginner-friendly setup. Always avoid metal components, as they will corrode and poison your reef. Sand all edges thoroughly to prevent tank damage and improve glue adhesion. Test all magnets before permanent installation, and disinfect your rack before adding it to the tank.
With the right materials and techniques, you can create a system that grows with your reef, adapts to your tank, and keeps your corals thriving. The skills you develop through DIY construction translate to other reef projects, making you a more confident and capable reef keeper. Happy fragging.


