
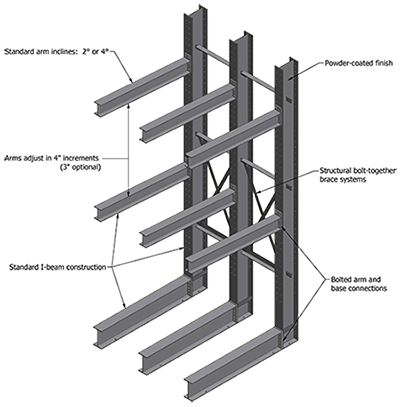
Storing lumber efficiently in a workshop or garage can be a constant challenge. Boards lean against walls, sag on makeshift shelves, or clutter the floor where you need to work. A well-built lumber rack solves this by keeping your stock organized, off the ground, and easily accessible. You do not need advanced skills or expensive materials to build one. With basic tools and common lumber like 2x4s, you can create a strong, durable rack that holds hundreds of pounds. This guide covers three proven designs, from beginner-friendly wall racks to heavy-duty freestanding units, so you can choose the best fit for your space and storage needs.
Wall-Mounted Angled Lumber Rack

This design uses shear-rated lag bolts and angled supports to create one of the strongest wall-mounted solutions available. Instead of relying on shelf brackets, weight transfers directly to 6-inch lag bolts embedded into wall studs, making it ideal for heavy loads.
Build Angled Support Blocks
Cut 4-inch tall blocks from ½-inch plywood using a miter saw set to a 5-degree angle. Drill a centered through-hole in each block just wide enough for the lag bolt shank, not the threads. These blocks will anchor the rack to the wall. Attach two 3.5-inch wide plywood strips to the sides of each block using construction screws, alternating screw positions between blocks to prevent splitting. This creates a channel that accepts the 2×4 support arms.
Install Lag Bolts into Studs
Locate wall studs with a stud finder or magnets. Mark centerlines with a pencil. Pre-drill pilot holes through drywall and into each stud. Insert 6-inch lag bolts, leaving ¾ to 1 inch protruding. Ensure all bolts are level and aligned, as this is critical for smooth arm installation. Use high-quality, structural-grade lag bolts rated for shear load, typically 300 to 500 pounds per bolt.
Slide in Beveled 2×4 Supports
Cut 2x4s to 20 inches long and bevel both ends at 5 degrees. Slide each support onto the protruding lag bolts, starting from the bottom. The bevel allows the board to sit securely while angling slightly forward to prevent tipping. After placing each arm, check alignment with a level. Load test gradually by starting with lighter boards before adding heavy hardwoods.
Simple 2×4 Wall-Mounted Lumber Rack
Perfect for beginners, this rack uses only 2x4s and wood screws. It is fast to build, requires no special cuts, and provides reliable support when properly anchored to wall studs.
Cut and Space Rung Supports
Use full 8-foot 2x4s as vertical backer boards for ceilings 10 feet or higher. For 8-foot ceilings, cut backers 1 inch shorter than ceiling height for easier installation. From remaining lumber, cut twenty 14-inch rungs, five per backer board. Keep one extra 14-inch piece as a spacer block to ensure consistent spacing between rungs.
Attach Rungs to Backer Boards
Position the first rung 14 inches from the bottom of each backer board using the spacer block. Place a scrap 2×4 under the rung to center it vertically. Pre-drill two holes through the backer into the end of the rung to prevent splitting. Drive two 4-inch wood screws per joint. Move the spacer up and repeat until all five rungs are installed. Keep rungs on the same side of each backer for uniform loading.
Mount Backers to Wall Studs
Align each backer board with wall studs. Use a level to ensure it is plumb. Secure with at least three 4-inch wood screws per stud, placing them at the top, middle, and bottom. Never use drywall anchors. The entire load depends on solid stud attachment. Test stability by applying manual pressure or climbing on the rack lightly, as any movement means a screw missed a stud.
Freestanding Lumber Rack Design
No wall mounting? No problem. This self-supporting rack uses modular 2×4 columns, diagonal bracing, and 2×10 back plates to stay stable without needing wall studs.
Assemble Modular Columns
Each column is built from labeled pieces. Start by attaching a brown piece to a blue side piece with wood glue, clamps, and 2½-inch screws. Add the red middle section, flush with the blue piece, and secure with two screws. Stack pink spacers and yellow horizontal bars on top, gluing and screwing each layer. Cap with a green top piece.
Add Feet and Diagonal Braces
Attach 45-degree-cut blue ends as feet using a single 3½-inch screw per foot. Flip the column and stagger screw positions when adding the second foot. Reinforce by driving 3½-inch screws through all three layers at the base. Install a light-blue diagonal brace to resist racking. This adds rigidity and prevents side-to-side sway.
Join Columns with Spacers
Lay five assembled columns side by side. Use black spacers between them and clamp with a 36-inch bar. Stagger the support positions so joints do not align. Connect adjacent columns by driving 2½-inch screws through the face into the spacers. Start with the middle rung, then secure bottom and top. Ensure spacers do not interfere with loading long boards.
Install 2×10 Back Stabilizers
Cut two 2x10s to span between the top and bottom black spacers. Install with the cupped side inward to resist bowing. Clamp at the deepest point of the curve and screw into place with 2½-inch or 3½-inch screws. Mark an 8-inch reference line on the back for alignment. Use a combo square to ensure ends are square. For permanent setups, screw the 2x10s to a wall, post, or pillar.
Alternative Lumber Rack Designs
Not every space fits standard builds. These variations offer flexibility for sheds, mixed storage, or tight budgets.
Ledger-Based Frame with Plywood Shelves
Install a horizontal ledger board, either 2×3 or 2×4, directly into wall studs. Attach vertical uprights to the ledger, spacing them 16 to 24 inches apart. Mount ¾-inch plywood shelves on pre-made brackets. This design supports both sheet goods and long lumber. Use clearance-grade plywood to save costs by trimming damaged edges before installation.
Cleat-Mounted Arms with Glue Joints
Ideal for sheds or light-duty storage, this system uses vertical plywood cleats mounted to wall sheathing. Attach 12 to 18-inch reclaimed deck boards perpendicularly using polyurethane glue and 3½-inch screws. The cleats are secured with 1¼-inch drywall screws every 6 inches. While not suitable for heavy loads, it is ultra-low-cost and easy to scale by adding more cleat sections.
Find Wall Studs Accurately
Hitting studs is non-negotiable for wall-mounted racks. Use these reliable methods to locate framing accurately.
Use Magnets to Locate Studs
Grab child-safety lock magnets and slide them along the wall. They will stick where drywall screws anchor into studs. Follow the screw pattern to mark stud centers. This method is faster and more reliable than many electronic stud finders, especially on uneven walls.
Confirm with Electronic Stud Finder
Use a commercial stud finder to scan the wall. Mark each stud centerline. For best results, combine both methods by using the stud finder first, then verifying with magnets. This double-check prevents missed studs and ensures every mounting point is secure.
Build Stronger Joints
Maximize strength and durability with proper assembly techniques that distribute load effectively.
Pre-Drill All Screw Holes
Always pre-drill when driving 4-inch screws into end grain or near board edges. This prevents 2x4s from splitting. Use a drill bit slightly smaller than the screw shank. Countersink holes so screw heads sit flush, which ensures brackets and supports lie flat against the wood.
Combine Glue and Screws
Use polyurethane construction adhesive on joints before screwing. The glue expands slightly, fills gaps, and increases shear strength. Screws provide immediate clamping and alignment. This combination is especially effective in freestanding racks where joint integrity is critical for stability.
Ensure Level and Consistent Spacing
Precision improves both function and appearance, making your rack easier to use.
Use a Spacer Block for Uniform Gaps
Cut a 14-inch scrap 2×4 to use as a spacing guide. Place it between rungs during installation to maintain consistent 14-inch gaps. This eliminates measuring errors and speeds up assembly. For taller racks, use the same block to align multiple backer boards perfectly.
Level with a Long Bubble Level
Use a 24-inch or longer level to check horizontal and vertical alignment. Walls are rarely perfectly plumb, so do not assume studs are level. Adjust each support as needed before fully tightening screws. Re-check level after partial fastening, as wood can shift slightly during assembly.
Maximize Load Capacity Safely
Even simple materials can hold heavy loads if built correctly using proper engineering principles.
Anchor Only to Studs or Sheathing
Never rely on drywall alone. For wood-framed walls, screw only into studs. In sheds with structural sheathing, you can mount cleats into ½-inch plywood or OSB provided screws are closely spaced every 6 to 8 inches. For concrete walls, use 3-inch Tapcon screws with a masonry bit.
Limit Rung Length to 16 Inches
Longer arms increase leverage and risk of pull-out. Stick to 12 to 16-inch rungs for 2×4 wall racks. If you need deeper storage, add intermediate supports or use thicker lumber. Shorter arms equal higher load capacity.
Space Supports Every 16 to 24 Inches
Closer spacing increases rigidity, especially for heavy hardwoods. For racks holding 8-foot or longer boards, space supports every 16 inches. For lighter loads, 24-inch spacing is acceptable.
Customize for Your Space
Make the rack fit your workshop layout and usage patterns for maximum efficiency.
Scale Width to Match Stud Spacing
Design the rack width to span multiple studs, typically 16 or 24 inches on center. A 12-foot rack will cover about 5 to 6 studs, providing ample mounting points. Add more backer boards for longer runs.
Reserve Space for Long Boards
Leave a vertical gap on one side of the rack to store 8 to 10-foot boards upright. This prevents warping and keeps long stock out of the way. Use a simple floor-to-ceiling channel made from scrap 2x4s.
Adjust Height and Depth
For wall-mounted racks, maximum height is 8 feet unless braced. Freestanding units can go taller with diagonal supports. Adjust arm depth based on lumber size, as 14 inches fits 2x4s and 4x4s while 24 inches accommodates sheet goods.
Maintain and Inspect Annually
Keep your rack safe and functional over time with regular maintenance checks.
Check for Loose Fasteners
Inspect screws and bolts yearly. Retighten any that have loosened due to vibration or wood shrinkage. Replace cracked or split boards immediately to prevent failure under load.
Prevent Moisture Damage
Keep rack feet off concrete floors. Use pressure-treated 2x4s or place rubber pads under feet to prevent moisture absorption. Elevating the rack by ½ inch improves airflow and reduces rot risk.
Organize by Size and Type
After installation, sort lumber by length and species. Group heavy boards on lower supports to lower the center of gravity. This improves stability and makes retrieval faster.
Key Takeaways for Building a Lumber Rack
Whether you choose a wall-mounted angled rack for maximum strength, a simple 2×4 build for speed, or a freestanding unit for flexibility, the principles remain the same. Anchor to structural supports, pre-drill all screw holes, level carefully, and test with incremental loading before full use. The wall-mounted angled design transfers weight through shear-rated lag bolts for the heaviest loads. The simple 2×4 rack offers the fastest build time for beginners. The freestanding option works anywhere without wall access. With under $60 in materials and a weekend of work, you can transform a cluttered workshop into an organized, efficient space. Build smart, build safe, and enjoy the benefits of a custom lumber rack that lasts for years.
Frequently Asked Questions About Making a Lumber Rack
How much does it cost to build a lumber rack?
Most lumber rack designs cost under $60 using ten 2x4x10-foot boards and two 2×10 boards for back stabilizers. Simple 2×4 wall-mounted versions can cost even less depending on lumber prices in your area.
What is the strongest type of lumber rack design?
The wall-mounted angled rack using 6-inch lag bolts into wall studs is the strongest design. Weight transfers directly through shear-rated bolts, allowing each bolt to handle 300 to 500 pounds depending on the bolt grade and wood species.
Can I build a lumber rack without mounting it to a wall?
Yes, the freestanding lumber rack design uses modular 2×4 columns with diagonal bracing and 2×10 back plates for stability. It can stand freely or be tied to a wall, post, or pillar for added security.
How do I find wall studs accurately for mounting a lumber rack?
Use a stud finder to locate studs, then verify with magnets from child-safety locks. The magnets stick where drywall screws anchor into studs, providing a reliable double-check method.
What is the ideal spacing between lumber rack rungs?
A 14-inch spacing is a proven standard that balances strength and reach. Space supports every 16 to 24 inches depending on load weight, with closer spacing for heavier hardwoods.


