

If you are planning to carry kayaks, bikes, skis, or a rooftop tent, knowing how to measure for a roof rack is the first step to a safe and secure setup. An improperly sized rack can lead to instability, damage to your vehicle, or even cargo loss on the road. The right fit depends on more than just your car’s make and model. It comes down to precise measurements of your roof’s width, crossbar spacing, and structural features. This guide walks you through every critical dimension, explains how to take them correctly, and shows you how to use that data to choose compatible components.
Measure Your Roof Width Correctly
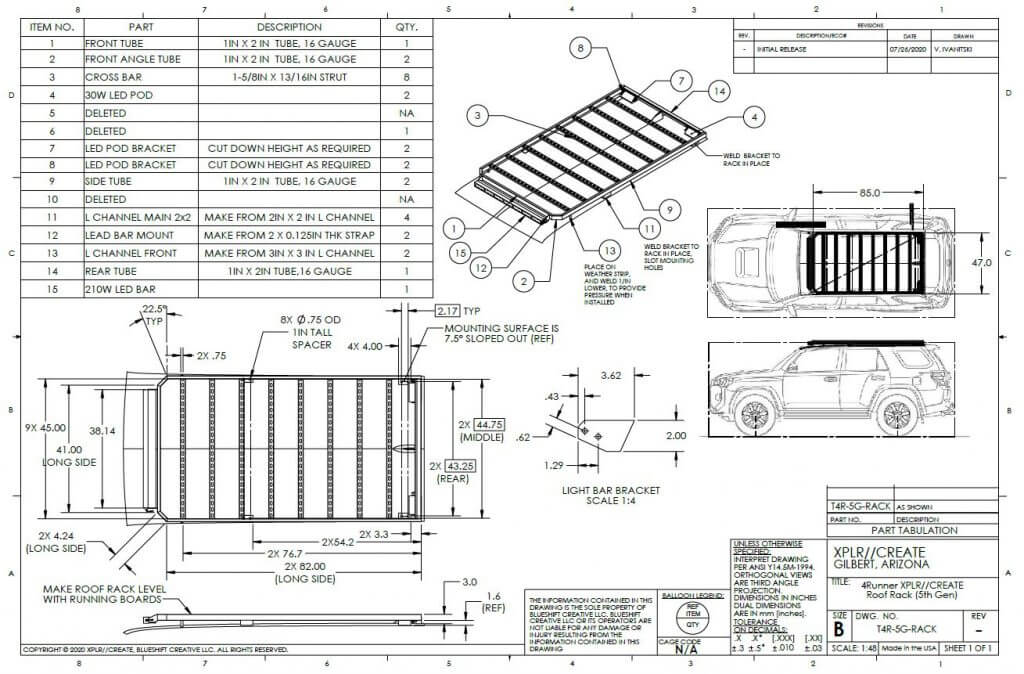
Your vehicle’s roof width determines the minimum crossbar length you will need. Too short, and your gear will not fit. Too long, and you risk wind noise, reduced fuel efficiency, or clearance issues.
Find the Drip Molding on Standard Roofs
The drip molding is the raised edge or groove along both sides of the roof where water drains. Use a retractable tape measure to record the distance between the outer edges of the drip molding. Take measurements at three points: front, middle, and rear of the roof to account for any tapering. Use the widest measurement as your reference.
If your vehicle lacks visible drip molding, measure from the outermost edge of the roof panel where it starts to curve downward.
Adjust Measurements for Hatchbacks and SUVs
Hatchbacks and many SUVs have sloped rear doors that interfere with rear-mounted platforms or cargo. Open the rear hatch fully. Measure from the point where the windshield meets the roof to the inner edge of the hatch opening. This adjusted front-to-hatch measurement ensures compatibility with rear-accessible roof decks.
Avoid mounting crossbars or platforms that block the hatch swing radius. Always leave at least 4 to 6 inches of clearance.
Determine Crossbar Spacing for Your Gear

Crossbar spacing affects load stability and accessory fit. Some cargo boxes and platforms require specific distances between supports.
Extend Bars to Maximum Width
If your rack has adjustable crossbars, slide them outward to their widest safe position. Measure from the center of one crossbar mount to the center of the opposite mount. Record this center-to-center span because it is the key number for platform and box compatibility.
Match Spacing to Your Cargo
Shorter spans of 24 to 30 inches work well for bikes and light loads. Wider spans of 30 to 36 inches or more are better for long items like skis, kayaks, or ladders. Many systems allow repositioning, so prioritize flexibility if you carry varied gear.
Place the front crossbar just behind the front doors and the rear bar ahead of the rear hatch or spoiler for balanced weight distribution.
Choose the Right Crossbar Length

Crossbar length is not always the same as roof width. It must support your cargo while staying within structural limits.
Standard Crossbar Sizes by Category
• Small: 50 inches JetStream, 50 inches CoreBar, 48 inches RoundBar
• Medium: 60 inches JetStream, 60 inches CoreBar, 58 inches RoundBar
• Large: 70 inches JetStream, 70 inches CoreBar, 66 inches RoundBar
• X-Large: 80 inches CoreBar, 78 inches RoundBar
Use the Fit My Car Tool available on most manufacturer sites to find the minimum required length for your vehicle. You can upgrade to a longer bar if carrying wide gear, but never go shorter than recommended.
A Subaru Outback may require a 50 inch minimum but benefits from a 60 inch bar when hauling two bikes or a rooftop basket.
Balance Length With Practicality
Longer bars increase versatility but come with trade-offs. Wind noise increases significantly beyond 6 inches of roof width. Garage clearance may be compromised, so measure your garage height with the rack installed. Fuel economy drops due to added drag. Expect a 2 to 5 percent reduction at highway speeds.
Check Vehicle-Specific Roof Features
Your roof’s design impacts which rack type will fit and how it mounts.
Factory Rails vs. Naked Roofs
Vehicles with factory rails are common on SUVs, trucks, and some sedans. Confirm rail compatibility with clamp systems. Measure internal rail width and depth if using gutter-style mounts. Avoid placing towers over sunroofs or panoramic glass panels.
Naked roofs require door-mounted towers that clamp around the frame. Measure door jamb thickness because most systems fit 1.5 to 2.5 inches. Check for roof curvature and seam placement because steep curves may need specialized feet. Ensure sunroof clearance by keeping towers at least 2 inches away from glass edges.
Look for pre-threaded mounting points or rubber seals along the roof seams. These often indicate factory provisions for rack installation.
Use Digital Tools to Verify Fit
Even with accurate measurements, double-check compatibility before buying.
Run a Fit My Car Search
Visit manufacturer websites like kuat.com or thule.com. Enter your vehicle’s make, model, year, and trim. The tool will display compatible tower systems, required foot packs, minimum crossbar length, and approved accessories.
Many tools show 3D renderings of how the rack will look on your vehicle.
Review Dimensional Diagrams
Download product PDFs with detailed specs. Compare tower footprint, bar diameter, and clearance zones. Confirm that crossbar ends will not extend past mirrors or interfere with door opening.
Avoid Common Measurement Mistakes
A small error can lead to big problems. Watch out for these frequent missteps.
Do Not Measure From Mirror to Mirror
Using side mirror positions as reference points is a mistake. Mirrors vary in placement and do not reflect true roof width. Always measure from drip molding or roof edge instead.
Do Not Ignore Weight Limits
Focusing only on dimensions and ignoring load capacity is risky. Overloading can bend crossbars, damage roof seams, or compromise handling. Check your vehicle owner’s manual for maximum dynamic driving load, static parked load limit, and recommended load distribution.
Never exceed 165 pounds on most aftermarket crossbars unless specified otherwise.
Do Not Forget Hatch Clearance
Installing a rear deck too close to the hatch causes damage when the hatch hits the rack when opening. Perform a dry fit test by opening and closing the hatch fully with the rack loosely installed.
Perform a Dry Fit Before Final Assembly
Before tightening any bolts, simulate the full installation.
Step-by-Step Dry Fit Process
- Assemble towers and feet without tools.
- Place on roof in intended positions, front and rear.
- Install crossbars and adjust to desired spacing.
- Check for alignment. Are bars parallel? Do feet sit flush on the roof? Is there interference with doors, glass, or antennas?
- Open all doors and the hatch to confirm clearance.
- Mark positions lightly with tape if satisfied.
Smooth door and hatch operation and even pressure across all mounting points indicate a successful fit.
Select Components Based on Cargo Type
Your gear should drive your crossbar configuration.
Carrying Bikes? Optimize Bar Spacing
Use medium to large bars of 60 inches or more for two or more bikes. Space crossbars so the front wheel does not hit the windshield. Place the front bar 24 to 30 inches behind the windshield and the rear bar ahead of the rear spoiler or hatch handle.
Hauling Kayaks or Skis? Prioritize Length
Choose longer crossbars of 70 inches or more for tandem kayaks or long skis. Use J-cradles or saddles mounted near bar ends for secure hold. Ensure a minimum of 24 inches between bars for hull support.
Need a Roof Platform? Match Deck Dimensions
Decks like the Küat DEK require specific bar lengths and spacing. Verify that deck width is less than or equal to crossbar length, deck length is less than or equal to distance between towers, and there is clearance for rear access.
Install a lightweight cargo basket first to test fit before investing in a full platform.
Finalize With Safety and Maintenance Checks
Once measured and installed, ensure long-term safety and performance.
Recheck Torque and Alignment
After the first 50 miles, re-tighten all bolts to manufacturer specs. Inspect for rubbing, vibration marks, or misalignment. Lubricate movable parts like clamps and levers annually.
Inspect Regularly Before Each Trip
Check crossbar tightness, tower stability, and signs of roof seal damage. Clean seals and contact points every 3 to 6 months to prevent corrosion.
If you hear flapping, creaking, or whistling, stop and inspect immediately. These are early signs of loose hardware or poor fit.
Frequently Asked Questions About Measuring for a Roof Rack
What is the most important measurement for a roof rack?
The roof width measured from drip molding to drip molding is the most critical measurement. This determines the minimum crossbar length needed for a secure fit.
Can I use my car’s mirror positions to measure roof width?
No. Mirrors vary in placement across different trims and models. Always measure from the drip molding or roof edge for accurate roof width.
How do I measure for a roof rack on a hatchback?
Open the rear hatch fully. Measure from where the windshield meets the roof to the inner edge of the hatch opening. This accounts for the sloped rear design.
What crossbar spacing do I need for bikes?
For bike racks, aim for a crossbar spacing of 24 to 30 inches. This provides enough support for the wheels while keeping the front wheel away from the windshield.
Do I need to account for weight limits when measuring?
Yes. Weight capacity is separate from measurements. Check your vehicle owner’s manual for maximum roof load and never exceed 165 pounds on most aftermarket crossbars.
How do I know if my roof is compatible with a roof rack?
Use the Fit My Car Tool on manufacturer websites. Enter your vehicle make, model, year, and trim to see compatible towers, foot packs, and required crossbar lengths.
Key Takeaways for Measuring Your Roof Rack
Knowing how to measure for a roof rack transforms guesswork into precision. Start by measuring your roof width using the drip molding as your reference point. Determine crossbar spacing by extending adjustable bars to their widest position and measuring center to center. Select crossbar length based on your vehicle requirements and intended cargo. Always validate fit with digital tools and perform a dry fit before final assembly.
Respect weight limits and structural constraints, and when in doubt, contact manufacturer support. With accurate measurements and smart choices, your roof rack will not just fit. It will perform reliably on every adventure.


