
Mounting a floating shelf can transform a room with clean lines and modern appeal, but the sleek appearance hides a critical truth: these shelves must be anchored securely into wall studs to support meaningful weight. Relying on drywall anchors or pre-drilled kits often leads to failure and frustration. This guide reveals the professional method for how to mount a floating shelf that is both beautiful and strong, using hidden steel brackets, precise alignment, and stud-based support.
You will learn how to plan your layout with laser accuracy, cut drywall for flush mounting, drill shelf holes with a doweling jig, and install brackets so the shelf slides on smoothly. Whether you are installing a single shelf or a multi-unit L-shaped system, this step-by-step process ensures a level, gap-free, load-bearing result.
Plan Shelf Position Accurately
Use Tape to Transfer Hole Layout
Before drilling, map exactly where your shelf will sit. Use masking tape or Frogtape to capture the bracket screw positions. Apply tape along the top edge of the shelf, aligning it flush. Poke through the bracket screw holes to mark the tape, then transfer that template to the wall at your desired height. This gives you a perfect guide for drilling.
Add a vertical strip of tape to show the shelf depth, such as 10.5 inches from the wall. This visual footprint helps you assess balance and alignment before making any holes in your wall.
Align with Laser Level
Project a horizontal laser line at the exact height you want the shelf bottom edge. Align the punched holes in the tape with the laser line, not the tape edge, to ensure precision. For multiple shelves, use a vertical laser or plumb line to keep brackets aligned across walls.
Step back and evaluate the layout. Does it center over your furniture? Is spacing between shelves consistent? Adjust now, because once you drill, corrections become difficult and time-consuming.
Locate and Prepare the Wall
Find Studs and Scan for Wires
Use a stud finder with AC detection to locate wood or metal studs, typically spaced 16 or 24 inches apart. Mark both the edges and center of each stud. Always scan for electrical wiring and plumbing behind the wall, especially near outlets or switches.
Never assume stud location. Drilling into a live wire or water pipe can be dangerous and costly. Verify every hole site before proceeding.
Cut Drywall for Flush Bracket Fit
If your bracket has a mounting plate, you may need to cut a small section of drywall so the plate sits flush against the stud. Trace the plate outline on the wall, then use a multi-tool to cut along the lines. Remove the drywall carefully to expose the stud.
This step ensures the bracket is fully supported and hidden when the shelf is mounted. Patching is minimal, and the shelf will sit tight to the wall with no gaps.
Install Hidden Brackets Securely
Mount Bracket to Stud
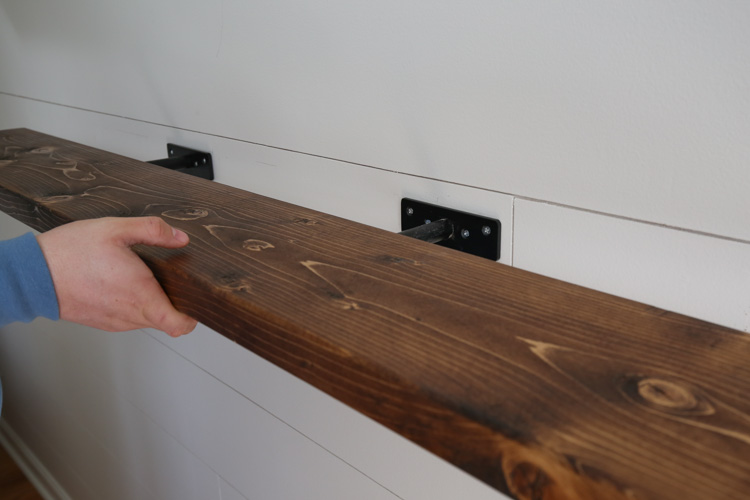
Position the bracket over the stud, aligned with your laser line. Use a spirit level to confirm it is perfectly horizontal. If slight leveling is needed, place metal washers under the bracket. Unlike wood shims, metal will not compress over time.
Drill pilot holes into the stud using a wood bit. To control depth, tape a mark on the bit at the screw length. Insert wall plugs if required, then drive 2-inch #8 or #10 wood screws through the bracket into the stud. Never use screws shorter than 2 inches, as they will not grip enough wood to hold weight.
Align Multiple Brackets
For shelves longer than 24 inches, use two or more brackets. Install the first, then use it as a reference. Hold the second bracket in place and check level across both with a long spirit level. Re-check after tightening.
Misaligned brackets mean the shelf will not slide on properly. Precision at this stage prevents frustration later.
Drill Shelf Holes with Precision
Use a Self-Centering Doweling Jig
The shelf must slide snugly onto the bracket steel rod. Use a half-inch self-centering doweling jig to drill perfectly centered holes. Clamp the shelf to your workbench using a foot clamp for stability. Set the jig over the marked hole location and drill to a depth equal to the rod length plus one-eighth inch extra. This extra depth allows the shelf to seat fully without binding.
Loosen Hole Entry for Easier Mounting
After drilling, slightly wiggle the bit at the entrance of the hole. This breaks up wood fibers, making it easier to slide the shelf on without enlarging the entire bore. Blow out or brush away all sawdust. A clogged hole can prevent full seating and cause wobble.
Mount the Shelf Smoothly
Slide Shelf Onto Bracket Rods
With brackets secured, lift the shelf and align the holes with the rods. Gently slide it straight onto the brackets. If it binds, tap lightly with a rubber mallet or 2×4 block. Never force it.
The shelf should sit flush against the wall with no gaps. If it does not, check for drywall protrusions or misaligned brackets.
Secure from Below
Some systems include underside screws to lock the shelf to the bracket. If so, drive the screws up through the bracket into the shelf bottom. Cover the heads with decorative stickers to maintain the floating illusion.
Avoid glue or caulk. The fit and friction are meant to hold it, and these additives can cause alignment issues while making removal impossible.
Reinforce Corner and L-Shaped Shelves

Build Half-Lap Joints
For L-shaped floating shelves, create a seamless corner with a half-lap joint. Use a three-quarter-inch rabbiting bit in a router to cut halfway through each shelf end. Fit them together like a puzzle and clean up uneven cuts with a chisel for a tight fit.
Align and Glue the Joint
Install the longer shelf first and use it as a reference for the corner piece. If a gap appears, apply wood glue to the joint, then insert shims behind the second shelf to push it into alignment. Clamp until the glue dries.
Hide Screws in the Joint
Reinforce the connection with hidden screws. From below, drive screws upward into the bottom shelf. From the top, drive screws down through the top shelf. Both methods keep fasteners invisible while locking the shelves together securely.
Maximize Load Capacity
Choose Strong Materials
Floating shelves are not just for light decor. With the right build, they can hold books, kitchen items, or heavy displays. Use three-quarter-inch or thicker hardwood, such as oak or maple, instead of MDF or particleboard. Thicker shelves resist sagging and splitting.
Use Custom Steel Brackets
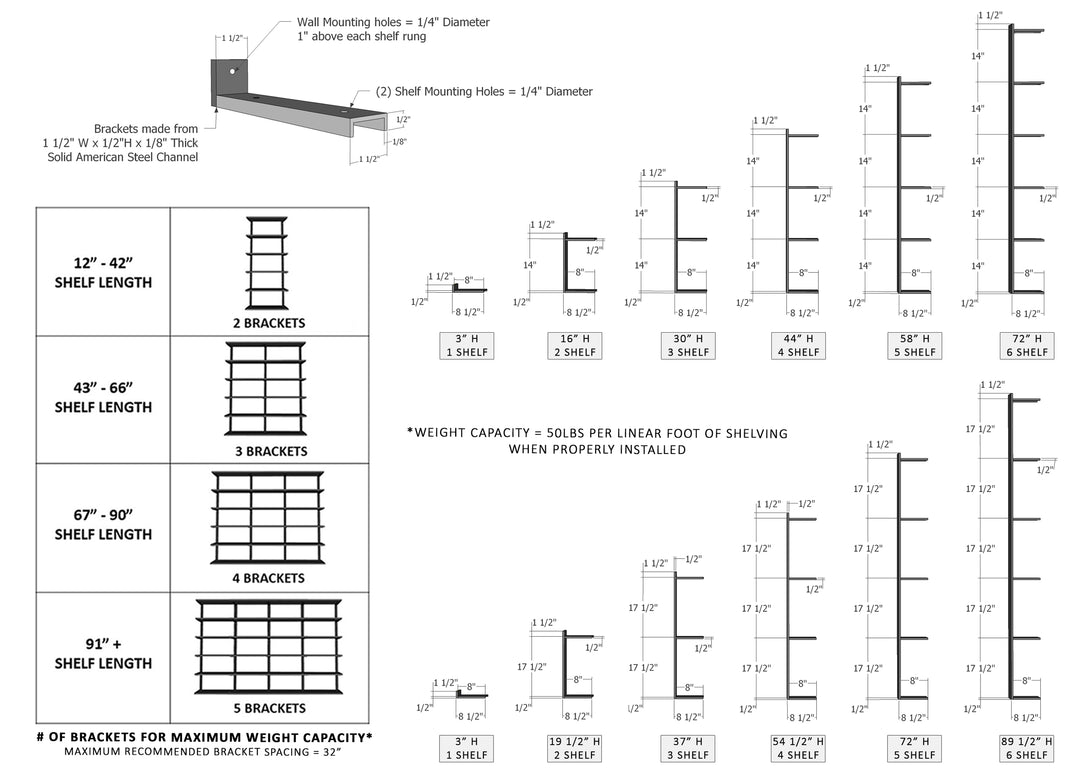
Off-the-shelf kits often use weak brackets that cannot support real weight. For strength, use half-inch steel round stock welded to a quarter-inch steel mounting plate. These brackets, anchored into studs with 2-inch screws, can support 50 to 100 plus pounds per bracket. Avoid brackets that rely on drywall anchors, because no anchor can match stud strength.
Add Brackets for Wide Shelves
For shelves over 36 inches, use three brackets to prevent sagging. Center one, then space the others evenly. This distributes weight and maintains rigidity across the entire span.
Avoid Common Installation Mistakes
Never Use Drywall Anchors for Load
Drywall anchors may hold 10 to 20 pounds at best. A fully loaded shelf can exceed this easily. Always anchor into studs. It is the only safe way to mount a floating shelf that bears real weight.
Do Not Drill at an Angle
If you tilt the drill, the bracket hole will not align with the shelf. Keep the drill perpendicular to the wall for straight, clean holes that match perfectly.
Skip the Short Screws
Screws shorter than 2 inches will not penetrate deep enough into the stud. Use minimum 2-inch wood screws for secure hold. This investment in proper length prevents pull-out failures.
Prevent Binding with Clean Holes
Sawdust in the shelf hole creates friction and prevents full seating. Always clear debris before mounting. A blocked hole means the shelf will not seat fully, creating a wobbly result.
Achieve a Seamless, Floating Look
Hide All Hardware
Choose brackets narrow enough, about 1.5 inches, so a standard 1.5-inch-thick shelf fully covers them. Use screw covers or stickers to conceal any visible fasteners. Ensure the shelf sits flush against the wall. No gaps at the back enhance the illusion of floating.
Maintain Visual Flow
For multiple shelves, keep spacing consistent, such as 9.75 inches between units. Use a laser level to maintain alignment across walls. A staggered or slanted shelf breaks the clean aesthetic you are trying to achieve.
Install Before Tiling
For tile walls, mount the bracket before tiling. The tiles will cover the hardware, leaving only the shelf visible. If retrofitting, use a diamond-tipped bit with water cooling to drill tile without cracking.
Final Check: Is Your Shelf Ready
After mounting, verify that the shelf is perfectly level with no gaps between shelf and wall. Check for smooth, full seating on all brackets. For jointed shelves, confirm they are flush and seamless. Finally, test that it can support heavy items without sag or wobble.
When done right, your floating shelf will appear to defy gravity while holding books, decor, or kitchenware with confidence. The secret is not magic. It is precision, studs, and steel.
Frequently Asked Questions About Mounting a Floating Shelf
Can I mount a floating shelf without finding studs?
You should never rely on drywall anchors for load-bearing floating shelves. Drywall anchors can only support 10 to 20 pounds and will eventually pull out under heavier loads. Always locate and anchor into wall studs for a secure installation.
What tools do I need to mount a floating shelf?
You will need a stud finder with AC detection, laser level, drill, self-centering doweling jig, multi-tool, and spirit level. You also need 2-inch wood screws, metal washers for leveling, and a rubber mallet for tapping the shelf into place.
How much weight can a properly mounted floating shelf hold?
When mounted into studs with 2-inch screws and quality steel brackets, a floating shelf can support 50 to 100 plus pounds per bracket. The exact capacity depends on shelf thickness, bracket design, and the number of brackets used.
How do I align multiple floating shelves evenly?
Use a laser level to project horizontal lines at each shelf height. Apply tape to the shelf edges to transfer hole positions to the wall. Step back and evaluate the visual layout before drilling to ensure even spacing and alignment.
Can I create an L-shaped floating shelf system?
Yes. Build half-lap joints using a router with a rabbiting bit. Install the longer shelf first, use it as a reference, then align the corner piece. Reinforce with wood glue and hidden screws driven from above and below the joint.
Should I glue the shelf to the brackets?
No. Floating shelves are designed to hold by friction and precise fit. Using glue or caulk can cause alignment issues and make removal impossible if you need to adjust or replace the shelf later.
Key Takeaways for Mounting Your Floating Shelf
Floating shelves succeed or fail based on anchoring. Always mount directly into wall studs using minimum 2-inch wood screws, never relying on drywall anchors regardless of how light the load seems. Precision matters throughout the process, from using tape templates to transfer hole positions accurately, to drilling shelf holes with a self-centering doweling jig that ensures perfect alignment with bracket rods. Choose custom steel brackets over weak kit brackets, and use three-quarter-inch hardwood rather than particleboard for durability and load capacity. Finally, verify level at every stage before proceeding to the next step. The result is a stunning, durable upgrade that looks effortless but was built with expertise.