
Is your wooden shelf looking worn, outdated, or out of style? A fresh coat of paint can completely transform its look without the cost of replacement. Whether you’re updating a bookshelf for a new room, refreshing a thrift-store find, or matching cabinetry to a new decor scheme, painting a wooden shelf is a beginner-friendly DIY project that delivers professional-looking results.
The key to a flawless, long-lasting finish is not just the paint. It is in the preparation. Most painting failures come from skipping sanding, skipping primer, or rushing the cure time. With the right materials, proper surface preparation, and a step-by-step approach, you can achieve a smooth, durable finish that resists chipping, peeling, and blocking. This guide walks you through every stage from removing hardware to final curing so your shelf looks custom-made and lasts for years.
Prepare Your Workspace
Start by moving your shelf to a well-ventilated space, ideally outdoors or in a garage. If working indoors, open windows and use fans for airflow. Lay down a drop cloth, plastic sheeting, or old newspapers to protect floors from drips and dust. Keep the area dust-free and low-humidity to avoid particles settling on wet paint.
Optional but helpful: use paint stands or sawhorses to elevate the shelf. This allows you to paint all sides without flipping too soon and prevents sticking.
Gather All Tools Before Starting
Have every tool and material ready before you begin. Interruptions can lead to dried edges or dust contamination. Your checklist should include:
- Sandpaper in 120 to 220 grit
- Tack cloth or vacuum
- Paint scraper or putty knife
- Wood filler
- Primer and paint
- Brushes, rollers, or spray cans
- Drop cloth, painter’s tape, and safety gear
Working efficiently minimizes exposure time and maximizes finish quality.
Remove Hardware and Disassemble
Use a screwdriver to remove all hardware including adjustable shelf pins, brackets, knobs, hinges, or doors. Keeping these off during painting ensures full coverage and prevents paint from clogging screw holes.
Place screws and small parts in resealable plastic bags, labeled clearly such as “Top Shelf Pins” or “Left Door Hinges,” to simplify reassembly later.
Mask Off Screw Holes
Apply painter’s tape over screw holes on shelf edges and cabinet fronts. This keeps paint from seeping into threads, which could make reinserting hardware difficult.
If shelves are built-in or fixed, mask surrounding walls and trim with tape and paper to avoid accidental splatter.
Clean the Surface Thoroughly
Even new wood collects dust. Used shelves often have grease, fingerprints, or residue. Start by wiping the entire surface with a damp microfiber cloth.
For kitchen shelves or high-touch areas, wash with warm, soapy water using dish soap like Dawn. For heavier buildup, mix TSP cleaner per instructions, then rinse and dry completely.
Dry Fully Before Proceeding
Let the shelf air-dry for at least 2 to 4 hours, or until no moisture remains in joints or crevices. Painting over damp wood leads to poor adhesion and bubbling.
Sand for Better Adhesion
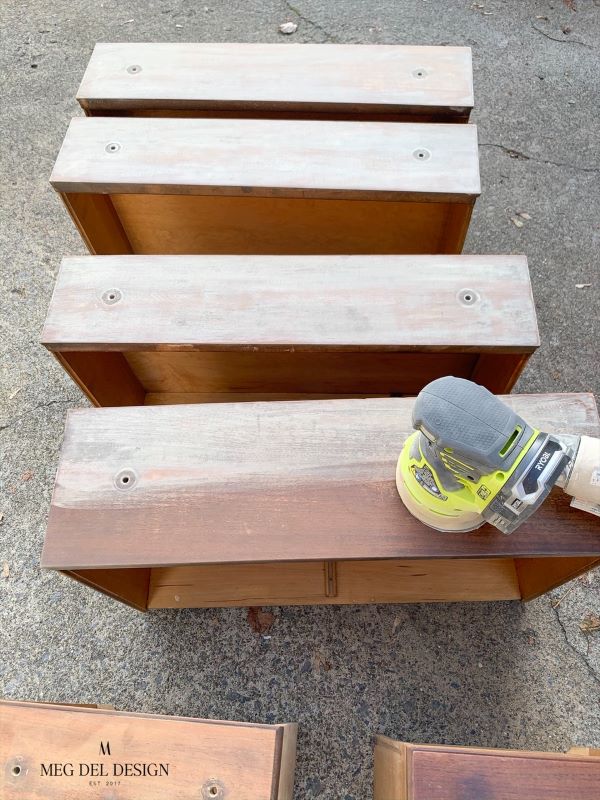
Use 120 to 220 grit sandpaper to smooth the surface and dull any glossy finish. For unfinished wood, start with 120 grit to level imperfections, then finish with 220 for smoothness. Avoid over-sanding. Your goal is a matte, even texture, not bare wood removal.
Sand in the Direction of the Grain
Always sand with the grain to prevent scratches. Use a sanding sponge or block for flat areas, and wrap sandpaper around a pencil or dowel for corners and detailed trim.
Pay extra attention to edges and previously painted areas that may be peeling.
Skip Sanding for Spray Painting
If using the spray paint method, light sanding can be replaced with liquid deglosser on varnished or lacquered surfaces. However, cleaning and priming are still required. Never skip primer.
For reclaimed or distressed wood, avoid sanding to preserve character. Instead, clean with a stiff brush, air compressor, or gentle power wash, then seal without painting if desired.
Repair Dents and Holes
Inspect for dents, cracks, or nail holes. Apply wood filler or putty with a putty knife, pressing it flush into the void. Overfill slightly because shrinkage occurs as it dries.
Let dry completely, typically 1 to 2 hours, then check product instructions.
Sand Filled Areas Smooth
Once dry, sand the patch with 220-grit paper until level with the surrounding wood. Wipe away dust with a tack cloth.
For large gaps or splits, consider wood epoxy for stronger repair.
Prime for Long-Lasting Results
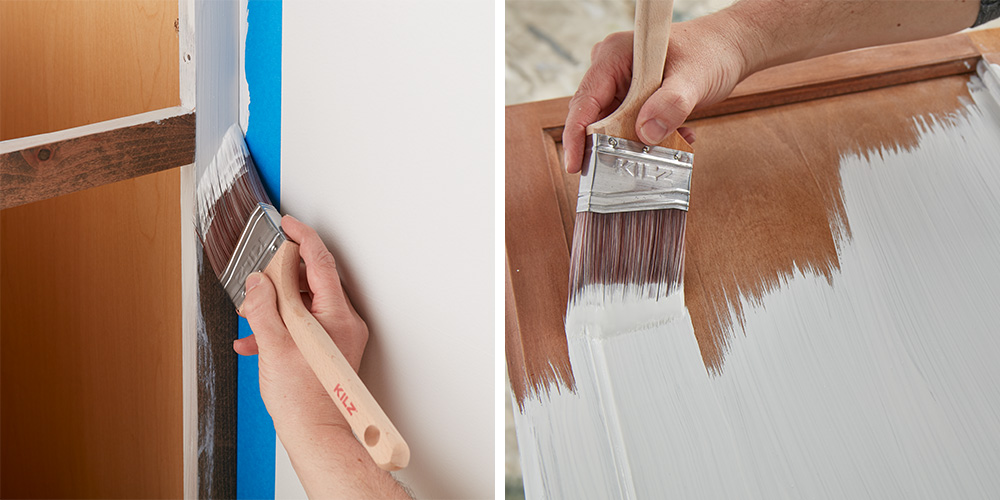
Primer ensures paint sticks and blocks bleed-through. Match your primer to the wood type:
| Surface | Recommended Primer |
|---|---|
| Unfinished or raw wood | Fresh Start High-Hiding All Purpose Primer |
| Glossy or sealed wood | INSL-X STIX Bonding Primer |
| Dark wood or stain | Gray or white high-hiding primer |
| Knotty pine or resinous wood | Shellac-based like BIN to stop tannin bleed |
| Oil-based paint | Oil or shellac-based primer |
Avoid water-based primers on glossy surfaces unless labeled for adhesion.
Apply Primer Evenly
Use a synthetic brush for water-based primer and natural bristle for oil-based. Roll large areas with a 4-inch foam roller for a smooth finish. Apply thin, even coats in the direction of the grain. Avoid thick blobs that can drip.
Let Primer Dry and Lightly Sand
Wait 2 to 4 hours for drying, less for spray primers. Then, lightly sand with 220-grit paper to remove dust nibs or raised grain. Wipe clean with a tack cloth.
Apply a second coat if coverage is spotty, especially on dark or porous wood.
Paint Like a Pro
Not all wall paint holds up on furniture. Choose furniture-grade formulas. Recommended options include:
- Benjamin Moore ADVANCE: waterborne alkyd, smooth, durable, resists blocking
- INSL-X Cabinet Coat: designed for cabinetry, ultra-smooth, long-lasting
- Regal Select: great coverage for general use
- Chalk or clay paint: no prep needed usually, but requires sealing
Avoid flat sheens on high-use shelves. Opt for satin or eggshell for durability and easy cleaning.
Use Thin Coats to Prevent Runs
Apply two thin coats instead of one thick one. Thick paint sags, drips, and takes longer to dry.
For brush or roller method, cut in edges first with a 1 to 2-inch angled brush. Roll flat areas with a foam or fine-finish roller. Maintain a wet edge to avoid lap marks.
For spray painting, hold the can 8 to 12 inches from the surface. Use short, overlapping passes. Let dry 15 to 20 minutes between coats.
Add Floetrol for Smoother Finish
Mix Floetrol into latex paint to reduce brush strokes, improve flow, and extend drying time for easier blending.
Paint in this order: back, sides, front, top, bottom. Flip only when the previous side is fully dry.
Seal for Durability
A clear topcoat adds protection from scratches, moisture, UV fading, and heat from lamps or electronics. This is essential for shelves in kitchens, bathrooms, kids rooms, or sunlit areas.
Choose the Right Sealer
| Sealer | Best For | Notes |
|---|---|---|
| Polycrylic (water-based) | White or light paints | Non-yellowing, dries fast, low odor |
| Polyurethane (oil-based) | High-traffic areas | Durable but may amber over time |
| Clear furniture wax | Vintage or shabby-chic looks | Soft sheen, requires reapplication every 6 to 12 months |
Apply 2 to 3 thin coats, sanding lightly with 220-grit between layers if needed.
For wax, apply with a lint-free cloth or wax brush, wait 5 to 15 minutes, then buff vigorously to prevent stickiness.
Cure Completely Before Use
Dry time means the surface feels dry. Cure time means paint reaches full hardness. Even if the shelf feels dry, it is not ready for use.
| Paint Type | Cure Time |
|---|---|
| Latex or water-based | 3 to 5 days |
| Oil-based or alkyd | Up to 14 days |
| Spray paint | 24 hours for light use, 3 days for full cure |
Wait until fully cured before placing books, decor, or reattaching hardware. Placing items too soon can cause blocking where paint sticks to objects or shelves adhere together.
Achieve a Vintage Look
After the final paint coat dries but before sealing, lightly sand edges, corners, and raised details with a sponge or steel wool. This reveals the wood or undercoat for a rustic, time-worn look. Wipe away dust, then seal as usual.
Try Color Layering
For an antique effect, paint a dark base coat first. Apply a white or light top coat. After drying, distress to reveal the base color underneath. Seal to protect the layered finish.
This technique is popular for farmhouse, shabby-chic, or cottage styles.
Reassemble and Style
Once fully cured, remove painter’s tape and reinstall brackets, pins, and doors. Use original or new hardware for a fresh look. Ensure shelves are level and secure, especially floating or built-in units.
Now it is time to decorate. Mix vertical and horizontal book stacking. Use bookends to keep items tidy. Add plants, framed photos, baskets, or small sculptures. Incorporate texture with woven boxes or ceramic vases.
A freshly painted shelf becomes both functional and a design focal point.
Maintain Your Painted Shelf
Wipe with a soft, damp cloth. Avoid abrasive scrubbers, ammonia-based cleaners, and soaking with water.
For sticky spots, use mild soap and water, then dry immediately.
Keep leftover paint in a labeled jar for touch-ups. Use a small brush to fix chips or scuffs.
If sealed with wax, reapply every 6 to 12 months for continued protection and sheen. Avoid placing hot, wet, or sharp objects directly on the surface.
Avoid Common Painting Mistakes
| Mistake | How to Prevent |
|---|---|
| Peeling paint | Always clean and prime, never skip prep |
| Visible brush strokes | Use quality brush, Floetrol, and thin coats |
| Drips and runs | Do not overload brush, wipe drips immediately |
| Sticky or soft finish | Allow full cure time before use |
| Yellowing over time | Use water-based polycrylic instead of oil-based polyurethane on white paint |
| Painted hardware | Remove or mask all parts before painting |
When to Consider Alternatives
If your shelf is made from reclaimed or character-rich wood, painting may hide its natural beauty. Instead, clean thoroughly, sand lightly if needed, and apply clear sealant to protect while preserving grain.
For renters or quick refreshes, paint only a 1-inch edge inside cabinets for a crisp look. Use peel-and-stick wallpaper on the back panel. Add new knobs or lighting for instant style.
Brands like Urban Legacy Colorway offer ready-to-hang, professionally painted shelves in custom colors, ideal for remodels or those avoiding DIY.
Key Takeaways for Painting Your Wooden Shelf
Painting a wooden shelf is more than a quick upgrade. It is a chance to personalize your space with minimal cost and effort. The secret to success lies in prep, patience, and proper materials. Sanding, priming, and curing are not optional steps. They are what separate a DIY disaster from a professional finish.
With high-quality paint like Benjamin Moore ADVANCE, the right tools, and attention to detail, your shelf will look custom-made and stand up to daily use. Whether you prefer a sleek modern look with satin white paint or a cozy vintage vibe with distressed chalk paint, the possibilities are endless.
Now that you know how to paint a wooden shelf the right way, grab your supplies and start transforming your space one brushstroke at a time.
Frequently Asked Questions About Painting a Wooden Shelf
What is the best paint finish for a wooden shelf?
Satin or eggshell finishes work best for most wooden shelves. These sheens offer a good balance of durability and easy cleaning while resisting wear from daily use. Avoid flat paints on high-traffic shelves because they scuff easily and cannot be cleaned effectively.
Do I need to sand before painting a wooden shelf?
Yes, sanding is typically necessary unless you are using chalk paint or a spray method with deglosser. Light sanding with 120 to 220 grit sandpaper dulls glossy surfaces and creates better adhesion. For spray painting, you can substitute sanding with liquid deglosser on sealed or varnished surfaces.
How long does it take for painted shelf paint to cure?
Latex or water-based paints need 3 to 5 days to cure fully. Oil-based or alkyd paints require up to 14 days. Spray paint cures in about 24 hours for light use but needs 3 days for full hardness. Always wait before placing items on shelves or reattaching hardware.
Should I seal my painted shelf?
Sealing is recommended but optional. A clear topcoat adds protection against scratches, moisture, and UV fading. This is especially important for shelves in kitchens, bathrooms, or areas with direct sunlight. Use polycrylic for white or light paints to prevent yellowing.
Can I paint over stained wood without sanding?
Light sanding is still recommended for stained wood to ensure proper adhesion. Alternatively, use a spray method with a bonding primer like INSL-X STIX, which adheres to glossy surfaces without sanding. Always clean the surface thoroughly before painting regardless of the method used.


