

If you’re wondering how to remove Elfa door rack without damaging your door or losing small parts, you’re not alone. Whether you’re reorganizing your space, moving out, or switching storage systems, removing an Elfa over-the-door rack can be quick and clean when done the right way. The Elfa system is designed for easy, non-permanent installation, which means removal should be just as simple. No major tools, no drilling, and no wall damage required.
In this guide, you’ll learn the exact steps to safely take down your Elfa door rack, keep all hardware organized, and prepare components for reuse or storage. Since Elfa parts are modular and interchangeable, removing the rack does not mean starting over later. You can reinstall it in another room or on a different door with ease.
Remove All Accessories First
Before loosening any brackets, clear the rack completely. This reduces weight and prevents accidental drops during disassembly.
Take Off Baskets, Bins, and Hooks
Remove all baskets, bins, hooks, and accessories hanging from the vertical support. If your baskets are labeled, save the label inserts. They are reusable and help maintain your organization system when reinstalling.
Place a soft cloth on the floor beneath the rack to protect both the components and your flooring if anything slips.
Loosen the Top Bracket
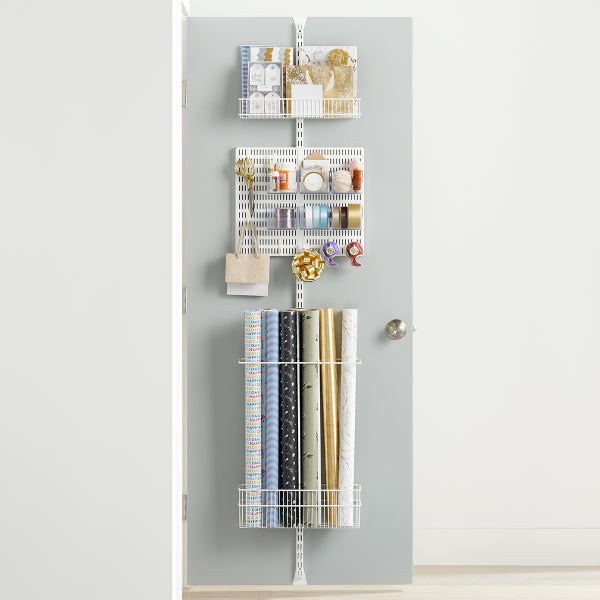
The top bracket anchors the entire system over the door and must be detached first.
Unscrew or Unhook from Door Edge
Locate the top mounting bracket that sits over the upper edge of the door. In most Elfa models, this bracket is secured with a side-mounted screw driven into the door’s vertical edge. Use a screwdriver or 5/64 inch hex key to loosen or fully remove the screw.
Once the screw is out, gently lift or slide the bracket off the top of the door. If it feels stuck, wiggle it slightly. Do not force it. Some models have a cap covering the screw. Pop it off with a flat tool before unscrewing.
Never try to pull the vertical support down without detaching the top bracket first. This can bend or warp the metal.
Detach the Bottom Bracket

The lower bracket stabilizes the rack and must be removed next.
Slide or Unscrew from Door Base
Check if the bottom bracket is slid onto the door or screw-mounted. On thinner or lightweight doors, it may simply rest in place. On sturdier setups, it is often secured with a screw through the door’s bottom edge.
If unscrewed, use your hex key or screwdriver to remove the fastener. If slide-on, gently shift the bracket sideways to free it from the door’s edge. Hold the vertical support with your other hand to prevent it from falling once the bottom bracket is released.
Remove the Vertical Support
With both brackets disengaged, the main frame comes off easily.
Unhook and Lower Carefully
Once the top and bottom brackets are loose, unhook the vertical support rail from both ends. Gently lower it straight down, keeping it level to avoid scratching the door.
Inspect the rail for scratches, warping, or bent mounting holes. Since Elfa components are reusable across systems, even minor damage can affect stability during reinstallation.
If the rail resists removal, double-check for hidden screws or tight brackets. Never yank it free.
Collect and Store Hardware
Do not lose small parts. Organize them for future use.
Bag Screws and Brackets Together
Place all screws, hex keys, plastic caps, and brackets into a labeled plastic bag. Tape it to the back of the vertical rail or store it with the baskets. This ensures you will not lose critical hardware before reassembly.
If you are removing the rack before moving out, keep hardware safe. You may need it to reinstall the system in your new place.
Check for Door Damage
Even non-permanent systems can leave marks.
Fill Screw Holes if Needed
If screws were used at the top or bottom, you may see small holes in the door edge. These are easy to repair.
Use wood filler for solid-core doors. Sand smooth after drying. Touch up with paint or stain to match the door. For hollow-core doors, avoid over-tightening in the future. Use plastic anchors or toggle bolts if reinstalling.
Most Elfa installations avoid drilling into frames, so trim and hinges should remain untouched.
Clean and Inspect Components
Prep your Elfa rack for reuse or storage.
Wipe Down Rails and Baskets
Use a damp cloth to clean dust, grease, or grime from the vertical support, brackets, and baskets. Dry thoroughly before storing to prevent rust or spotting.
Look for Wear and Tear
Check for bent rails or mounting tabs, cracked plastic baskets, and stripped screw holes in brackets. Elfa parts are interchangeable and durable, but damaged pieces should be replaced for safety and stability.
Visit the Elfa website to order individual replacement parts. No need to buy a whole new kit.
Plan for Reuse or Reinstallation
Your Elfa system is not obsolete. It can be relocated.
Measure New Door Dimensions
Before reinstalling, confirm the new door is within 1-3/8 inch to 1-3/4 inch thick, the standard range for Elfa over-door racks. Use a tape measure across the door’s edge.
Also check for clearance above and below the door, obstructions like carpet, thresholds, or baseboards, and smooth door swing. Racks should not interfere with door operation.
Reuse Labels and Configuration
If you are setting up in a new space, replicate your old layout using saved labels. Many users find it helpful to take a photo of the original setup before removal for easy reassembly.
Use a level during reinstallation to ensure the vertical support is plumb. This prevents wobbling and uneven basket alignment.
Frequently Asked Questions About Removing Elfa Door Rack
Do I need special tools to remove an Elfa door rack?
No special tools are required. A screwdriver or 5/64 inch hex key, which is commonly included with Elfa kits, is sufficient for removing the brackets. A soft cloth helps protect your floor during the process.
Will removing the Elfa door rack damage my door?
The system is designed for non-permanent installation. Most brackets rest over the door edges without drilling. If screws were used, they leave small holes that are easily filled with wood filler. The door frame and hinges remain untouched.
Can I reinstall my Elfa door rack on a different door?
Yes. Elfa components are modular and reusable. Simply ensure the new door thickness falls within the 1-3/8 inch to 1-3/4 inch range. Check for adequate clearance and smooth door operation before reinstalling.
How long does it take to remove an Elfa door rack?
The entire removal process takes under 15 minutes with basic tools. Removing accessories first makes the process faster and prevents components from falling.
What should I do with the hardware after removal?
Store all screws, brackets, caps, and hex keys in a labeled plastic bag. Attach it to the back of the vertical rail or keep it with the baskets. This keeps everything organized for future reinstallation.
Can I reuse the baskets and labels?
Yes. Elfa baskets and label inserts are fully reusable. Save the labels when removing baskets. Taking a photo of your original configuration helps you replicate the setup when reinstalling.
Key Takeaways for Removing Your Elfa Door Rack
Removing an Elfa door rack is a simple, reversible process that takes under 15 minutes with basic tools. By following these steps, you preserve both the system and your door.
The Elfa over-door system requires no drilling. It is non-permanent and ideal for renters. All parts are reusable, including baskets, brackets, and labels. Minimal door impact means small screw holes are easily repaired with wood filler. Reinstallation is straightforward. Just check door thickness and use a level for proper alignment.
Whether you are switching rooms, upgrading your storage, or simply clearing space, knowing how to remove Elfa door rack properly ensures a clean, damage-free result and a smooth setup next time.


