
If you’re tired of tripping over drum stands or struggling to position your toms just right, a drum rack setup might be the solution you’ve been missing. Drum racks replace traditional floor stands with a suspended framework that holds your toms, cymbals, and accessories in precise, repeatable positions. Used by pros like Ray Luzier and Todd Sucherman, these systems offer cleaner stage layouts, better ergonomics, and a sleek, modern look. Whether you’re building a compact practice rig or a full touring kit, mastering the drum rack setup process ensures stability, speed, and professional results.
This guide walks you through every step, from choosing compatible parts to final tuning, using only proven methods and real-world-tested components. You’ll learn how to assemble a reliable rack, avoid common mistakes, and customize your layout for comfort and performance. No fluff, no guesswork, just a clear path to a smarter drum setup.
Choose Compatible Rack Components
Before assembling your rack, verify that all parts work together. Mismatched hardware leads to instability or stripped threads.
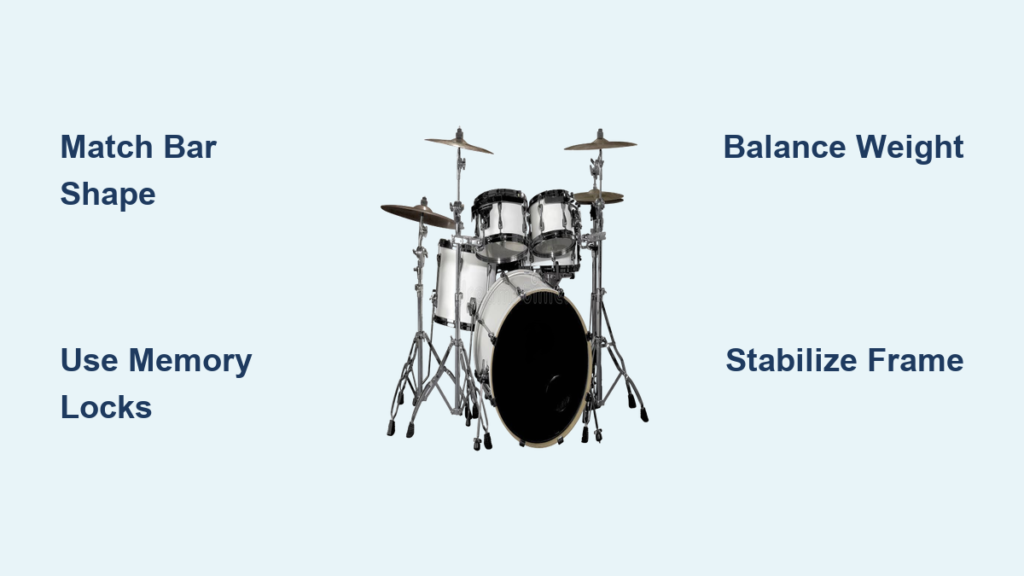
Match Bar Shape to Clamps
Rack bars come in round, hex, or square profiles. Clamps must match exactly to ensure secure connections and prevent damage during performance.
- Round bars are used by DW, PDP, and many Gibraltar kits
- Hex bars are exclusive to Yamaha and require hex-specific clamps
- Square bars are found on Pearl Icon series and are not interchangeable with other profiles
Using the wrong clamp risks slippage or damage to both components. When in doubt, check manufacturer specs before buying.
Prioritize Memory Locks
Memory locks let you disassemble and rebuild your kit in seconds. These wing-nut clamps remember exact positions and are essential for gigging drummers who need fast setup times.
Install memory locks at all major joints, especially where vertical posts meet T-legs and main bars. Even if your rack doesn’t come with memory locks, add them. They pay for themselves in setup time.
Use Quality Connectors
Super Multiclamps allow multi-angle mounting for toms, cymbals, and effects. T-clamps secure horizontal bars to vertical posts. Always use rubber isolation pads inside clamps to prevent slippage and protect finishes.
Assemble the Base Structure

Start with a solid foundation. A shaky base ruins everything above it and creates instability that affects your entire kit.
Attach T-Legs to Kick Drum
Place your kick drum in position. Mount T-legs to the kick drum spurs using memory locks. If your kit lacks attachment points, use floor-mounted T-legs with rubber feet instead.
Ensure both legs are level and evenly spaced. Uneven bases cause wobble and misalignment that compounds as you build upward.
Install Vertical Posts
Slide 30″ or 36″ vertical tubes into each T-leg. Secure with memory locks, but don’t fully tighten yet. Fine adjustments come later after the full structure is in place.
Use a spirit level to confirm posts stand perfectly vertical. This foundation determines everything that follows.
Connect Main Horizontal Bar
Lift the curved main bar onto the vertical posts. Balance it carefully, especially on larger racks where the weight is significant.
Use T-clamps at both ends to attach the bar. Insert rubber pads between clamp and tube to prevent slippage during playing. For asymmetric setups with a large floor tom, use a longer bar on the heavy side to balance weight.
Stabilize the Frame
A floating rack needs cross-support to resist tipping during aggressive play. Skip this step and risk a catastrophic collapse mid-performance.
Add Mini T-Legs for Snare Support
Cut a 30″ straight tube into two 15″ sections. Assemble a mini T-leg using one T-clamp, two memory locks, and flat rubber feet.
Attach the vertical post to the base frame with a right-angle clamp. This mini structure supports your snare basket and keeps it stable during fast fills.
Install Cross-Braces or Secondary Bars
Use right-angle clamps to add lateral support between vertical posts. This prevents side-to-side sway that loosens connections over time.
On large rigs, add a second curved bar above or below the main bar for additional cymbal arms or percussion mounting points.
Never skip stabilization, especially with heavy cymbal loads. The cost of extra hardware is far less than replacing damaged drums or cymbals.
Mount Toms and Cymbals
Now suspend your drums and cymbals where they belong. Proper positioning affects your playing comfort and technique.
Position Rack Toms with Adjustable Arms
Attach a Super Multiclamp to the main bar. Insert a tom arm and secure your rack tom.
Adjust height and angle so the drum shell is slightly tilted toward you. Ideal playing position sits 10″ to 16″ above your lap when seated. Mounting toms too high is the most common mistake. Lower is always better for control and speed.
Convert Vertical Legs to Cymbal Stands
Use a rack tube to accessory arm converter on a vertical post. Then attach a short boom arm for hi-hats or a long boom for rides and crashes.
For elevated cymbals, insert an 18″ extension tube before the arm. This frees floor space and creates a clean, integrated look that eliminates the typical stand forest around your kit.
Integrate Snare and Hi-Hat
Mount a snare basket to the mini T-leg’s vertical post using a Stealth Bar. Adjust height so the snare sits at hip level when seated.
For the hi-hat, use a legless hi-hat clutch and clamp it directly to a vertical tube. Secure with a lug screw and tuning key. Align vertically so the foot pedal operates smoothly without binding.
Optimize for Performance
A stable rack isn’t just about assembly. It’s about balance and feel that translates to your playing.
Balance Weight Across the Frame
Place heavier components like ride cymbals and floor toms on opposite sides. Overloading one side causes tipping that distracts you during performance.
Use longer horizontal bars on the floor tom side to counterbalance weight. Test balance by gently pushing the rack sideways. If it leans, redistribute weight before mounting expensive gear.
Dampen Vibration
Tighten all clamps snugly but not excessively. Overtightening damages threads and increases metal fatigue over time.
Use rubber isolation pads at every clamp-tube contact point. These absorb vibration and prevent slippage during aggressive playing. This small detail makes a massive difference in stability.
Verify Stability Before Use
Give the rack a firm shake. If anything shifts, recheck all memory locks and clamps.
Never mount expensive cymbals or drums until the frame is 100% stable. A few extra minutes of checking prevents catastrophic damage.
Customize Your Layout
Make the rack fit your style, not the other way around. Your setup should enable your playing, not restrict it.
Build Symmetrical or Asymmetrical Rigs
Mirror-image layouts look clean and balanced. They’re ideal for studio work where visual symmetry matters.
Asymmetrical builds emphasize function, like placing more cymbals on your dominant side. Experiment to match your playing dynamics.
Add Electronic Pads or Percussion
Use spare boom arms or multiclamps to mount MIDI triggers, electronic pads, cowbells, tambourines, or chimes.
Hybrid setups thrive on rack flexibility. No extra stands needed means faster setup and less clutter on stage.
Create Minimalist or Touring-Friendly Designs
For small stages, use only essential arms and keep the kit open and mobile.
For touring, label every part with colored tape or tags. Preset memory locks so reassembly takes minutes, not hours.
Photograph your final setup and reference it during every load-in. This simple habit saves massive frustration.
Maintain and Store Properly
A well-maintained rack lasts decades. Neglect turns precision hardware into dangerous junk.
Clean and Inspect Regularly
Wipe down tubes and clamps after gigs to remove dust and sweat. Check for worn rubber pads, cracked clamp jaws, and stripped memory lock threads.
Replace damaged parts immediately. Waiting leads to cascading failures that cost more in the long run.
Lubricate Memory Locks
Apply light machine oil to memory lock threads every few months. Keeps them turning smoothly and prevents seizing.
Avoid heavy grease. It attracts dirt and creates more problems than it solves.
Disassemble in Order
When breaking down, remove cymbals and toms first, then take off arms and converters. Next, unclamp horizontal bars, remove vertical posts, and finally detach T-legs.
Store in padded cases to prevent dents and scratches. Your rack protects your drums, so protect your rack.
Avoid Common Setup Mistakes
Even experienced drummers make these errors. Learn from their costly lessons.
Skipping Memory Locks on Critical Joints
Some skip memory locks on secondary arms to save money. This is a bad idea that costs more in the long run.
Every load-bearing joint needs a memory lock. Misaligned toms, wobbly cymbals, or dropped gear are not worth the savings.
Overloading One Side
Adding three cymbals to the right side and nothing on the left creates imbalance. The rack may tip during fast fills, scattering your drums across the stage.
Distribute weight evenly or counterbalance with a floor tom or gong on the lighter side.
Forcing Mismatched Parts
Don’t force a hex clamp onto a round bar. It damages both parts and creates a weak connection that fails under pressure.
If mixing brands, use verified adapters, not improvisation. Your gear deserves proper connections.
Upgrade Smartly
Not every part needs to be top-tier, but some components demand quality investment.
Invest in Quality Clamps
Gibraltar memory locks are the industry standard for a reason. They’re durable, precise, and widely compatible across brands.
Avoid no-name clamps. They strip easily and lack fine adjustment. The few dollars you save aren’t worth the risk.
Consider Pre-Built Kits
For beginners, full rack kits cost $400 to $700 and include everything needed to get started.
T-legs, vertical posts, curved bars, clamps, and memory locks come pre-matched. This saves time and ensures compatibility across all components.
Buy Individual Parts for Custom Builds
Need just a 46″ bar or a snare basket? Retailers sell every component separately.
Average prices let you build incrementally as your needs grow. T-legs run $40 to $60, curved bars $80 to $150, and snare baskets $60 to $80.
Finalize with Precision
The last steps make the difference between good and professional results.
Use a Spirit Level
Place a small level on the main bar. Adjust vertical post heights until the bar is perfectly horizontal.
This ensures even cymbal and tom placement, critical for both visual appeal and comfortable playing.
Fine-Tune Angles
Slight downward tilt of 5° to 10° improves ergonomics and visual flow. Just ensure all clamps still hold securely at the adjusted angle.
Tighten All Clamps
Once positioning is confirmed, fully tighten every wing nut and bolt.
Then double-check by going back and re-tightening each one. Connections settle during assembly, and a second pass catches everything.
Frequently Asked Questions About Drum Rack Setup
What is a drum rack and why should I use one?
A drum rack is a structural framework that suspends toms, cymbals, and accessories above your kit, replacing multiple floor stands. It offers better stability, cleaner aesthetics, faster setup times with memory locks, and more ergonomic positioning options.
Are all drum rack parts compatible with each other?
Not necessarily. Rack bars come in round, hex, and square profiles, and clamps must match exactly. Round bars from DW and PDP work together, but Yamaha hex bars require specific clamps, and Pearl square bars need Pearl-specific hardware.
How do I prevent my drum rack from tipping over?
Balance weight evenly across both sides of the frame. Add cross-braces between vertical posts. Use rubber isolation pads at all clamp points and always use memory locks on load-bearing joints. Test stability by gently shaking the rack before mounting drums and cymbals.
Do I really need memory locks on my drum rack?
Yes. Memory locks are essential for gigging drummers who need consistent, fast setup times. They hold exact positions when you disassemble and reassemble your kit, eliminating the frustration of readjusting every component at every show.
Can I add electronic pads to my acoustic drum rack?
Absolutely. Use spare boom arms or Super Multiclamps to mount MIDI triggers, electronic pads, or percussion accessories like cowbells and chimes. This creates a hybrid setup that combines acoustic and electronic elements without additional stands.
How much does a complete drum rack setup cost?
Prices vary widely based on complexity. Basic setups start around $200, while full touring racks with multiple bars, numerous cymbal arms, and all accessories can exceed $1,000. Individual components like T-legs run $40 to $60, curved bars $80 to $150, and clamps $35 to $50 each.
Key Takeaways for Building Your Drum Rack
A well-executed drum rack setup transforms your kit from cluttered to commanding. It saves space, speeds up load-in, and gives you total control over drum and cymbal placement. Whether you’re using Gibraltar, DW, PDP, or Pearl, the core principles remain the same. Match components to ensure compatibility, stabilize the frame with cross-braces and proper clamps, balance weight evenly across both sides, and lock everything in place with quality memory locks.
Start simple with a basic two-post rack before expanding to multi-tier designs. Invest in quality clamps and memory locks because these components bear the load and determine long-term durability. Use a spirit level during setup to ensure even positioning, and always test stability before mounting expensive gear.
Once you go rack, you’ll never go back to a forest of floor stands. The professional look, repeatable setup, and enhanced playing experience justify the initial investment of time and money. Build your rack, lock it in place, and let the performance speak for itself.