You’ve bought a wire shelf for your closet, pantry, or garage, but it doesn’t fit perfectly. Do not worry. Cutting a wire shelf is a simple DIY task with the right tools and technique. Whether you are trimming it to size or customizing a layout, the key is making clean, safe cuts without damaging the shelf’s structure or finish. This guide walks you through the best methods, tools, and safety tips to cut a wire shelf accurately and efficiently. No special skills are required.
You will learn how to choose between bolt cutters and a hacksaw, avoid common mistakes, and finish the job with protective caps for a professional result. The process is straightforward when you follow these steps carefully.
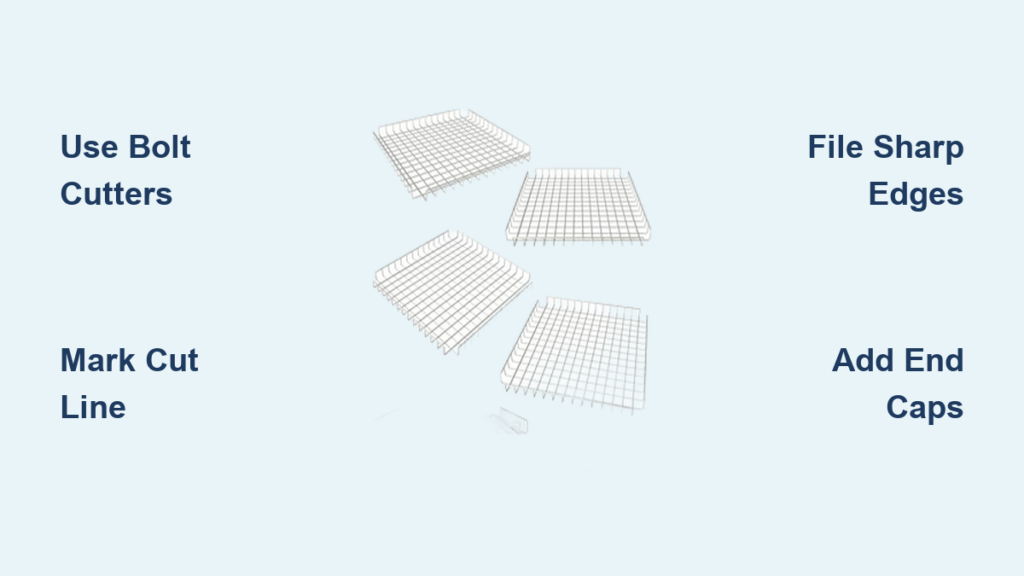
Choose the Right Cutting Tool
Your choice of tool affects speed, precision, and effort. Two tools dominate for this job: bolt cutters and hacksaws. Each has pros and cons depending on your strength, workspace, and desired accuracy.
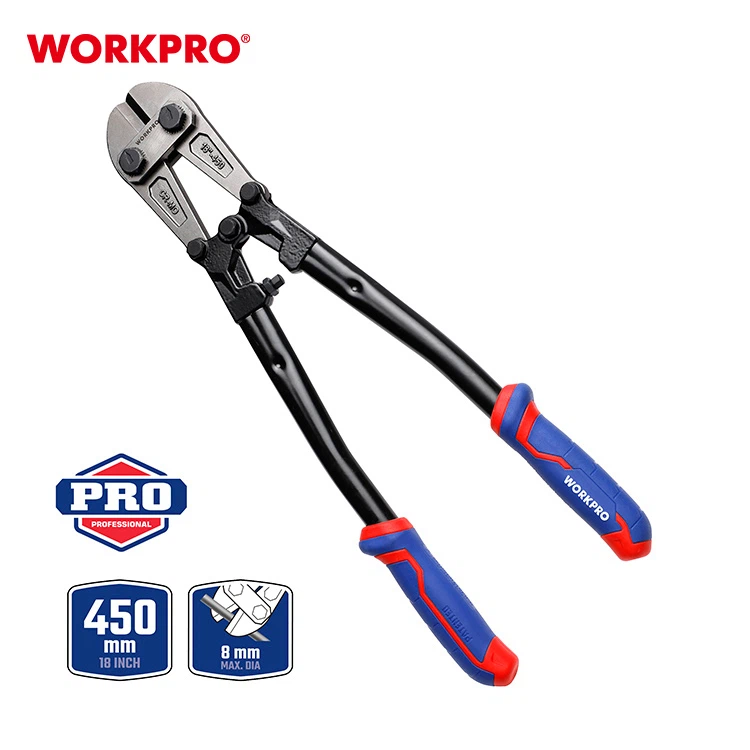
Use Bolt Cutters for Speed
If you need to cut quickly and do not mind extra hand strain, bolt cutters are ideal. They are designed to slice through thick metal wires in one squeeze.
- Fastest method. Cuts happen in seconds.
- Best for thick-gauge wire shelves.
- Requires strong grip and hand strength.
- May slightly crush or distort the wire mesh at the cut point.
Pro tip: Cut one wire at a time to avoid misalignment. Trying to cut multiple wires together can lead to uneven edges.
Use a Hacksaw for Precision
When accuracy matters more than speed, a hacksaw gives you full control over the cut. It is the better option if you are working on a tight measurement or want a clean, straight edge.
- Cleaner, straighter cuts with minimal distortion.
- Easier on hands. Ideal for extended use.
- Slower than bolt cutters, but more predictable.
- Works well on both horizontal and vertical wires.
Pro tip: Use a fine-tooth blade with 18 to 32 teeth per inch for smoother results and less fraying of the wire ends.
Prepare the Shelf for Cutting
Before making any cuts, proper preparation ensures safety, accuracy, and protection of your shelf’s coating. Taking time here prevents mistakes that are hard to fix later.
Mark the Cut Line Clearly
- Measure twice, cut once. Use a tape measure and permanent marker to mark exactly where you want to cut.
- Wrap masking tape around the wire at the cut site to reduce slippage and prevent paint chipping.
- Use a square or straightedge to align marks across multiple wires for a straight edge.
Secure the Shelf Properly
- Place the shelf on a stable workbench or sawhorse.
- Clamp it down firmly to prevent vibration or shifting during cutting.
- Lay a soft cloth or cardboard underneath to protect the finish from scratches.
Warning: Never hold the shelf in your hands while cutting. Loose movement increases the risk of injury and uneven cuts.
Cut the Wire Shelf Step by Step
Now that your shelf is marked and secured, it is time to make the cut. Follow these steps based on your chosen tool. The process differs slightly between tools.
For Bolt Cutter Users
- Position the jaws over a single wire at the marked line.
- Apply steady, even pressure. Do not jerk or twist.
- Cut one wire at a time, moving across the shelf systematically.
- Check alignment after every few cuts to ensure a straight edge.
Note: If the wire bends instead of cutting, your bolt cutters may need sharpening or more leverage.
For Hacksaw Users
- Start with a light back-and-forth motion to create a groove.
- Once seated, use full strokes with moderate pressure.
- Keep the blade perpendicular to the wire for a square cut.
- Pause occasionally to let the blade cool and prevent tooth damage.
Pro tip: Apply a drop of cutting oil to reduce friction and extend blade life.
Smooth and Protect the Cut Ends

After cutting, exposed wire ends are sharp and can scratch walls or your hands. Finishing them properly is a crucial final step that should never be skipped.
File Down Sharp Edges
- Use a metal file or emery cloth to smooth each cut end.
- Round off the tips to eliminate sharp points.
- Wipe away metal burrs with a damp cloth.
Never skip this step. Sharp wires are a safety hazard, especially in closets or kid-accessible areas.
Install Vinyl End Caps
- Slide vinyl shelf caps over every exposed wire end.
- Choose caps that match the wire diameter. Typical sizes are 1/8 inch to 1/4 inch.
- Push them on firmly until snug. Some may require a drop of glue for permanence.
Bonus: Caps prevent wall scratches and give your shelf a factory-finished look.
Avoid Common Cutting Mistakes

Even a simple cut can go wrong without attention to detail. Steer clear of these frequent errors to ensure your shelf turns out right.
Cutting Multiple Wires at Once
- Bolt cutters may tempt you to cut several wires together, but this often leads to misaligned cuts and a jagged edge.
- Always cut one wire at a time for consistency.
Ignoring the Grid Pattern
- Wire shelves have a repeating mesh grid. Cutting in the wrong spot can weaken the structure.
- Cut along the outer edge of the mesh, where wires connect to the frame, for maximum stability.
Skipping Safety Gear
- Wear cut-resistant gloves and safety glasses.
- Metal shards and sharp edges are real risks during cutting and filing.
When to Avoid Cutting a Shelf
Not all wire shelves are meant to be modified. Know when it is safer to return or replace instead of cutting.
Shelves with Reinforced Frames
Some models have welded borders or load-bearing rails that lose strength if cut. Check the manufacturer is guidelines. Cutting may void the warranty.
Load-Bearing or Heavy-Duty Shelves
If the shelf is designed for heavy storage like tools, books, or appliances, altering its size could compromise weight capacity.
Alternative: Look for adjustable or modular shelves that fit your space without cutting.
Final Touches and Installation
Once cut and finished, reassemble and install your shelf with confidence. These final steps ensure everything works properly.
Reattach Brackets or Clips
- If your shelf uses side brackets or support clips, reposition them to match the new dimensions.
- Ensure all connections are tight and level.
Test for Stability
- Place the shelf in position and check for wobbling.
- Confirm it fits snugly within cabinets or closet rails.
- Load lightly at first to verify structural integrity.
Frequently Asked Questions About Cutting Wire Shelves
Can I cut a wire shelf with regular scissors?
No. Regular scissors cannot handle the gauge of wire used in shelving. You need bolt cutters or a hacksaw designed for metal cutting.
Does cutting a wire shelf void the warranty?
It depends on the manufacturer. Some warranties specifically exclude modifications. Check the product documentation before cutting.
What is the easiest tool for a beginner to use?
A hacksaw is easier for beginners. It requires less hand strength and provides better control for accurate cuts.
How do I prevent the wire from fraying after cutting?
Use a metal file to smooth the cut ends, then apply vinyl caps. This prevents fraying and protects against scratches.
Can I cut a wire shelf that has a powder-coated finish?
Yes, but use masking tape around the cut area to protect the coating from chipping. File any rough spots smooth after cutting.
Do I need to reinforce the shelf after cutting?
Generally no, if you cut along the outer edge of the mesh grid. The remaining structure maintains its strength for typical storage use.
Key Takeaways for Cutting Your Wire Shelf
Cutting a wire shelf is straightforward when you use the right approach. First, choose your tool based on your needs. Bolt cutters offer speed but require strength, while hacksaws provide precision and easier handling. Second, always measure carefully and secure the shelf firmly before cutting. Third, finish every cut end with filing and vinyl caps to prevent injuries and wall damage.
Now that you know how to cut a wire shelf safely and cleanly, you can customize your storage space perfectly. No more settling for ill-fitting racks. With the right tools and a few minutes of effort, your DIY shelf fits like it was made for the space. Start your project today and enjoy a perfectly customized storage solution.