

A leaning shelf isn’t just an eyesore. It can signal structural weakness, poor installation, or material failure that risks collapse, damaged belongings, and potential injury. Whether it’s a floating shelf tilting forward, a bookcase wobbling on an uneven floor, or a built-in unit sagging under weight, the problem demands immediate attention.
This guide shows you how to fix leaning shelf problems by identifying the cause, reinforcing weak connections, leveling the unit, and preventing future issues with proven methods and professional-grade techniques.
Diagnose the Type of Lean Before Repairing
Identifying the exact nature of your shelf lean is crucial. Each type points to a specific cause and requires a targeted solution. Skip this step, and you risk applying the wrong fix.
Check for Downward Sag
Place a level across the shelf surface. If the bubble drifts toward the center, you’re dealing with sagging rather than true leaning. This typically stems from overloaded shelves, weak particle board material, or brackets spaced too far apart. Measure the span between supports. Anything over 32 inches invites sag in standard materials.
Identify Side-to-Side Tilt
A shelf slanting left or right usually indicates uneven floor contact or unbalanced weight distribution. Use a level across the top of the unit side to side. Rock the furniture gently. If one corner lifts, that leg isn’t fully supported. Check your floor with a level. Even 1/8 inch of slope creates visible lean in tall units.
Detect Forward or Backward Lean
Hold a level vertically against the front of the shelf. A gap at the bottom means forward lean, caused by top-heavy loading or lack of wall anchoring. A gap at the top suggests backward lean from a bowed wall or gap at the base. Both scenarios require different repair approaches.
Rule Out Hidden Wobble
A shelf may appear level but wobble when touched. Gently shake the unit. Movement indicates loose screws, unstable legs, or weak wall fasteners. Test both floor and shelf with a level. A shelf can look level while sitting on a sloped floor, creating silent stress that worsens over time.
Fix Floating Shelves That Lean Forward or Tilt
Floating shelves depend entirely on hidden brackets and secure wall anchoring. When they lean, poor mounting is almost always the culprit. Here’s how to fix floating shelf lean permanently.
Reanchor Into Wall Studs for Maximum Strength
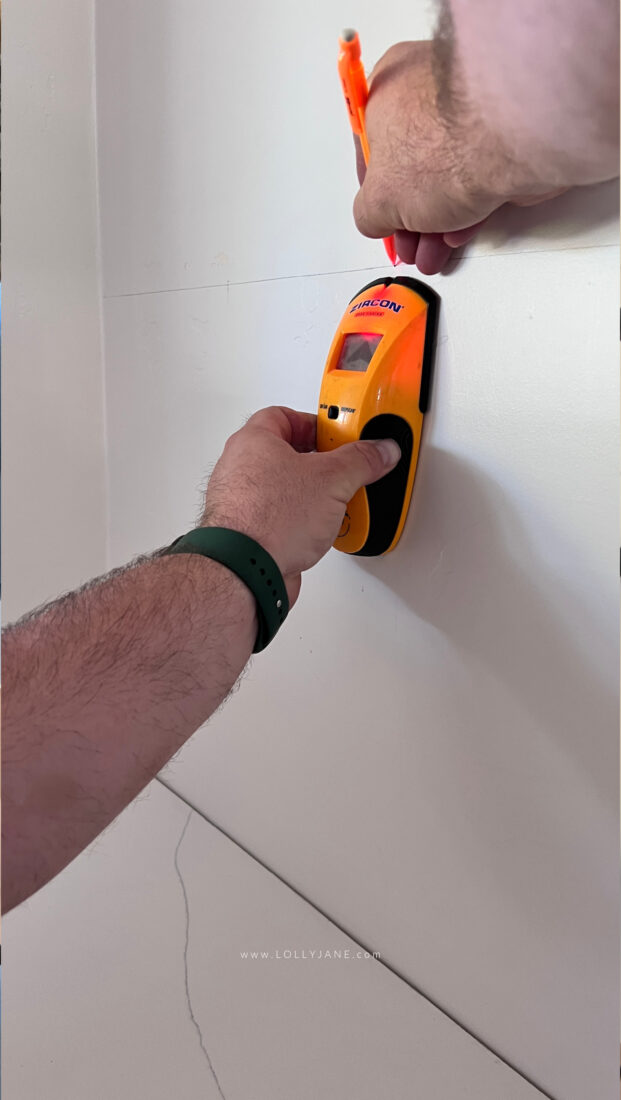
The strongest fix involves screwing directly into wall studs. Remove the shelf carefully. Use a stud finder to locate studs behind the wall. Reinstall the bracket so at least one screw per end hits a stud. Use 2.5 to 3 inch #8 or #10 wood screws for maximum grip.
When no stud aligns with the bracket, use toggle bolts rated for 50 pounds or more each. Drill a 9/16 inch hole, insert the bolt through the bracket, and tighten until snug. Never rely on plastic anchors for heavy loads. They fail under sustained pressure.
Shim Behind Brackets for Perfect Leveling
If one end sits lower than the other, slide thin plastic or composite shims between the bracket and the wall. Add shims incrementally, checking with a level after each addition. Stack multiple thin shims rather than using one thick piece for better control. Trim excess material with a utility knife after securing.
Never shim between the shelf and bracket. This creates instability and compromises the mounting strength. The shims must go behind the bracket against the wall surface.
Level Bookcases on Uneven Floors Without Drilling
Tall bookcases amplify floor imperfections. A 1/8 inch slope can cause noticeable lean in units over four feet tall. Here’s how to fix a leaning bookshelf on uneven surfaces.
Use Hard Shims Under Legs or Base
Insert hard plastic or rubber shims under the shortest leg to correct tilt. Add one shim at a time and recheck level after each addition. Avoid cardboard or paper shims. They compress over time, causing the lean to return.
For carpeted floors, front legs often sink more due to padding compression. Cut out the padding under front legs and insert a rigid 1/8 inch plywood spacer to equalize height. This prevents the unit from settling unevenly over time.
Install Adjustable Leveling Feet for Precision
Replace fixed legs with threaded leveling feet for permanent, fine-tune leveling. Pre-drill pilot holes to prevent wood splitting. Choose feet with rubber caps to protect flooring. Adjust seasonally if flooring expands or contracts with humidity changes.
Leveling feet work best for heavy or visible units where precision matters. They allow ongoing adjustment without removing the furniture.
Square and Stabilize Out-of-Square Bookcase Frames
Many leaning bookcases are actually twisted or out of square, especially flat-pack furniture assembled without proper alignment. This is how to fix a leaning bookshelf frame without wall anchoring.
Loosen, Realign, and Retighten the Frame
Remove all contents from the unit. Loosen the screws connecting shelves to the sides. Gently push the frame into alignment by checking diagonal measurements from corner to corner. Both measurements must be equal for a square frame. Tighten screws gradually and evenly, working opposite corners in sequence.
This simple step often corrects lean caused by assembly stress. The frame was likely twisted during initial setup or transported with force.
Anchor to Wall for Safety and Stability
A leaning bookcase can tip forward when opened or bumped, creating serious injury risk. Use L-brackets or anti-tip straps attached near the top rear of the unit. Secure into wall studs when possible. If no stud is available, use toggle bolts or Taggler anchors rated for heavy loads.
Keep hardware discreet by painting over brackets or recessing them into the wood. This step is non-negotiable for safety.
Reinforce Sagging Shelves That Dip Under Weight

If the shelf dips in the middle under load, it needs structural support, not just leveling. Here’s how to fix a sagging shelf with added support.
Add a Center Bracket for Long Spans
For shelves over 36 inches long, install a third bracket in the center. Space brackets no more than 24 to 32 inches apart. Mount into a stud or use a toggle bolt for secure hold. This often can be added without removing the shelf or its contents.
Choose heavy-duty steel L-brackets at least 1/4 inch thick with gussets and multiple screw holes. Check manufacturer weight ratings. Don’t guess at capacity.
Upgrade to Stronger Brackets
Replace flimsy brackets with solid steel models. Look for reinforced corners and multiple mounting holes. Ensure the wall-facing side has at least three screw points. Weak brackets cause progressive lean over time as they flex under load.
Replace or Repair Warped Shelf Boards That Won’t Stay Level
A permanently bowed shelf won’t stay level regardless of shimming. Here’s how to fix a warped shelf that keeps sagging.
Try Counter-Pressure Flattening
For mild warping, remove the shelf and place it on a flat surface with the bowed side facing up. Lay heavy weights across the high spots. Leave for 3 to 7 days. Recheck with a level.
This reverses minor creep from prolonged loading. Severe warping requires replacement.
Replace with Stronger Material
For severe warping, upgrade to ¾ inch birch plywood or solid hardwood like oak or maple. Avoid particle board and MDF for heavy loads. Ensure new boards are at least ¾ inch thick for rigidity.
Some brands offer pre-cut solid wood shelves designed to pair with heavy-duty brackets. This investment pays off in decades of stable service.
Choose the Right Drywall Anchors That Won’t Fail
Plastic anchors fail. Use high-strength alternatives for lasting support in drywall installations.
Toggle Bolts for Heavy Loads
Toggle bolts fold flat for insertion and expand behind drywall. They hold 50 to 100 pounds per bolt depending on size. Drill a 9/16 inch hole. Insert the bolt through the bracket first, then through the wall. Tighten until snug. Use only the included metal screw.
Taggler Duck Anchors for Grip and Ease
Taggler anchors use a unique duck mechanism that grips drywall from behind. They resist pull-out and torque without spinning. Drill a 5/16 inch hole. Bend the fastener, insert, tap flush, and screw in. No overtightening needed.
SnapSkru Mini for Quick Contractor-Grade Fixes
SnapSkru anchors offer contractor-grade speed and shear resistance. Pre-drill with the correct bit. Drive in with a screwdriver. Ideal for quick fixes where plastic anchors previously failed.
Prevent Future Leaning with Smart Habits
A one-time fix isn’t enough. Prevent recurrence with proper installation habits and ongoing maintenance.
Follow Pre-Installation Best Practices
Use a 24 inch level. Shorter levels lack accuracy. Mark bracket positions with painter’s tape for easy adjustment. Pre-drill pilot holes to prevent splitting. Measure from the same reference point on both sides. Never assume walls or floors are level.
Distribute Weight Wisely
Place heaviest items on bottom shelves. Medium-weight items go in the middle. Light decor belongs on top. Balance weight evenly from left to right. Place heavy items directly over brackets to transfer load efficiently.
Maintain Over Time
Check level every 6 to 12 months. Tighten loose screws, especially after seasonal humidity changes. Rotate shelf contents to prevent localized stress. Avoid dragging furniture. Lift or use furniture sliders instead.
Recommended Tools and Materials for Shelf Repair
Gather these essentials before starting your repair project.
Must-Have Tools
A stud finder helps locate wall studs for secure anchoring. A 24 inch spirit or digital level ensures accuracy. A tape measure provides precise measurements. A drill with screwdriver bits drives fasteners efficiently. Pilot drill bits prevent splitting. A utility knife trims shims. A carpenter’s square checks alignment.
Best Materials for Lasting Repairs
Hard plastic shims level furniture on uneven floors without compressing. Toggle bolts provide 50 plus pound capacity per anchor in drywall. Heavy-duty L-brackets offer 1/4 inch steel reinforcement. Three-quarter inch plywood resists sag affordably. Adjustable leveling feet enable precise height tuning while protecting floors.
Frequently Asked Questions About Fixing Leaning Shelves
Can I fix a leaning shelf without removing it?
Yes. You can add a center bracket if accessible, re-tighten loose screws, shim under legs, or adjust weight distribution. However, wall anchoring and bracket reinforcement typically require some disassembly.
Why is my shelf still sagging with brackets installed?
Likely causes include brackets spaced too far apart, screws pulling out of drywall, permanently deformed shelf boards, or brackets too weak for the load. Add center support, upgrade anchors, or replace the board.
Does flipping a sagging shelf help?
Temporarily, yes. But if the wood has crept from sustained loading, it will sag again. Address the root cause with added support or material replacement.
How much weight can shelf brackets hold?
This depends on bracket strength, screw quantity, and wall type. A steel bracket into a stud holds 75 to 100 plus pounds. Same bracket in drywall with plastic anchor holds only 25 to 35 pounds.
Can I level a bookcase without drilling into the wall?
Yes, if the lean comes from floor unevenness. Use shims or adjustable feet. But anchoring requires drilling for safety with tall or top-heavy units.
Why does my bookcase lean on a level-looking floor?
Floors often have subtle slopes invisible to the eye. Use a level to detect 1/8 inch dips. Even minor slopes tilt tall furniture significantly.
Key Takeaways for Fixing Your Leaning Shelf Permanently

Diagnosing the root cause before repairing saves time and prevents repeat problems. Floating shelves need secure stud anchoring or toggle bolts. Bookcases require shimming or leveling feet for uneven floors plus wall anchoring for safety. Sagging shelves need center brackets and stronger materials. Warped boards often need replacement with 3/4 inch plywood or solid hardwood.
Prevent future leaning by distributing weight wisely, checking level annually, and using quality hardware from the start. A straight, stable shelf isn’t just aesthetic. It’s a sign of proper installation and structural integrity that protects your belongings and your family.


