
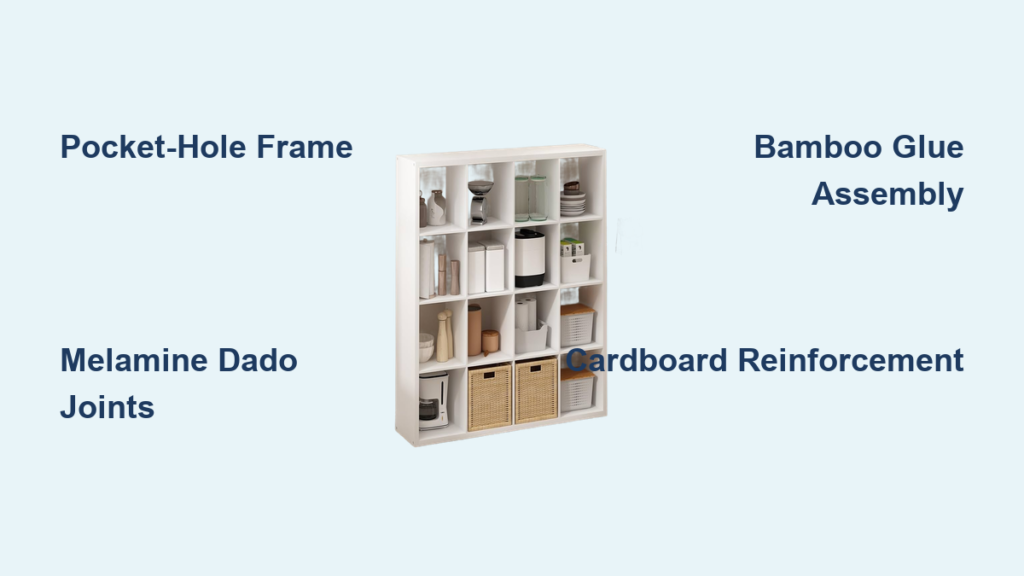
You’ve seen them in homes, offices, and boutiques—clean, modular cube organizers that turn clutter into curated storage. But instead of buying one, you can build your own custom cube organizer for a fraction of the retail cost. Whether you need to store toys, books, office supplies, or decorative items, a DIY cube organizer gives you full control over size, color, materials, and durability.
The good news: building a cube organizer is achievable for most skill levels. With the right tools, materials, and a clear plan, you can create a sturdy, attractive unit in just a few hours. This guide walks you through four proven methods, from beginner-friendly cardboard builds to professional-grade melamine units, so you can choose the best approach for your budget, tools, and space.
Choose Your Build Method

Selecting the right construction method depends on your skill level, available tools, budget, and how long you need the organizer to last. Each method offers different advantages.
Pocket-Hole Wood Frame
This method uses 1×10 or 1×12 pine boards and a Kreg pocket-hole jig to create strong, hidden joints. It produces a rustic-chic or modern wooden frame with 14 cubes (7 per side) and clean lines. You need a drill, square, clamps, and a saw, plus about 4 to 6 hours of build time. This option works best for beginners with basic power tools who want a permanent, durable result.
Melamine Dado Joint Unit
Best for intermediate builders seeking a sleek, durable finish. This method uses ¾-inch white melamine panels with precisely cut dado joints to hold shelves. It is ideal for closets or modern spaces where a clean, painted-furniture look is desired. You will need a table saw or circular saw with a dado blade, and the build takes about 3 hours.
Bamboo Cutting Board Assembly
A no-tool, glue-only method perfect for renters or crafters. Use E6000 adhesive to join bamboo cutting boards into cubes. One board serves as both the top of one cubby and the bottom of the next. No cutting or sanding is needed. Build time is 1 to 2 hours, plus 24 to 72 hours for the glue to cure.
Cardboard Storage Cubes
Ultra-low-cost and fully customizable. Reinforce double-layer cardboard with fiberglass tape, then wrap in decorative paper or fabric. Add Velcro tops for removable lids. This option is great for kids’ rooms or temporary storage, with a total cost under $10.
Gather Essential Tools
:max_bytes(150000):strip_icc()/power-tools-woodworkers-should-have-3536541-FINAL1-5bb7c2bc46e0fb002692907b.png)
Having the right tools makes the difference between a frustrating build and a smooth one. Here is what you need for each method.
Must-Have Power Tools
A compact drill with a pocket-hole jig is essential for creating strong, invisible connections in wooden frames. The Kreg 20V Ionic Drive drill paired with the Kreg Pocket-Hole Jig 720 lets you create angled pilot holes that pull joints tight without splitting wood.
A miter saw delivers precise crosscuts for dimensional lumber. If working with sheet goods like melamine, a circular saw with a guide rail ensures straight, clean edges. Always measure twice and cut once.
A 5-inch random orbit sander smooths rough edges and preps surfaces for paint or stain. Use 120 to 150 grit for initial sanding, then 220 for final passes.
Supporting Tools
A right-angle square ensures 90-degree corners during assembly. A tape measure confirms accurate cuts and alignment. Misalignment early on leads to wobbly shelves later.
Use 6-inch wood clamps to hold pieces steady while drilling. A right angle screwdriver is invaluable when attaching long side panels because tight spaces make standard drivers awkward.
To finish melamine edges, use a household iron to activate heat-sensitive edge banding. Press with a J-roller for a seamless bond, then trim excess with a utility knife.
Select the Right Materials
Lumber and Sheet Options
Standard 1×10 boards work well for wooden frames. A 1×10 board is actually 0.75 inch thick by 9.25 inches wide, giving you an internal cube depth of about 8-1/4 inches. Use four 96-inch boards for a 14-cube unit. Pine is affordable, while poplar offers smoother finishing.
Three-quarter-inch melamine panels come pre-finished and scratch-resistant. They are ideal for modern builds and come in white or wood grain. This material requires precise cutting, so measure dado locations before cutting full sheets.
Use ¼-inch hardboard or plywood for the back panel to add rigidity. Attach with ¾-inch staples at the top, bottom, and along shelf lines.
Alternative Materials
Bamboo cutting boards are available at dollar stores or online. Use 10 per row of 3 cubbies. One board forms the base of a cubby and the top of the one below, so no cutting is needed.
For cardboard cubes, cut and tape two layers together for strength. Reinforce corners with fiberglass-reinforced packaging tape. Use an X-acto knife for clean cuts.
Hardware and Fasteners
For the pocket-hole method, you need 81 screws that are 1 inch long for pocket-hole joints, and 21 screws that are 1-1/4 inches long for second-side shelf attachment. Using different lengths prevents screw collision inside the wood.
Other options include 1-¼-inch wood screws for general framing, ¾-inch staples for back panels, and countersunk screws as an alternative for clean wood joints.
Adhesives and Finishing Supplies
Use wood glue in dado joints for extra strength. Fill pocket holes with white wood filler before sanding and painting.
E6000 adhesive bonds bamboo boards and requires a 24 to 72 hour cure time. Tacky glue mixed with water (1:0.5 ratio) works well for wrapping cardboard in decorative paper.
For finishes, zero-VOC paint is safe for kids’ rooms. Heat-activated edge banding gives melamine a factory-finish look.
Cut All Pieces to Size
Wooden Frame Cut List (14-Cube Unit)
You need 2 long sides measuring 1 inch by 10 inches by 72-3/4 inches. You need 1 middle shelf at 1 inch by 10 inches by 71-1/4 inches. You need 2 short sides at 1 inch by 10 inches by 17-1/4 inches. You need 14 shelves at 1 inch by 10 inches by 8-1/4 inches.
Cut using a miter saw for accuracy. Sand edges lightly to prevent splinters.
Melamine 8-Cube Unit Dimensions
You need 2 side panels at 46-5/8 inches high by 12-3/8 inches wide. You need 4 shelves at 24-1/4 inches wide by 12 inches deep. You need 2 top/bottom panels at 25 inches wide by 12-3/8 inches deep. You need 1 center board at 42-5/8 inches high by 12-3/8 inches wide.
Cut before applying edge banding to avoid chipping.
Cardboard and Bamboo Cuts
For cardboard cubes, cut five panels per cube with no top. For bamboo, use full cutting boards with no cutting required.
Build a Wooden Frame (Pocket-Hole Method)
Mark Shelf Positions
On the middle shelf (71-1/4 inches), draw vertical lines every 8-1/4 inches, leaving 3/4-inch gaps between. Transfer these lines to both front and back faces. On the short sides (17-1/4 inches), mark shelf positions on one side only, aligning with the middle shelf layout.
This ensures symmetrical cube spacing and prevents misalignment during assembly.
Drill Staggered Pocket Holes
Drill three pocket holes at each end of the middle shelf and short sides.
For the 14 shelves, drill three pocket holes at each end. For the first 7 shelves, keep holes centered. For the next 7 shelves, offset the holes slightly from center.
Staggering prevents screws from colliding when attaching shelves to both sides of the middle shelf. Use 1-inch screws on the first side and 1-1/4-inch screws on the second side.
Attach First Shelf Layer
Align the 7 centered-hole shelves with the guide lines on one side of the middle shelf. Clamp in place. Drive 1-inch Kreg screws until snug, but do not overtighten. Check each shelf for flush alignment with a square.
Add Second Shelf Layer
Flip the unit. Align the 7 offset-hole shelves with the opposite side. Use 1-1/4-inch screws. The offset ensures screws miss the first layer.
The result is a central spine with 14 cube openings (7 per side).
Secure Short Sides
Position one short side (17-1/4 inches) at each end. Attach using pocket holes in the shelf ends and middle shelf. Use 1-inch screws. Check for squareness by measuring diagonals; they should match.
Install Long Side Panels
Lay one long side (72-3/4 inches) flat. Place the frame on top, open side down. Begin by securing the ends of short sides and middle shelf using a right angle screwdriver. Then attach each 8-1/4-inch shelf to the long side. Repeat for the second long side.
Work from the center outward to maintain alignment.
Assemble Melamine Unit with Dados
Apply Edge Banding First
Cut melamine edge banding to length. Heat an iron to medium setting and test on scrap material. Run over the edge to activate adhesive. Press with a J-roller, then trim excess with a chisel or utility knife. Sand lightly with 150-grit paper.
Never skip this step because dadoing after banding causes chipping.
Cut Dado Joints
Use a Freud 4-tooth dado set. Set depth to 3/8 inch, cutting in passes of 3/16 inch. Cut dados in side panels for shelf insertion, allowing 3/16-inch clearance per side. Cut dados in top and bottom panels for the center board.
Shelves should slide in snugly with no wobble.
Glue and Nail Core Structure
First, glue and nail top and bottom to the center divider. Next, insert shelves alternately into dados and nail through dado walls. Then, attach outer side panels and add the final shelf. Flip the unit and drive nails through end panels into shelf ends for stability. Finally, apply a glue bead in the bottom dado, align, and secure.
Let glue dry 1 to 2 hours before proceeding.
Staple Back Panel
Cut ¼-inch back panel to fit. Mark shelf positions on both sides. Staple the top, bottom, and sides first. Then staple along the center line between marks.
This ensures the unit stays square.
Add Toe Kick and Top
Attach stretchers for the toe kick, slide in the kick piece, and nail 2 per side. For the top panel, make it 1 inch wider and ½ inch deeper than the cabinet. Edge-band all sides and secure with interior screws.
The result is a sleek, furniture-grade 8-cube unit in under 3 hours.
Build No-Tool Bamboo Cubes
Assemble Base Cubby
Apply E6000 adhesive to both ends of one bamboo board. Attach two boards perpendicularly to form a box, which is the base of the first cubby. Use small dabs of hot glue at corners to hold alignment while E6000 cures (24 to 72 hours).
Stack with Shared Shelves
For a 3-row, 9-cubby unit, use 10 boards per row but share intermediate layers. One board serves as the top of the lower cubby and the bottom of the upper cubby. No additional supports are needed.
Choose Configuration
Place rows side-by-side for a linear configuration. Build vertically for a stacked configuration. Keep separate or glue together permanently for a modular configuration.
Insert black storage bins or wire baskets (bend inward for a snug fit) for a clean look.
Construct Cardboard Storage Cubes
Cut and Reinforce Panels
Each cube needs five panels (no top). If using thin cardboard, double-layer by taping two pieces together with fiberglass-reinforced tape.
Tape and Assemble
Tape adjacent sides with full length on top edges and small tabs on bottom for temporary hold. For extra strength, insert scrap wood strips at stress points.
Add Handles
Create a paper template with width equal to the front panel. Use a glass rim to trace curves. Cut one at a time with an X-acto knife. Line the inside of the handle with tape to prevent tearing.
Wrap with Decorative Paper
Mix tacky glue and water at a 1:0.5 ratio. Apply with a sponge brush. Wrap the outside like a gift box, folding and gluing the bottom neatly. Trim excess. Reinforce the top edge with internal tape.
Attach Removable Top
Cover a 16-inch by 32-inch plywood top with primer and paint. Attach to cubes using Velcro strips, which hold well under light load.
Total cost is about $5.50 when using salvaged materials.
Finish and Customize
Fill and Sand
Fill all pocket holes and imperfections with wood filler. Sand the entire unit with 120 to 220 grit for a smooth finish.
Apply Paint or Stain
Use non-toxic, zero-VOC paint (such as ECOS Lullaby) for kids’ rooms. Apply thin, even coats with a brush or sprayer. Let dry 4 or more hours between coats.
Paint individual cubes in contrasting colors to define storage zones.
Add Mobility
Attach four caster wheels (locking preferred) to bottom crosspieces. Use hardwood blocks for reinforcement. This transforms the organizer into a rolling cart, perfect for under-bed or office use.
Style for Your Space
A modern farmhouse look uses whitewashed pine with black bins. A Scandinavian style uses light wood with neutral baskets. An industrial look uses raw wood with metal legs.
Label cubbies with words or pictures for kids’ literacy development.
Troubleshoot Common Issues
Warped Wood
Warped wood results from moisture exposure or poor storage. Test-fit dividers and use a center screw to pull misaligned pieces straight during assembly.
Gaps in Joints
Gaps result from inaccurate cuts. Sand or shim the affected areas. Use caulk for cosmetic repair on melamine.
Chipped Melamine
Chipped melamine results from dadoing after edge banding. Always apply edge banding first, then cut dados.
Misaligned Shelves
Misaligned shelves result from poor measuring. Mark positions on both sides and use guide lines and a square.
Weak Glue Bond
Weak glue bonds result from insufficient curing time. Allow 24 to 72 hours for E6000 to fully cure.
Maximize Longevity and Use
Expected Lifespan
A pine frame lasts 10 or more years with care. Melamine lasts 8 to 12 years and resists scratches. Cardboard lasts 1 to 2 years and is best for temporary use.
Maintenance Tips
Dust weekly. Tighten screws annually. Reapply finish every 2 to 3 years if exposed to sun or moisture.
Load Capacity
Wooden frames hold books, bins, and decor. Avoid overloading single shelves. Use wall anchors in high-traffic areas.
Frequently Asked Questions About Making a Cube Organizer
What is the easiest way to make a cube organizer?
The easiest method is the bamboo cutting board assembly. It requires no tools, no cutting, and no sanding. You simply glue bamboo cutting boards together using E6000 adhesive. The main drawback is the 24 to 72 hour cure time before the glue sets fully.
How much does it cost to build a cube organizer?
Costs vary by method. A cardboard version costs under $10. A bamboo cutting board build costs $20 to $30. A pine wood frame costs $30 to $50 in materials. A melamine unit costs $60 to $80. These prices are significantly lower than retail cube organizers, which often cost $150 to $300 or more.
What tools do I need for a wooden frame build?
You need a drill, a pocket-hole jig (such as Kreg), a miter saw or circular saw, a random orbit sander, a square, a tape measure, clamps, and a right angle screwdriver. These tools create strong, hidden joints that result in a professional-looking finished product.
Can I make a cube organizer without power tools?
Yes. The bamboo cutting board method and the cardboard method both require no power tools. Both are beginner-friendly and work well for renters or temporary situations. The bamboo method produces a more attractive result, while the cardboard method is the most economical.
How long does it take to build a cube organizer?
Build time depends on the method. Cardboard cubes take 2 to 3 hours. Bamboo cubes take 1 to 2 hours plus glue curing time. A melamine unit takes about 3 hours. A wooden frame with pocket-hole joinery takes 4 to 6 hours. All times assume basic familiarity with tools and materials.
Key Takeaways for Building Your Own Cube Organizer
Building a cube organizer is more than a DIY project. It is a smart investment in your space that saves money while delivering custom storage that fits your exact needs. Whether you choose a wooden frame with pocket-hole joinery, a sleek melamine unit with dado joints, a no-tool bamboo assembly, or a budget-friendly cardboard build, each method produces functional, attractive storage.
You now have everything needed to start building. Exact cut lists, step-by-step assembly instructions, tool recommendations, and pro tips to avoid common mistakes are all covered in this guide. Pick your method based on your skill level, budget, and how long you need the organizer to last.
Gather your materials, set aside a few hours, and start building. In just an afternoon, you will have a functional, beautiful organizer that works as hard as you do. Choose the method that fits your situation, follow the steps carefully, and enjoy your custom storage solution.


