
If you’re tired of tangled hair bows, lost clips, or drawers overflowing with mismatched barrettes, a DIY bow organizer is the stylish and functional solution you need. Whether you’re organizing your child’s ever-growing collection or creating a boutique-style display, how to make a bow organizer has never been easier or more customizable. This guide breaks down two proven methods. A sewn fabric tube holder gives you a polished, durable look, while a no-sew yarn dowel hanger is perfect for beginners and quick weekend projects.
Sewn Fabric Bow Holder

This structured organizer uses fabric and a wooden base to create a sleek, long-lasting storage solution ideal for nurseries, closets, or gift-giving. The sewn version provides excellent clip retention and a professional appearance.
Cut Fabric Strips to Size
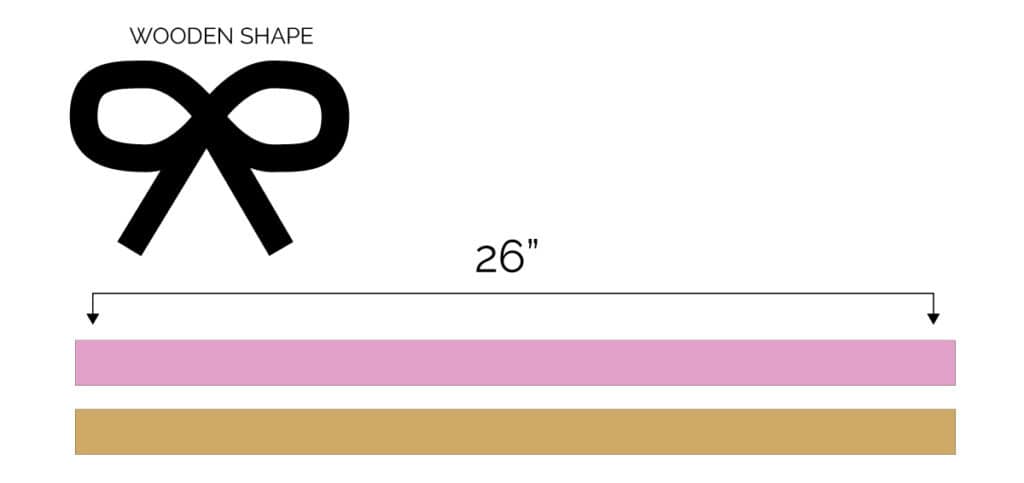
Start by cutting two fabric strips to 2.5 inches wide and 26 inches long. Use jelly roll quilting fabric for convenience, or cut your own from cotton or cotton blends. For larger storage needs, extend the length to 30 inches or more. Choose coordinating prints like florals, solids, or themed patterns to match your room decor.
You will need:
– Two fabric strips (2.5″ x 26″)
– Sewing machine with thread
– Scissors and iron
– Pins or fabric clips
Pro Tip: Pre-wash your fabric to prevent shrinkage, and iron it flat before cutting for clean, precise edges.
Sew the Fabric Tube
Place the two strips together with right sides facing each other. Pin in place to keep them from shifting. Using your sewing machine, stitch along three sides with a quarter-inch seam allowance. Leave one short end open for turning. Clip the corners diagonally to reduce bulk, then turn the tube right side out. Use a turning tool or chopstick to push out the corners fully. Press flat with an iron for a crisp, professional finish.
Close and Topstitch the Open End
Fold the raw edge of the open end inward by a quarter inch. Pin or clip it closed, then topstitch around the edge at one-eighth inch to secure everything in place. This creates a clean finish and prevents fraying over time. Make sure your stitching is tight and even for maximum durability with frequent use.
Mount on Wooden Shape With Glue
Select a wooden shape such as a bow, heart, circle, or monogram letter. Paint it if desired, or leave it natural. Apply tacky glue like Aleene’s to the top 2 to 3 inches of the back side of the fabric tube. Press firmly onto the back of your wooden shape, aligning it vertically. Let dry completely, typically 2 to 4 hours, before handling. For extra strength, add a second glue layer after 30 minutes.
Install Hanging Hardware
Attach a sawtooth hanger, D-ring, or picture wire to the back of your wooden base. Center the hardware to ensure the organizer hangs straight on your wall. Use small nails or screws appropriate for your wall type. Test the hanger with light pressure before loading it with bows to make sure everything is secure.
Organize Bows and Headbands
Slide alligator clip bows onto the fabric tube from the bottom up. Hang headbands over the top edge or loop them through the tube’s base. Clip larger bows directly onto the fabric below the mounted section. Sort by color, occasion, or child for quick, easy access.
Avoid This Mistake: Do not overload the tube. Space bows slightly to prevent slipping or premature fabric wear.
No-Sew Yarn Dowel Bow Holder
This fast, beginner-friendly option requires no sewing machine. The boho-chic organizer uses yarn and a wooden dowel for a soft, textured wall display that works wonderfully in nurseries and children’s rooms.
Paint and Prep the Dowel
Use a 12-inch wooden dowel with half-inch diameter or thicker for stability. Paint with acrylic paint in any color that matches your theme, whether white, pastel, or bold hues. Let dry completely before adding yarn. For extra flair, use glitter paint, try ombre blending, or add vinyl lettering with a name.
Cut Yarn Strands
Cut multiple pieces of thick yarn, each 48 inches long. This length creates a 24-inch drop when folded in half. Use chunky yarn for fullness, or mix colors for a rainbow effect. For holiday themes, choose red and green, pastels, or metallics.
Expert Note: Thicker yarn holds clips better and resists stretching over time, giving you a more durable organizer.
Attach Yarn With Lark’s Head Knots
Fold one strand in half to form a loop at the top. Place the loop under the dowel, then pull the loose ends through the loop and tighten. This is a lark’s head knot. Start one inch from one end of the dowel. Continue knotting strands side by side until you reach one inch from the other end. Keep strands touching with no gaps for maximum storage capacity.
Visual Cue: The dowel should be fully covered with no visible wood showing between the knots.
Trim Into a V-Shape
Once all strands are attached, lay the organizer flat on a clean surface. Cut the bottom into a V-shape by starting 2 inches from the bottom on both sides. Cut diagonally toward the center to meet at a point. Use fabric scissors for a clean, precise cut. Alternative styles include a straight across cut, U-shape, or zig-zag for decorative flair.
Add Yarn Hanger and Embellishments
Cut a 24-inch piece of yarn and fold it in half. Twist the doubled section to create a sturdy hanger. Wrap each end around the dowel’s sides and tie securely. Trim excess for a neat look. Now personalize your creation.
Popular embellishments include:
– Fake flowers or pom-poms attached with hot glue
– Ribbon strands woven through the yarn
– Tassels added to the bottom
– Beads threaded onto yarn ends before knotting
Safety Tip: Supervise children if using hot glue or small embellishments that could pose a choking hazard.
Hang and Sort Bows by Color
Mount the organizer at child-accessible height, around 3 to 4 feet from the floor. Clip bows directly onto the yarn strands. Drape headbands over the dowel or hang them from lower loops. Sort bows by color, size, or frequency of use for easy matching.
Pro Organization Tip: Place favorite or daily-use bows in the center for quick, convenient reach.
Compare Sewn vs No-Sew Organizers
Choosing the right method depends on your skills, available tools, and design goals. Both options offer unique advantages for different situations.
Sewn Organizer: Best for Structure
The sewn version is ideal if you own a sewing machine and want a long-lasting, tailored look. This method works best if you prefer mounting on decorative wood shapes and need high clip retention and durability.
Time Required: 30 to 60 minutes
Skill Level: Beginner to intermediate
Best For: Minimalist decor, gift-making, compact storage
No-Sew Organizer: Best for Speed
The no-sew version is perfect if you want to avoid sewing or lack access to a machine. Choose this method if you want a colorful, boho wall accent and need a quick project completed under 40 minutes. This option also works well if you plan to involve kids in the crafting process.
Time Required: 20 to 40 minutes
Skill Level: Beginner
Best For: Nurseries, seasonal decor, budget-friendly gifts
Which Should You Choose?
Pick the sewn method for durability, clean lines, and a professional finish. Pick the no-sew method for speed, customization, and playful texture. Consider making both versions. Use the sewn version for daily use and the no-sew version for easy holiday rotations.
Customize Your Bow Organizer Design

Personalization turns a simple organizer into a standout decor piece that reflects your style and needs.
Choose Themed Fabrics or Yarn
Seasonal options work wonderfully:
– Floral prints for spring
– Bright colors for summer
– Plaid or warm tones for fall
– Red and green for Christmas
– Pastels for Easter
– Orange and black for Halloween
Gender-neutral choices include:
– Earth tones and neutrals
– Animal prints
– Geometric patterns
Add Names or Labels
Paint a child’s name directly on the dowel or wooden shape. Use iron-on letters or fabric vinyl for a clean, professional look. Alternatively, attach a small fabric tag with the child’s name for a charming touch.
Scale for Larger Collections
Use a longer dowel, 18 to 24 inches, to create more yarn strands and increase storage capacity. Choose a wider wooden shape to allow multiple fabric tubes mounted side by side. Add double-layer yarn by stacking two knots per spot for extra thickness and durability.
Cost and Material Breakdown
Both organizers are budget-friendly, though costs vary slightly depending on materials and where you shop.
Sewn Version: $8 to $15
Materials needed:
– Fabric: $5 for half a yard of cotton
– Wooden shape: $4
– Tacky glue: $2.50
– Hanging hardware: $1.50
No-Sew Version: $5 to $10
Materials needed:
– Wooden dowel: $3
– Yarn: $4 for one ball (makes multiple organizers)
– Paint: $1.50
– Embellishments: $2 (optional)
Savings Tip: Buy fabric or yarn in bulk to complete multiple projects or create organizers for different rooms.
Maintain and Care for Longevity
Keep your bow organizer looking fresh with simple, regular upkeep.
Spot Clean Fabric Tubes
Use a damp cloth to wipe the sewn fabric, but never soak it. For stains, use mild soap and blot gently. Re-stitch the topstitching if it loosens over time. Re-glue the fabric to the wood if it starts to peel away.
Refresh Yarn Strands
Trim frayed ends every few months using sharp scissors. Shake out dust or use a cool hairdryer setting on low. Re-tie any loose lark’s head knots immediately. Replace a few strands if they become stretched or broken.
Warning: Keep both types of organizers away from high humidity or direct sunlight to prevent fading, fabric deterioration, and glue failure.
Ideal Users and Use Cases
Different users benefit from different organizer styles based on their specific needs and situations.
Parents of multiple girls should consider larger sewn versions with multi-tube setups. Alternatively, hang multiple no-sew dowels at different heights to accommodate extensive collections.
Gift makers love the sewn version for personalizing with monogrammed fabric. The no-sew version works beautifully for adding baby’s name and nursery colors, making it perfect for baby showers.
Boutique owners can display hair accessories in shops using scaled-up versions. Mount several organizers on a single board for a retail-ready look that attracts customers.
Minimalist decorators should choose neutral fabrics like linen, beige, or gray with simple wood shapes. Skip embellishments for a clean, modern aesthetic that complements any decor style.
Final Tips for Success
Build a bow organizer that lasts and impresses everyone who sees it.
Test Clip Retention First
Before final mounting, clip a few bows to your organizer to ensure they stay secure. If clips slide easily, switch to thicker fabric or yarn for better grip.
Mount at Eye Level
Hang your organizer where children can reach it, typically 3 to 4 feet high. This encourages independence and makes it easy for kids to choose their own accessories.
Rotate Seasonal Bows
Store off-season bows in drawers and swap organizers as needed. Use removable no-sew versions for easy switching between holidays and seasons.
Involve Kids in Making
Let children choose colors, tie knots, or pick embellishments. This turns organizing into a fun bonding activity and helps kids feel invested in caring for their accessories.
Frequently Asked Questions About Making a Bow Organizer
What is the easiest bow organizer to make for beginners?
The no-sew yarn dowel bow holder is the easiest option for beginners. It requires only basic materials like a wooden dowel, yarn, and scissors. No sewing machine or special skills are needed, and the project can be completed in 20 to 40 minutes.
How long does it take to make a sewn bow organizer?
A sewn fabric bow holder typically takes 30 to 60 minutes to complete. This includes cutting fabric, sewing the tube, attaching it to the wooden base, and installing hanging hardware. The time varies based on your sewing experience and whether you add customizations.
What type of glue works best for attaching fabric to wood?
Tacky glue like Aleene’s Tacky Glue works best for attaching fabric to wood. Apply it to the top 2 to 3 inches of the fabric tube and press firmly onto the wooden base. Let it dry completely for 2 to 4 hours before handling or hanging.
Can I use other materials instead of yarn for the no-sew version?
Yes, you can use fabric strips, ribbon, or twine instead of yarn. Thicker materials provide better clip retention. Just ensure your material is sturdy enough to hold the weight of multiple bows without stretching or fraying.
How do I clean my bow organizer?
For fabric organizers, spot clean with a damp cloth and mild soap if needed. Avoid soaking. For yarn organizers, shake out dust regularly or use a cool hairdryer setting. Trim any frayed ends to keep it looking neat.
Key Takeaways for Making Your Own Bow Organizer
Creating a bow organizer is a simple, rewarding project that combines function and style. The sewn fabric version offers durability and a professional look, perfect for daily use. The no-sew yarn dowel version provides speed and customization, ideal for beginners and seasonal displays. Both methods keep hair accessories visible, accessible, and beautifully displayed while reducing clutter in your home.
With clear steps, affordable materials, and endless customization options, you can create a storage solution that fits your space and style perfectly. Choose your method based on your skills and needs, then personalize with colors, embellishments, and names to make it truly unique.


