
You’ve just finished cleaning your oven, and now the rack won’t slide back in. It catches, jams, or refuses to go past the front edge. This is one of the most common kitchen frustrations, and you are not alone. The good news: how to put rack back in oven is simpler than it seems, as long as you follow the right steps. Most failures happen because the rack is inserted flat instead of angled, or it’s placed in backward. With the correct alignment and a slight tilt, your rack should glide smoothly into place.
This guide covers universal techniques, brand-specific tips, and pro fixes for stubborn racks. You’ll learn exactly how to align the rack with side rails, insert it at the proper angle, and avoid common mistakes that cause damage. Whether you have a Samsung, KitchenAid, or Whirlpool model, these steps will help you get your rack back in quickly and safely.
Align Rack with Side Rails
Position Rear First, Front Elevated
Always start by aligning the back of the rack with the rear portion of the side rails. These metal tracks run horizontally along both oven walls and guide the rack in and out. To bypass the front stop mechanism, tilt the front of the rack upward 1 to 2 inches. This angle lets the rear wheels or glides slide into the back of the rails before the front encounters the stop. Never force the rack straight in, as this causes binding and can bend rails.
Check Front-to-Back Orientation
Many racks have a beveled or chamfered front edge designed to lock into a notch in the rail. If inserted backward, the rack won’t seat properly. Confirm which end is the front by looking for an angled edge or label. On Samsung and Whirlpool models, the angled end must enter the slot first. Some racks are position specific, meaning top, middle, and bottom racks aren’t always interchangeable.
Insert Rack at an Upward Angle
Slide Forward While Tilted
With the rear aligned and front elevated, gently slide the rack forward along the rails. Keep the front raised as you push. This allows the rear rollers to stay engaged while the front glides over the stop mechanism. If you feel resistance, stop and increase the angle slightly. Forcing it can damage the rails or scratch the oven interior.
Avoid Common Insertion Mistakes
The most common mistakes that cause failed insertion include:
- Inserting the rack flat instead of at an angle
- Using excessive force to push the rack in
- Ignoring rail obstructions like food debris or grease buildup
Pro Tip: If the rack feels stuck, pull it out completely, recheck the angle, and retry. A little patience prevents costly repairs.
Lower and Seat the Rack Fully
Clear the Stop Mechanism First
Once the front rollers or glides pass the front stop notch, gradually lower the rack to a horizontal position. You’ll feel it drop slightly when properly seated. If you lower too soon, the rack will jam. Keep pushing forward as you level it.
Push to the Backstop
After lowering, push the rack all the way to the back of the oven until it stops. A fully seated rack should not wobble or tilt. Leave space between the rack and back wall, typically half an inch, to avoid interfering with heating elements or convection fans.
Verify Smooth Operation
Test the rack by pulling it out and pushing it back in. It should glide smoothly and evenly on both sides. If one side drags, clean the rails with a damp cloth, inspect for bent rollers or debris, and apply a food-safe lubricant sparingly to dry rails.
Fix Stuck or Backward-Inserted Racks
Remove a Jammed Rack Safely
If the rack is stuck due to incorrect insertion, follow these steps:
- Lift the front while gently pulling outward
- Apply cooking oil to both rails where the rack binds
- Wait 5 to 10 minutes for lubrication to penetrate
- Try again with a steeper angle
Warning: Never use pliers or metal tools, as these can scratch or dent the oven cavity.
Correct Backward or Upside-Down Installation
Some users accidentally insert the rack backward or upside down. To fix this, rotate the rack 180 degrees so the angled front edge leads. On models with rollers, ensure wheels face downward. Reinsert using the tilt method described earlier.
Brand-Specific Installation Tips
KitchenAid: Use Angled Front Entry
KitchenAid racks require a 1 to 2 inch front lift during insertion. Align the rear, slide forward at an angle, then lower. If stuck, apply food-grade lubricant to rails and clean grease buildup monthly to prevent sticking. Replace damaged rollers to maintain smooth glide.
Samsung: Match Angled Edge to Slot
Samsung models use a notch-and-slot system. Insert the angled end into the rail slot, lift upward to clear the stop, push inward past the notch, then lower and slide fully in. Verified buyers confirm: “They must go on the exact spot that you took them off.”
Always consult your Samsung manual, page 21, for diagrams. Manuals are available online via the Samsung Support Portal using your model number.
Whirlpool and Maytag: Confirm Part Compatibility
For models using part WPW10282492, confirm fit using your full model number. Clean rails before inserting new or existing racks. Replace bent or damaged racks immediately, as warped metal causes long-term misalignment.
Safety First: Turn off power at the circuit breaker before replacing parts near heating elements.
Maintain Racks for Smooth Reinsertion
Clean Rails Regularly
Dirty rails are the top cause of sticking. Clean every time you clean the oven by wiping rails with a non-abrasive cloth and mild cleaner. Remove baked-on grease with a baking soda paste. Avoid harsh oven cleaners that degrade metal finishes.
Lubricate When Needed
Apply a drop of cooking oil to rails if the rack feels stiff. Wipe off excess to prevent attracting dust. Over-lubrication creates a gummy buildup, so use only when necessary.
Inspect for Damage
Check monthly for worn or broken rollers, bent rack edges, and dented or warped rails. Replace damaged parts promptly. A single broken roller increases friction and can ruin the entire glide system.
Avoid Common Reinstallation Errors
Do Not Force the Rack
If resistance occurs, stop immediately. Forcing the rack can bend rail guides, crack enamel coating, and damage convection fan housing in rear-mounted models. Back out, recheck alignment, and retry with more tilt.
Do Not Swap Racks Between Levels
Many users assume racks are interchangeable, but racks are often position-specific. Top racks may be shorter or shaped to avoid broil elements. Bottom racks sit lower to optimize baking heat. Convection ovens require precise rack placement to avoid blocking airflow. Label your racks after cleaning to avoid confusion.
Troubleshoot Reinsertion Problems
Rack Won’t Go In at All
The cause is typically inserted backward or flat. The fix is to rotate 180 degrees, tilt front up, and retry.
One Side Catches or Binds
The cause is debris, bent rail, or misaligned rack. The fix is to clean rails, inspect for damage, and ensure rack is level during insertion.
Rack Slides Unevenly
The cause is worn rollers or damaged glides. The fix is to replace the rack if rollers are cracked or missing.
Rack Doesn’t Seat Fully
The cause is obstruction or dented rail. The fix is to clear food debris and check for warping. If rails are bent, contact a technician.
Quick Reference Table
| Problem | Solution |
|---|---|
| Rack jams mid-insertion | Increase front angle, realign rear first |
| Front won’t lower | Front hasn’t cleared stop, push further before leveling |
| Rack wobbles | Check for bent rack or uneven rails |
| Noisy sliding | Clean and lightly lubricate rails |
Optimize for Convection and Self-Cleaning Ovens
Position Racks Correctly for Airflow
In convection ovens, improper rack placement blocks the rear fan, causing uneven cooking, hot spots, and longer bake times. Always install racks in manufacturer-recommended positions. Refer to your manual for approved levels during convection mode.
Protect Enamel in Self-Cleaning Models
Self-cleaning ovens have porcelain enamel interiors that scratch easily. Handle racks by the sides, not the front edge. Avoid dropping or dragging racks across rails. Never use abrasive pads on rails or rack ends.
Final Verification and Safety Check
Test Rack Glide and Levelness
After installation, pull the rack out and back in. It should move smoothly. Check for side-to-side levelness. A tilted rack can spill liquids or destabilize cookware. Ensure no part of the rack touches heating elements.
Restore Power and Run Test Cycle
If you turned off power, restore electricity or gas supply. Run a short 5-minute bake cycle to confirm no interference. Listen for unusual noises like rubbing or scraping.
Replace Damaged Racks Promptly
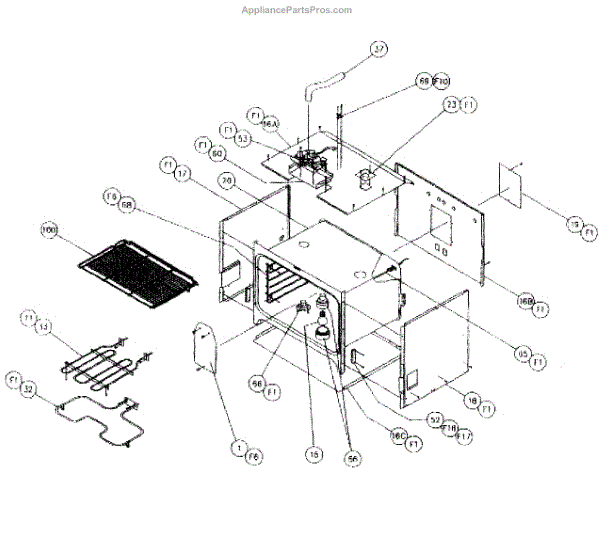
Use OEM or model-specific replacements. Search by model number on sites like AppliancePartsPros.com. Verify dimensions including length, width, and roller type. Avoid universal racks unless confirmed compatible.
Frequently Asked Questions About Putting Rack Back in Oven
Why does my oven rack keep getting stuck when I try to put it back in?
Most rack insertion failures happen because the rack is inserted flat instead of at an angle. The front stop mechanism in the rail system catches the rack when it’s pushed in horizontally. Always tilt the front of the rack upward 1 to 2 inches before sliding it in.
How do I know which end of the rack is the front?
Look for a beveled or chamfered edge on one end of the rack. Many racks have an angled front edge designed to engage with a notch in the rail. Some models also have labels indicating “Front.” On Samsung models, the angled end must enter the slot first.
Can I use any rack in any position in my oven?
No, racks are often position-specific. Top racks may be shorter or shaped to avoid broil elements. Bottom racks sit lower to optimize baking heat. Convection ovens require precise rack placement to avoid blocking airflow. Check your manual for approved positions.
What should I do if the rack is stuck and won’t come out?
If the rack is stuck, apply cooking oil to both rails where the rack binds. Wait 5 to 10 minutes for lubrication to penetrate. Then lift the front while gently pulling outward. Never use pliers or metal tools, as they can damage the oven cavity.
How often should I clean the oven rails?
Clean the rails every time you clean your oven. Built-up grease and debris are the leading cause of rack sticking. Use a non-abrasive cloth and mild cleaner, or a baking soda paste for baked-on residue.
Is it normal for the rack to wobble after reinstallation?
No, a properly installed rack should not wobble. If your rack wobbles, check for bent rack edges or damaged rails. Inspect the rollers for wear or breakage. Replace any damaged components promptly to ensure safe and stable cookware placement.
Key Takeaways for Putting Rack Back in Oven
Knowing how to put rack back in oven correctly prevents damage and ensures long-term performance. Always tilt the front up, align the rear first, and never force the rack into place. The key is to bypass the front stop mechanism by maintaining an upward angle during insertion, then lowering the rack once it clears the notch.
Keep rails clean and lubricated to prevent sticking. Use proper orientation, and follow brand-specific steps, especially for Samsung, KitchenAid, and Whirlpool models. Label your racks by position to avoid confusion, and inspect regularly for damage. With this method, reinserting your oven rack becomes quick, safe, and frustration-free.