
Loading a bike onto a bike rack seems simple, but doing it wrong leads to scratched frames, unstable transport, or even accidents on the road. Whether you own a trunk-mounted hanger, a hitch-mounted platform, or a pickup truck rack, knowing how to put a bike on a bike rack correctly keeps your bike safe during every trip. This guide walks you through every major rack type step by step, so you can load confidently without worrying about damage or instability.
You’ll learn the exact loading procedure for hanging racks and platform systems, how to handle special frame types like step-through bikes, and proven anti-sway techniques that experienced cyclists use. By the end, you’ll have all the knowledge needed to transport any bike securely.
Choose the Right Bike Rack Type for Your Vehicle
Before loading, you need to confirm which rack type you’re using, since each has different mounting mechanics and weight capacities. The three most common options are hanging racks, platform racks, and truck-mounted systems. Your choice directly affects how you secure the frame, where you lift, and whether you need additional adapters.
Hanging racks suspend bikes by the top tube using padded cradles. They’re affordable and easy to install but tend to sway more at highway speeds. Platform racks support bikes by the wheels instead of the frame, offering better stability and protecting delicate carbon frames. Truck bed racks use fork mounts or tie-downs for high-capacity transport.
Check these factors before loading:
- Verify the rack’s weight limit matches your bike’s weight, especially for e-bikes which typically weigh 40 to 60 pounds
- Confirm your vehicle can support the rack type, whether it’s a Class II hitch receiver, a smooth trunk lid, or a pickup bed
- Ensure the rack is compatible with your bike’s frame geometry
Load a Hanging Trunk Rack Step by Step
Hanging trunk racks remain popular because they’re affordable and fit most vehicles without requiring a hitch. The key is positioning the bike correctly in the cradles to prevent frame damage and minimize sway.
Position the Bike Over the Cradles
Lift the bike and align it over the rack arms, starting with the rear wheel closest to the vehicle. Slide the bike rearward until the top tube rests in the cradle closest to your car. Keep the bike upright and avoid tilting it sideways, which misalignes the frame. Use both hands to control the lift rather than dragging the bike onto the rack.
Secure the Top Tube in the Cradle
Place the top tube into the rubberized cradle and tighten the adjustable arm or strap to hold the frame firmly. Never overtighten, since this damages paint or carbon fiber frames. If your bike has a step-through frame, skip this step and use a top-tube adapter instead. Ensure no part of the derailleur, chain, or disc brake touches the rack arms.
Fasten the Wheel Straps
Most hanging racks include front wheel straps. Loop them around the front tire or fork to prevent swinging, then pull tight and clip securely. Some models offer anti-sway bars that attach from the down tube to the rack post. After securing, gently shake the bike to test for movement.
Install a Hitch-Mounted Platform Rack Correctly

Platform racks provide superior stability because they secure the wheels rather than the frame. This makes them ideal for carbon frames, e-bikes, and step-through geometries that don’t work with traditional top-tube clamps.
Load Via Wheel Cradles
Lift the bike onto the platform and place the rear wheel first into the backmost cradle. Lower the front wheel into its tray, making sure both tires sit fully in the molded supports. Avoid resting the frame on any part of the rack unless you’re using a designated frame clamp.
Lock the Front Wheel in Place
Raise the wheel retention arm over the front tire and turn the knob or lever clockwise until snug. This arm prevents forward movement during braking. Some systems use ratcheting arms while others have spring-loaded levers. Confirm the tire is fully captured and cannot roll forward.
Secure the Rear Wheel
Pull the rear wheel forward and secure it with a wheel strap or anti-sway block. This eliminates backward motion and stabilizes the entire bike. Most platforms include an adjustable chock that tightens against the rear tire tread. Double-check strap tension after driving a few miles, since vibration often loosens them.
Secure Step-Through Bike Frames Properly
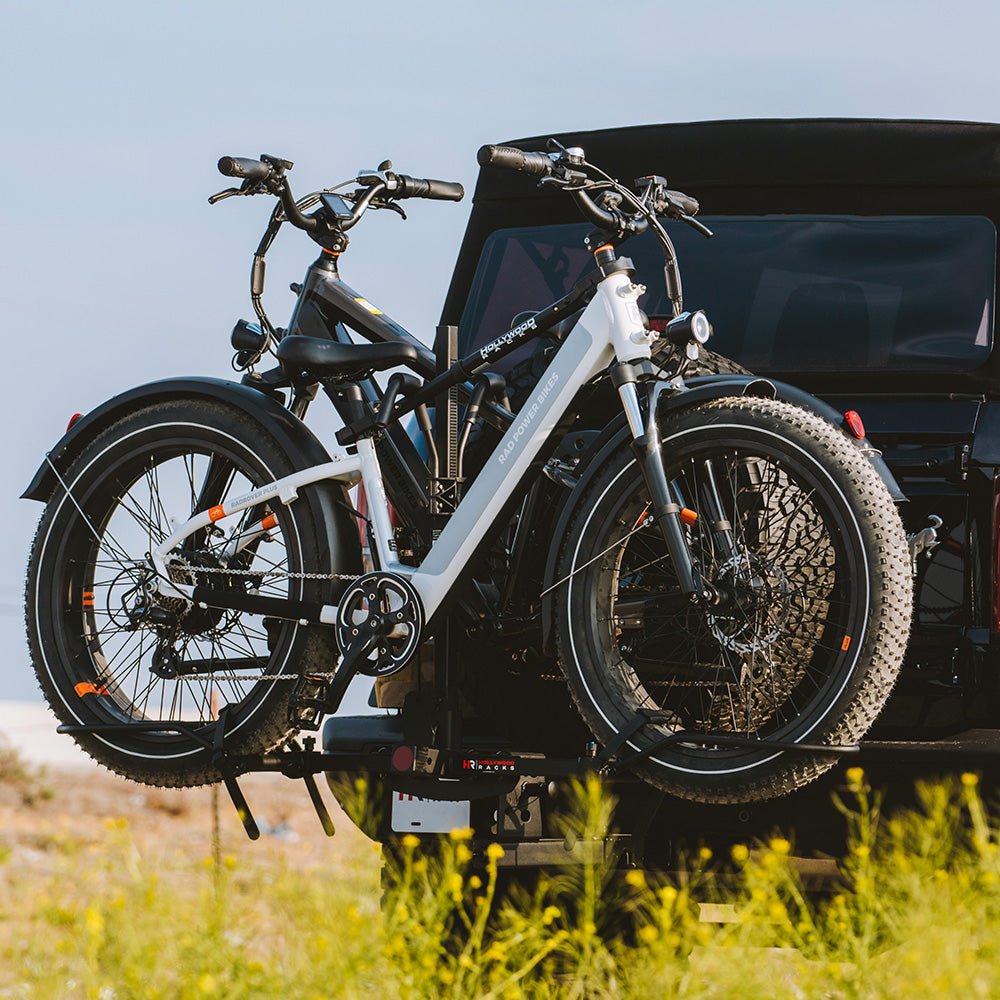
Low-step frames lack a horizontal top tube, making standard rack mounting unsafe or impossible. Using the wrong mounting method risks the bike falling or the frame being damaged.
Use a Top-Tube Adapter
A top-tube adapter bar attaches to the seat post and extends horizontally to mimic a top tube. Slide it into the seat tube, position it horizontally, then place the rack’s cradle over the bar. These adapters are lightweight, inexpensive, and work with most hanging racks. Ensure the bar locks in place and doesn’t wobble before securing the bike.
Try a Crossbar Substitute
A crossbar substitute attaches to the front wheel dropouts and extends rearward to create a mounting point for trunk racks. Insert the ends into the front dropouts, expand the bar to match rack width, and lock with the quick-release lever. Mount the bike as usual, then remove by reversing the steps after transport.
Prefer Wheel-Based Mounting
The easiest solution is using a platform rack that secures wheels only. Since it doesn’t touch the frame, the geometry doesn’t matter. This eliminates the need for adapters entirely and provides the most secure method for frequent transport of step-through bikes.
Prevent Sway and Vehicle Contact During Transport
Even properly mounted bikes sway during transit, risking contact with bumpers, fenders, or other bikes. Adding simple anti-sway measures protects your vehicle paint and prevents damage.
Add a Pool Noodle Bumper
Cut a pool noodle lengthwise and slide it over the upright rack post. Secure with zip ties to prevent slipping. When the bike sways forward, the tire hits the soft foam instead of your vehicle. This low-cost trick protects paint and reduces rattling noise. Replace every season or if the foam cracks.
Attach Bungee Cords for Extra Stability
Run a hooked bungee cord from the bike’s down tube to the vertical rack post. This pulls the frame toward the center and minimizes front-to-back motion. You can also loop one from the front wheel to the hitch receiver for added damping. Avoid elastic cords with frayed hooks since they can snap during transport.
Use Inner Tube Ties for Long-Term Durability
Cut an old bicycle or car inner tube into loops and tie them from frame points to rack arms. They’re stretchy, durable, and grip well under vibration. Unlike bungees, they don’t degrade in sunlight and last for years. Many cyclists use them for long-haul trips or rugged terrain transport.
Try Industrial Velcro Ties
Replace standard straps with heavy-duty Velcro cable ties that resist UV damage, don’t loosen over time, and can be reused thousands of times. Wrap them around wheel rims and crossbars for secondary security. They’re ideal for high-vibration environments or frequent use.
Mount Bikes on Pickup Truck Racks Safely
Pickup trucks offer versatile options for secure, high-capacity loading. Whether using bed racks or tailgate mounts, proper technique ensures your bike stays stable.
Load Using Fork Mounts
For truck bed racks with fork mounts, remove the front wheel to expose the fork dropout. Lift the bike into the bed and insert the steerer tube into the rack’s fork clamp. Tighten the lever or bolt until the bike is immobile, then test by wiggling the handlebars. No play should exist. This method offers maximum stability and is used by professional teams.
Secure Frame to Tie-Downs
Even with a fork mount, add a rear wheel or frame strap to anchor points in the truck bed. This prevents vertical bounce and lateral shift. Use ratchet straps for precise tension and avoid nylon ropes, which stretch and loosen over time.
Use Tailgate Racks Vertically
For tailgate-mounted racks, lower the tailgate and rest the rear wheel against the front edge. Wrap integrated straps around the top tube or down tube and tighten until the bike stands rigidly. These racks protect the tailgate but may allow frame-on-frame contact with multiple bikes, making them best for short trips.
Final Safety Checklist Before Driving
Never drive off without verifying every point below. A few minutes of checking prevents costly damage or dangerous situations on the road.
Confirm frame and wheel security:
- Ensure all clamps, straps, and retention arms are tight
- Gently shake each bike with no movement occurring
- Recheck tension after the first 5 to 10 miles of driving
Prevent vehicle contact:
- Make sure tires, pedals, or handlebars don’t touch the vehicle
- Use pool noodles or spacers if clearance is tight
- Alternate handlebar directions on multi-bike racks to reduce width
Engage all locks and cables:
- Attach safety cables from the rack to the vehicle’s hitch or frame
- Engage integrated locks to deter theft
- Verify the rack is properly attached to the hitch or trunk
Check lights and clearance:
- Ensure brake lights, reflectors, and license plate remain visible
- Install an add-on light bar if the rack blocks them
- Check vertical clearance for tall bikes in garages or parking structures
Frequently Asked Questions About Putting a Bike on a Bike Rack
Can I transport a step-through bike on a hanging rack?
No, standard hanging racks require a horizontal top tube for the cradle. For step-through bikes, use a top-tube adapter, a crossbar substitute, or switch to a platform rack that secures wheels only.
How do I stop my bike from swaying on the rack?
Add anti-sway measures like pool noodles on the rack posts, bungee cords from the down tube to the rack, or inner tube ties. Also place bikes in the forward slot on hitch racks to reduce the lever arm of sway.
Should I remove the front wheel when using a truck bed rack?
Yes, truck bed fork mounts require removing the front wheel to expose the fork dropout. This provides the most secure mounting method for pickup truck transport.
How often should I check strap tightness?
Check strap tension after the first 5 to 10 miles of driving, then periodically on long trips. Vibration loosens straps, so re-tightening prevents the bike from shifting during transit.
Can I use a regular rack for an e-bike?
Only if the rack is rated for e-bike weight, which is typically 40 to 60 pounds per bike. Using an under-rated rack risks failure during transport. Look for racks specifically designed for heavier e-bike weights.
Key Takeaways for Loading Your Bike on a Rack

Knowing how to put a bike on a bike rack correctly protects your investment and ensures stress-free travel. Match your loading method to your rack type and bike geometry. Use top-tube adapters for step-through frames, and always prefer wheel-based platform racks when possible. Secure every point of movement with proper straps, then add anti-sway solutions like pool noodles or bungee cords for extra protection. Double-check all clamps and straps before driving, and re-tighten after the first few miles. With these techniques, you’ll transport your bike confidently on every adventure.


