

A fold-down shelf transforms unused wall space into a functional surface in seconds. Whether you need a temporary desk, outdoor serving station, or hidden homework station, this guide walks you through building a sturdy, smooth-operating fold-down shelf using proven DIY techniques. You will learn how to select materials, construct a rigid panel, install reliable hinges and supports, and apply the perfect finish for your environment.
The process involves choosing the right wood for your space, gathering precision tools, assembling a warp-resistant panel, mounting hinges that distribute weight evenly, and adding support systems that prevent over-extension. Each step builds toward a shelf that folds flat against the wall when not in use and deploys quickly when needed.
Choose the Right Wood for Your Project
Selecting appropriate wood ensures your shelf handles weight, resists warping, and looks great for years. Your material choice depends on whether the shelf lives indoors or outside.
Solid Wood Options
White oak delivers exceptional durability and beautiful grain for indoor installations. This dense hardwood accepts oil finishes beautifully, creating a rich, natural appearance that enhances any room. However, white oak requires careful planing and jointing during preparation to prevent warping over time.
Pine or fir 1×6 softwood offers affordability and easy handling for outdoor projects. These boards resist weather when properly sealed and cost significantly less than hardwoods. Paint adheres well to softwood, making it ideal for backyard bars or patio serving stations.
Plywood provides superior stability in humid environments where solid wood might expand or contract. Marine-grade plywood works best for outdoor applications, while standard cabinet-grade plywood suits indoor use.
Engineered Alternatives
For budget-conscious builds, consider MDF for painted indoor applications or pressure-treated plywood for exterior installations. Both materials resist warping better than solid lumber but require different finishing approaches.
Surface Preparation Requirements
Start with rough lumber cut slightly oversized. Use a jointer to flatten one face, then run boards through a planer to achieve consistent thickness throughout. Always sand surfaces to 150 grit maximum before applying oil finishes, as higher grits prevent proper absorption.
Gather Essential Tools for Precision Work
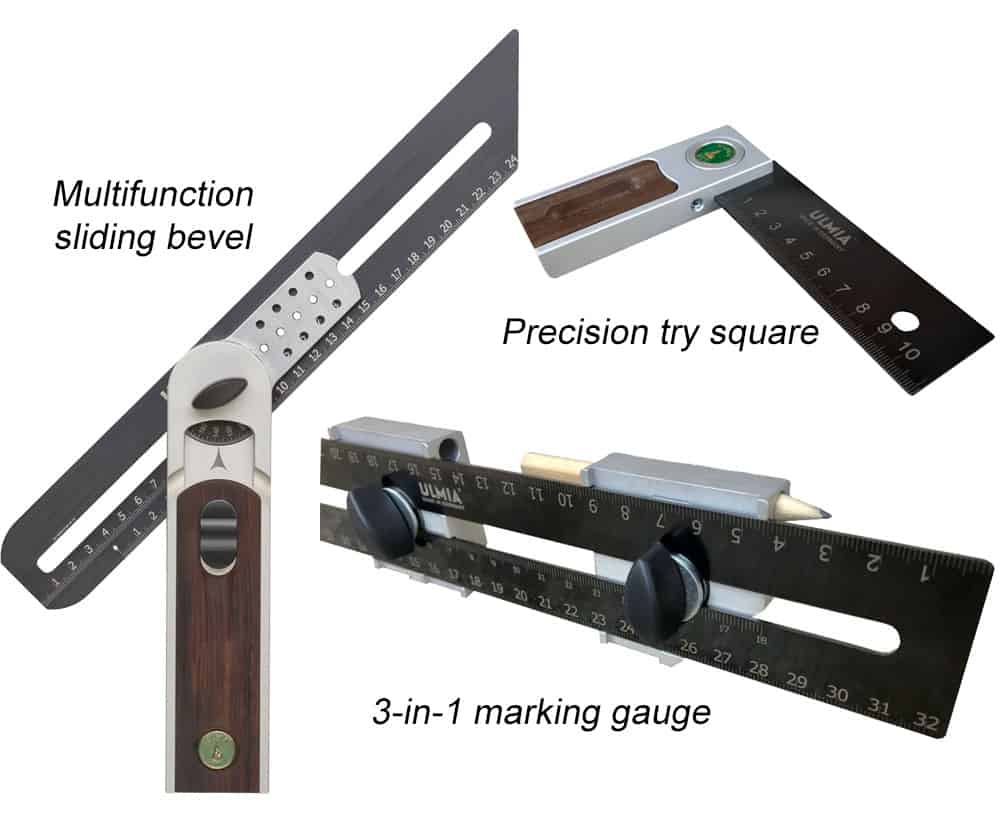
Successful fold-down shelf construction requires tools that deliver clean cuts, accurate joinery, and smooth finishes. The investment in quality tools pays off in professional results.
Cutting Equipment
A tracksaw handles long, straight rip cuts with precision that circular saws cannot match. Use it after gluing panels to trim edges flush and square. A compound miter saw ensures accurate crosscuts and angled joints for frame construction, while a jigsaw handles rough shaping but should never replace precise cutting tools for final edges.
Joinery Tools
A biscuit joiner creates alignment slots for edge-glued panels, ensuring perfectly aligned boards during glue-ups. Mark biscuit locations every 6 to 8 inches along mating edges for optimal support. A router equipped with a 1/4-inch roundover bit softens sharp edges for safety and visual appeal.
Installation Equipment
A right-angle drill attachment reaches tight mounting areas behind brackets. A self-centering drill bit prevents wood splitting when driving screws near edges. Keep needle-nose pliers handy for adjusting chain links during support setup.
Construct a Warp-Resistant Shelf Panel
The shelf panel must support significant weight without sagging or twisting. Whether building a solid-wood panel or enclosed box, structural integrity determines long-term performance.
Solid-Wood Panel Assembly
- Joint the edges of boards until mating surfaces are perfectly flat.
- Mark biscuit slots every 6 to 8 inches along each edge.
- Cut slots with a biscuit joiner, then apply wood glue to both edges.
- Insert biscuits, clamp tightly, and allow curing for 12 to 24 hours.
- Trim the panel to final dimensions using a tracksaw.
- Sand all surfaces and apply edge profiling with a router, avoiding the wall-facing side.
Pro Tip: Biscuit joints improve alignment but do not provide structural strength. Always reinforce high-stress areas with screws or brackets.
Box-Frame Construction
For added rigidity and interior storage, build a shallow box frame.
- Cut front, sides, top, and back pieces from 1×6 lumber.
- Apply wood glue to all joint surfaces.
- Reinforce corners with staples driven at angles.
- Install a middle divider and interior shelf for additional strength.
- Verify squareness by measuring diagonal distances until both measurements match exactly.
Warning: A non-square frame will bind when folding. Double-check alignment before the glue sets completely.
Install Hinges for Smooth Folding Action

The hinge system determines how smoothly your shelf operates and how much weight it can safely support. Choose based on shelf width and intended load.
Continuous Piano Hinge Installation
Mount a continuous piano hinge along the underside of the shelf for maximum weight distribution. This approach works best for wide or heavy shelves.
Position the hinge so it spans the entire back edge of the shelf. If the hinge exceeds the shelf length, space screws evenly and place 16-gauge shims behind excess sections to maintain level alignment. Attach one leaf to the shelf and the other to a wall-mounted cleat or backer board.
Visual Cue: When closed, the hinge should sit flush against the wall with no visible gaps. Test the pivot action before final tightening.
Standard Butt Hinge Setup
For smaller shelves under 24 inches wide, two heavy-duty butt hinges provide adequate support.
Pre-drill all screw holes using a self-centering bit to prevent splitting. Use Torx or square-drive screws rather than Phillips heads, which cam out easily in tight angles. Ensure both hinges align perfectly to prevent binding during operation.
Add Support Systems for Safety
Without proper support, a fold-down shelf can collapse or swing uncontrollably. Install one of these proven systems to ensure safe, controlled operation.
Chain Limiters
Chains control extension distance and prevent over-extension, making them ideal for outdoor bars and serving stations.
- Unhook one chain end using needle-nose pliers.
- Loop the freed end around a screw secured to the wall frame.
- Extend the shelf fully and measure the taut chain length.
- Mark the chain at the desired length and cut with bolt cutters.
- Reattach the cut end to a screw on the shelf underside.
Expert Note: Install chains on both sides for balanced support. Use galvanized chains outdoors to resist rust and corrosion.
Folding Shelf Brackets
Pre-made 16-inch folding brackets simplify installation and extend approximately 12 inches when deployed.
Mount brackets directly into wall studs for maximum holding power. If pipes or wiring block stud access, attach a horizontal wood plank across multiple studs first, then mount brackets to the plank. Add a small shim under each bracket to ensure smooth folding action without binding.
Latch Hardware
Install a hook-and-eye latch to secure the shelf when folded against the wall.
Mount the hook on the wall and the eye on the shelf edge. Use L-brackets to reinforce attachment points if needed. This prevents accidental opening from wind or vibration, especially important for outdoor installations.
Apply the Perfect Finish

The right finish protects wood from moisture, wear, and UV damage while enhancing visual appeal. Match your finish to the shelf location.
Oil Finishes for Indoor Use
Rubio Monaco Oil Plus 2C penetrates deeply and provides excellent protection with a natural feel.
- Mix the oil in a precise 3:1 ratio using craft syringes for accuracy.
- Apply to the bottom surface first and let soak for 3 to 5 minutes.
- Wipe off excess with a clean white cloth until nearly dry.
- Flip the shelf, clean the top with mineral spirits, then apply oil.
- Allow 12 to 24 hours curing time before use.
Fire Safety Warning: Oily rags can spontaneously combust. Lay them flat to dry outdoors or submerge in water before disposal.
Paint for Outdoor Applications
For patios or exterior walls, use UV-resistant, low-VOC paint like RECLAIM.
- Lightly sand the surface and wipe clean with a damp cloth.
- Apply the first coat with a roller and let dry completely.
- Apply a second coat for full, even coverage.
- Allow 48 hours curing time before installing or using the shelf.
Personalization Options
Add character with a custom branding iron applied to the underside, vinyl lettering cut with a Cricut machine, or stain like Varathane Early American for a warm, traditional tone. Avoid low-quality contact paper, which peels over time.
Mount the Shelf Securely to Wall Studs
Even the best-built shelf fails if not anchored properly. Follow these steps for a rock-solid installation.
Locate and Mark Studs
Use a stud finder to identify wood studs behind the drywall. Mark the center of each stud clearly with a pencil. Always anchor mounting hardware directly into studs, never into drywall alone, for load-bearing strength.
Bridge Obstructions
If plumbing or electrical lines block direct stud access, install a horizontal backer board across two or more studs. Secure the board firmly into each stud, then mount hinges or brackets to this solid backing.
Test Before Final Tightening
- Mount the shelf and open it slowly to check operation.
- Look for binding, wobble, or misalignment.
- Adjust shims or bracket positions as needed.
- Cycle the fold mechanism 5 to 10 times to ensure smooth action.
- Only fully tighten all screws once movement is flawless.
Customize Dimensions for Your Space
Fold-down shelves adapt easily to specific needs. Adjust three key dimensions to fit your situation.
Height: Mount at elbow level for desk use, lower for children’s stations or serving counters.
Width: Measure the available space between cabinets, under windows, or beside doors. Standard widths range from 24 to 48 inches.
Depth: A 12-inch depth accommodates laptops, serving trays, or craft supplies. Deeper shelves hold more but require stronger support systems.
Functional Upgrades
Consider adding interior dividers for tool storage, glass racks for outdoor bars, built-in coolers for beverage service, or a chalkboard panel for notes and reminders.
Frequently Asked Questions About Building Fold-Down Shelves
What is the best wood for an indoor fold-down shelf?
White oak provides the best combination of durability and appearance for indoor use. Its dense grain accepts oil finishes beautifully and resists wear. Pine or fir works well if you plan to paint the shelf, while plywood offers superior stability in humid environments like bathrooms or kitchens.
How much weight can a fold-down shelf support?
Weight capacity depends on hinge type, support system, and wall stud anchoring. A shelf mounted with a continuous piano hinge into wall studs typically supports 50 to 100 pounds. Lighter shelves with butt hinges and folding brackets handle 25 to 50 pounds. Always anchor into studs for maximum load capacity.
Do I need to finish both sides of the shelf?
Yes, finishing both sides prevents uneven moisture absorption that causes warping. Apply the same finish system to all surfaces, whether oil-based or painted. For oil finishes, the bottom receives application first, then the top after flipping.
Can I install a fold-down shelf on a concrete wall?
Yes, but you need appropriate masonry anchors instead of wood screws. Use a hammer drill to create pilot holes for sleeve anchors or concrete screws rated for the shelf weight. A horizontal backer board mounted with masonry anchors provides a solid mounting surface for hinges and brackets.
How do I prevent the shelf from squeaking when folding?
Squeaking usually results from friction between moving parts. Apply a small amount of wax or silicone lubricant to hinge pins and bracket pivot points. If squeaking originates from wood contact, add thin felt pads where the shelf contacts wall brackets or support arms.
Key Takeaways for Building Your Fold-Down Shelf
Building a fold-down shelf combines smart design, solid craftsmanship, and practical function. Select materials matched to your environment, with white oak and oil finishes for indoor use or pressure-treated lumber with exterior paint for outdoor applications. Construct the panel using glue and mechanical fasteners, then verify square alignment before proceeding to hinge installation.
Anchor all mounting hardware directly into wall studs for safe load-bearing capacity. Install support chains or folding brackets on both sides for balanced operation, and add a hook-and-eye latch to secure the shelf when folded. Test the fold mechanism multiple times before final tightening, and reapply oil finishes every 6 to 12 months for indoor use or touch up paint as needed for outdoor units.
Whether you are creating a hidden homework station, an outdoor serving bar, or a temporary workspace, this project maximizes space without sacrificing style. Use quality materials, anchor into studs, and finish with care, and you will enjoy a durable, user-friendly shelf for years to come.


