
Is your dishwasher rack sagging, rusted, or missing tines? You are not alone. Over time, the top or bottom rack can degrade due to wear, corrosion, or impact, especially in popular models from Whirlpool, KitchenAid, Maytag, and Kenmore.
A broken rack does not just make loading dishes harder; it can lead to poor cleaning, dish damage, and even interfere with door closure. But before you replace the entire dishwasher, know this: most issues are fixable with simple, low-cost repairs. This guide shows you how to fix broken dishwasher rack problems with proven solutions, from zip-tie repairs to full part replacements, so you can restore function quickly without spending hundreds.
Diagnose the Damage First
Before grabbing tools or ordering parts, identify what is actually broken. Most rack issues fall into three categories: mechanical failure, rust, or broken tines. Pinpointing the problem ensures you apply the right fix.
Check for Bracket or Roller Failure
If your top rack sags or does not slide smoothly, the issue is likely failed plastic brackets or rollers. This is especially common on the right side of Whirlpool-built models, including KitchenAid and Maytag.
Look for:
– Cracks in plastic adjusters or mounting brackets
– Missing or detached wheels
– One side of the rack dropping lower than the other
– Difficulty pulling the rack out fully
Pro Tip: Test movement with the rack empty. If it binds or tilts, bracket failure is likely the culprit.
Inspect for Rust and Coating Damage
Even high-end racks can rust within two years due to moisture, harsh detergents, or heat cycles.
Signs of corrosion:
– Reddish-brown flaking on tine tips or frame
– Bare metal showing through vinyl or epoxy coating
– Rust stains on dishes or inside the tub
Rust starts at stress points, like tine ends or weld joints, and spreads over time, weakening the rack structure.
Identify Broken or Missing Tines
Tines break from heavy pots, repeated loading, or corrosion.
Red flags:
– Gaps where tines should hold bowls or pans
– Dishes tipping over during cycles
– Only one or two tines damaged versus multiple
If three or more tines are broken or the frame is warped, consider a full rack swap.
Fix Broken Brackets and Sliders
When the rack will not glide or sags on one side, damaged sliders or brackets are usually to blame. Replace them or use a quick zip tie fix.
Replace Damaged Adjuster Brackets
For Whirlpool, KitchenAid, and Maytag models, OEM parts like WPW10546503 or W11308506 are readily available and easy to install.
Steps to replace:
1. Pull the rack out fully.
2. Locate the four clips on the faulty bracket, two on top and two on bottom.
3. Push the top clip off the rail.
4. Pinch the lower clips inward to release.
5. Slide the old bracket out.
6. Clean the rail with a cloth.
7. Slide in the new bracket, ensuring the internal clip compresses.
8. Reattach clips in this order: back, center, front.
9. Test smooth movement.
Time: 10 minutes. Tools: None required.
Expert Note: Replace both left and right brackets even if only one is broken. This prevents future imbalance.
Reinforce With Zip Ties (Quick Fix)
No parts on hand? Use heavy-duty, heat-resistant zip ties rated to 185°F to stabilize a sagging rack.
How to do it:
1. Extend the rack and align the low side with the opposite side.
2. Loop a zip tie from the rack frame to a stable track point.
3. Do not tighten fully. Adjust for levelness first.
4. Tighten gradually until both sides are even.
5. Add a second zip tie for strength.
6. Optional: Add a horizontal tie across the bracket to stop side-to-side shift.
Check: Rack must slide freely and not block the door seal.
Real-World Result: Many users report zip ties lasting over a year, especially on KitchenAid models.
Repair Rust and Corrosion
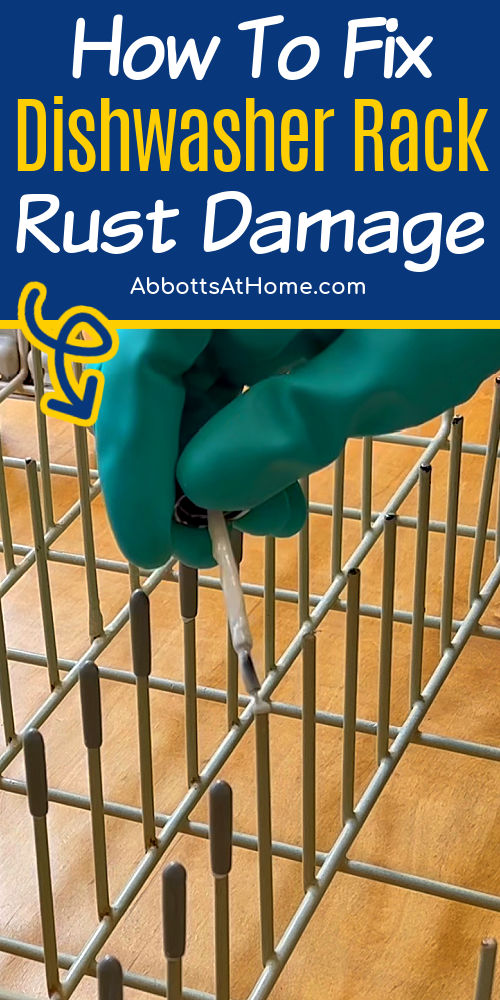
Rust is not just ugly. It is a health hazard and structural risk. Stop it before it spreads with proper cleaning and recoating.
Sand and Clean the Metal Surface
You cannot paint over rust. You must remove it first.
What you need:
– Wire brush or rotary tool
– 120 to 220 grit sandpaper
– Rubbing alcohol
– Lint-free cloth
Process:
1. Remove the rack from the dishwasher.
2. Scrub all rusted areas, focusing on tine tips, joints, and frame rails.
3. Sand until bare metal is exposed and smooth.
4. Wipe with rubbing alcohol to remove grease and debris.
5. Let dry for at least one hour.
Safety First: Wear gloves and eye protection. Metal dust is sharp and harmful if inhaled.
Apply a Protective Coating
Once clean, seal the metal with a dishwasher-safe coating.
Use Uber Goop for Long-Lasting Protection
Uber Goop is a rubberized, heat-resistant sealant designed for appliance racks.
Application:
1. Apply 2 to 3 thin coats with a brush.
2. Let each coat dry at least 2 hours.
3. Allow 24 hours for full cure before reinstalling.
Why it works:
– Stays flexible and will not chip or crack
– Resists detergents, heat, and abrasion
– Lasts 2 to 5 years under normal use
Pro Tip: Coat all tine tips, even those not yet rusted, for preventive protection.
Try Vinyl Repair Paint (Alternative)
Sold by RepairClinic and SearsPartsDirect, this paint matches rack colors including black, gray, and white.
Steps:
1. After sanding, apply paint to exposed metal.
2. Cover all rust-prone areas thoroughly.
3. Let dry per instructions, usually 12 to 24 hours.
Best paired with tine tip replacements for full restoration.
Replace Broken Tines and Tips
Missing or snapped tines make loading dishes risky. Replace them easily with DIY kits.
Install New Tine Tips
Replacement vinyl or plastic tips slip over cut-off metal ends.
What you need:
– Tine tip kit (color-matched)
– Rotary tool with cutoff wheel (optional)
– Rubbing alcohol
Steps:
1. Cut off damaged tine end flush with the rack wire.
2. Clean the cut with alcohol.
3. Apply vinyl paint to the exposed metal (optional but recommended).
4. Slide new tip on. It should fit snugly.
5. Repeat for all damaged tines.
Cost: $10 to $25. Time: 30 to 60 minutes.
Note: Some tips include adhesive. Others rely on friction fit.
Add Coating Caps for Extra Protection
Caps seal tine ends from water, preventing future rust.
How to install:
1. Apply Uber Goop or paint to the tine tip.
2. Warm the cap in your hands or under hot water.
3. Stretch it over the treated tip.
4. Press firmly to secure.
Best practice: Use caps with a coating, not alone, for long-term hold.
Maintenance: Check annually. Replace if cracked or loose.
When to Replace the Entire Rack
Some damage is beyond repair. Know when to cut your losses and install a new rack.
Signs You Need a Full Replacement
Replace the rack if:
– Three or more tines are broken
– Frame is severely rusted or bent
– Repair parts are unavailable (common on older models)
– Repairs keep failing, which suggests a design flaw
– Repair cost exceeds 50 to 70 percent of a new rack price
Example: Spending $100 on brackets to fix a $150 rack is not cost-effective.
How to Buy and Install a New Rack
- Find your model number. Check the door rim or inside cabinet.
- Search by model or part number on Amazon, PartsDoctor, or RepairClinic.
- Choose OEM or aftermarket. OEM guarantees fit at higher price ($50 to $150). Aftermarket costs $30 to $80 and often performs the same.
- Install by sliding out the old rack and inserting the new one into the tracks.
- Test movement and alignment.
No tools needed. Time: 5 minutes.
Source Parts Smartly
Buying the wrong part wastes time and money. Follow these steps to get the right one.
Match Model and Part Numbers
Always verify compatibility:
– Use your dishwasher model number, not brand alone
– Cross-reference with part listings
– Check product images and dimensions
Avoid: Generic listings without model-specific confirmation.
Best Places to Buy
Why each site works:
– Amazon: Fast shipping, user reviews, part numbers in search
– PartsDoctor.com: Model-based filters, genuine-compatible parts
– RepairClinic.com: Videos, compatibility guides, step-by-step help
– SearsPartsDirect.com: Best for Kenmore and legacy models
Tip: Search using WPW10546503 or W11308506 if you know the part number.
Test and Maintain Your Fix
A repair is not done until it is tested and future-proofed.
Verify the Repair Works
After any fix:
– Slide the rack in and out 3 to 5 times. It should move smoothly.
– Check alignment. It must stay level.
– Test adjustability if you replaced an adjuster.
– Ensure door closes fully. No gasket interference.
– Confirm all clips and brackets stay locked.
If it binds or wobbles, recheck installation.
Extend Rack Life With Prevention
Keep your rack working longer with simple habits:
– Inspect every 6 months for cracks or rust
– Clean tracks monthly with a damp cloth
– Do not overload. Excess weight strains brackets.
– Use rinse aid to reduce mineral buildup
– Load dishes gently. Avoid forcing the rack shut.
Pro Move: Keep a spare bracket on hand. Swap it in before failure.
Cost and Time Comparison
See how much you save by repairing versus replacing.
| Repair Type | Time | Tools | Cost | Savings vs. New Rack |
|---|---|---|---|---|
| Bracket Replacement | 10 min | None | $20 to $50 | More than 80% |
| Adjuster Swap | 15 min | Screwdriver | $25 to $30 | More than 75% |
| Zip Tie Fix | Under 10 min | Scissors | Under $5 | More than 95% |
| Rust Repair (Uber Goop) | 1 hr | Brush, alcohol | $15 to $30 | More than 70% |
| Full Rack Replacement | 5 min | None | $50 to $150 | N/A |
Bottom Line: Repairs cost less than 20% of a new rack and often last just as long.
Frequently Asked Questions About Fixing a Broken Dishwasher Rack
Can I repair a dishwasher rack without replacing it entirely?
Yes. Most rack problems, including broken brackets, rusted tines, and missing tips, can be repaired with DIY methods. Only severe damage, like three or more broken tines or a warped frame, requires full replacement.
How long does it take to fix a broken dishwasher rack?
It depends on the repair. Bracket replacement takes about 10 minutes. Rust repair with sanding and coating takes roughly one hour. Full rack replacement takes only 5 minutes.
What is the cheapest way to fix a sagging dishwasher rack?
A zip tie fix costs under $5 and takes less than 10 minutes. Use heavy-duty, heat-resistant zip ties rated to 185°F. This temporary solution can last over a year on many models.
Does Uber Goop really work on dishwasher racks?
Yes. Uber Goop is a rubberized, heat-resistant sealant designed specifically for appliance racks. It lasts 2 to 5 years under normal use, resists detergents and heat, and stays flexible without chipping.
Where can I find the right replacement rack for my dishwasher?
Find your model number on the door rim or inside the cabinet. Search on Amazon, PartsDoctor, RepairClinic, or SearsPartsDirect. Always verify compatibility using the model number before purchasing.
When should I just replace the whole dishwasher rack?
Replace the rack if three or more tines are broken, the frame is severely rusted or bent, repair parts are unavailable, or repair costs exceed 50 to 70 percent of a new rack price.
Key Takeaways for Fixing Your Dishwasher Rack
Fixing a broken dishwasher rack is one of the easiest and most cost-effective appliance repairs you can make. Whether you are replacing a $25 bracket, sealing rust with Uber Goop, or using zip ties as a temporary fix, you will restore full function and avoid unnecessary waste. Start by diagnosing the exact problem, whether it is bracket failure, rust, or broken tines. Choose the right solution based on damage severity and your budget. OEM parts offer guaranteed fit, while aftermarket options provide significant savings with comparable performance. Maintain your rack by inspecting it every 6 months, cleaning tracks regularly, and avoiding overloading. With the right approach, most rack problems can be resolved in under an hour for a fraction of the cost of a new rack or dishwasher.


