

Is your dishwasher rack sticking, dragging, or suddenly dropping when you pull it out? This common problem happens when the wheels wear out from heat, moisture, and constant use, especially in homes with hard water. The good news is that learning how to fix dishwasher rack wheels is a simple DIY repair you can complete in about 20 minutes, often with no tools or plumbing disassembly required.
In this guide, you’ll learn exactly how to diagnose the problem, replace damaged wheels on both upper and lower racks, and upgrade to longer-lasting metal-hub versions that can help extend your dishwasher’s life by several years.
Diagnose Wheel Problems Before Replacing Parts
Before spending money on new wheels, confirm the issue is actually with the wheels themselves and not something else entirely.
Common Signs of Failing Dishwasher Rack Wheels
Watch for these warning indicators that your rack wheels need attention. The rack drags or sticks when you pull it out, especially on one side. You might hear grinding, squeaking, or scraping noises during movement. The upper rack may drop suddenly mid-pull, which is almost always caused by a failed wheel assembly. Look for visible cracks, missing plastic pieces, or wobbling when the rack moves. One side might bind while the other moves smoothly, creating an uneven pulling experience.
How to Inspect Your Dishwasher Rack
Start by opening the dishwasher fully and pulling the rack all the way out. Lift the back upward to disengage the wheels from the floor tracks, then place the rack on a towel to prevent scratches. Flip the rack over and examine every wheel, paying special attention to the rear wheels since they bear the most weight. Spin each wheel manually to feel for stiffness, wobbling, or grinding resistance. Also check the internal glide tracks inside the dishwasher tub for debris, broken glass, or limescale buildup that could be causing problems.
Identify Your Dishwasher Model for Compatible Parts
Not all dishwasher wheels are universal, so you need to know your exact model before purchasing replacements.
Brands With Interchangeable Wheel Designs
Several major brands share similar wheel designs, making replacements easier to find. Whirlpool, Kenmore, Maytag, KitchenAid, and certain GE models all use compatible or cross-compatible wheel systems. This means you can often find replacement parts that work across multiple brands within this family.
Where to Find Your Model Number
Look inside the dishwasher door frame or along the tub edge for a label containing your full model number, such as WDT730PAHZ0. Use this number to verify part compatibility on PartSelect.com, RepairClinic.com, or AppliancePartsPros.com before buying anything.
Gather Tools for the Repair Job
You don’t need any power tools for this repair. Everything required fits in a basic kitchen drawer.
What You Will Need
Keep these essential tools on hand before starting. Needle-nose pliers work best for removing broken clips and compressing retaining tabs. A small flat-head screwdriver helps press release buttons and dislodge stuck components. An X-acto knife cleans debris from wheel mounts. A soft cloth or towel protects the rack finish during removal and installation. Replacement wheels matched to your specific model number are, of course, the most important item.
Optional Items
You might also consider food-safe silicone lubricant or Petrol-Gel for applying to axles after installation, though this is completely optional and only needed if you want extra smooth gliding.
Clean Tracks and Wheels as a Temporary Solution
If your wheels are stiff but not broken, cleaning may temporarily improve performance, though this is not a permanent fix.
Cleaning Procedure
Mix equal parts white vinegar and water. Use a toothbrush to scrub the wheels, axles, and interior tracks thoroughly. Rinse with clean water and dry completely. This removes limescale and debris but will not repair cracked plastic tabs or broken hubs.
When Cleaning Helps
This method works only for early-stage wear caused by mineral buildup or light debris. If the wheels are physically damaged, cleaning will provide no real benefit.
Lubricate Wheels for Short-Term Relief
Applying food-safe grease can reduce friction and buy you some time, but it is not a long-term solution.
How to Apply Lubricant
Wipe the wheels and glide tracks clean first. Apply a pea-sized amount of grease to each wheel axle. Slide the rack in and out several times to distribute the lubricant evenly. Be aware that grease attracts dirt over time and will need reapplication every four to six weeks.
Replace Bottom Rack Wheels on Whirlpool and Related Brands
Bottom racks use simple snap-on wheels that typically wear out after three to seven years of use.
Parts Needed
You will need a four-pack bottom rack wheel kit designed for Whirlpool-family models. These kits cost between $13 and $17 and are available on Amazon, PartSelect, or AppliancePartsPros. Consider upgrading to kits with metal screws instead of plastic clips for longer durability.
Step-by-Step Bottom Rack Wheel Replacement
Pull the rack fully out, then lift the rear upward to disengage it from the floor channels. Place the rack on a soft surface. Flip the rack upside down and locate each wheel assembly on the U-shaped wire. Press the two locking tabs inward with your fingers or a small screwdriver, then push the assembly away from the rack to release it. Repeat for all damaged wheels.
For installation, position the new wheel so its two inner tabs rest on the inner wire. Lower the rack, letting the vertical wire slide into the catch and tab. Push the wire forward with your thumb until it snaps securely into place. Ensure all wheels are aligned and seated evenly before reinstalling.
Slide the rack back into the dishwasher and pull it in and out several times to test. The rack should glide smoothly with less than two pounds of force, with no binding or scraping sounds.
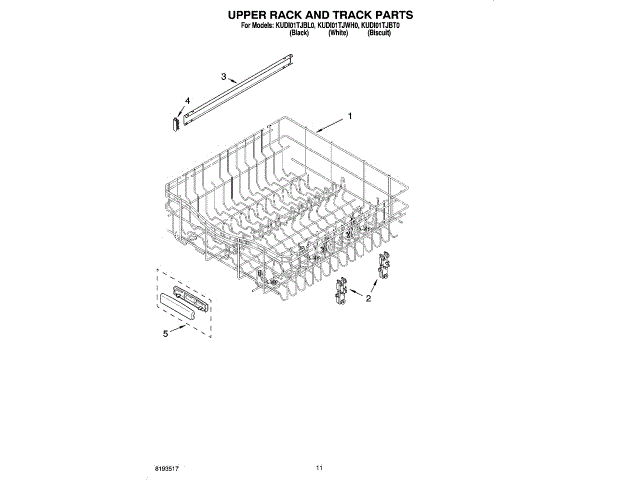
Replace Upper Rack Wheels on Whirlpool and KitchenAid Models
Upper rack wheels are more complex to replace, but the process is still manageable for DIYers. A failed upper wheel can cause the rack to fall into the tub, potentially damaging dishes and spray arms.
Parts Needed
You will need an upper rack wheel assembly such as WPW10571738, which costs between $15 and $25 from PartSelect or RepairClinic. Choose versions with metal hubs for longer life instead of the original plastic design.
Step-by-Step Upper Rack Wheel Replacement
Pull the rack out completely and place it on a soft cloth. Press the center button on the end clip to release and remove the side rails from both ends. Detach the long side clip by pushing the wire off from behind and sliding it down over the post. Remove the short wide clip by pressing the center with a screwdriver and sliding it up and off. Use needle-nose pliers for the center clip by squeezing the edges inward and pushing through the hole to pop it off.
Press the release button on top of the wheel assembly and pull the wheel out of the rail. Check for cracked plastic hubs or debris in the center-clip hole.
Install the new wheel by aligning the two fins, making sure the thinner fin is on the right and centered. Insert the wheel into the rail and rotate until the top piece aligns. Push up on the locking tab to secure it in place.
Reattach all clips by snapping the center clip back into place, reinstalling the short wide clip by sliding it over the post and pushing back to lock, then attaching the long clip by sliding over the post and snapping into place. Reconnect the end clips to both sides and ensure everything is aligned.
Slide the rack back into the dishwasher and test by opening and closing several times. The rack should glide smoothly and evenly with no sudden drops or resistance.
Upgrade to Metal-Hub Wheels for Better Durability

Original plastic wheels crack easily under normal use. Upgraded replacement versions offer significantly better longevity.
Benefits of Metal-Hub Wheels
Metal-hub wheels resist cracking and warping far better than plastic. They handle heavier loads without degradation. These upgraded parts last five to eight years or more compared to three to five years for standard plastic wheels. They also provide better retention with metal screws or reinforced clips instead of brittle plastic tabs.
User Experience
Many users report that metal-hub wheels show no wear after more than one year of use, while original equipment parts failed within five to six years.
Prevent Future Wheel Failures
Extend the life of your new wheels with regular maintenance.
Monthly Maintenance
Wipe the glide tracks with a damp cloth to remove food debris and mineral buildup. This simple step prevents accumulation that leads to premature wear.
Every Six Months
Run a cleaning cycle with vinegar or citric acid to clear internal buildup. Avoid using bleach or ammonia, as these chemicals degrade plastic components over time.
Annual Inspection
Inspect all wheels for early signs of wear. Apply silicone spray to the glides, but never use petroleum-based grease unless it is specifically labeled as food-safe.
When to Replace the Entire Rack Instead
Wheel replacement is not always enough. Consider replacing the full rack if multiple wheel mounts are cracked, the rack frame is bent or warped, the internal glide rails are damaged, or replacement parts are unavailable for your model.
Cost Comparison
A wheel kit costs between $15 and $40, while a new rack runs $80 to $150. In most cases, wheel replacement is the smarter choice, but a full rack makes sense when the frame itself is damaged.
Buy the Right Parts: Pricing and Sources
Current prices for replacement parts range from $13 to $30 depending on the component and source. Bottom wheel kits (four-pack) cost $13 to $17 on Amazon or PartSelect. Upper wheel assemblies like WPW10571738 run $15 to $25 from RepairClinic. Metal-hub upgrades cost $23 to $30 from specialty parts sites. GE lower roller assemblies (WD12X26146) range from $19 to $26.
Buy a multi-pack even if only one wheel is broken, since the others will likely fail soon due to similar wear patterns.
Frequently Asked Questions About Fixing Dishwasher Rack Wheels
How Do I Know If My Dishwasher Rack Wheels Need Replacement?
Signs that indicate replacement is needed include dragging or sticking when sliding the rack, grinding or squeaking noises, sudden dropping of the upper rack, visible cracks or missing plastic on wheels, wobbling during movement, and one side binding while the other moves smoothly. If cleaning and lubrication do not resolve the issue, the wheels are physically damaged and require replacement.
Can I Replace Dishwasher Rack Wheels Myself Without Professional Help?
Yes, replacing dishwasher rack wheels is one of the easiest DIY appliance repairs. No special tools, plumbing disassembly, or professional experience is required. Most homeowners complete the repair in 20 minutes or less by following simple step-by-step procedures. The work is done entirely on the removable rack, not inside the dishwasher cabinet.
How Long Do Replacement Dishwasher Rack Wheels Last?
Standard plastic replacement wheels typically last three to five years. Upgraded metal-hub wheels last five to eight years or longer with proper maintenance. Lifespan depends on usage frequency, water hardness, and how well the wheels are maintained.
What Brands Use Compatible Dishwasher Rack Wheels?
Whirlpool, Kenmore, Maytag, KitchenAid, and select GE models share interchangeable wheel designs. This cross-compatibility makes finding replacement parts easier, though you should always verify fit using your specific model number before purchasing.
Are Metal-Hub Wheels Worth the Extra Cost?
Yes, metal-hub wheels are worth the additional investment for most households. They resist cracking, handle heavier loads, and last significantly longer than original plastic parts. The longer lifespan offsets the higher initial cost, and many users report that metal-hub wheels outperform original equipment by several years.
Key Takeaways for Fixing Your Dishwasher Rack Wheels
Fixing dishwasher rack wheels is a straightforward repair that restores smooth operation without professional help or expensive service calls. Start by diagnosing the problem through visual inspection and movement tests, then identify your specific model number to ensure compatible parts. For bottom rack wheels, the snap-on design makes replacement quick, while upper rack wheels require slightly more involved rail disassembly but follow the same straightforward logic. Consider upgrading to metal-hub wheels for durability that outlasts original equipment by years. Perform simple monthly maintenance by wiping tracks clean and run vinegar cleaning cycles every six months to prevent limescale buildup that accelerates wear. With the right parts and about 20 minutes of effort, your dishwasher will glide like new again.


