

A cracked or split wooden shelf can turn a beautiful display into a disaster waiting to happen. Whether it’s holding your favorite books, collectibles, or that heavy monitor your cat insists on perching on, a broken shelf needs more than a quick patch. The good news? Learning how to fix broken wooden shelf is a DIY project most homeowners can tackle with the right guidance. This comprehensive guide walks you through every step, from initial assessment to final finishing, so your repair is strong, seamless, and built to last.
You’ll discover how to identify different break types, prepare surfaces properly, apply glue like a professional, reinforce weak joints, and finish the repair so invisibly that no one will know it was ever damaged.
Assess the Damage Before Starting Repairs
Successful shelf repairs begin with understanding exactly what you’re dealing with. Rushing to glue without inspection leads to weak bonds and future failures.
Identify the Break Type
Run your fingers along the damaged area and tap lightly with a knuckle. A hollow sound often means the shelf has already separated internally. Check both front and back surfaces, especially where the shelf meets supports or wall brackets.
Different breaks require different approaches:
- Clean split: The two pieces fit together tightly. These are ideal for glue-only repairs.
- Jagged or fragmented: Splintering or crushed fibers mean material is missing. You’ll need gap-filling methods.
- End-grain separation: Breaks across the wood’s end are naturally weak because end grain absorbs glue heavily but doesn’t bond well. These always require mechanical reinforcement.
Check for Previous Repairs
Extra nail holes, mismatched wood tones, or uneven surfaces suggest the shelf has been fixed before. Old glue or paint residue can block new adhesion, so plan for thorough cleaning during your repair.
Evaluate Load-Bearing Needs
Ask yourself what the shelf will hold once repaired. Light decor or picture frames may need only glue and clamps. Books, tools, or electronics require screws or brackets. Heavy loads demand aggressive reinforcement and wall stud anchoring.
Disassemble for a Stronger Bond
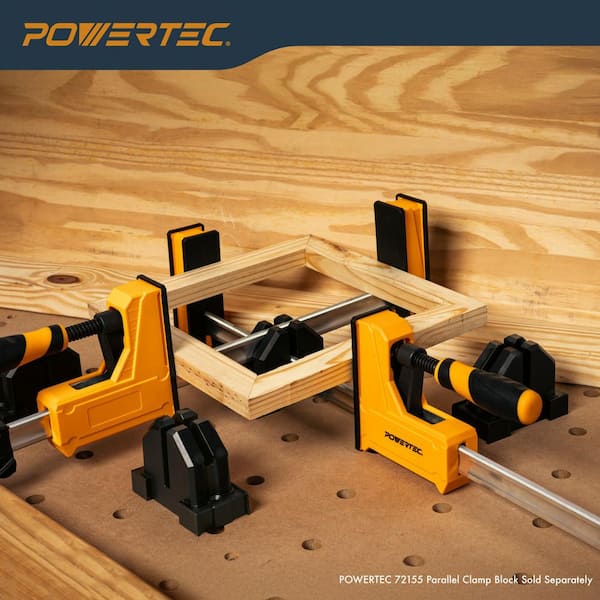
If the joint is dirty, has old glue residue, or shows signs of previous failure, full disassembly gives you a fresh start and the best chance at a permanent fix.
Use Clamps to Open the Joint
Attach spreader clamps or grip-style clamps across the joint. Tighten slowly to avoid splitting the wood further. Once you have enough gap, insert a thin wood or plastic wedge to keep the pieces apart while you work.
This method works especially well for frame-and-panel shelves or built-in units where access is limited.
Remove All Old Hardware
Take out any screws, nails, or brackets. Label their positions or photograph them before removal if you plan to reuse them. Missing even one hidden fastener can cause alignment problems during reassembly.
Clean Surfaces to Bare Wood
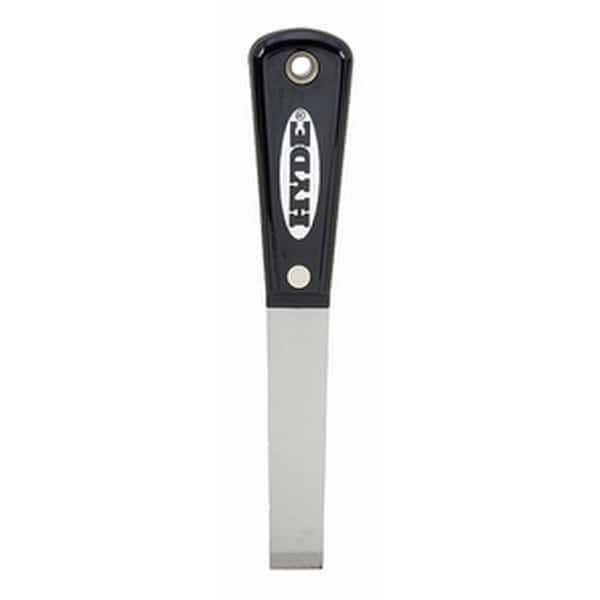
Glue simply will not stick to dirt, oil, old finish, or leftover adhesive. For a bond that lasts years, both mating surfaces must be absolutely clean and dry.
Scrape Off All Old Glue
Use a chisel, putty knife, or dedicated glue scraper to remove every trace of residue. Work gently to avoid gouging the wood. Focus on the joint edges specifically, as any leftover gunk prevents full contact between surfaces.
Sand for Better Adhesion
Lightly sand both surfaces with 80 to 120 grit paper to create a slightly rough texture. This increases the surface area the glue can grip. Wipe away all dust with a dry cloth or tack rag before proceeding.
This step matters enormously: contaminants can reduce glue strength by up to 50 percent. Skipping proper cleaning is the number one reason repairs fail later.
Apply Glue Using Professional Techniques
The right adhesive and application method make the difference between a temporary patch and a lifelong fix.
Choose the Best Adhesive
- Wood glue (PVA): The standard choice for most repairs. Strong, water-resistant, and sands easily when cured.
- Epoxy: Best for large gaps or moisture-prone areas. Fills voids and bonds well to end grain.
- Hide glue: Traditional option requiring heat and skill. Less common for modern DIY projects.
Glue a Clean Split Properly
Apply a moderate bead of wood glue along the entire crack. Press the pieces together firmly and clamp. Look for even squeeze-out along the entire seam. This confirms full coverage and proper pressure.
Pro tip: The glue squeeze-out is exactly what you want to see. It signals a tight, even bond.
Reach Deep Cracks with String
For narrow or deep splits that brushes cannot reach:
- Dip a cotton string into glue
- Pull it back and forth inside the crack to wick glue into hidden fibers
- Follow with a brush to fill wider areas
This technique ensures glue penetrates where standard application cannot reach.
Clamp with Consistent Pressure
Clamping is not optional. Without proper pressure, the glue bond will be weak and the repair will fail under load.
Use Appropriate Clamps
Bar or pipe clamps provide even pressure across long seams. F-style clamps offer high force for stubborn joints. Always use caul blocks (wood scraps) between the clamp jaws and your shelf to distribute pressure and prevent dents.
Tighten Until Squeeze-OutAppears
Tighten clamps until glue oozes out uniformly along the seam. Too little pressure creates a weak bond. Too much pressure squeezes out all the glue, creating a starved joint that lacks strength.
Allow Full Cure Time
Initial set takes about 30 minutes, but you can carefully handle the shelf. Full strength develops over 24 hours. Do not load the shelf or stress the joint until curing is complete. Wipe excess glue from finished surfaces before it dries, because cured glue requires aggressive sanding to remove.
Reinforce for Heavy Loads

Glue alone is insufficient for shelves supporting more than 30 to 50 pounds, or for joints originally built without screws.
When to Add Mechanical Support
- The shelf was only glued or nailed originally
- It will support monitors, tools, or multiple heavy items
- The joint involves end grain, which is naturally weak
Install Wood Screws Properly
Use #4 or #6 wood screws, 1.5 to 2 inches long depending on your shelf thickness. Always pilot drill first to prevent splitting, especially near edges. Place screws at least three-quarters of an inch from the edge. Drive them vertically through the shelf into a wall support or upper frame.
Anchor Into Wall Studs
If the shelf mounts to a wall, use a stud finder to locate solid wood. Drive screws directly into studs for maximum holding power. If no studs align with your shelf position, use heavy-duty drywall anchors rated for your intended load.
Fill Gaps and Missing Material
Jagged breaks leave voids that need filling before sanding and finishing can begin.
Mix Sawdust and Glue for Stained Shelves
Collect fine sawdust from the same wood species if possible. Mix it 50/50 with wood glue to form a thick paste. Press the mixture into the gap and overfill slightly. Let it dry completely, then sand flush.
Critical warning: Remove all excess before staining. Glue does not absorb stain and will leave a blotchy spot that ruins the finish.
Use Joint Compound for Painted Shelves
Apply pre-mixed sheetrock mud with a putty knife. Let it dry, then sand smooth. Prime and paint over the repair. This method is cheap, easy, and perfect for cosmetic fixes on painted furniture.
Patch Large Breaks with Bondo
For major damage like deep gouges or large voids:
- Mix two-part Bondo (resin plus hardener) in small batches
- Apply immediately with a spatula or gloved hand
- Overfill slightly, then sand smooth after curing
Safety note: Work in a well-ventilated area and wear a respirator. Bondo fumes are strong and can cause respiratory irritation.
Align Wood Grain for Seamless Repair
A structurally sound repair can still look wrong if the wood grain doesn’t match.
Match Direction During Reassembly
When putting pieces back together, ensure the wood grain runs the same direction on both surfaces. Misaligned grain stands out dramatically, especially under direct lighting.
Understand Why Grain Matters
Long grain (along the board) bonds best and provides the strongest joint. End grain absorbs glue like a sponge but creates inherently weak bonds. Always reinforce end-grain joints with screws or dowels.
Finish to Hide the Repair
A flawless finish makes the repair disappear completely.
Strip and Sand for Best Results
For antique or heavily damaged shelves, strip the old finish completely using chemical stripper or sanding. Remove all glue residue, filler, and old stain. Sand progressively through 80, 120, and 220 grit for a smooth surface ready for finishing.
Apply Stain and Top Coat
Stain the repaired area to match the surrounding wood. Test on a scrap piece first. Apply two to three coats for light use, or four or more coats for heavy-use shelves. Lightly sand between coats with 220 to 320 grit paper. Use polyurethane, lacquer, or wax for protection.
Avoid These Common Mistakes
Even experienced DIYers make errors that weaken repairs. Learn what to avoid:
- Thin glue layer with no pressure: Produces weak bonds that fail under load. Use enough glue and clamp until squeeze-out appears.
- Skipping surface cleaning: Leaves contaminants that prevent proper adhesion. Always scrape and sand to bare wood.
- No pilot hole before screwing: Causes splits, especially near edges. Always pre-drill.
- Leaving dried glue on the surface: Creates visible lines and poor finish. Wipe before drying or sand after.
- Relying on end-grain glue alone: Creates structural failure risk. Reinforce with screws or dowels.
- Releasing clamps too early: Results in incomplete cure and weak joints. Wait a full 24 hours.
Frequently Asked Questions About Fixing Broken Wooden Shelves
Can I fix a broken shelf with wood glue alone?
Yes, for clean splits and light loads, wood glue with proper clamping can create a strong bond. However, for heavy loads or end-grain breaks, you should add mechanical reinforcement with screws.
How long does wood glue take to cure fully?
Wood glue reaches initial set in about 30 minutes, but full strength requires 24 hours of curing time. Do not load the shelf until the full cure is complete.
What is the strongest glue for wooden shelf repairs?
PVA wood glue is the standard choice for most repairs. Epoxy is stronger for gap-filling and moisture resistance but is more difficult to work with.
Can I stain over a repaired area?
Yes, but only if you use the sawdust-and-glue method for filling gaps. Joint compound and Bondo do not accept stain and will show through.
How do I know if my shelf needs reinforcement?
If the shelf will hold more than 50 pounds, was originally built with only glue or nails, or has an end-grain break, add screws or brackets for reinforcement.
Should I replace the shelf instead of repairing it?
If the wood is severely damaged, rotted, or the repair would be structurally unsound, replacement is the safer choice. A properly repaired shelf can be stronger than the original, but only if the underlying wood is sound.
Key Takeaways for Fixing Your Broken Wooden Shelf
A successful shelf repair requires methodical assessment and proper technique. Always start by identifying the break type and evaluating load-bearing needs, because this determines your entire repair strategy. Disassemble when joints are dirty or previously repaired, and clean all surfaces to bare wood before applying adhesive.
Apply sufficient glue and clamp until you see even squeeze-out along the seam. Reinforce heavy-use shelves with wood screws into wall studs. Fill gaps using the method that matches your finish: sawdust and glue for stain, joint compound for paint, Bondo for major damage.
A properly executed repair can last decades and be stronger than the original construction. Take your time with surface preparation and curing, because shortcuts lead to failures. With these techniques, your fixed shelf will hold whatever you place on it for years to come.


