

A collapsing or sagging closet shelf is not just an annoyance; it is a warning that your storage system is failing. Most shelf failures happen when the original installation relies on drywall anchors or nails instead of brackets secured directly into wall studs. As fasteners pull loose under constant weight, the shelf can sag, crack, or crash down entirely. The good news is that you can Fix Closet Shelf problems permanently with the right tools and techniques.
This guide walks you through diagnosing the issue, choosing proper fasteners, reanchoring brackets into studs, reinforcing sagging shelves, and upgrading to a track-based system for long-term reliability. Whether you have a wire shelf in a reach-in closet or a sagging wood plank in a pantry, these steps can help create a rock-solid repair.
Diagnose the Shelf Failure
Before starting repairs, you must understand why the shelf failed. The fix depends entirely on the root cause.
Check for Missing Stud Anchors
Most shelf collapses happen because the brackets were never secured to wall studs. Drywall alone cannot support long-term weight. If the original installer used nails or drywall screws without hitting wood framing, the fasteners slowly pulled out under repeated stress. Use a stud finder to check whether the brackets align with studs. If they do not, that is your primary problem.
Inspect Fastener Damage
Examine the holes in the wall and the hardware closely. Elongated holes in drywall indicate the anchors failed. Bent or corroded clips cannot hold the shelf securely. Loose or stripped screws point to poor initial installation. If you see any of these signs, replace all damaged parts. Never reuse bent metal or worn anchors.
Look for Shelf Sag and Cracks
Even if the shelf has not fallen yet, visible sagging or cracks along the rear edge means the shelf is under too much stress. This commonly happens when weight is concentrated in the middle or front, especially on shelves longer than 24 inches. Reinforcement is required immediately to prevent complete failure.
Use the Right Tools and Hardware

A strong repair starts with the right tools and materials. Skip the shortcuts and invest in quality hardware for a lasting fix.
Essential Tools
You will need several key tools to complete this repair properly. A magnetic or electronic stud finder locates studs behind drywall. Magnetic types detect nail heads in studs while electronic versions sense density changes. A drill with a 3/8-inch bit creates holes for toggle bolt installation. An impact driver or screwdriver drives screws without stripping heads. Channel locks straighten or remove bent brackets. A level ensures the shelf sits flat after reinstallation. A measuring tape confirms bracket spacing and stud alignment.
Choose the Correct Fasteners
Using the right fasteners makes all the difference in load capacity. 2.5-inch GRK wood screws work best for stud-mounted brackets and can support over 100 pounds per screw. 1/8-inch by 3-inch toggle bolts are ideal for drywall locations where no stud is available, supporting 50 to 75 pounds per bolt. 75-pound rated plastic anchors work for light loads up to 75 pounds. #8 or #10 wood screws serve general stud attachment needs. Never use nails or drywall screws alone because they lack thread grip and pull out easily under load.
Reanchor Brackets Into Wall Studs
This method provides the strongest and most reliable fix, especially for heavy or frequently used shelves.
Remove Shelf and Damaged Hardware
Take down the shelf and inspect all clips and anchors. Discard bent metal brackets, stripped plastic anchors, and corroded or loose screws. If the clip has an integrated drywall anchor, cut it off with side cutters so the screw can pass through cleanly.
Locate Studs and Mark Positions
Use a stud finder to map all studs. Standard spacing is 16 inches on center. Mark each stud location with a pencil. Align the shelf brackets with these marks to ensure every fastener hits solid wood.
Install Screws Into Studs
Use 2.5-inch GRK or equivalent wood screws. These have aggressive threading and penetrate deep into the stud, typically 1.5 to 2 inches of engagement, creating a secure hold. Drill pilot holes if the wood is hard. Drive screws fully until the bracket is flush. Repeat for every bracket that aligns with a stud.
A single 2.5-inch screw in a stud can support over 100 pounds, far more than drywall anchors.
Reinstall and Test the Shelf
Slide the shelf back onto the brackets. Use a level to confirm it is even. Apply gentle downward pressure to test for movement. If it is solid, the repair is complete.
Use Toggle Bolts for Non-Stud Areas
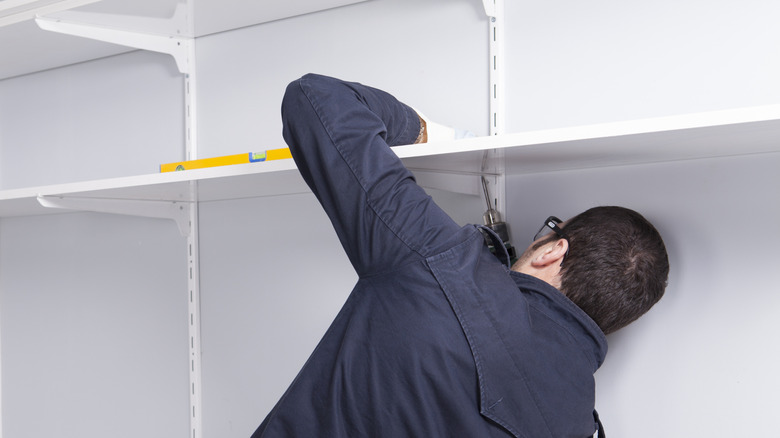
If a bracket does not align with a stud, toggle bolts provide the strongest drywall support.
Drill and Insert Toggle Bolts
Mark the bracket hole on the wall. Drill a 3/8-inch hole at the mark. Thread the 1/8-inch by 3-inch toggle bolt through the bracket. Push the bolt through the wall until the wings snap open behind the drywall. Pull gently toward you while tightening the nut to press the wings flat against the back of the drywall. Tighten until the bracket is secure and flush.
Toggle bolts distribute weight over a larger area, reducing stress on the drywall. They are stronger than plastic anchors and ideal for end brackets or odd spacing.
Reinforce Sagging Shelves
For shelves that are still up but show sag, cracks, or separation, add support before they fail completely.
Install Angled Brackets
Use 45-degree L-brackets to support the shelf from below, especially if it extends past baseboard or trim. Position the bracket so it reaches a wall stud. If direct alignment is not possible, toe-screw at an angle into the stud. Secure with 2.5-inch wood screws. Attach the top of the bracket to the shelf underside.
Install one bracket per 12 to 16 inches for heavy loads. For a 36-inch shelf, use at least three reinforcement brackets.
Patch and Seal Cracks
If the shelf has rear-edge cracks, clean the area. Fill with white wood caulk. Smooth and let dry. Paint to match if needed. This stops cracks from spreading and restores rigidity.
Upgrade to a Track-Based Shelving System

For recurring failures or aging wire shelves, replace the system entirely with a modern track-based solution.
Why Choose a Track System
Tracks mount directly into studs every 16 inches. Brackets slide in and adjust vertically. Shelves can be repositioned or expanded easily. The system reuses existing wire shelves if they are in good condition.
Install ClosetMaid Shelf Track
Buy the track kit in your desired length. Locate all studs with a stud finder. Align the track with stud positions and mark screw holes. Secure with 2.5-inch wood screws into each stud. Insert adjustable brackets into the track. Place wire shelves onto brackets and lock in place.
After Hurricane Ian, a Florida homeowner replaced failed wire shelves with ClosetMaid tracks anchored into studs. Despite humidity and structural stress, the new system remained stable.
Prevent Future Shelf Failures
A one-time fix is not enough. Protect your repair with smart habits and maintenance.
Distribute Weight Evenly
Avoid stacking heavy items like books or boots at the front edge. Place heavier items closer to the wall and near brackets. Rotate stored items to prevent static load fatigue.
Perform Annual Inspections
Check for sag, movement, or loose screws. Retighten any hardware that has loosened. Replace worn brackets or anchors before they fail.
Upgrade in Humid Climates
In high-moisture areas, use stainless steel or coated screws to resist corrosion. Ensure the closet has adequate ventilation. Consider moisture-resistant shelving like melamine or metal.
Enhance Storage While Repairing
Fixing your shelf is the perfect time to upgrade your closet functionality.
Add Double Hanging Rods
Install a second rod below the first to double hanging space. This is ideal for shirts, pants, or kids clothing.
Install Angled Shoe Shelves
Tilt the shelf down so heels face front. This improves visibility and prevents shoes from sliding off.
Use Clear Stackable Boxes
Store shoes or accessories in clear plastic bins. Tape photos of contents to the top for quick identification.
Go Modular
Switch to a track system with add-ons like drawers, bins, or LED lighting. These systems grow with your needs.
Final Checklist: Permanent Shelf Repair
Take these steps to ensure a lasting fix. Remove the shelf and inspect for damage. Locate and mark all wall studs. Discard bent clips and stripped anchors. Use 2.5-inch screws for stud-mounted brackets. Install toggle bolts where no stud is available. Reinforce sagging shelves with angled brackets. Reinstall the shelf and check with a level. Test stability under load. Patch cracks with white caulk. Consider upgrading to a track system.
Frequently Asked Questions About Fixing a Closet Shelf
Why does my closet shelf keep sagging?
Sagging usually occurs because brackets were mounted into drywall rather than wall studs. Drywall cannot hold fasteners securely under constant weight. The fix requires reanchoring brackets into studs with proper wood screws.
Can I use drywall anchors instead of studs?
Drywall anchors can support light loads but are not reliable for long-term shelf support. They pull out over time, especially under repeated weight. Toggle bolts are stronger than plastic anchors but still inferior to stud mounting.
How do I find wall studs behind drywall?
Use a magnetic or electronic stud finder. Magnetic types detect nail heads in studs. Electronic versions sense density changes. Standard stud spacing is 16 inches on center.
What screws are best for closet shelf brackets?
2.5-inch GRK or equivalent wood screws with aggressive threading provide the best hold. They penetrate deep into studs and support over 100 pounds per screw. Never use nails or standard drywall screws.
How do I reinforce a sagging shelf without removing it?
Install 45-degree L-brackets underneath the shelf, securing them into wall studs. Add multiple brackets along the shelf length for heavy loads. One bracket per 12 to 16 inches provides adequate support.
Should I upgrade to a track-based shelving system?
If your shelf has failed multiple times or uses aging wire shelving, a track system offers permanent reliability. Tracks mount directly into studs, brackets adjust vertically, and the system allows easy reconfiguration.
Key Takeaways for Fixing Your Closet Shelf
The most common cause of shelf failure is improper anchoring. Brackets must be secured into wall studs, not drywall. Use 2.5-inch wood screws for stud mounting, which can support over 100 pounds per screw. For non-stud locations, toggle bolts provide stronger drywall support than plastic anchors. Reinforce sagging shelves with angled brackets before they collapse completely. For long-term reliability, upgrade to a track-based system like ClosetMaid that mounts directly into studs. Distribute weight evenly and perform annual inspections to prevent future failures. By following these steps, you are not just repairing a shelf. You are building a storage system that lasts for years to come.


