
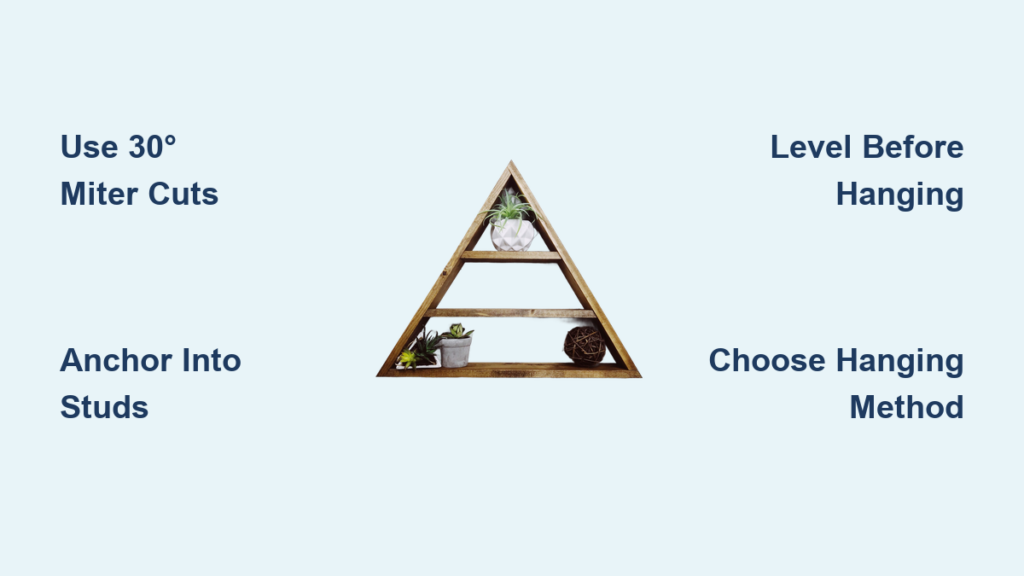
Hanging a triangle shelf is one of the fastest ways to add modern, space-saving storage to any room in your home. Whether you want a small 12-inch accent shelf for your bathroom or a bold 40-inch display shelf for your living room, the process combines precise woodworking with smart mounting techniques.
The key to success lies not just in building a clean triangular frame using ¾-inch plywood or solid wood cut at 30° mitered angles, but in knowing how to hang triangle shelf properly for your shelf’s weight, style, and wall type. This guide walks you through every step from cutting and finishing to mounting and maintaining your triangle shelf so it looks professional and lasts for years.
Choose Your Triangle Shelf Hanging Method

The first decision in hanging a triangle shelf is selecting the right mounting technique. Your choice depends on the shelf’s orientation, weight capacity, desired look, and wall material. Four proven methods are widely used, each offering distinct advantages.
Single Nail Method for Lightweight Displays
This method works best for upright triangles (apex pointing upward) where a single wall-mounted nail or screw supports the bottom corner. The shelf rests on the nail like a hook, creating a minimalist, grounded appearance perfect for bedrooms, bathrooms, or accent walls.
The single nail method works best for decorative items under 10 pounds such as candles, photos, and small plants. You’ll need just one nail or screw with a drywall anchor or stud mount, and the visual benefit is a nearly invisible installation. Use a level to align the base before final placement to ensure the shelf sits straight.
Dual Screw Method for Heavier Loads
For stronger support, mount the triangle upside down (apex pointing downward) using one screw driven into each top corner. Screws are pre-installed into wall anchors or studs, then the shelf is secured directly. This distributes weight evenly and significantly increases load capacity.
The dual screw method works best for functional storage including books, collectibles, and kitchen items. Load capacity reaches 15 to 20 pounds or more with proper anchoring into studs. Use two 1.5-inch to 2.5-inch screws plus appropriate anchors, and check alignment with a bubble or laser level before tightening to ensure the shelf stays level.
Rope Suspension for Bohemian Style
A bohemian favorite, this method involves drilling ¾-inch holes near the top corners and threading dyed braided cotton or UV-resistant nylon rope through them. The rope is then tied securely and hung from wall or ceiling hooks.
Rope suspension works best for nurseries, eclectic spaces, and adjustable-height displays. Use ¼-inch to ½-inch diameter rope rated for at least 20 pounds. You can dye the rope to match your room’s color scheme for a cohesive look. Ensure anchor points are load-rated and secure before hanging.
Back-Mounted Picture Hook for Hidden Hardware
Attach a D-ring or picture hanging hook to the center back of the frame, then hang it like framed artwork. This method hides all hardware behind the shelf, giving it a clean, floating effect.
This method works best for seasonal decor and lightweight keepsakes with a load capacity of 10 to 15 pounds. Use painter’s tape to mark the exact hook position before mounting to ensure accurate placement.
Build a Sturdy Triangle Shelf Frame
Before hanging, you must construct a structurally sound triangle shelf. Precision in cutting and assembly ensures stability and clean alignment during installation. The frame forms the foundation of your entire project, so take time to get this step right.
Cut 30° Mitered Angles for Perfect Corners
Each of the three wood pieces must be cut with a 30° angle on both ends to form a perfect equilateral triangle. Use a miter saw set to 30° for accuracy. Common wood types include ¾-inch plywood or 1×4 pine and poplar, with common lengths of 12 inches, 20 inches, or 40 inches per side.
To cut accurately, make your first 30° cut at one end of the board. Then flip the board 180°, measure your desired length, and cut the second end at 30°. Repeat for all three pieces to ensure symmetry. Inaccurate angles cause gaps in joints, so verify your miter saw with a speed square before cutting.
Assemble and Glue the Triangle Frame
Join the pieces using wood glue (Titebond or PVA) and reinforce with 1-inch to 1.5-inch brad nails. Apply glue to the mitered edges first, then join two pieces and clamp temporarily. Reinforce with brad nails, then attach the third piece to complete the triangle.
For stronger joints, stagger the miter seams instead of aligning them directly. This increases glue surface area and structural integrity. Use painter’s tape wrapped tightly around the perimeter to apply even pressure during drying instead of ratchet straps, which can slip. Let the glue cure fully for a minimum of 2 hours before sanding or finishing.
Add a Shelf Surface (Optional)

While some triangle shelves are open frames, others include a solid surface for practical use. Decide whether you need a flat surface for storing items or if the open frame design suits your decor better.
Insert a Plywood Base
Cut a triangular, hexagonal, or full plywood insert to fit inside the frame. Attach with wood glue and small nails, then sand flush. An alternative method uses nine 3.75-inch wide plywood strips arranged horizontally for a seamless look. Sand edges smooth and finish to match the frame.
Sand and Apply Finish
A professional appearance starts with proper sanding and finishing. Take time to prepare the surface properly, as this determines how your finished shelf will look.
Follow the Grit Progression
Use a consistent sanding sequence starting with 80-grit to remove saw marks and shape edges. Progress to 150-grit to smooth the surface, then finish with 220-grit for final polish. Use an orbital sander for large areas and hand-sand corners to prevent rounding.
Apply a Durable Finish
Choose a finish based on style and durability needs. Spray shellac offers fast-drying, clear results with no brush marks, making it ideal for beginners. Polyurethane adds moisture resistance, great for bathrooms. Paint hides imperfections, and white gives a clean, boho look. Stain enhances wood grain for rustic appeal.
Paint the inside middle section a contrasting color to add depth when viewed from angles. Fill nail holes with wood filler before finishing, and sand lightly between coats.
Prepare Your Wall for Mounting
Now that your shelf is built and finished, it’s time to hang it securely. Proper wall preparation ensures your shelf stays mounted safely for years.
Identify Your Wall Type
Your wall material determines the best fastening method. For wood studs, use a direct screw for the strongest hold. For drywall, use self-tapping anchors or toggle bolts. For masonry (brick or concrete), use a masonry bit plus a sleeve anchor.
At least one screw should hit a wall stud for maximum stability, especially for heavy or multi-shelf units. Use the following reference guide for mounting solutions.
| Wall Type | Mounting Solution |
|---|---|
| Wood stud | Direct screw (strongest) |
| Drywall | Self-tapping anchor or toggle bolt |
| Masonry | Masonry bit plus sleeve anchor |
Install Anchors and Mount the Shelf
If not mounting directly into studs, install wall anchors first. Pre-drill holes, insert anchors, then drive screws partially in so the shelf can rest on them. Use L-brackets mounted upside down so the bracket sits beneath the shelf, hiding hardware and creating a floating effect. Use two brackets for bottom shelves and three for top shelves. Drill pilot holes to prevent wood splitting.
Wrap tape around the drill bit to act as a depth guide. This prevents drilling too deep into walls.
Level and Test Stability
Even small misalignments ruin the clean look of geometric shelves. Whether hanging upright or inverted, always use a bubble or laser level to ensure the shelf sits straight. For multiple shelves, measure consistent spacing and mark all drill points before installation. Hold the shelf in place and check alignment from multiple angles.
After mounting, gently test the shelf’s stability. Respect weight limits based on your chosen hanging method. If the shelf wobbles, tighten the screws, replace weak anchors with toggle bolts, or re-mount into a stud.
Maintain Your Triangle Shelf
A well-hung triangle shelf can last years with minimal care. Regular maintenance keeps it looking great and ensures it stays securely mounted.
Clean and Inspect Regularly
Dust the shelf with a soft, dry cloth monthly. Re-tighten screws and anchors annually. For rope-hung shelves, look for fraying or UV damage every 6 to 12 months and replace if worn.
Refresh the Finish
Every 2 to 3 years, or if exposed to sun or moisture, lightly sand the surface and reapply polyurethane, paint, or stain. A polyurethane topcoat prevents chipping and increases longevity.
Avoid Common Hanging Mistakes
Even small errors can compromise safety and aesthetics. Learn what can go wrong so you can prevent these issues.
Misaligned Miter Cuts
If corners don’t meet cleanly, the shelf won’t sit flat. Re-cut pieces with a calibrated miter saw. Double-check the 30° angle with a protractor before assembly to prevent this issue.
Weak Anchoring
Nails pulling out of drywall is a common failure. Replace with self-tapping anchors or mount into studs. Use toggle bolts for heavy shelves to prevent this problem.
Over-Tightening Screws
This can crack wood or strip anchors. Drive screws slowly and stop when snug.
Uneven Rope Length
This causes the shelf to tilt. Re-tie knots to equalize length. Measure rope before cutting and knotting to prevent this issue.
Frequently Asked Questions About Hanging Triangle Shelves
What is the strongest way to hang a triangle shelf?
The dual screw method offers the strongest hold. Mount the triangle inverted (apex down) with one screw driven into each top corner, anchored into wall studs. This method supports 15 to 20 pounds or more with proper installation.
Can I hang a triangle shelf with just one nail?
Yes, for lightweight displays under 10 pounds. Use the single nail method with the triangle oriented upright (apex up). The bottom corner rests on the nail while the top two corners float freely. This creates a minimalist look but has limited weight capacity.
What tools do I need to build a triangle shelf?
You need a miter saw set to 30°, a drill or driver, an orbital sander, a level, a tape measure, and sandpaper in 80, 150, and 220 grit. A brad nailer speeds up assembly but is optional.
How do I hang a triangle shelf on drywall?
Use self-tapping drywall anchors or toggle bolts for secure mounting. At least one anchor should hit a wall stud for maximum stability. Pre-drill pilot holes and use appropriate anchors rated for your shelf’s weight.
Can I use rope to hang a triangle shelf?
Yes, the rope suspension method works well for bohemian or eclectic decor. Drill ¾-inch holes near the top corners, thread braided cotton or UV-resistant nylon rope through, and hang from wall or ceiling hooks. Ensure anchors are load-rated for the shelf weight.
Key Takeaways for Hanging Your Triangle Shelf
A triangle shelf is more than storage, it is a sculptural accent that blends function and design. By following precise 30° cuts, creating strong staggered joints, and using secure mounting techniques, you will create a piece that is both beautiful and durable.
Choose your hanging method based on weight needs. Single nail works for lightweight decor, dual screws support heavier items, rope adds boho flair, and picture hooks provide hidden mounting. Always anchor into wall studs when possible for maximum security.
Whether you choose a floating nail mount or a bold rope suspension, the right technique ensures your shelf stays safe, level, and stylish for years to come. Measure twice, cut once, and enjoy your finished triangle shelf.


