
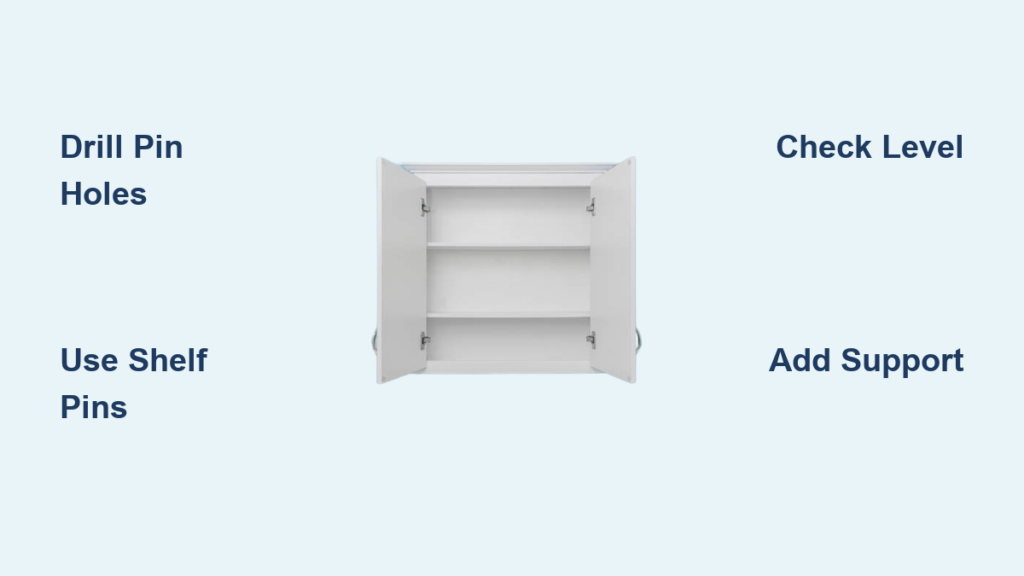
Adding a shelf inside a cabinet instantly doubles your storage space, transforming cluttered cabinets into organized storage zones. Whether you need space for pantry items, kitchen appliances, or bathroom supplies, knowing how to install a shelf in a cabinet gives you a customizable solution that fits your exact needs. This guide covers every method from adjustable pin systems to tool-free options, so you can choose the approach that matches your cabinet type, skill level, and budget.
You’ll learn how to select the right materials, drill precise holes, avoid common mistakes, and achieve professional results whether you’re using a power drill or need a rental-friendly no-drill solution.
Choose the Right Shelf Type for Your Needs
Adjustable Shelves Offer Maximum Flexibility
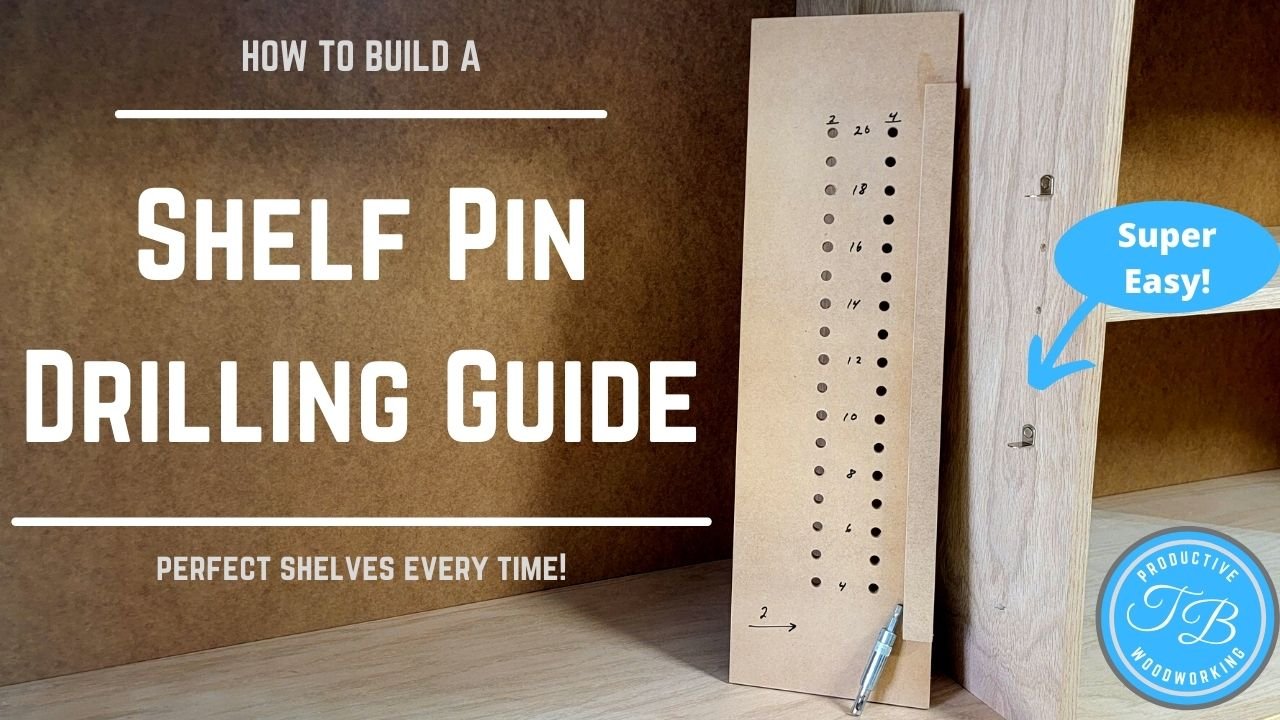
Adjustable shelves let you change the height whenever your storage needs change. They work perfectly for cabinets that hold items of varying sizes, like seasonal decorations or changing cookware collections. These shelves use shelf pins inserted into pre-drilled holes along the cabinet’s side walls. Most modern melamine and plywood cabinets come with factory-drilled holes spaced 1 inch apart, allowing you to raise or lower the shelf incrementally. If your cabinet lacks these holes, a shelf pin jig makes drilling them quick and accurate.
Fixed Shelves Handle Heavy Loads
Fixed shelves are permanently mounted with screws, brackets, or hidden metal connectors. They provide superior strength for heavy items like blenders, mixers, or stacks of dishes. Because they’re rigidly attached, fixed shelves resist sagging and wobbling even under significant weight. Use ¾-inch plywood or melamine for spans over 24 inches, and always anchor into solid cabinet walls rather than thin particleboard backing.
Tool-Free Options Work for Renters
No drilling required means these shelves are perfect for rentals, RVs, or anyone who cannot modify their cabinets. Tool-free shelves use adhesive strips like Command Strips, friction-fit supports, or existing peg holes. They install in minutes, leave no damage, and are fully removable. While they won’t hold heavy loads, they work well for spices, towels, or lightweight containers.
Select the Best Shelf Material

Pre-Finished Laminated Shelves Save Time
Pre-cut laminated shelves from home improvement stores are fast and affordable. They come in standard depths, usually 10 to 12 inches, but are often ½ inch shallower than your cabinet’s interior. This minor reduction is acceptable if it doesn’t compromise usability. These shelves need no sanding or finishing. Simply cut to width if necessary and place on pins or supports.
Birch Plywood Creates a Seamless Look
For a high-end, custom appearance, use ¾-inch birch plywood. It’s strong, stable, and matches solid wood cabinets when finished properly. One 2-foot by 4-foot sheet yields four standard shelves. Cut to exact cabinet width, subtracting ¼ inch for clearance, then apply heat-activated edge banding to hide raw edges. Iron the banding on at 200 degrees Fahrenheit, trim the excess, and your shelf looks factory-made.
Melamine Boards Resist Damage
Melamine shelves resist scratches, moisture, and stains, making them ideal for kitchens and bathrooms. They come with bull-nosed rounded edges, eliminating the need for edge banding. Available in white, oak, and walnut finishes, they blend with most cabinetry. For tool-free installs, the rounded front edge rests on the cabinet side, acting as a built-in lip.
Install Shelves with Shelf Pins
Mark and Drill Pin Holes Accurately
Installing adjustable shelves requires four sets of holes, two on each side wall. Use a shelf pin jig to ensure perfect alignment. Clamp the jig to the cabinet side, position it 6 inches from the bottom or your desired starting height, and drill using a ¼-inch brad-point bit with a stop collar. The stop collar limits depth to about ½ inch, preventing blowout through the cabinet wall.
Position Front and Back Holes Correctly
Drill front holes 1 inch less than the shelf depth from the back wall. For a 12-inch shelf, drill front holes at 11 inches from the rear. Align back holes near the cabinet’s back edge. Use the jig’s indicator pin to maintain consistent vertical spacing, typically 1 inch between holes. Repeat on all four side locations. Apply painter’s tape over the drilling area to reduce tear-out on melamine surfaces.
Insert Pins and Test Shelf Level
Cut your shelf to size, making it ¼ inch narrower than the cabinet’s narrowest width for easy insertion. Sand edges smooth. Insert one pin into each of the four hole sets at the same height. Place the shelf on the pins and check with a level. If it tilts, re-drill slightly deeper or adjust pin positions. A well-aligned shelf holds 30 to 50 pounds depending on pin quality and wall thickness.
Mount Fixed Shelves Securely
Use Hidden Metal Connectors
Hidden metal clips grip the shelf from above and below, creating invisible support. These brackets attach to the cabinet walls, and the shelf slides into place and locks securely. Metal clips handle heavier loads than plastic and offer a clean, modern look. Available at hardware stores, they’re ideal for permanent installations where aesthetics matter.
Install L-Brackets for Visible Support
For reliable but visible support, use L-brackets positioned on both sides at the desired height. Pre-drill pilot holes, then screw into the cabinet walls. Place the shelf on top and secure from underneath with screws. Paint brackets to match the cabinet for a less noticeable appearance.
Add Shelves Without Drilling
Rest Shelves on Bull-Nosed Edges
No tools are needed when using melamine shelves with bull-nosed fronts. Cut to fit the cabinet width. Position the shelf so the rounded front edge rests on the cabinet side while the back edge touches the rear wall. This method works best in shallow cabinets 10 to 12 inches deep. Apply Command Strips to the back of the shelf for added security.
Reinforce with Adhesive Strips
Command Strips hold up to 4 pounds per strip, enough for a lightweight shelf with small items. Clean the cabinet back panel with alcohol, press the strip firmly, and wait an hour before loading. To remove, stretch the strip horizontally with a hair dryer to release the adhesive cleanly with no residue left behind.
Use Vertical Support Rods
Insert adjustable rods between the cabinet floor and ceiling. Rest the shelf on top of the rods. These are ideal for deep cabinets or RVs. Rods are tension-mounted, fully removable, and require no tools.
Avoid Common Installation Mistakes
Prevent Tear-Out When Drilling
Tear-out, splintering on the back of the hole, is common in particleboard or melamine. Prevent it by using a sharp brad-point or Forstner bit, clamping the shelf pin jig securely, applying painter’s tape over the drilling spot, drilling slowly with steady pressure, and placing a scrap wood block behind the cabinet wall.
Pro Tip: Always test-drill on scrap material first to fine-tune depth and technique.
Fix Wobbly or Uneven Shelves
Shelves wobble due to misaligned holes or warped material. Ensure all four hole sets start at the same height, the jig is clamped straight, the shelf is cut flat and level, and pins are inserted into matching holes on both sides. Use a laser level for multi-shelf cabinets to keep everything aligned.
Maximize Cabinet Storage Space
Double Capacity with Two Extra Shelves
Adding just two extra shelves can double your cabinet’s storage capacity. Use adjustable pins to create tiered zones, with tall bottles below and small jars above. In pantries, dedicate lower shelves to heavy items and upper ones to lighter goods.
Store Items Strategically
Keep frequently used items at eye or waist level. Store drinkware on their sides for visibility. Use a 5-inch deep shelf mounted to the back for lid storage. Install a 5.5-inch narrow shelf along the back wall for spices. Avoid stacking items, as buried items get forgotten and create clutter.
Build Shelves Around Obstructions
Notch Shelves Around Cabinet Braces
Cabinet braces or face frames can block shelf insertion. Solve this by cutting corner notches in the shelf. Mark the obstruction’s size and location, then use a jigsaw to remove a 1-inch to 2-inch square from each back corner. Test-fit before final installation.
Add Face Frames for Clean Edges
If gaps appear between the shelf and cabinet walls, attach thin wood strips to cover the gaps and mimic the cabinet design. Use a front wood strip to hide exposed plywood edges. These can remain unpainted if hidden behind the shelf.
Install a Rear Lip to Prevent Sliding
Prevent items from sliding off by adding a 1-inch tall vertical lip at the back edge. Use thin wood or plastic trim secured with adhesive or small screws. This is especially useful in deep base cabinets.
Understand Weight Capacity Limits

| Material | Maximum Span | Weight Limit |
|---|---|---|
| Melamine | 24 inches | 30 to 50 lbs |
| ¾-inch Plywood | 36 inches | 50+ lbs |
| Particleboard | 24 inches | 30 to 40 lbs |
Shelf pins typically support 30 to 50 pounds per shelf, but the cabinet wall must be at least ½ inch thick. Sagging usually occurs in the shelf material itself, not the pins. For shelves over 24 inches, install a center support bracket or vertical brace to prevent sagging under heavy loads.
Save Money on Materials
Buy Clearance or Damaged Shelves
Full shelves cost $8 to $12, but clearance or damaged bins at IKEA, Home Depot, or Lowe’s often sell them for $2 to $5. Minor edge chips are hidden once installed. One user found a perfect shelf for $2 that looks brand new.
Cut Multiple Shelves from One Sheet
A 4-foot by 8-foot melamine sheet costs $30 to $50 and yields 10 or more shelves. Have the store cut it, or use a circular saw with a guide for clean cuts. Buy once and use for multiple cabinets.
Reuse Old Hardware
Save shelf pins, brackets, or supports from old furniture. Command Strips are reusable if you peel them off carefully and reapply them if the adhesive remains intact.
Maintain Shelves for Long Life
Clean Without Damaging Surfaces
Wipe melamine shelves with a damp cloth and avoid harsh chemicals that degrade the laminate. For wood shelves, reseal annually with polyurethane if exposed to humidity. Inspect pins and supports every 6 to 12 months for looseness.
Check for Long-Term Wear
Melamine resists scratches but may delaminate if chipped. Plywood edges need sealing to prevent water damage. Metal supports last longer than plastic, so check for corrosion in humid bathrooms. Adhesive strips lose grip over time, so replace them every 1 to 2 years in high-use areas.
Customize Shelves for Style and Function
Match Cabinet Aesthetics
Choose shelf color to match your cabinetry, whether white, oak, or walnut. Use bull-nosed melamine edges for a factory-finish look. Conceal visible screws or brackets with matching stickers or paint.
Personalize with Contact Paper
Transform plain shelves with decorative contact paper in marble, wood grain, or patterned designs. Apply with spray adhesive for a smooth, bubble-free finish. This is easy to replace when styles change.
Add Under-Shelf Lighting
Install LED strip lights underneath shelves for better visibility and ambiance. Battery-powered strips are tool-free and ideal for renters. They’re perfect for dark pantries or deep cabinets.
Frequently Asked Questions About Installing Cabinet Shelves
What is the easiest way to add a shelf to a cabinet without drilling?
Use melamine shelves with bull-nosed edges combined with Command Strips. Cut the shelf to fit snugly, then apply adhesive strips to the back and press firmly against the cabinet back panel. This method holds lightweight items and requires no tools.
How much weight can cabinet shelf pins hold?
Shelf pins typically support 30 to 50 pounds per shelf, depending on pin quality and cabinet wall thickness. Use ¼-inch pins rather than 5mm pins for better stability. The shelf material itself usually fails before the pins do.
Can I install a shelf in a particleboard cabinet?
Yes, but with caution. Particleboard is weaker than plywood or melamine. Use a sharp Brad-Point bit to prevent tear-out, apply painter’s tape before drilling, and avoid overloading the shelf beyond 30 to 40 pounds. Consider using adhesive supports for added security.
How do I know what size shelf to buy?
Measure your cabinet’s interior at the top, middle, and bottom, then use the narrowest measurement. Subtract ¼ inch from that width for easy insertion. For depth, measure from the back wall to the cabinet opening and subtract 1 inch for front hole positioning.
Do I need special tools to install adjustable shelves?
A shelf pin jig is essential for precise hole alignment. This kit includes a guide, a drill bit with a stop collar, and an indicator pin. You’ll also need a drill, measuring tape, level, and clamps. The jig ensures holes are evenly spaced and properly aligned.
Key Takeaways for Installing Cabinet Shelves
Installing a shelf in a cabinet transforms wasted vertical space into functional storage. Choose adjustable shelves for flexibility, fixed shelves for heavy loads, and tool-free options for rentals. Use ¾-inch plywood or melamine for durability, and always subtract ¼ inch from cabinet width for easy insertion. Prevent tear-out by using sharp bits and painter’s tape, and add center supports for spans over 24 inches. With the right materials and careful measurement, your new shelf will look and perform like it was always meant to be there. Start with one cabinet today and experience the immediate organization improvement.


