
Installing a ClosetMaid wire shelf can transform your closet from cluttered to organized in under two hours. Whether you are upgrading a bedroom reach-in or building a custom storage system, knowing how to install ClosetMaid shelf properly ensures long-term stability, safety, and flexibility. These modular systems, especially the ShelfTrack and Fixed Mount configurations, are designed for DIYers, but success hinges on one critical factor: anchoring into wall studs. This guide walks you through every step, from measuring your space and locating studs to cutting shelves and securing hardware, using only tools found in most home toolkits.
You will learn pro tips for avoiding common mistakes, optimizing load capacity, and achieving a clean, professional fit. By the end, you will be able to install a shelf that holds heavy bins, shoes, or folded clothes without sagging, rattling, or pulling away from the wall.
Measure Your Space Before Buying Materials
Before touching a drill, measure your closet thoroughly. Walls are rarely square, and small gaps or overlaps can ruin alignment if you skip this step.
Check Height, Width, and Depth
Measure your closet at multiple points to get accurate dimensions. Use the narrowest measurement for width to ensure your shelf fits properly.
- Height: Measure from floor to ceiling at multiple points. Standard top shelf height is 84 inches, just below the top wall plate.
- Width: Record the inner distance between side walls at top, middle, and bottom. Use the narrowest measurement.
- Depth: Choose between 12 inches, 16 inches, or 24 inches shelves based on your needs. Most closets use 12-inch or 16-inch depths.
Pro Tip: Always cut shelves slightly shorter than the measured width to allow for baseboards or wall irregularities.
Mark Stud Locations Early
Use a stud finder to locate vertical studs behind drywall. Standard spacing is 16 inches on center, but verify with multiple scans.
- Mark each stud center with an X
- Tape over extra marks with blue painter tape to avoid confusion later
Gather the Right Tools
Having the correct tools streamlines installation and prevents damage to components. Most items are standard household tools.
Essential Tool List
- Stud finder
- Level (laser or bubble)
- Cordless drill
- Drill bits: 1/4-inch for pilot holes, 1/2-inch for toggle bolts
- Hacksaw or bolt cutters for cutting wire shelves
- Utility knife to trim anchor remnants
- Needle-nose pliers for removing plastic rings from clips
- Pencil and tape measure
Budget Hack: A $11 bolt cutter from Harbor Freight cuts through 12-foot wire panels cleanly, faster than a hacksaw.
Choose Your Mounting System

ClosetMaid offers two main wall-mounted systems: ShelfTrack and Fixed Mount. Pick based on adjustability and support needs.
ShelfTrack vs Fixed Mount Comparison
| Feature | ShelfTrack | Fixed Mount |
|---|---|---|
| Adjustability | Brackets slide up and down on vertical standards | Shelves fixed at one height |
| Stud Requirement | Standards must be secured to studs | Brackets require stud mounting |
| Best For | Frequent reconfiguration and multi-shelf systems | Permanent and high-load installations |
When to Use Which: Use ShelfTrack if you plan to change shelf heights later for seasonal storage. Use Fixed Mount for heavy loads like books or toolboxes where rigidity matters most.
Install ShelfTrack System
The ShelfTrack system uses vertical metal standards and adjustable brackets for flexible shelving that you can reconfigure later.
Mount the Hang Track
- Position the Hang Track along your level line, typically at 84 inches.
- Mark screw holes. At least one hole must hit a stud.
- For stud locations, drive screw directly into wood.
- For non-stud spots, pre-drill a 1/2-inch hole, insert toggle bolt through track, push toggle into wall, then tighten.
Best Practice: Alternate stud screws and toggles for balanced support across the entire track.
Attach Shelving Standards
- Standards come in five lengths. Pick based on desired shelf count.
- Mount each standard with one central screw first.
- Use a plumb line or level to ensure it is perfectly vertical before tightening fully.
- Space standards no more than 24 inches apart.
Snap in Brackets and Shelf
- Slide adjustable brackets onto the standard at your chosen height.
- Cap shelf ends with large front and small rear end caps.
- Lower the shelf into brackets from above. Do not exceed 4 inches of overhang on either side.
Warning: Overhanging too far risks sagging or collapse under heavy load.
Set Up Fixed Mount System
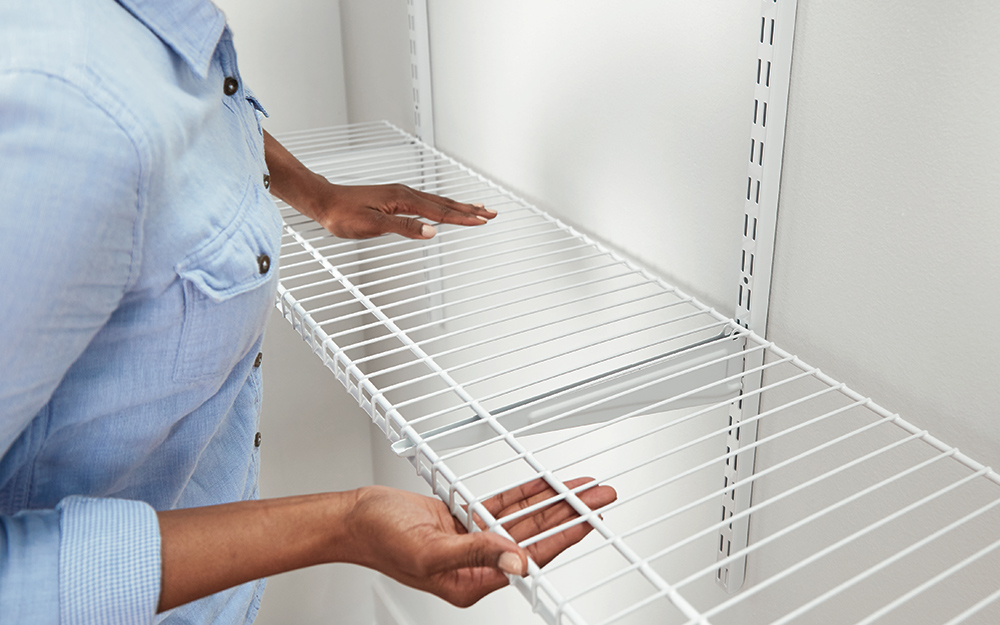
This method uses wall clips and support brackets for a rigid, permanent shelf that maximizes weight capacity.
Cut Shelf to Fit
Most stock shelves are 72 inches long, too big for many closets.
- Measure your opening carefully.
- Mark cut line across wires.
- Use bolt cutters or hacksaw to make a clean cut.
- Snap end caps onto both ends to cover sharp edges.
Retail Option: Home Depot or Amazon often cut shelves for free. Just request it at checkout.
Install Wall Clips
ClosetMaid recommends first clip 2 inches from each end, with additional clips every 12 to 16 inches. For a 4.5 to 5-foot shelf, use 5 clips total.
- Drill 1/4-inch pilot hole.
- Tap in drywall anchor.
- Push wall clip into hole by hand.
Convert One Clip for Stud Mount
For added strength, replace one anchor with a direct stud screw.
- Remove plastic ring from clip using needle-nose pliers.
- Trim excess plastic with utility knife.
- Drill pilot hole slightly smaller than screw.
- Drive screw into stud. No anchor needed.
Why It Matters: Even one stud-mounted clip reduces long-term sag by over 60 percent.
Attach Support Brackets
- Brackets are depth-specific. Use 12-inch brackets for 12-inch shelves.
- Position so top slot fits around the narrow spoke of the shelf.
- Align screw hole with stud, drill pilot hole, then drive long screw.
- Install at both ends and midspan every 36 inches.
Note: If the wall is not flat, gently flex the bracket to seat it fully.
Final Shelf Placement
- For long shelves, lay on floor and slide diagonally into closet.
- Insert back edge into rear connectors.
- Tilt up and hook front support hooks into brackets.
- Secure with screws or nails. Screws with washers are preferred.
User Insight: It feels awkward at first, but when snapped in, the shelf becomes rattle-free and solid.
Handle Special Configurations
Some setups require extra hardware for stability and function beyond standard shelf installation.
Install Corner Supports
When two shelves meet at a 90-degree angle, use Corner Support brackets. Mount each side into studs on adjacent walls to ensure seamless alignment and prevent wobbling.
Add SuperSlide Hanger Bars
For continuous clothing rods that allow hangers to slide smoothly across the entire shelf width.
- Use J-brackets that snap between horizontal wires.
- Install one support every 3 feet.
- Insert end caps on rod ends.
- Press bar down until it clicks into place.
Pro Tip: Flip the bracket upward from beneath, tilt back, then snap into wire for easiest installation.
Integrate Drawers and Organizers
- ShelfTrack Drawers slide into vertical standards like shelves.
- Stackable units mount directly to wall or sit on existing shelf.
- Deep baskets hang via adapter brackets.
Compatibility: All ShelfTrack accessories share the same notch pattern, so you can swap freely between components.
Maximize Load and Longevity
Even the best installation fails if overloaded or poorly maintained. Follow these guidelines to ensure your shelf lasts for decades.
Follow Weight Guidelines
The system is designed for clothing, bins, and shoes. Place heavy items directly over studs or near support brackets. Avoid front-heavy loads that can loosen back clips over time.
Safety Tip: Drywall clips prevent pull-away but do not bear weight. Only brackets mounted into studs support the load.
Prevent Sagging and Damage
- Never exceed 4-inch overhang on either side
- Double-check all brackets are level before final tightening
- Retighten screws and toggles after 2 to 4 weeks as the house settles
Annual Maintenance Checklist
- Inspect for loose screws or bent brackets
- Clean with damp cloth. No harsh chemicals.
- Replace damaged end caps immediately
Real-World Data: Users report zero failures after 10 plus years when installed correctly.
Optimize Cost and Time
You can build a full shelf for around $15, depending on size and accessories. Smart sourcing reduces both cost and installation time.
Smart Sourcing Tips
- Buy 12-foot shelf panels at Home Depot for $15 and cut them yourself
- Order online for pre-cut shelves with free shipping
- Use bolt cutters instead of power tools. They are cheaper and effective.
Time Estimate: A single shelf takes 1 to 2 hours. A full closet system takes 3 to 4 hours with proper planning.
Frequently Asked Questions About ClosetMaid Shelf Installation
Can I install ClosetMaid shelving without finding studs?
You must anchor support brackets into studs for the system to bear weight. Drywall anchors alone will not support heavy loads and can pull away over time. Use toggle bolts for non-stud locations on the hang track, but always secure main support brackets to studs.
What tools do I need to cut a ClosetMaid wire shelf?
Bolt cutters or a hacksaw work best for cutting wire shelves. Bolt cutters, especially affordable models around $11, make clean cuts through the wire grid. Wear gloves to protect your hands from sharp wire ends, and always attach end caps after cutting.
How far apart should ClosetMaid brackets be spaced?
Support brackets should be installed every 36 inches, with one at each end within 6 inches of the shelf edge. Wall clips for the Fixed Mount system go every 12 to 16 inches, with the first clip 2 inches from each end. Shelving standards for ShelfTrack systems should be no more than 24 inches apart.
Can I adjust ShelfTrack shelf height after installation?
Yes, the ShelfTrack system is designed for adjustability. Simply lift the shelf slightly, slide the bracket to a new notch position on the vertical standard, and lower the shelf back into place. This makes it ideal for seasonal storage changes or reorganizing your closet layout.
How much weight can a ClosetMaid shelf hold?
The system is rated for typical closet loads including clothing, shoes, and storage bins. Heavy items like books or toolboxes should be placed directly over studs or near support brackets. Following the 4-inch maximum overhang rule prevents sagging and maintains structural integrity.
Key Takeaways for Installing ClosetMaid Shelves
Installing a ClosetMaid shelf is a rewarding DIY project that delivers professional-grade organization. The most critical factor for success is proper stud detection. All weight-bearing brackets must anchor directly into wall studs, while toggle bolts work only for secondary support on the hang track. Take time to measure your space accurately at multiple points, and always cut shelves slightly shorter to account for wall irregularities and baseboards.
Choose between ShelfTrack for flexibility or Fixed Mount for maximum load capacity based on your long-term needs. Regardless of system, respect the 4-inch overhang limit, space brackets every 36 inches, and retighten hardware after the first month. With clear planning and basic tools, any DIYer can achieve a closet system that lasts over a decade without sagging or failure.