
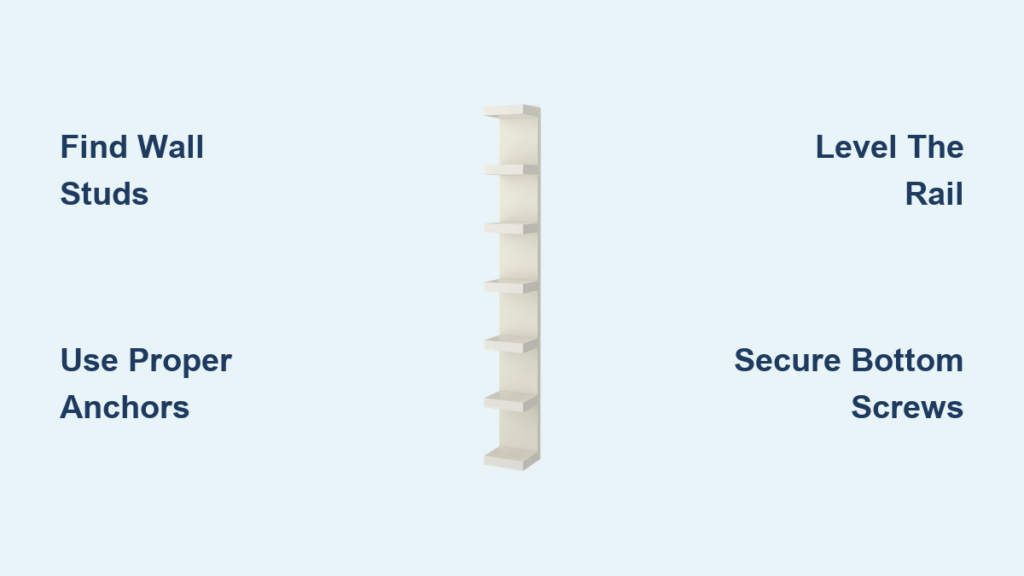
If you have ever stared at a bare wall wondering how to add storage without cluttering the space, the IKEA LACK floating shelf might be your answer. Lightweight, minimalist, and budget-friendly, this sleek shelf creates the illusion of floating on the wall thanks to a hidden metal rail mounted securely behind it. To Install Lack Shelf correctly, proper measurements, suitable wall anchors, and secure mounting are essential. Otherwise, a poorly installed shelf can sag, wobble, or even fall.
This guide shows you how to Install Lack Shelf systems step by step—from finding wall studs to tightening the final screw. Whether you’re mounting a bedside shelf or a child-friendly display, you’ll learn how to avoid common mistakes, maximize stability, and achieve a clean, professional finish.
Choose the Right Location for Your LACK Shelf
Where you place your LACK shelf affects both function and safety. Get this step wrong, and even a perfectly installed shelf will feel awkward or unusable.
Match Height to Your Use Case
The shelf height depends entirely on how you plan to use it. For a bedside setup, mount the shelf 2 inches above your mattress for easy reach. This height lets you grab your phone, glasses, or book without stretching. For child-accessible placement, position the top of the shelf at 33 to 45 inches from the floor depending on age. A 33-inch height works well for toddlers while older children can handle higher placements. For hallway or living room use, aim for eye-level or slightly below when standing, typically 48 to 60 inches from the floor.
Plan for Growth and Flexibility
In kids rooms or evolving spaces, install rails with future adjustments in mind. Leave vertical room so lower shelves can be moved up as the child grows. A 10 to 12 inch gap between shelf centers gives you flexibility later.
Pro tip: Use painter tape to outline the shelf on the wall. Step back and live with it for a day. Does it feel right? Adjust before drilling.
Find and Mark Wall Studs

Studs are your best friend when mounting any shelf. They provide the strongest anchor points, especially important since the LACK shelf relies on a slim metal rail for support.
Use a Magnetic Stud Finder
Slowly move the finder across the wall near your planned shelf location. When it sticks, you have found a stud. Studs are typically 1.5 inches wide and spaced 16 or 24 inches apart. Mark both edges and the center of the stud with a pencil.
Warning: Never mount a LACK shelf into drywall alone without anchors. Drywall cannot support weight long-term.
Maximize Stud Engagement
The ideal setup mounts both ends of the rail into studs. Reality check: often only one end aligns with a stud. That is okay. Use heavy-duty anchors for the other holes. Even one stud connection significantly boosts stability.
Level and Mark Mounting Points
A crooked shelf ruins the clean look of a floating design. A level installation starts with precise marking.
Draw a Straight Reference Line
Use a 4-foot spirit level or laser level to draw a horizontal line where the center of the rail will go. For multiple shelves, use the same level line or measure consistent spacing such as 12 inches between shelf centers.
Transfer Hole Positions Accurately
Hold the metal rail against the wall aligned with your level line. Mark the center of each pre-drilled hole on the rail. Better method: peel back the protective paper on the back of the shelf and stick it to the wall like a stencil. It shows exact hole positions.
Avoid this mistake: Off-by-half-inch misalignment is the number one reason shelves do not sit flush. Double-check every mark.
Drill Holes and Insert Anchors
Now it is time to make holes, but only where needed. Your wall type determines what kind of fastener to use.
Drilling Into Studs
Use a drill bit slightly smaller than your screw diameter. For example, use 1/8 inch for #6 screws. Drill pilot holes through the stud at marked points. No anchors are needed because wood provides natural grip.
Drilling Into Drywall
Use a bit matching your anchor size. Check the packaging to confirm. Drill straight, clean holes. Insert toggle bolts or molly anchors. These expand behind the drywall for superior hold. Push anchors in until flush with the wall.
Pro upgrade: Add small washers under screw heads when using anchors. They prevent the screw from pulling through soft drywall, especially if the hole is tight.
Attach the Mounting Rail
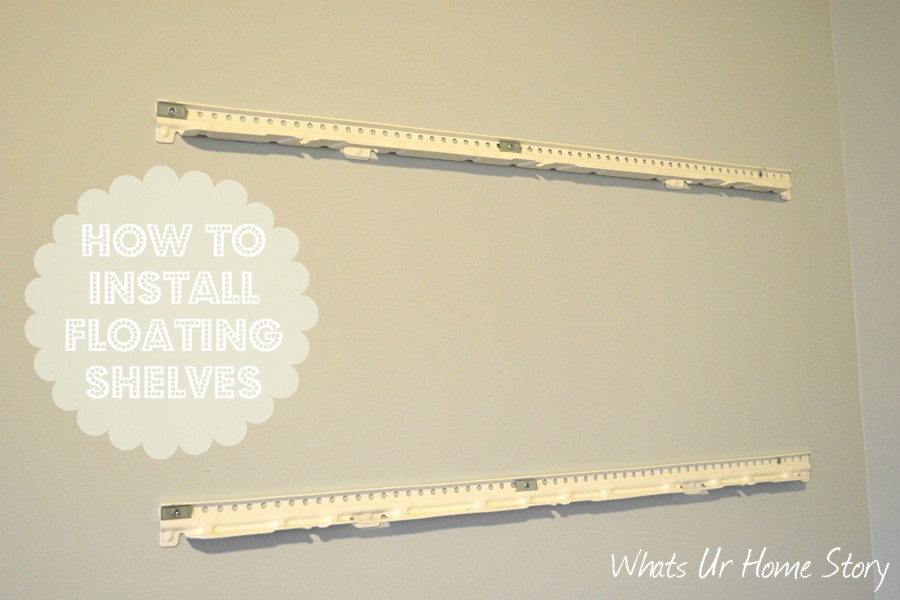
The metal rail is the backbone of your floating shelf. Install it wrong, and the shelf will not fit, or worse, it could fail.
Check Rail Orientation
The rail has a top and bottom. The side with downward-facing support rods must face down. These rods slide into the groove on the back of the shelf. If flipped, the shelf will not lock in.
Secure the Rail
Align the rail with your marked holes. Insert screws through the rail into studs or anchors. Drive screws until snug. Do not overtighten, which can strip anchors or bend the rail. Re-check levelness as you go.
Visual cue: The rail should sit perfectly flat against the wall with no gaps.
Mount the Shelf to the Rail
There are two common methods for attaching the LACK shelf depending on size and model.
Slide-On Shelves
Most LACK shelves use this method. Lift the shelf and slide it backward onto the rail. The rear groove should click over the support rods. Push until fully seated. No front gap should be visible.
Screw-In Bottom Fixation
Some small LACK shelves use a picture-frame hanger with two hooks. Hang the shelf on the rail first. Then insert the included screws through the bottom of the shelf into the rail. These screws prevent the shelf from lifting off under front pressure.
Critical step: Never skip the bottom screws. Without them, the shelf can dislodge if bumped or overloaded.
Test Stability and Load Capacity
Your shelf looks great, but is it safe? Perform these checks before loading your items.
Perform a Stability Test
Press down firmly on the front edge. There should be no wobbling or movement. Gently pull outward at the front. The shelf should not shift or lift. Check that the back sits flush against the wall.
Know the Weight Limit
Maximum safe load is 10 to 15 pounds when properly installed. This is lower if only drywall anchors are used. It is higher if mounted into one or more studs. The LACK shelf is designed for lightweight items.
Distribute Weight Wisely
Place heavier items closer to the wall. Avoid loading the front edge. For example, do not rest a heavy speaker at the front. The shelf is ideal for lightweight items like books, phones, lamps, and photo frames.
Annual check: Tighten screws and inspect anchors once a year, especially in humid areas.
Fix Common Installation Problems
Even careful installers run into issues. Here is how to solve them fast.
Shelf Is Not Flush Against the Wall
The cause is holes off by half an inch or more. Re-drill with precise alignment. Use the painter tape stencil method for accuracy. A small gap across multiple shelves can look intentional in modern decor if consistent.
Shelf Sags or Wobbles
The cause is weak anchors or no stud support. Replace plastic anchors with toggle bolts. If possible, reposition the rail to hit a stud. Add washers under screw heads for better grip.
Shelf Detaches Easily
The cause is missing bottom screws. Immediately install the small screws through the bottom of the shelf into the rail. These are easy to overlook but critical for safety.
Rail Is Not Level
The cause is poor initial marking. Remove the rail, re-mark with laser level, and re-drill. Use a laser for multi-shelf setups. It ensures perfect alignment every time.
Optimize for Kids Rooms and Future Use
Installing shelves in a child room? Plan ahead for growth and safety.
Install for Growth
Mount lower shelves with space to move them up later. Use adjustable rails or leave wall space above for repositioning. For example, install the first shelf at 33 inches and leave 18 inches above for future expansion.
Choose Safe Placement
Avoid placing shelves above cribs or near climbing furniture. Keep cords from lamps and chargers out of reach. Secure all items that could tip or fall.
Bonus: Pair with wall-mounted lights or hooks for a full minimalist setup.
Professional Finish Tips for LACK Shelf Installation
Use the Right Tools
A cordless 18V driver gives control and power. A laser level saves time on multi-shelf jobs. A magnetic stud finder is reliable and affordable.
Shop Smart at IKEA
Stores often open at 11:00 AM. Arrive early or wait outside. Use in-store kiosks to find product codes. LACK shelves are in the Self-Serve Warehouse section. Follow signs from Market Hall.
Maintain Long-Term Performance
Wipe the shelf with a damp cloth. Avoid harsh cleaners. Re-tighten screws every 6 to 12 months. Watch for paint cracks around anchors. This is a sign of movement.
Frequently Asked Questions About Installing IKEA LACK Shelves
How much weight can an IKEA LACK shelf hold?
When properly mounted into studs with reliable anchors, the LACK shelf supports 10 to 15 pounds. Load capacity drops if only drywall anchors are used. Always distribute heavier items toward the back of the shelf near the wall.
Can I install a LACK shelf on drywall without studs?
Yes, but you must use proper wall anchors. Toggle bolts or molly anchors work best. Never rely on drywall alone because it cannot support weight long-term. The shelf will eventually detach.
Why is my LACK shelf not sitting flush against the wall?
This usually happens when mounting holes are misaligned by half an inch or more. Use the painter tape stencil method to transfer exact hole positions. Re-drill with precise measurement to fix the issue.
Do I need to screw the LACK shelf from the bottom?
Yes. Many LACK shelves require bottom screws to secure them to the rail. This step prevents the shelf from dislodging if bumped or overloaded. It is a critical safety step that many people skip.
What height should I mount a LACK shelf for a bedside nightstand?
Mount the shelf approximately 2 inches above your mattress surface and about 10 inches from the edge of the bed. This provides easy access to items without interfering with movement around the bed.
Can I adjust a LACK shelf height after installation?
The shelf itself cannot be adjusted, but you can reinstall the mounting rail higher if needed. In children rooms, plan ahead by leaving extra vertical space above the first shelf so you can move it up as the child grows.
Key Takeaways for Installing Your IKEA LACK Shelf
The IKEA LACK shelf is more than cheap storage. It is a design solution that works when installed right. By anchoring into studs, using quality fasteners, leveling precisely, and securing the shelf from below, you create a safe, sturdy, and stylish addition to any room.
The most important steps are finding wall studs whenever possible and always using anchors in drywall. Never skip the bottom screws that lock the shelf to the rail. Measure twice and drill once to avoid alignment problems that cause gaps. Use a laser level for perfect results.
Whether you are building a floating nightstand or a kid-friendly display, this simple shelf delivers big results with the right technique. Take your time with the installation, test the stability before loading it up, and check the hardware annually to keep it secure for years to come.


