

Installing a rack mount transforms chaotic wiring and scattered gear into a clean, efficient, and scalable network setup. Whether you’re setting up a server room, home lab, or wall-mounted networking closet, knowing how to install a rack mount properly ensures your equipment stays secure, cool, and organized. This guide walks you through every step, from selecting the right rack to final testing, using best practices from real-world deployments.
By the end, you’ll have a fully functional, future-ready rack system that supports high-speed networking, easy maintenance, and room for growth.
Choose the Right Rack Type for Your Setup
Selecting the correct rack sets the foundation for a successful installation. The three main types serve different needs based on space, load, and environment.
Floor-Standing Rack Cabinets
Ideal for data centers or server rooms, these cabinets offer high capacity and full protection.
- Height typically ranges from 42U to 48U
- Features include locking doors, side panels, ventilation, and cable management arms
- Weight support reaches up to 2,000+ lb when floor-anchored
- Best suited for enterprise networks, ISPs, or multi-device setups
Anchor floor racks to prevent tipping, especially critical in earthquake-prone areas.
Wall-Mounted Enclosures (4U to 12U)
Perfect for compact spaces like home offices or network closets.
- Common size is 4U, fitting UDM-Pro Max, switches, patch panels, and UPS units
- Depth can be as shallow as 3 inches to save valuable space
- Mounting requires secure attachment to wall studs or toggle bolts for drywall
- Load capacity ranges from 45 to 121 lb depending on fastener ratings
Use a stud finder first. If studs do not align with mounting holes, toggle bolts are essential.
Open-Frame Racks (2-Post or 4-Post)
Cost-effective and ventilated, but less secure than enclosed cabinets.
- 2-post racks work best for lightweight gear like routers and switches
- 4-post racks support full servers with front and rear cage nuts
- No doors or panels means maximum airflow with minimum security
- Adapter kits are required for non-standard devices
Use 4-post racks when you need rear access or plan to install PDUs.
Check Equipment Compatibility Before Installing
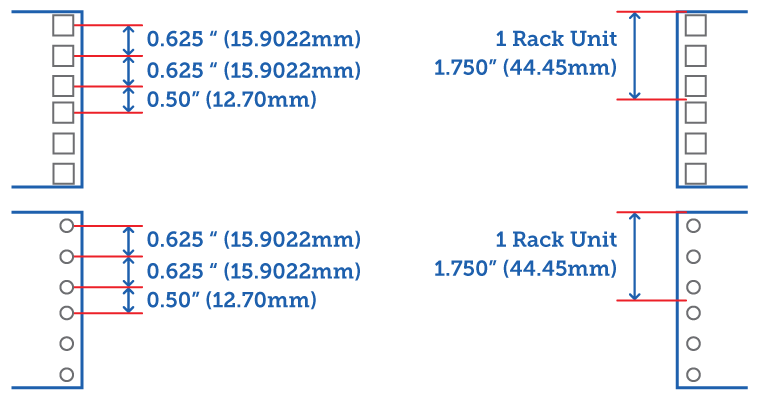
Before mounting anything, verify all gear fits your rack both physically and electrically.
Match Rack Units and Width
- 1U equals 1.75 inches (44.45 mm) in height
- Standard width is 19 inches, nearly universal across manufacturers
- Measure device height in U and confirm available space in your rack
Example: 4U Wall Rack Loadout
| Device | U Size | Weight |
|---|---|---|
| UDM-Pro Max | 1U | 10.4 lb |
| 24-Port Switch | 1U | ~15 lb |
| Patch Panel | 1U | 3 lb |
| 500 VA UPS | 1U | 18 lb |
| Total | 4U | ~47 lb |
Always leave extra U slots for PDUs, KVMs, or future gear.
Confirm Mounting Depth and Weight Limits
- Measure device depth and compare to rack depth specifications
- Many rails have adjustable brackets that slide to match server depth
- Ensure total weight stays under the rack’s rated capacity
- Wall racks with 121 lb max capacity handle most 4U setups safely
Overloading a wall mount risks detachment. Never exceed fastener limits.
Identify Rack Hole Types and Required Hardware

Different racks use different hole patterns. Know yours before buying screws or rails.
| Hole Type | Required Hardware | Installation Tip |
|---|---|---|
| Threaded (10-32 UNC) | 10-32 rack screws | Direct screw-in, no extra parts needed |
| Square (unthreaded) | Cage nuts plus 10-32 screws | Insert cage nut first, it snaps into place |
| Round (unthreaded) | Shoulder bolts or clips | Rare, used with OEM server rails |
| J-slot or Tool-less | Clip-in rails only | No tools needed for fast deployment |
Cage nuts are mandatory for square-hole racks. Keep spares on hand.
Essential Mounting Hardware
- 10-32 rack screws for standard panels, shelves, and rails
- M5 screws required for UniFi UDM-Pro Max and some switches
- Cage nuts (10-32) snap into square holes to create threaded anchor points
- Toggle bolts (1/2 inch) for wall mounts without stud access
- Thumb screws for tool-less option on universal rails
- Shoulder bolts used with OEM rails like HPE or Dell
Use plastic washers to prevent over-tightening and protect chassis finishes.
Gather Essential Tools for Rack Installation
You will need basic tools, many of which are household items.
- Drill with 1/2 inch bit for toggle bolt installation
- Stud finder, critical for wall mounts
- Phillips and flathead screwdrivers
- Flush cutter to trim cable ties cleanly
- Cable stripper for Ethernet termination
- Panduit termination tool for keystone modules
- Label maker such as Diamond Label Manager 160
A flush cutter prevents jagged tie ends that can snag cables during maintenance.
Install a Floor-Standing Rack Cabinet
Follow these steps for enterprise-grade installations with full cable management.
Prepare Floor and Route Cables
- Clear the installation area and mark cable paths
- Lay adhesive-backed floor channels along the intended route
- Run all network cables inside the channel
- Snap cover on and press firmly to secure
- Bundle excess cable and trim ties flush
Pre-route cables before installing the rack to avoid lifting heavy gear over existing wires.
Terminate Cables and Mount Patch Panel
- Strip outer jacket with cable stripper
- Separate twisted pairs and trim insulation flush
- Terminate with Panduit Mini-Cons AK modules, placing brown and green pairs on front of cap and blue and orange pairs on back
- Press each wire into matching color channel
- Use Panduit tool to punch down and cut excess wire
- Insert module into patch panel housing
Label each port during installation. This saves hours of confusion later.
Mount Patch Panel and Cable Manager
- Secure Bandwidth patch panel with 10-32 screws
- Install side-mounted cable manager for organization
- Add pass-through panel at opening to block dust
- Label ports using 6 mm cassette with 10-point font, limiting text to 6 characters like “ISP”
- Affix labels and remove protective film
Use Velcro straps in cable manager for easy reconfiguration.
Mount a Wall-Mounted 4U Rack
Ideal for home labs and small offices, wall-mounted racks save space while looking professional.
Secure Rack to Wall
- Use stud finder to locate wall studs
- Mark positions with blue tape for visibility
- If holes do not align with studs, drill 1/2 inch holes for toggle bolts
- Insert toggle bolts and tighten until secure
- Hang rack and fasten with screws
Mount rack approximately 8 inches from floor to avoid kicks and allow proper airflow.
Install UPS and Network Gear
Mount 500 VA UPS
- Attach rack ears to UPS using M5 screws
- Use only four cage nuts to avoid over-mounting
- Connect to surge protector first, then to UPS for battery backup
Install Patch Panel
- Insert keystone jacks before mounting the panel
- Use Cat 6A couplers for reliable connections
- Cover unused ports with silver dust covers
- For dual-ISP setups, install two couplers to pass separate lines
Blank inserts prevent dust accumulation and improve aesthetics.
Attach Router and Switch
- Slide UDM-Pro Max into rack using built-in cage nuts
- Connect to switch via SFP+ uplink cable supporting SFP28 speeds
- Use EtherLighting patch cables for speed and VLAN identification
- Protect open ports with UniFi dust covers
Route all cables through the bottom of the rack to keep the top clean and cool.
Install a 1U Server Using Combo Rails
Universal rails let you install servers from any brand, even in mixed environments.
Attach Combo Rails to Rack
- Align one rail end with 1U holes
- Hook S-hooks into rack frame
- Match opposite rail and secure hook
- Drive M5 screws into middle holes to lock rails
Ensure both rails are level. Misalignment causes binding during server installation.
Mount Server: Slide-Rail Method
- Detach inner slide rail from guide rail
- Attach inner rails to server sides, aligning buckle lock
- Clamp server onto guide rail
- Press side switches and slowly pull back into rack
This method works best for tight spaces and requires minimal clearance.
Mount Server: Pull-Out Rail Method
- Pull inner rails fully until they click into place
- One person lifts server while second aligns rails with side holes
- Lock rails into place
- Release switches and push server in
Two-person installation is recommended since servers are front-heavy.
Final Server Checks
- Confirm server is fully seated and locked
- Check for any wobble or movement
- Tighten all screws securely
- Verify power and data cables do not strain connections
Never force a server. If it binds, realign the rails before proceeding.
Master Cable Management Techniques
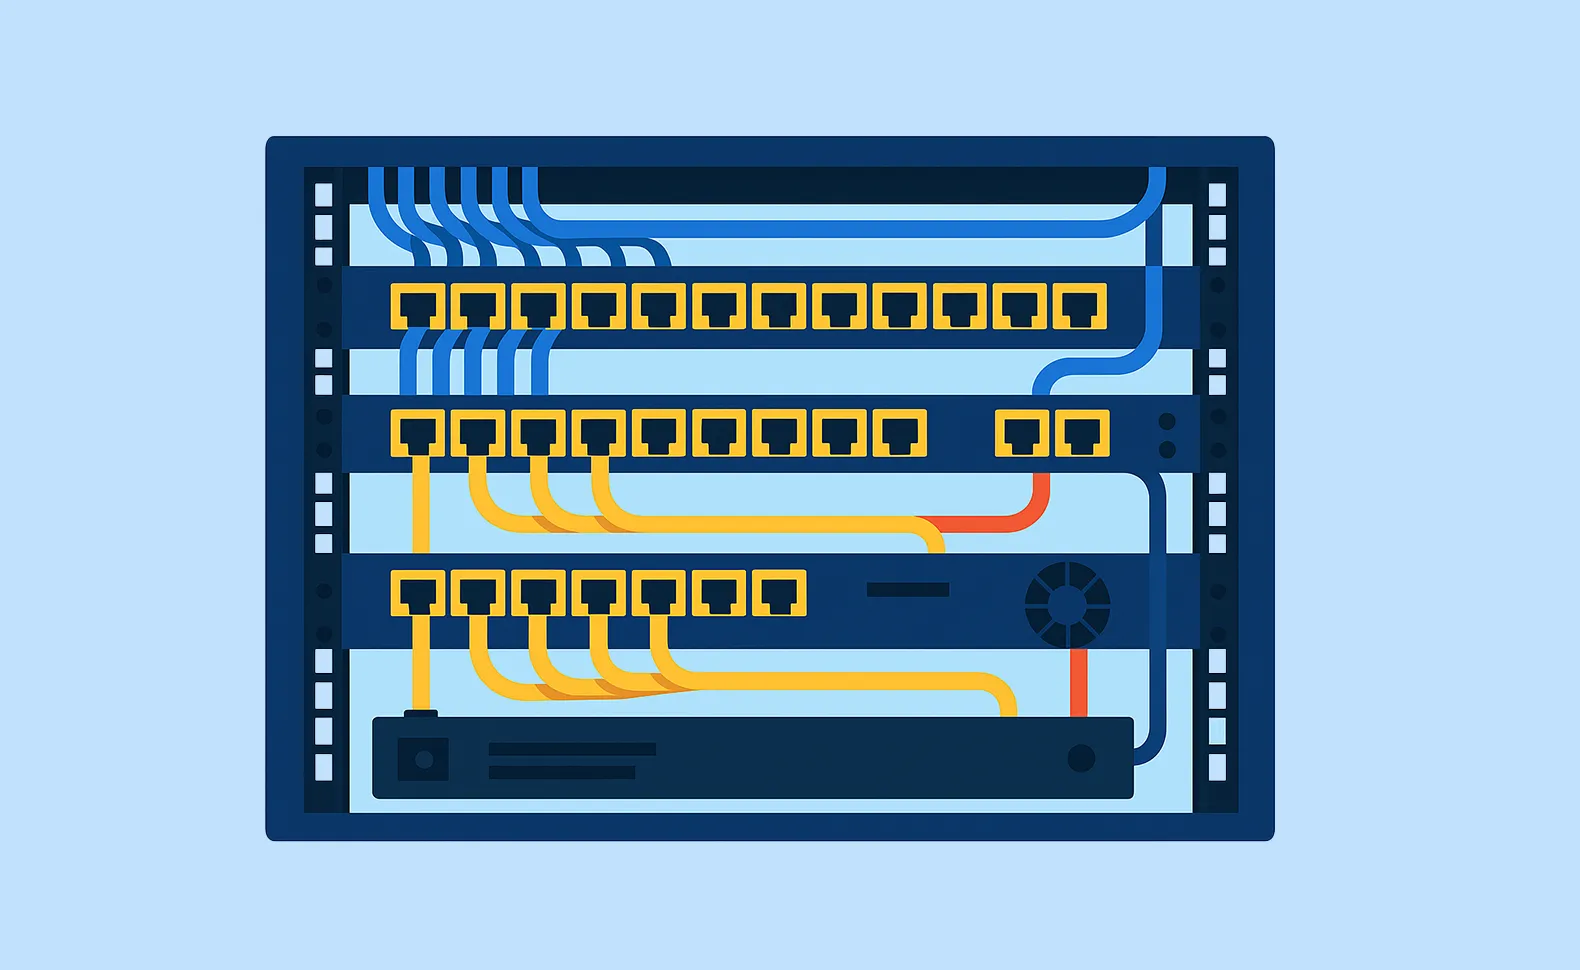
Good cable management prevents tangles, improves airflow, and simplifies troubleshooting.
Use Vertical and Horizontal Cable Bars
- Run cables down vertical managers on rack sides
- Transfer to horizontal bars near destination equipment
- Avoid crossing cables over equipment vents
Keep power and data cables separated to reduce electromagnetic interference.
Choose the Right Cable Ties and Sleeves
- Velcro ties are reusable and flexible, ideal for changes
- Releasable cable ties are stronger than Velcro but still removable
- Spiral wrap groups multiple cables neatly
- Cable sleeves provide professional appearance and easy routing
Never use zip ties permanently. They are hard to remove without cutting.
Color-Code for Clarity
Assign colors by function for instant identification.
| Color | Purpose |
|---|---|
| Red | ISP or WAN connections |
| Blue | LAN or user ports |
| Green | VLANs or security systems |
| Yellow | Management or console access |
Lighted patch cables (EtherLighting) show live status, great for monitoring.
Set Up Power and Cooling Systems
Protect your gear and maintain performance with smart power and airflow planning.
Power Distribution Options
- Small racks benefit from rack-mount surge protectors like Schneider Electric
- Large racks require PDUs mounted on front or rear
- Connect all critical gear to UPS with 500 to 1500 VA capacity
- Wire sequence: Switch to Surge Protector to UPS to Wall Outlet
Never daisy-chain power strips. This creates a fire hazard.
Ensure Proper Ventilation
- Keep 3 or more inches of clearance around all sides
- Allow front-to-back airflow, do not block intake or exhaust
- Avoid stacking heat-generating devices like UPS and switches without spacing
- Use fan trays in enclosed cabinets if needed
Hot spots reduce hardware lifespan. Monitor with a small thermometer.
Design Your Rack for Future Expansion
Build a rack that grows with your needs.
Reserve Space for Upgrades
Leave room for extra PDUs, KVM switches (1U models fit neatly), cable management bars, and at least 2 to 3 spare U slots.
Future-proofing costs nothing during initial installation.
Use Universal Rails for Flexibility
- Universal rails work with multiple brands
- Support thumb screws for tool-less swaps
- Easy to reconfigure when upgrading hardware
Server-specific rails from HPE or Dell lock you in. Use them only if committed to one brand.
Integrate a KVM Console
- 1-port KVM fits in 1U
- Lets you control multiple servers with one keyboard, mouse, and monitor
- Eliminates need for external peripherals
- Ideal for headless server environments
KVMs save space and streamline daily access.
Test and Verify Your Installation
Never assume it works. Test every connection.
Power Cycle and Check Lights
- Turn on UPS first, then surge protector
- Power up devices in order: modem to router to switch
- Watch for link lights on all ports
No light means check cable, port, or device power.
Confirm Connectivity
- Ping devices from a connected PC
- Test ISP connection through router
- Verify SFP+ uplink speed (10G if supported)
- Check patch panel labeling matches physical setup
Use a network tester for permanent cable runs.
Final Stability Check
- Ensure wall-mounted rack is level and stable
- Confirm no cable strain or loose screws
- Tighten any cage nuts or rail bolts
- Recheck toggle bolts after 24 hours as drywall may settle
A wobbling rack is a safety hazard. Fix it immediately.
Maintain Your Rack Long-Term
A well-installed rack lasts years with minimal upkeep.
Annual Maintenance Tasks
- Inspect rack stability, especially wall mounts
- Tighten loose screws or cage nuts
- Clean dust with compressed air
- Replace worn cable ties or damaged cables
- Update labels if ports change
Dust buildup insulates heat. Clean vents quarterly in dusty environments.
Warranty and Support
- Most racks come with 5 to 10 year warranty
- Rails typically covered for 1 to 3 years
- Register products to activate support
Keep receipts and model numbers in a rack maintenance log.
Frequently Asked Questions About Rack Mount Installation
What tools do I need to install a rack mount?
You will need a drill with 1/2 inch bit, stud finder, Phillips and flathead screwdrivers, flush cutter, cable stripper, Panduit termination tool, and a label maker. These tools handle everything from wall mounting to cable termination.
How do I know which rack type is right for my needs?
Floor-standing cabinets suit data centers and server rooms needing high capacity and security. Wall-mounted enclosures work best for home offices and closets with limited space. Open-frame racks are ideal for environments prioritizing airflow and cost over security.
Can I install a rack mount on drywall without studs?
Yes, use toggle bolts rated for 155 lb or higher. Drill 1/2 inch holes, insert toggle bolts, and tighten securely. Toggle bolts provide reliable support when studs are not available.
What is a cage nut and when do I need it?
A cage nut is a spring-steel nut that snaps into square holes to create threaded anchor points. You need cage nuts for square-hole racks when attaching rails, shelves, or equipment. Threaded racks do not require them.
How much weight can a wall-mounted rack hold?
Most wall-mounted racks support 45 to 121 lb depending on model and fastener type. Using toggle bolts rated above your total equipment weight ensures safe mounting.
How do I manage cables in a rack mount properly?
Use vertical and horizontal cable management bars. Route cables down vertical managers first, then into horizontal bars near destination. Separate power and data cables to reduce interference. Color-code by function using patch cables.
Key Takeaways for Installing a Rack Mount
A properly installed rack transforms disorganized equipment into a clean, professional setup that performs reliably for years. Always verify dimensions and weight capacity before mounting, use cage nuts in square-hole racks, and install a patch panel even in small setups to protect permanent wiring. Label every port and cable to save hours during troubleshooting. Use UPS and surge protection on all critical gear, route cables from the bottom to maintain airflow, and choose universal rails for flexibility when upgrading hardware later.
With the right planning and tools, how to install a rack mount becomes a straightforward project that brings order to your digital infrastructure. Start with a solid foundation, plan for future growth, and your rack will serve you well for years to come.


