
Ever pulled bacon from the oven only to find it soggy on the bottom? Or roasted a chicken with uneven browning? The secret to crisp, evenly cooked food lies in elevation, and you do not need a fancy kitchen gadget to achieve it. Whether you are roasting meat, baking fries, or building a stylish storage rack, learning how to make a baking rack transforms your cooking and kitchen organization.
This guide covers two essential types of baking racks. First, DIY oven-safe foil racks for better roasting and crisping, using no tools and costing nothing. Second, wooden baker’s racks for kitchen storage and display, perfect for intermediate DIYers. You will learn fast, reliable methods using household items or quality hardwoods.
Create a Foil Baking Rack
When you lack a metal roasting rack, aluminum foil becomes your best ally. These disposable lifts elevate food for better airflow and drainage, just like a wire rack. The methods below take only minutes to assemble and require no special skills.
Crimped Foil Ridges for Bacon
Use this accordion-style method for crispy, grease-free bacon in minutes.
- Cut a sheet of heavy-duty aluminum foil to fit your rimmed baking sheet (18″ × 13″ standard).
- Fold one edge back 1 inch, flip the foil, and repeat across the full length, forming a continuous ridged fan-fold pattern.
- Unfold gently and place in the baking sheet. The peaks will support the bacon.
- Lay strips perpendicular to the ridges, avoiding any overlap.
- Bake at 400°F (204°C) for 15 to 20 minutes until golden and crisp.
Pro Tip: Let bacon rest 1 to 2 minutes before serving. Fat drains further during this time, boosting crispness.
Air circulates under each strip, and grease collects in the foil valleys below. This method works specifically because the raised texture creates consistent airflow around every piece of bacon.
Avoid: Regular foil without pre-crumpling. It may flatten under heat. For extra strength, double-layer if heavy-duty is not available.
Build a Foil Grid for Roasts
Need to roast a chicken or pork loin? A foil rope grid offers sturdier support than crimped foil.
What You Will Need:
- Heavy-duty aluminum foil
- Disposable roasting pan (such as 16″ × 13″)
- Baking sheet for stability
Step-by-Step:
- Place the roasting pan on a baking sheet to prevent tipping.
- Cut two long foil strips and roll each tightly into a rope log.
- Lay them parallel along the pan’s length.
- Cut four shorter strips, roll into logs, and slightly arch each in the middle.
- Position these across the long ropes, forming a lattice.
- Press intersections lightly. Friction holds the structure.
- Set meat on top and roast as usual.
This method costs under $3 total and takes about 10 minutes. Discard after use with no cleanup required.
Best For: Whole chickens, small turkeys, or roasts under 5 pounds.
Reinforce for heavy loads: Double-wrap foil or use extra-wide rolls to prevent compression under larger items.
Twist Foil into Support Coils
Fastest of all? Foil coils. This method works great for roasting or dry-brining and takes under 3 minutes.
How To:
- Take a long strip of heavy-duty foil.
- Scrunch it lengthwise into a thick log.
- Twist the log into a tight spiral coil.
- Repeat to cover the pan base.
- Arrange coils flat and place meat on top.
Bonus Use: Refrigerate seasoned meat on foil coils for 2 to 24 hours. Air reaches all sides, drying the surface for a superior sear.
This method mimics the texture of a wire rack and requires no special skills. It is ideal for brined chicken, thick pork chops, or ribeye roasts.
Use Household Items as Substitutes
No foil? No problem. Common kitchen tools can lift food off the pan when you need a quick solution.
Prop Meat on Upside-Down Utensils
Place spoons or forks handle-down in the roasting pan.
Arrange 3 to 4 in a row to support poultry or roast. This elevates food one-half to 1 inch, providing minimal but effective lift. The arrangement allows limited fat drainage and slight airflow.
Limitation: Narrow contact points may leave marks on meat or wobble under weight. Use only for light dishes, not recommended for large turkeys or heavy cuts.
Repurpose a Cooling Rack
Already own a wire cooling rack? Use it as a roasting rack.
- Line a baking sheet with foil.
- Set the metal rack on top.
- Place food directly on the wires.
Benefits:
- Maximum airflow and browning
- Reusable and dishwasher-safe
- Perfect for bacon, fries, or small roasts
Size Tip: A 10″ × 15″ rack fits most half-sheet pans.
This is the easiest permanent solution if you bake often. Costs $10 to $30 but lasts for years with proper care.
Choose the Right Foil Method
Not all DIY racks are equal. Match the method to your food type for the best results.
| Food Type | Best Method | Why It Works |
|---|---|---|
| Bacon, fries | Crimped foil ridges | Fast setup, excellent crispness |
| Chicken, pork roast | Foil grid or coils | Sturdy, handles weight |
| Dry-brining meat | Foil coils | Air reaches all sides in refrigerator |
| Emergency lift | Silverware hack | Uses what is on hand |
Golden Rule: Always pair with a rimmed baking sheet to catch drippings and prevent mess in your oven.
Build a Wooden Baker’s Rack
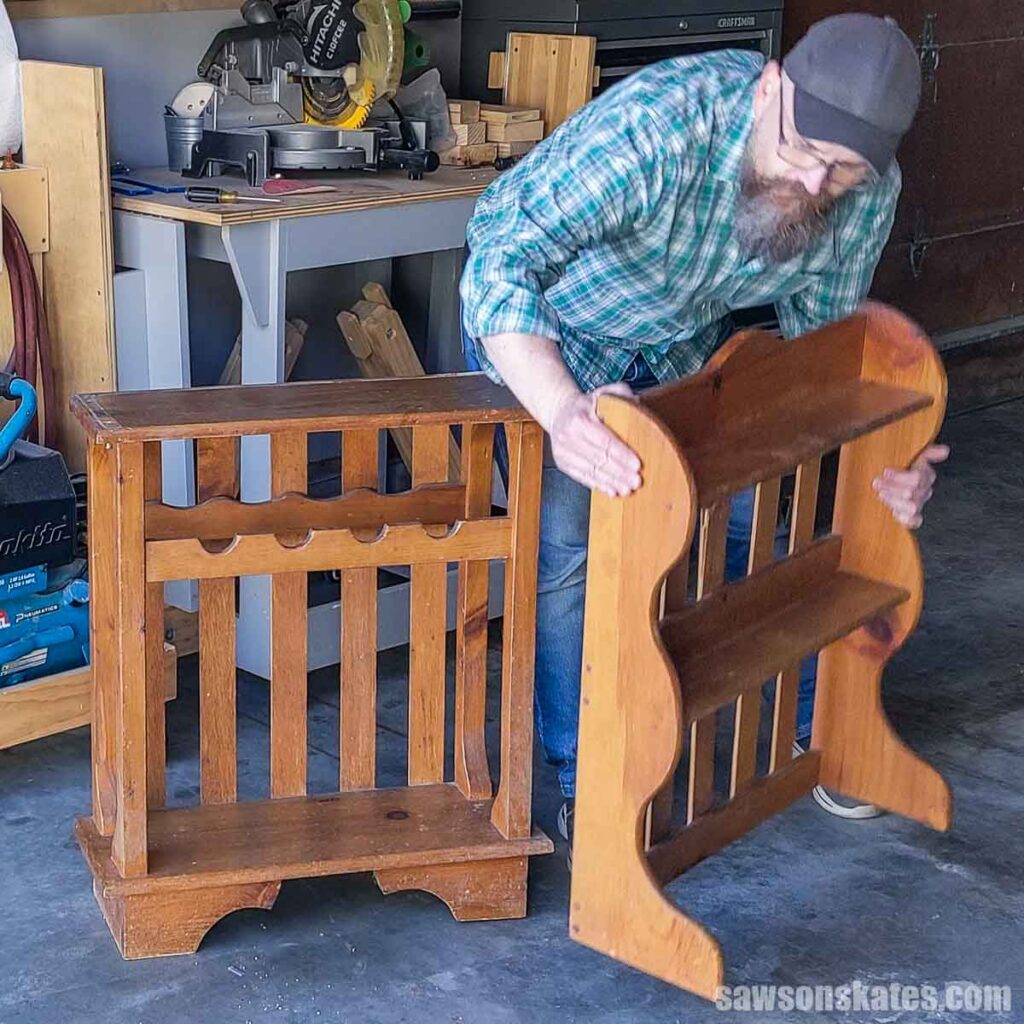
Beyond oven tricks, a freestanding baker’s rack adds storage and style to your kitchen. Unlike roasting racks, this is furniture used for displaying bowls, linens, herbs, or bread.
Design for Airflow and Strength
Traditional baker’s racks use slatted shelves to let air pass through, ideal for cooling or drying baked goods.
Key Features:
- Height: 48″ to 60″ for easy reach without bending
- Material: Use hardwood like walnut or white oak. Avoid pine or poplar. They dent easily and lack structural rigidity.
- Shelving: Space slats 1 to 2 inches apart for airflow
- Finish: Raw walnut for rustic charm, or sealed/stained wood for durability in high-use areas
Bonus Function: Use as an herb-drying rack. Air circulates through slats naturally, preserving freshness.
Follow Step-by-Step Plans
Intermediate woodworkers can build a pro-quality rack using digital plans.
What Is Included:
- Full materials list (lumber, screws, finish)
- Tool requirements (drill, saw, sander)
- Numbered assembly instructions
- 3D renderings and video tutorial
Build time is 6 or more hours over 1 to 2 days.
Skill Level: Requires basic joinery and precision cutting.
This is not a quick fix. It is a long-term kitchen upgrade that blends function with vintage charm.
Style and Placement Tips
A wooden baker’s rack is not just storage. It is decor.
Best Locations:
- Beside cabinets
- In pantry nooks
- Near a windowsill for herbs
Styling Ideas:
- Stack mixing bowls or serving trays
- Drape linens over lower shelves
- Add vintage frames or art prints
- Use white or cream accents to contrast dark wood
- Include matching wood accessories for cohesion
Design Hack: Style with antique pieces to create a lived-in look, even if newly built.
Compare All Baking Rack Options

Choosing the right rack depends on your goal, budget, and time available.
| Feature | Foil Rack | Cooling Rack | Wooden Rack |
|---|---|---|---|
| Best For | Crispy bacon, roasting | Reusable baking/cooling | Storage, display |
| Cost | Under $3 | $10 to $30 | $100+ |
| Reusable | No (disposable) | Yes | Yes |
| Setup Time | 2 to 10 minutes | 1 minute | 6+ hours |
| Supports Heavy Loads | No | Medium | Yes |
| Cleaning | Discard | Wash or dishwasher | Wipe clean |
| Storage Space | None | Moderate | Floor space needed |
Quick Decision Guide:
- Need it now? Use foil ridge or coil method.
- Cook often? Buy a wire cooling rack.
- Want kitchen style? Build a walnut baker’s rack.
Prevent Common Mistakes
Even simple hacks fail when done wrong. Avoid these pitfalls to ensure success.
Foil Racks That Collapse
Cause: Using regular foil for heavy meats.
Fix: Always use heavy-duty foil. For turkeys or large roasts, double-layer or switch to a wire rack.
Never rely on foil alone for items over 5 pounds.
Uneven Crisping
Cause: Overcrowding bacon or fries on the rack.
Fix: Leave one-half inch between pieces. Air must circulate freely.
Pro Tip: Rotate the pan halfway through baking for balanced browning on all sides.
Wood Damage in Humid Kitchens
Cause: Unsealed wood exposed to steam or spills.
Fix: Apply a food-safe sealant such as tung oil or polyurethane if placing near sinks or stoves.
Avoid placing wooden racks in damp areas unless properly sealed.
Maximize Airflow for Better Results
The core principle behind every baking rack, whether foil, wire, or wood, is air circulation. Understanding why elevation matters helps you achieve professional results consistently.
Why Elevation Matters
Heat wraps around food evenly when elevated. Moisture escapes, preventing sogginess. Fat drips away, improving both texture and health.
Science in Action: When food sits in its own juices, it steams instead of roasting. This leads to pale, soft skin on poultry and uneven browning on meats.
Whether you are baking bacon or air-drying herbs, lifting food off the surface is the key to professional results.
Maintain and Reuse When Possible
While foil racks are designed to be disposable, you can sometimes extend their life with proper care.
Reusing Foil Grids
If foil holds shape and is not torn, wipe with a damp cloth and reshape gently. Reuse for light-duty tasks only. This is not recommended after cooking fatty meats because grease soaks into the material.
Cleaning Wire Cooling Racks
Soak in warm, soapy water for 10 minutes. Scrub with a non-abrasive brush. For stuck-on grease, use a baking soda paste (1:1 water and baking soda). Dry thoroughly to prevent rust.
Dishwasher Safe? Yes, but hand washing preserves longevity.
Caring for Wooden Racks
Dust weekly with a dry cloth. For spills, wipe immediately with a damp (not wet) cloth. Reapply oil or sealant every 6 to 12 months.
Never soak or steam clean wooden racks. Wood warps and cracks when exposed to excessive moisture.
Final Tips for Perfect Results
You now have multiple ways to make a baking rack. Choose based on your specific needs.
For Crispy Bacon:
- Use the crimped foil method
- Bake at 400°F on the center rack
- Let rest 1 to 2 minutes before serving
For Juicy, Crispy Chicken:
- Use a foil grid or wire rack
- Pat skin dry before seasoning
- Roast at 425°F for extra crunch
For a Stylish Kitchen:
- Build a walnut baker’s rack with slatted shelves
- Style with white ceramics and green herbs
- Place near natural light for warmth
DIY Confidence: Start with foil hacks, then tackle woodworking when ready.
Frequently Asked Questions About Making a Baking Rack
Can I use regular foil instead of heavy-duty for a baking rack?
Regular foil works in a pinch but tends to collapse under heat and weight. Heavy-duty foil holds its shape better and provides more reliable elevation for cooking. If only regular foil is available, crumple it loosely first to create texture and some lift, but avoid placing heavy items on it.
How do I make a baking rack for bacon without it getting soggy?
The crimped foil ridge method works best for bacon. Create accordion-style folds in heavy-duty foil, place bacon strips perpendicular to the ridges, and bake at 400°F. The elevated ridges allow air to circulate underneath while fat drips into the valleys, resulting in uniformly crispy bacon without a soggy bottom.
What household items can I use instead of a roasting rack?
You can use upside-down spoons or forks arranged in a roasting pan for temporary elevation. A wire cooling rack placed on a foil-lined baking sheet works as an excellent permanent substitute. These options provide the airflow needed for even cooking and browning.
Is a wooden baker’s rack difficult to build for beginners?
Building a wooden baker’s rack requires intermediate woodworking skills, including basic joinery and precision cutting. Complete plans with materials lists, tool requirements, and step-by-step instructions are available for purchase. The project takes 6 or more hours over 1 to 2 days to complete.
How long does a DIY foil baking rack last?
A foil baking rack is designed for single use. If the foil remains intact and undamaged after cooking, you can wipe it clean and reuse it for light-duty tasks. However, it is not recommended for reuse after cooking fatty meats because grease absorbs into the material.
Can I use a baking rack for dry-brining meat?
Yes. Foil coils or a foil grid work excellently for dry-brining. Place seasoned meat on the elevated coils or grid on a sheet tray, then refrigerate uncovered for 2 to 24 hours. The elevation allows air to reach all sides of the meat, drying the surface for a superior sear and better flavor development.
Key Takeaways for Making Your Own Baking Rack
You do not need expensive gear to cook like a pro. With aluminum foil, you can make a baking rack in minutes using three main methods. The crimped ridge technique works best for bacon and fries, taking only 5 minutes. The foil grid method handles whole chickens and roasts with a sturdier lattice structure. Foil coils offer the fastest setup at under 3 minutes and double as a dry-brining tool.
For a permanent solution, a wire cooling rack provides years of reliable service at $10 to $30. If you want to upgrade your kitchen with both storage and style, building a walnut baker’s rack with slatted shelves creates a beautiful centerpiece that honors traditional baking craftsmanship.
The underlying principle remains constant across all methods. Elevation improves everything, from crispy bacon to organized countertops. Start with simple foil hacks for immediate results, then progress to woodworking projects when you are ready.