

Managing bills doesn’t have to be stressful. A bill organizer brings clarity to your finances by centralizing all recurring payments, from rent and utilities to subscriptions and loans, into one easy-to-use system. Whether you prefer pen and paper, digital spreadsheets, or a handmade planner, building your own organizer helps prevent late fees, improves budgeting, and reduces financial anxiety. With just a few tools and about 30 minutes of setup, you can create a custom system that fits your lifestyle and keeps your money on track.
This guide walks you through three proven methods: designing a printable tracker in Canva, building a smart Google Sheets spreadsheet, and crafting a reusable handmade folio. Each method includes step-by-step instructions, material lists, customization tips, and maintenance strategies.
Why Create a Custom Bill Organizer
A bill organizer serves as your financial command center, tracking every payment due each month. The primary objectives include preventing missed or late payments, avoiding late fees and service disruptions, improving cash flow visibility, and enhancing budgeting accuracy. Users who implement a structured system report significantly reduced financial stress and improved credit scores through consistent on-time payments.
The most effective bill organizer is one you actually use. Whether that means clicking checkboxes in a spreadsheet, checking off a printed list, or flipping through a beautifully crafted folio, the choice depends on your personality and daily habits. A personalized system that matches your workflow encourages consistency and long-term adherence.
Choose Your Bill Organizer Type
Before building, decide which format suits your routine best.
Printable PDFs work well for tactile users who love checking off boxes with a pen. These physical trackers are ideal for placement on refrigerators, bulletin boards, or desks. They require no technology once printed and provide a satisfying visual record of paid bills.
Digital spreadsheets suit those who want real-time tracking, automation, and shared access. Google Sheets and Excel offer automatic calculations, overdue alerts, and the ability to collaborate with family members or business partners. These systems reduce manual math errors and provide instant totals.
Handmade organizers appeal to creative DIYers who want a personalized, reusable tool that doubles as decor. A handmade folio combines functionality with aesthetics, encouraging consistent use through its visual appeal and tactile nature.
Design a Printable Bill Organizer in Canva
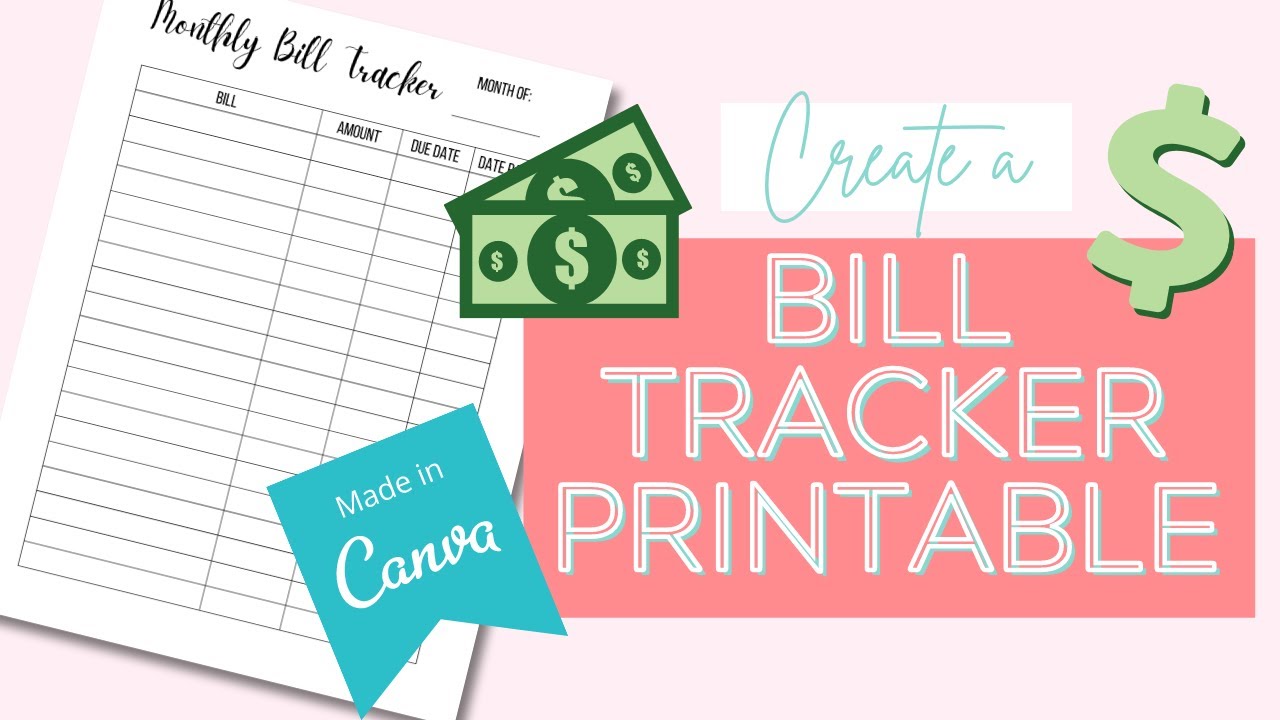
Create a clean, professional-looking monthly tracker without design experience using this step-by-step process.
Set Up the Canvas Correctly
Open Canva and click “Create a Design.” Choose Custom Size and enter dimensions based on your region. For U.S. users, select 8.5 × 11 inches. International users may prefer A4 at 8.27 × 11.69 inches. Switch units to inches for accuracy to ensure clean printing and proper margins.
Build the Tracking Grid
Use Elements to add horizontal lines for each bill row. Select a thin line with a weight of 1 for a subtle appearance. Duplicate lines efficiently using Ctrl+D on Windows or Cmd+D on Mac. Stack them evenly to create uniform rows.
Select all lines and access the alignment tools. Choose Position, then Tidy Up, and select Even Vertical Spacing. This automatic alignment saves time and dramatically improves readability by ensuring perfectly spaced rows.
Add Column Headers
Create these essential columns at the top of your tracker. The Bill column holds expense names like Electricity or Internet. The Amount column records the cost such as $85.40. The Due Date column tracks payment deadlines like the 15th. The Date Paid column records when you actually paid. The Status column uses checkmarks or highlights to show completion.
Apply bold formatting and all-caps to headers for easy scanning. Use a clean sans-serif font like Babis and keep the font size consistent across all headers.
Insert Vertical Dividers
Add a vertical line element and rotate it 90 degrees. Place it between columns to create clear visual separation. Duplicate this divider as needed. Widen the Bill column to accommodate longer names like “Internet Service Provider” and narrow other columns for better visual balance.
Reapply the Even Horizontal Spacing alignment to ensure dividers sit perfectly even between columns.
Center Text and Add Titles
Manually center each header text within its column. Avoid relying on automatic centering tools. Visually confirm alignment for a polished, professional appearance.
Place a centered title at the top using a script font like Daydream, Sofia, or Brittany Signature for elegance. Below the title, add “Month of” followed by a thin horizontal line where you can write the specific month each time you print a new sheet.
Finalize and Export
Review your layout carefully before saving. Check that lines are straight and evenly spaced. Verify text is legible and centered with no overlapping elements. Ensure the overall appearance is clean and uncluttered.
Click Download and choose PDF Print for high-quality physical copies or PNG for digital use and email sharing. Save the Canva source file so you can reuse and modify it next year.
Build a Smart 12-Month Bill Tracker in Google Sheets
Automate your tracking with formulas, automatic totals, and overdue alerts using this comprehensive spreadsheet system.
Set Up the Base Structure
Start with a clear structure designed for 12 months of tracking. Enter the first month in cell D2 using a date format like January 1, 2025. Each month will use three columns. For example, January uses columns G through I, February uses J through L, and so on. This creates a total of 36 columns for the full year.
Enter your bill details in the first block using column B for the due day number, column C for the bill name, and column D for the amount. These values populate dynamically across all months, so you enter them only once.
Add Smart Due-Date Logic
In cell G8, calculate the end of the month using this formula: =EOMONTH(D2, 0). This determines the last day of each month automatically.
In cell H9, add logic to handle invalid dates. Use the formula: =IF(B9 > DAY($G$8), DAY($G$8), B9). This prevents errors for months with fewer days, such as trying to set a due date of February 30. Copy this formula down through H23 for all bill rows.
Display Expected Payments
In cell I9, reference the amount from your original entry using: =$D9. This pulls the bill amount into the monthly column. Drag this formula down through I23 to populate all bills for January.
Format these cells as Currency with two decimal places for professional appearance and accurate financial tracking.
Extend to All 12 Months
Copy the entire G through I column block and paste it into J through L for February. In the new month-end cell J8, update the formula to advance one month: =IF(ISDATE(G8), EOMONTH(G8,1), “”). Repeat this process for all 12 months, continuing through columns AP through AR.
Manually adjust the EOMONTH formula in each new month-end cell as you extend across the spreadsheet.
Calculate Monthly Totals
In cell D24, sum all expected bills for the first month using: =SUM(D9:D23). Format this cell with a gray background, bold text, and a border to make it stand out as a summary row.
Track Payments Made
In cell G5, sum only paid amounts using: =SUMIF(G9:G23, TRUE, I9:I23). This formula counts bills only when the checkbox is marked, giving you a running total of paid expenses. Copy this formula to J5, M5, and all corresponding cells through AP5.
In cell K2, show the total paid across all months using: =SUM(G5:AP5). This provides a comprehensive view of yearly spending.
Polish the Spreadsheet Layout
Format date cells D2 and G8 through AP8 as MMM YYYY to display months cleanly like Jan 2025. Turn off gridlines by accessing View, clicking Show, and unchecking Gridlines. Add inner borders to the data ranges B9:D23 and G9:AP23 for clear visual separation.
Clean up inter-month lines by removing all borders from row 8, then reapplying only left, top, and right borders at the start of each month. Freeze the first five columns using View, Freeze, and Up to Column E so headers remain visible during scrolling.
Apply conditional formatting to G9:AP23 using the rule =ISFORMULA(G9). Set the fill color to light gray to provide a visual warning if formulas get accidentally overwritten.
Reset for Next Year
To reuse your tracker, clear the bill entries in B9:D23. Delete the start date in D2. Press the spacebar in the checkbox column G9:G23 to uncheck all boxes. Re-enter your new start date in D2 and your updated bill information.
Craft a Handmade Bill Organizer Folio

Create a tactile, reusable system that combines function with aesthetics. This handmade folio doubles as decor while keeping your bills organized.
Gather Required Materials
Collect these supplies before starting. You will need a scoreboard, three sheets of heavyweight cardstock, 12 pocket fronts cut to 4.5 × 6.25 inches, Zig 2-Way Glue for removable page replacement, two magnets, colored pins, sticky notes, a bone folder for crisp folds, and optional art glitter glue for humid climates. All materials typically cost under $20.
Build the Accordion Base
Position your scoreboard vertically with the 11-inch side facing up. On each cardstock sheet, mark the center at 5.5 inches. Score each sheet differently to create staggered layers for the accordion effect. Sheet 1 scores at 5.375 inches right and 5.625 inches left. Sheet 2 scores at 5.75 inches right and 5.25 inches left. Sheet 3 scores at 5.875 inches right and 5.125 inches left.
Apply wet glue to the center gusset of each sheet. Stack the sheets together, aligning corners perfectly. Burnish all joints thoroughly with a bone folder to create a durable accordion spine that supports the monthly pockets.
Cut and Fold Monthly Pockets
Cut 12 pieces to 4.5 × 6.25 inches. Score 0.5 inch from the top and the opposite edge on each piece. Make corner cuts by starting at the outer score and cutting inward to prevent tearing.
Fold and burnish all edges carefully. Slide each pocket into the accordion base, placing the bottom piece on top to avoid catching during insertion.
Assemble and Secure
Mark pocket positions on the base using pencil or stamp. Insert year-free month labels like “January” into each pocket. Attach the pockets securely to the layered pages.
Glue the front cover using score tape, applying one top strip and four vertical strips. Clamp with clothespins while the glue dries. Burnish thoroughly to ensure strong adhesion. In humid climates, reinforce the center with art glitter glue for added durability.
Add Finishing Touches
Insert expense tracking sheets into each pocket. Decorate with inspirational quotes, seasonal paper, stickers, or handwritten notes. Attach two magnets to the back for holding mail or reminders.
Create an accessory pouch by cutting a 4.75 × 4.75 inch scrap, scoring at 0.5, 0.75, 4.25, and 4.5 inches, then folding and gluing the front flaps. Attach this pouch to the side of your folio to store pins, sticky notes, and pens.
Prepare six extra monthly pages bound with Zig glue for next year. Simply replace these pages annually while keeping the cover and base intact.
Customize a Digital Tracker with Edit.org
No design skills? No problem. Edit.org offers quick customization without complex software.
Use Edit.org for Quick Results
Go to edit.org and search for “bill tracker” or “monthly invoice organizer.” Choose a template that fits your personal or business style. Edit the template by adding your logo, inserting bill names, due dates, and categories, then changing colors, fonts, and layout to match your preferences.
Save your design to the cloud for easy access. Download as PDF, JPG, or PNG depending on your intended use. This method requires no Photoshop or Canva account while producing professional-looking results quickly.
Essential Features Every Organizer Needs
Include these elements for maximum effectiveness in any bill organizer system.
Must-have tracking fields include the due date in numeric or full date format, amount owed in currency format, payment status using checkboxes or highlights, payment method noting check, online, or auto-debit, category tags for grouping expenses like Utilities or Insurance, and a notes section for account numbers and customer service details.
Smart functional add-ons to consider include monthly totals that auto-sum in digital systems, category subtotals for grouping spending by type, reminder flags using red highlights or warning emojis, overdue alerts using Google Sheets formulas, and color coding where blue indicates utilities, purple indicates subscriptions, red indicates loans, and green indicates insurance.
Physical organizers benefit from magnets or clips attached to the back for holding bills, pouches for storing receipts and pens, and year-free labels allowing annual reuse without redesign.
Who Should Use a Bill Organizer
Homeowners and renters can track rent, utilities, internet, and insurance in one central location. Small business owners benefit from managing vendor invoices, taxes, and payroll deadlines. Freelancers should monitor client payments and quarterly tax obligations. Students can handle phone bills, subscriptions, and tuition installments. Seniors appreciate simplified fixed-income expense tracking with clear visuals. Couples and families can share financial responsibility with a visible, collaborative system. Startups and retail stores avoid service disruptions with high-volume invoice tracking.
Best Practices for Long-Term Use
Establish a weekly review routine by setting aside 15 to 30 minutes each week to update payment status, flag upcoming due dates, and note any changes like rent increases. Pair this routine with phone calendar reminders for consistency.
Use color coding by category to speed up decision-making. Red indicates urgent or overdue bills, green indicates auto-paid bills, and yellow indicates bills needing review.
Archive monthly by saving paid bills either digitally or in a physical folder at month-end. Export or print monthly summaries and reset digital trackers or replace printable sheets. This builds a payment history useful for tax purposes and budget reviews.
Choose year-free designs or replaceable inserts so your system lasts year after year. Store your organizer in a visible spot like your desk, kitchen counter, bulletin board, or near your mail station. Out of sight leads to out of mind, while visibility drives consistent use.
Compare Your Options
| Feature | Canva Printable | Google Sheets Digital | Handmade Folio |
|---|---|---|---|
| Ease of Use | Beginner-friendly | Moderate | Craft skill needed |
| Automation | None | Full formulas and alerts | None |
| Updates | Manual | Dynamic | Replaceable inserts |
| Customization | Visual | Functional | Aesthetic and structural |
| Portability | Physical | Cloud-based | Physical |
| Collaboration | No | Yes | No |
| Cost | Free | Free | $10-$20 |
| Best For | Minimalists | Data users, families | DIY enthusiasts |
Maintain and Reuse Your System
Perform a monthly reset by clearing paid status, updating any changed amounts, and printing or reloading a new month section. For annual backup, use Google Sheets version history to name monthly snapshots. Export yearly data as PDF or XLSX and store Canva source files in Google Drive or Dropbox.
Integrate with finance tools by exporting data to QuickBooks for business accounting or to YNAB, Mint, or PocketGuard for personal budgeting. Excel serves as a reliable offline backup option.
Key Takeaways for Creating Your Bill Organizer
Building a bill organizer takes about 30 minutes but saves hours every month while preventing costly late fees. Choose the method matching your personality: Canva for visual simplicity, Google Sheets for automation and data, or a handmade folio for creative personalization. Include essential fields like due date, amount, payment status, and category tags regardless of which format you select.
The most effective system is the one you actually use, so place it somewhere visible, pair it with calendar reminders, and personalize it to match your style. Start with a simple version and add features gradually as your routine develops.
Frequently Asked Questions About Making a Bill Organizer
What is the easiest way to make a bill organizer?
The easiest method is using Canva’s printable templates. You can create a professional-looking tracker in under 30 minutes without design experience. Simply set up an 8.5 × 11 inch canvas, add horizontal lines for rows, create column headers, and download as a PDF for printing.
How do I make a bill organizer in Google Sheets?
Set up a 12-month tracker by entering your bill names, due dates, and amounts in the first month columns. Use formulas like EOMONTH to calculate month ends automatically and SUMIF to track paid amounts. Extend the three-column blocks across 36 columns to cover all 12 months.
What materials do I need for a handmade bill organizer?
Gather a scoreboard, three sheets of heavyweight cardstock, 12 pocket fronts at 4.5 × 6.25 inches, Zig 2-Way Glue, two magnets, colored pins, sticky notes, a bone folder, and optional art glitter glue. Total cost typically stays under $20.
How do I customize a bill tracker without design skills?
Use Edit.org to search for bill tracker templates and customize them online. Add your logo, change colors and fonts, insert your specific bills and due dates, then download as PDF or image format. No software installation or design experience required.
How often should I update my bill organizer?
Review and update your bill organizer weekly, spending 15 to 30 minutes checking payment status, noting upcoming due dates, and recording any changes to bill amounts. Monthly, archive completed pages and reset for the new month.


