

Tired of loose receipts, rolling water bottles, and missing sunglasses every time you start your car? A custom car organizer can transform your vehicle from cluttered chaos to streamlined efficiency. The good news? You don’t need to buy an expensive model. You can make a car organizer yourself in just a few hours using basic sewing skills and affordable materials. Whether you are a parent juggling kids’ toys, a commuter needing quick access to essentials, or a road tripper packing for adventure, this guide walks you through every step to build a durable, personalized organizer that fits your car and lifestyle perfectly, saving you up to 75% compared to store-bought versions.
From choosing the right fabric to reinforcing stress points and adding smart features like elastic bottle holders and non-slip bases, we will cover proven techniques used by expert sewists. You will also learn how to customize pocket layouts, prevent sliding during turns, and create washable, eco-friendly versions. Let us get started.
Choose Your Organizer Type
Before cutting fabric, decide where your organizer will go and what it needs to hold. Different areas of the car require different designs.
Backseat Headrest Caddies
Perfect for families, these hang behind front seats and keep kids’ items within reach. Ideal for storing tablets, books, snacks, crayons, tissues, and water bottles. Use adjustable bungee cords or elastic bottom closures to prevent sagging.
Console and Gear Shift Organizers
These fit snugly between front seats. Great for drivers who need phone and charger access, pens, toll passes, and sunglasses. Often called “Car Diddy Bags” or “Miracle Caddies,” they may include hidden zipper pockets for cards or cash.
Glove Box and Sun Visor Holders
Compact and discreet options work well for registration and insurance cards. Roll-up glove box organizers and sun visor versions with clear vinyl windows hold IDs, sunglasses, and credit cards.
Trunk Cargo Totes
Sturdy bins with lidded or collapsible designs prevent groceries or sports gear from rolling around. Add clear vinyl panels so you can see contents at a glance.
Select Durable Materials

The right materials make your organizer last longer and perform better.
Best Fabrics for Each Part
- Main Body: Canvas, upholstery fabric, or quilting cotton for strength and shape retention
- Pockets: Cotton, mesh, or nylon for lightweight breathability
- Lining: Fusible interfacing plus cotton for added stiffness
- See-Through Pockets: Clear vinyl or plastic for instant content visibility
- Non-Slip Base: Shelf liner or dotted grip fabric to prevent sliding
Pro Tip: Pre-wash cotton fabrics to prevent shrinkage after sewing.
Essential Supplies Checklist
- Half yard main fabric (canvas or cotton)
- Half yard lining fabric
- Fusible interfacing for stiffness
- Quarter-inch to 1-inch elastic for bottle pockets
- Bias tape or binding (2.5 inches wide) for clean edges
- Polyester thread for durability
- Scissors, pins, ruler, and fabric marker
- Sewing machine
Design Smart Pocket Layouts
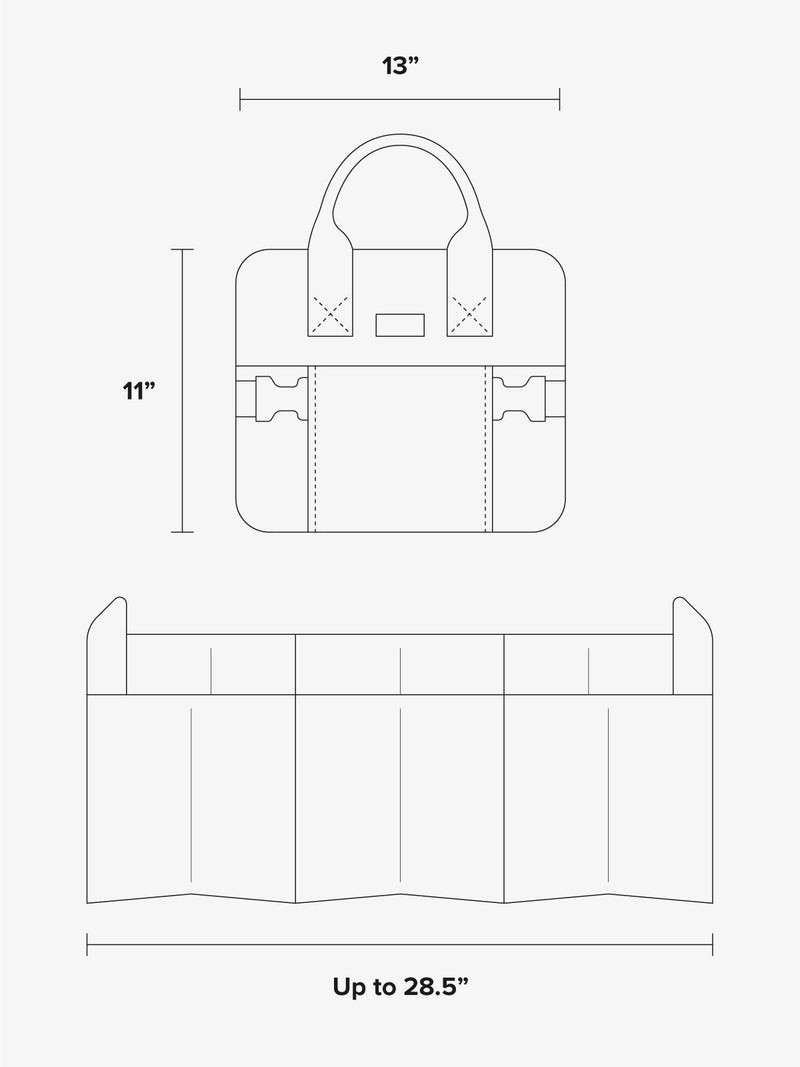
A well-planned pocket configuration makes everything easy to find.
Standard Three-Pocket Setup (Beginner-Friendly)
- Bottom Pocket (8 inches tall): For tissues or wipes
- Middle Pocket (10 inches tall, pleated): Expands for tablets or folders
- Top Pocket (16 inches tall): Holds phones, pens, and toll tags
Space each pocket 2 inches apart for clean separation.
Add Functional Upgrades
- Elastic Water Bottle Holder: Insert 4-inch elastic into a side pocket; stretches to fit most bottles
- Sunglasses Sleeve: Fold 4×4-inch fabric into a narrow tube and topstitch
- Zipper Compartment: Hide valuables like cash or ID in a secure inner pocket
- Accordion Pleats: Allow middle pockets to expand like a fan when loaded
Design Hack: Use contrasting thread to mark compartments and help identify sections at a glance.
Cut and Prepare Fabric Pieces
Accuracy ensures a professional finish.
Basic Dimensions (Adjust for Your Car)
| Part | Size (inches) | Quantity |
|---|---|---|
| Front Panel | 15 × 24 | 1 |
| Back Panel | 15 × 24 | 1 |
| Small Pocket | 15 × 8 | 1 |
| Middle Pocket | 19 × 10 | 1 |
| Top Pocket | 15 × 16 | 1 |
Measure your seat gap and headrest posts before cutting. Shorten height if needed.
Prep Steps
- Wash and iron fabric
- Fuse interfacing to back panel and pocket linings
- Mark all pieces with fabric chalk
- Cut carefully with rotary cutter or sharp scissors
Sew Pockets with Reinforced Edges
Strong stitching prevents pockets from tearing under weight.
Attach Bottom Pocket
- Place 15×8-inch pocket on front panel, half inch from the bottom edge
- Topstitch only the bottom edge (leave sides and top open)
- Backstitch at both ends
Create Pleated Middle Pocket
- Take the 19×10-inch piece
- Mark center, then 2 inches left and right
- Fold inward at marks to form accordion pleats
- Press flat with iron
- Attach above bottom pocket with 2-inch gap; topstitch bottom edge only
Divide Top Pocket into Three Sections
- Mark two vertical lines at 5 inches and 10 inches from left edge
- Stitch from bottom to top, backstitching at ends
- Now holds phone, pens, and wallet separately
Avoid This Mistake: Do not sew all four sides of pockets. Only bottom edges stay stitched to allow item access.
Install Hanging Straps and Ties

Secure mounting keeps your organizer from flopping.
Top Headrest Straps (Two Required)
- Cut 15-inch-long bias strips (2 inches wide)
- Fold long edges inward, then fold in half lengthwise
- Press and topstitch both edges
- Attach to top corners of back panel before final assembly
Bottom Stabilizer Ties (Two Required)
- Cut 23-inch-long strips
- Position across inside bottom edge of back panel
- Sew securely at both ends
- Wrap under seat cushion to anchor
Test Fit First: Hang the half-finished organizer in your car to check strap length.
Assemble the Full Organizer
Now bring all parts together.
Step-by-Step Assembly
- Attach all pockets to the front panel
- Add dividers to top and bottom pockets
- Sew ties to back panel
- Place front and back panels right sides together
- Pin around edges with half-inch seam allowance
- Sew all around, leaving a 6-inch gap at the top
- Turn right side out using a chopstick to push out corners
- Press entire piece with iron
- Hand-stitch opening closed with slip stitch
Reinforce Stress Points: Backstitch at pocket corners, strap bases, and tie attachments.
Add Anti-Slide Protection
Nothing ruins usability faster than a sliding organizer.
Best Non-Slip Solutions
- Non-Slip Shelf Liner: Cut to size and glue (fabric-safe adhesive) to back panel
- Dotted Grip Fabric: Sewn directly as backing layer
- Puffy Fabric Paint: Draw lines on underside; dries into rubberized grip (great for quick fixes)
Pro Tip: Test grip by placing organizer on a tilted surface with full load.
Customize for Your Lifestyle
Tailor your organizer to match your driving needs.
For Parents
- Add snack pockets with Velcro flaps
- Include crayon rolls and book sleeves
- Use fun prints like space or animals themes
For Ride-Share Drivers
- Hidden pocket for tips
- Sanitizer holder and mint pouch
- Phone mount plus charger cable slot
For Pet Owners
- Leash clip loop
- Waste bag dispenser pocket
- Collapsible bowl sleeve
For Road Trips
- Map holder
- First aid kit compartment
- Reusable shopping bag storage
Label Pockets: Sew on small tags or use embroidery to mark “Cords,” “Snacks,” or “Docs.”
Reinforce for Longevity
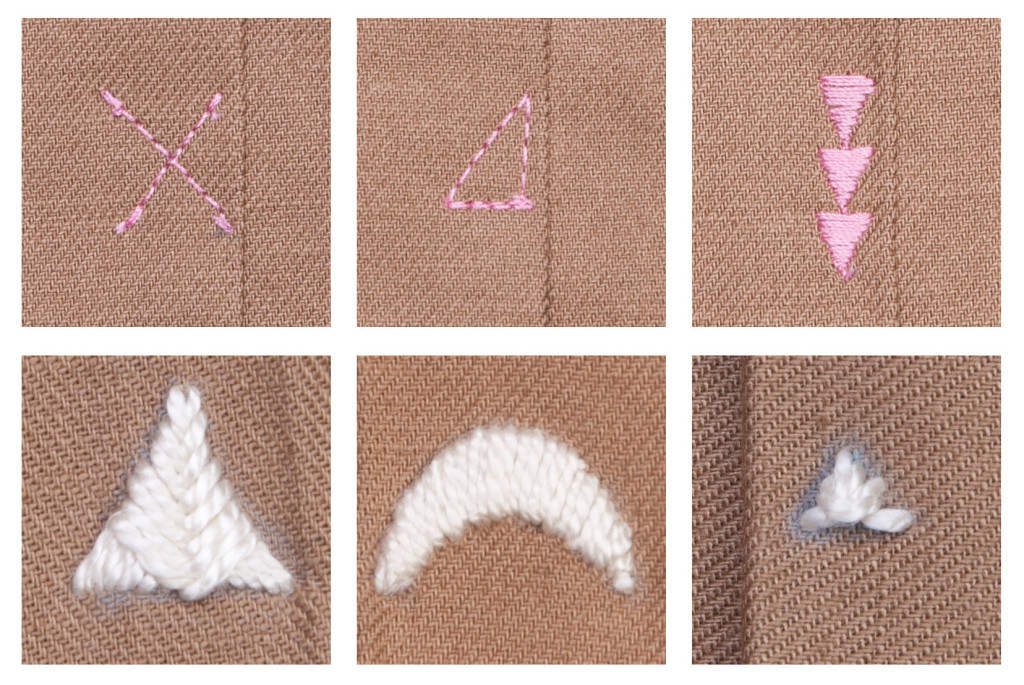
Make your organizer withstand daily wear.
Durability Upgrades
- Use polyester thread (stronger than cotton)
- Serge or zigzag seam edges to prevent fraying
- Bind side edges with 2.5-inch binding strips
- Backstitch every pocket corner and strap base
- Avoid loose threads; trim and secure all ends
Washability Note: If using elastic, hand wash or use gentle cycle. Check elastic after washing.
Test Before Final Use
Ensure it works in real driving conditions.
DIY Quality Checklist
- Load Test: Fill with phone, wallet, water bottle. Shake gently. No shifting?
- Mounting Test: Hang behind seat. Do straps stay put over headrest posts?
- Access Test: Can you grab your phone without removing the organizer?
- Wear Test: Use for 3 to 5 days. Look for loose threads or stretched pockets.
- Clean Test: Wipe with damp cloth. Does fabric resist stains?
Replace degraded elastic every 6 months for best performance.
Save Money vs. Store-Bought
DIY costs a fraction of retail prices.
| Feature | DIY Cost | Store-Bought Price |
|---|---|---|
| Basic Organizer | $5–$10 | $25–$40 |
| Premium Quilted | $12–$15 | $50+ |
| Washable Bin | $8 | $30 (Branded) |
Cost-Saving Hacks
- Use scrap fabric from old jeans or backpacks
- Download free patterns from SewCanShe.com or Doodlecraft
- Repurpose a mesh shower caddy with zip ties
- Try no-sew version with fabric glue
Free Patterns and Project Ideas
Start with proven designs.
| Pattern | Best For | Source |
|---|---|---|
| Mesh Car Organizer | Phone and glasses | SewCanShe.com |
| Roll-Up Glove Box Caddy | Documents | Doodlecraft |
| Miracle Caddy | Full console storage | SewCanShe.com |
| Six Pocket Car Caddy | Kids’ items | sew4home.com |
| Sun Visor Organizer | ID and cards | SewCanShe.com |
| Washable Trash Bin | No more trash piles | SewCanShe.com |
| Trunk Cargo Tote | Visible storage | SewCanShe.com |
Many patterns are available as instant Etsy downloads. Search “Kids Car Organizer Pattern” or “Car Diddy Bag.”
Pro Tips for Success
Maximize function and ease.
- Start simple: Master a 3-pocket design before adding pleats or zippers
- Custom-fit: Measure your car’s seat depth and headrest spacing first
- Make it washable: Use machine-safe fabrics and avoid water-soluble glue
- Use a zipper foot: For sewing close to elastic or vinyl edges
- Try puffy paint: Emergency grip solution if no shelf liner available
Expert Move: Store a spare elastic strip in a hidden pocket for easy replacement when worn.
Frequently Asked Questions About Making a Car Organizer
What materials work best for a durable car organizer?
Canvas, upholstery fabric, or quilting cotton work best for the main body because they are strong and hold their shape. For pockets, use cotton, mesh, or nylon for breathability. Add fusible interfacing to the lining for stiffness, and use non-slip shelf liner on the back to prevent sliding.
How long does it take to make a car organizer?
Most beginners can complete a basic 3-pocket car organizer in 1.5 to 3 hours. More complex designs with pleats, zippers, and multiple compartments may take 3 to 5 hours. Start with a simple design and advance to more complicated projects as your skills improve.
Can I make a car organizer without a sewing machine?
Yes. Use fabric glue, iron-on adhesive (HeatnBond), or no-sew fusion tape to create a functional organizer. However, sewn versions are more durable and professional-looking. If using glue, test it on scrap fabric first to ensure it holds.
How do I prevent my car organizer from sliding around?
Apply non-slip shelf liner or dotted grip fabric to the back panel. You can also use puffy fabric paint in lines on the underside, which dries into a rubberized grip. Test the organizer on a tilted surface with weight to verify it stays in place before regular use.
How do I clean my DIY car organizer?
Check the fabric type. Most cotton and canvas organizers can be hand-washed or machine-washed on gentle cycle. Remove any non-washable components like certain adhesives first. Always check elastic integrity after washing, and replace worn elastic every 6 months.
Key Takeaways for Making Your Own Car Organizer
You now have everything you need to make a car organizer that is smarter, sturdier, and more personal than anything you can buy. By choosing the right materials like canvas or quilting cotton, reinforcing key areas with backstitching and binding, and tailoring the pocket layout to your specific habits, your DIY organizer will stay secure, accessible, and clutter-free for miles to come.
Whether you spend 90 minutes on a simple console caddy or craft a fully quilted, nine-pocket masterpiece, the result is the same: a cleaner car, less distraction while driving, and pride in building something useful with your own hands. The DIY approach saves you up to 75% compared to store-bought versions, and you can customize every detail to fit your vehicle perfectly.
So grab your fabric, fire up the sewing machine, and turn car chaos into order, one stitch at a time.


