

You’ve seen it in spy movies: a bookshelf swings open to reveal a hidden arsenal. But you don’t need a secret agent budget to build your own. A concealment shelf gives you instant access to firearms, emergency cash, or important documents while looking like a normal floating shelf in your living room. Unlike bulky safes, it blends into your décor and opens in seconds. Whether you’re a homeowner, prepper, or DIY enthusiast, this guide walks you through every step from cutting precise 45° bevels to installing magnetic or RFID locks that only you can trigger.
By the end, you’ll know how to construct, mount, and disguise a concealment shelf that functions flawlessly and survives daily use. You’ll learn how to build a sturdy, secure, and nearly invisible storage unit for under $40, or upgrade to a high-tech version with motion lights and gas struts. Let’s get building.
Design a Realistic Floating Shelf
Choose the Right Concealment Type
Decide whether your shelf will pivot, slide, or have a removable false bottom. The most common and reliable design uses a hinged false bottom that swings down at a 45° angle when unlocked. This gives full access to the hidden compartment while maintaining a clean, floating appearance when closed. For firearm storage, ensure the opening motion clears nearby furniture and allows one-handed retrieval.
Consider these key factors when choosing your mechanism:
• Pivoting designs offer the best balance of accessibility and disguise
• Sliding mechanisms require deep wall space and are more visible
• Removable false bottoms work well for shallow compartments
Avoid sliding mechanisms unless you have deep wall space because these are more visible and prone to jamming.
Plan Hidden Compartment Dimensions
Measure what you intend to store, whether firearm, documents, or emergency kit, and add 2″ of clearance on all sides. A standard build uses a 24″ wide × 11.25″ deep base with a compartment depth of 6–8″. Keep the height low, under 12″, to avoid suspicion. Position the shelf between waist and eye level for quick access but out of reach of children.
Test the swing arc before finalizing placement. If mounting near a couch or bed, ensure the opening motion won’t cause collisions with furniture.
Build Around Wall Studs
Your shelf must anchor into wood studs, not drywall. Use a stud finder to locate two studs spaced 16″ apart. Design your back panel or mounting bracket to fit within this span. The load-bearing back panel should be recessed into the frame so it’s invisible from the front.
Always use 2.5″ wood screws into each stud. Never rely on drywall anchors alone for heavy loads. For extra strength, add a welded steel bracket, similar to those used in professional concealment units, that supports the entire weight.
Cut and Bevel Shelf Components
Rip Boards to Final Width
Start with a 1×12 common board, which has an actual thickness of approximately 0.75″ and width of about 11.25″. Rip it to 11.25″ wide using a table saw. Cut one 24″ length for the base. Then cut the front board to 18.25″ tall × 8.375″ wide. Use the same width for side panels. Rip all pieces to size before beveling to ensure uniformity and reduce error.
Label each piece with pencil as you cut to maintain orientation during assembly.
Cut Precise 45° Bevels
Set your table saw blade to exactly 45°. Use a framing square to verify the angle before cutting. Cut a long bevel along one edge of the top board, front board, and side panels. These bevels create mitered corners that hide seams.
For the front board, bevel both ends. For side panels, bevel only the outer edge, the one facing forward. Use a sliding compound miter saw for clean end cuts. A perfect 45° joint is critical because it ensures tight seams and a professional look.
Cut Crown Molding at Miter Angles
Use 4.5″ hardwood crown molding for a decorative front trim. To cut perfect miters, place the molding upside down on the saw base, nestled in the corner. Tape marking lines on both sides of the molding. Align the blade with the marks and cut at 45°. Cut two side pieces and one front piece that will form a seamless frame.
This upside-down cutting method mimics professional cabinet installation and prevents gaps in your finished trim.
Assemble the Shelf Frame
Dry-Fit All Mitered Joints
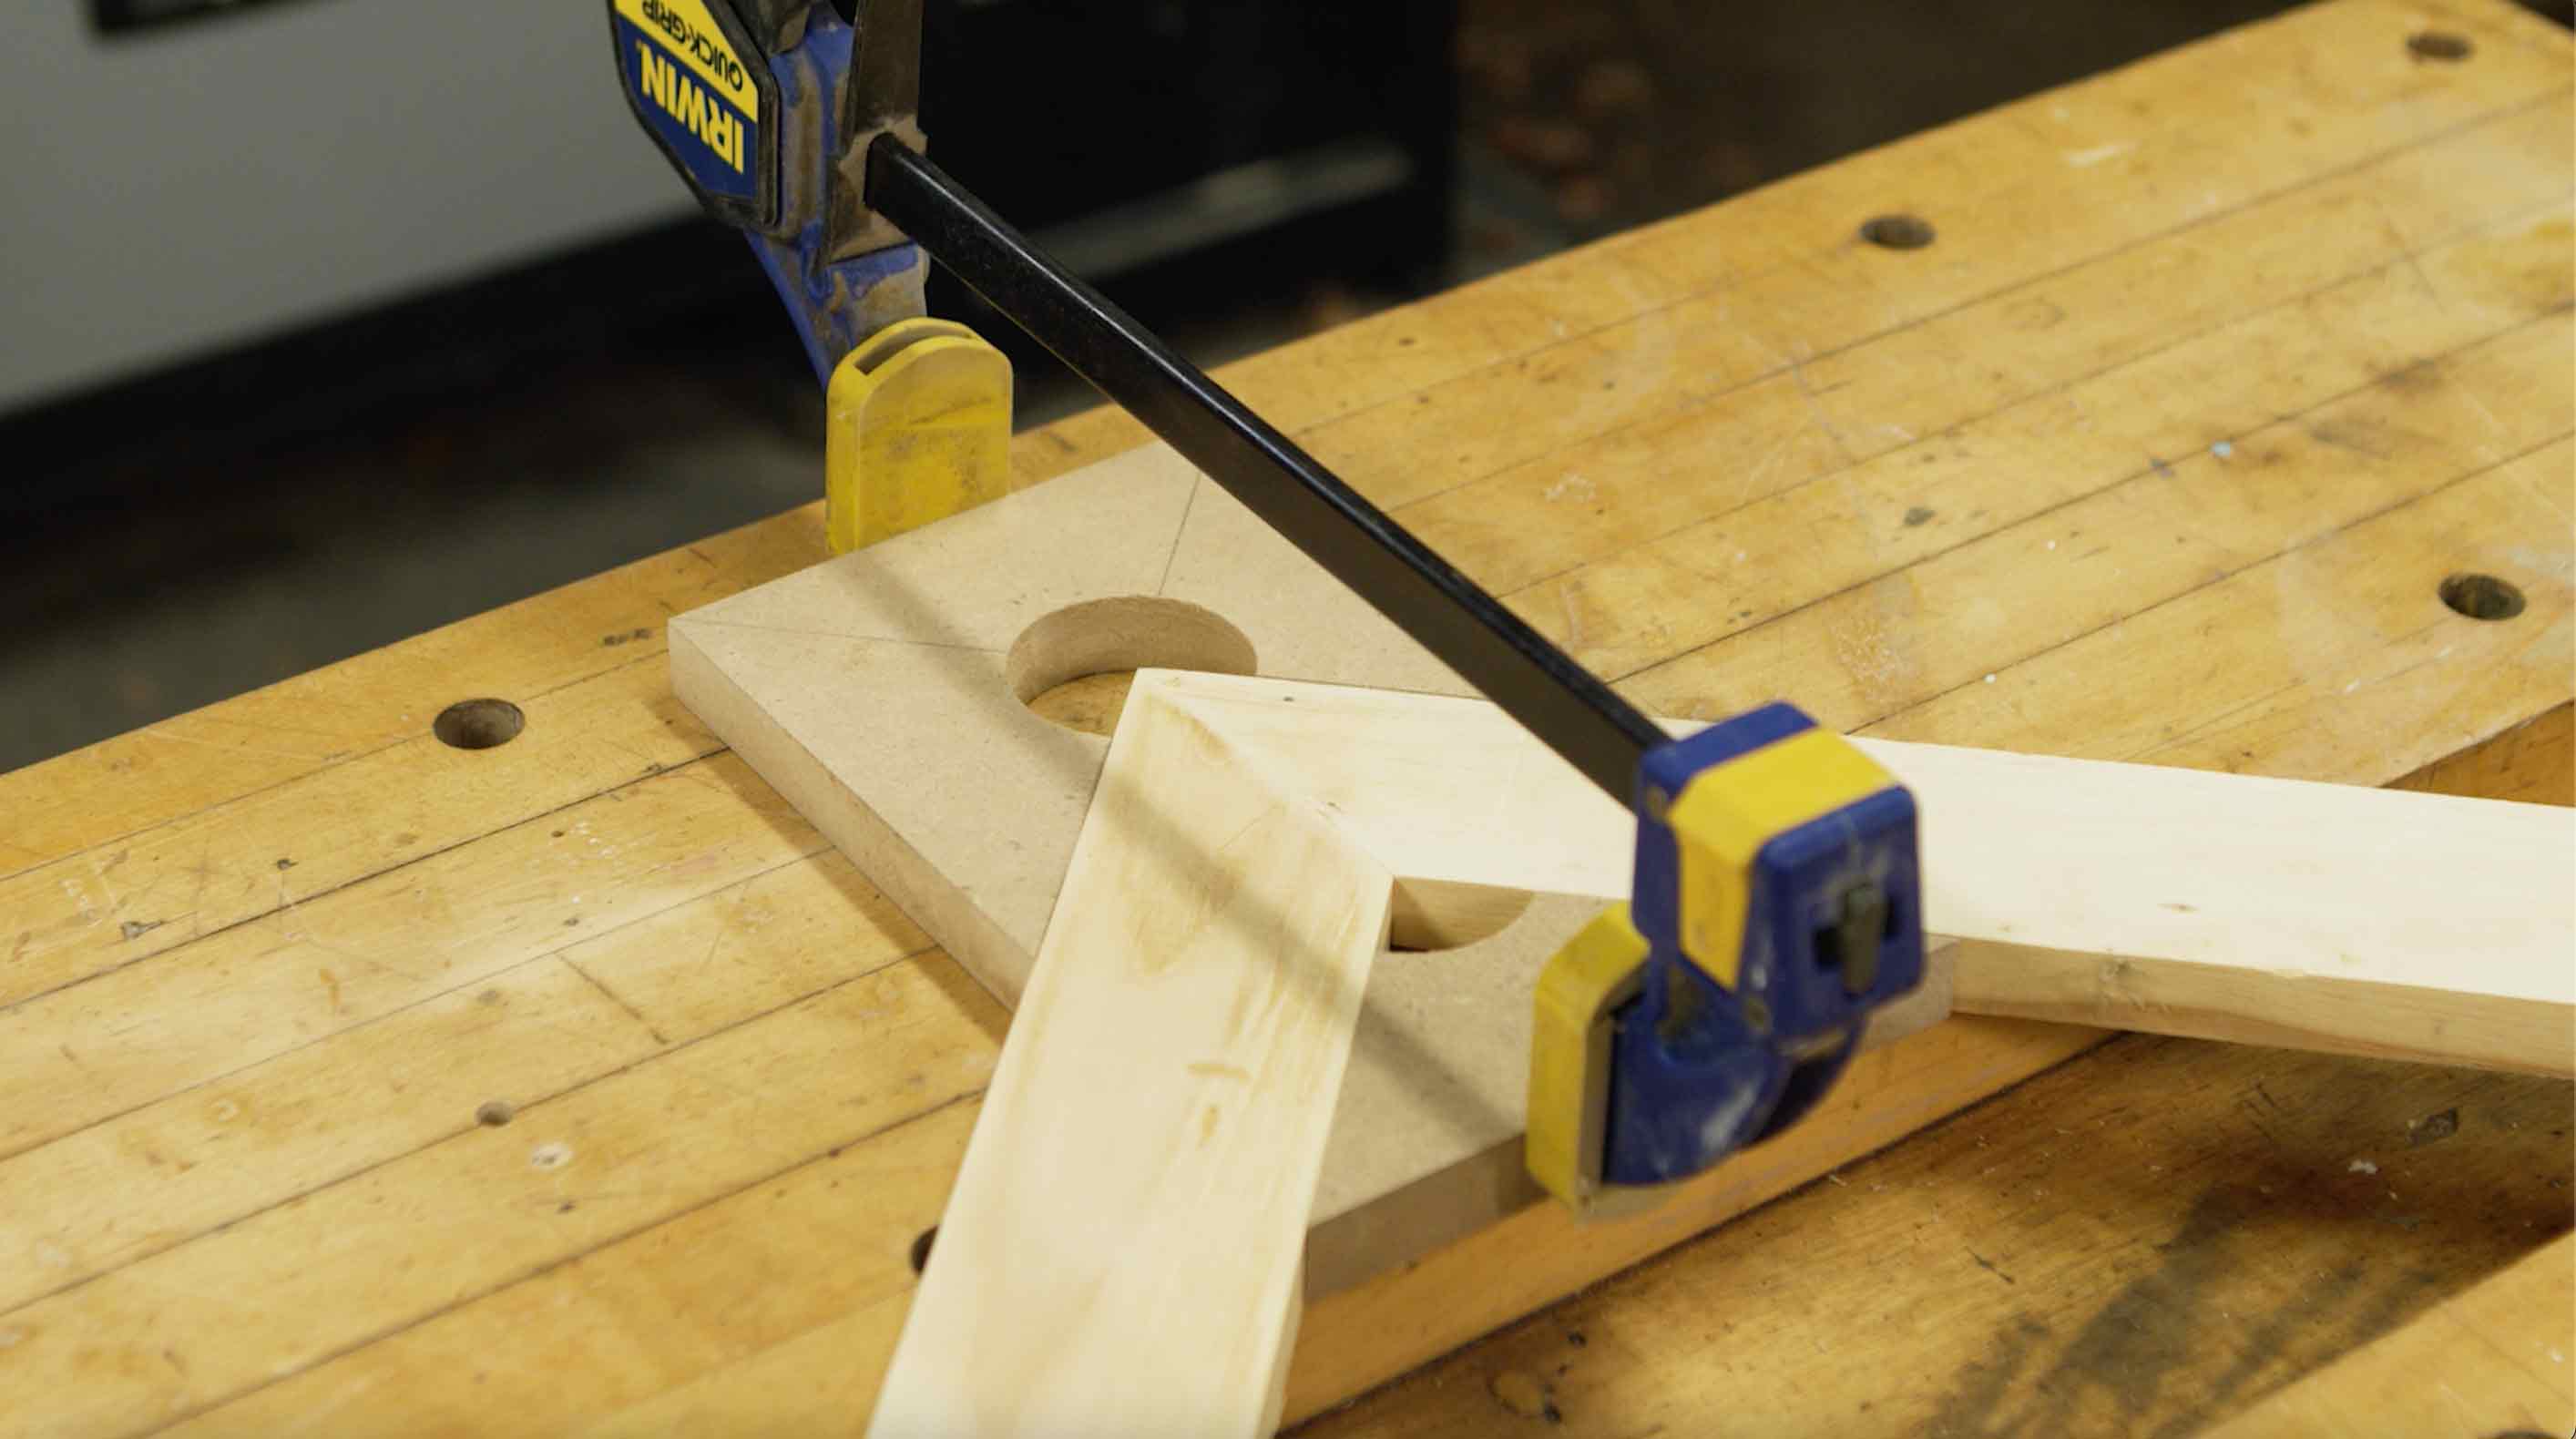
Before gluing, dry-fit every piece. Lay the base board flat. Position the front board between the two side panels, forming a U-shape. Check alignment with a framing square. Ensure all beveled edges meet tightly.
If gaps appear, sand or re-cut the joints. Label each piece with pencil to maintain orientation during final assembly.
Glue and Nail the Frame
Apply wood glue to all mitered edges. Use painter’s tape to hold joints together temporarily. Then secure with 1¼” brad nails. Attach the left side panel first, then the front board, and finally the right side panel. Space nails every 6″. Wipe excess glue with a damp cloth.
Reinforce corners with two 2″ wood screws driven from the inside of the side panels into the front board ends. This prevents racking under load.
Reinforce with Pocket Holes (Optional)
For added strength, drill pocket holes on the inside of the side panels before assembly. Use a Kreg Jig to create angled holes that accept 1¼” screws. This method hides fasteners and increases joint durability, ideal for shelves storing heavy items like firearms.
Install Crown Molding and Trim
Attach Front Crown Molding
Position the base board flat on your work surface. Apply a continuous bead of wood glue to the bottom edge of the crown molding. Align it flush with the front edge of the base board. Secure with finishing nails every 2 inches. Use a nail set to countersink each nail.
Glue and pin the corner joints where the side pieces meet the front. This prevents delamination over time.
Add Emboss Rope Top Trim
Apply 1″ diameter emboss rope trim to the top board. Let it overhang the bottom edge by 0.5″. This overhang creates a shadow line that visually separates the top from the front, hiding the seam where the false bottom will open. Glue and pin the rope in place every 3″. Sand lightly after installation to blend edges.
Disguise Seams with Layered Trim
The combination of crown molding and emboss rope adds depth and realism. From a distance, the shelf looks like a high-end built-in. The layered profile distracts from the functional mechanics underneath, making the concealment nearly invisible.
Install the False Bottom Mechanism
Mount Full-Overlay Cup Hinges
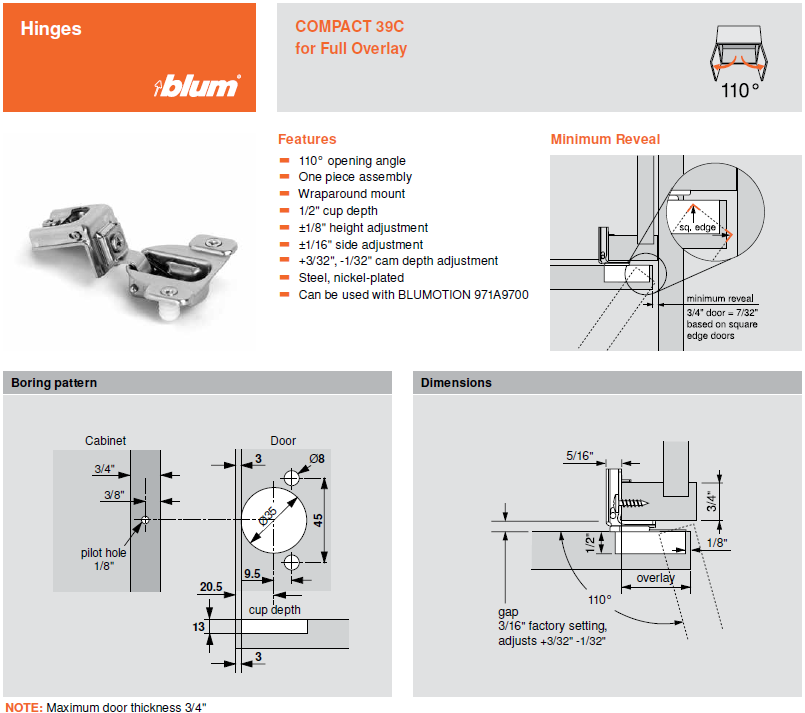
Use HC11SFC-N-P-C5 full-overlay cup hinges, the same type used in kitchen cabinets. These allow a smooth 90°+ swing and self-close capability. Position hinges 3.5″ from each side edge on the underside of the shelf. Mark screw centers. Drill 1.375″ diameter Forstner holes for the hinge cups. Chisel out if no Forstner bit is available.
Attach Support Bar to Wall
The hinges connect to a support bar or arm mounted to wall studs. Cut a solid wood bar, 2×4 or 2×6, to fit between the studs. Pre-drill and secure it with 2.5″ screws. Ensure it’s perfectly level. Attach the hinges to the support bar first, then connect the shelf.
Test the swing. The bottom should clear the wall by at least 1″ when open.
Set Stop Blocks Inside Frame
Cut two 6″ long 2×6 blocks. Mount them ¾” down from the top on the inside of the side panels. These stop blocks limit the downward travel of the false bottom. When closed, the bottom panel rests flush against them. Position so the shelf closes tightly without binding.
Choose and Install a Locking System
Use Magnetic Locks with Hidden Triggers
Install a child-safety cabinet magnetic lock with approximately 1″ activation range. Glue 45° prism blocks inside the crown molding to create a flat surface for the lock plate. To align the lock properly, apply toothpaste to the lock’s ridges, close the shelf, then reopen. Where the toothpaste transfers is your contact point. Mount the lock at that spot.
Critical: Manually move the lock to the open position before final attachment. Otherwise, you may lock yourself out of your own shelf.
Hide Magnets in Decorative Objects
Replace the visible magnetic key with tiny neodymium magnets. Embed them in fake books, picture frames, or wall art. Cover the magnet with a felt pad or price tag to avoid detection. Place the trigger item on the shelf. When brought close, it releases the lock.
For higher security, use multiple magnetic locks, each requiring a different magnet. This adds exponential difficulty for unauthorized access.
Upgrade to RFID for Firearm Storage
For faster, more secure access, use an RFID lock system. It reads fobs or cards through wood with no line-of-sight needed. Mount the mechanism inside the cavity. Insert fresh batteries during installation. Do not press reset unless reprogramming. Test with all fobs. Store a backup fob in a separate safe location.
Mount the Shelf Securely to the Wall
Locate Studs and Mark Level Line
Use a stud finder to identify two wall studs. Mark a level line at your desired height, typically 48″ to 60″ from the floor. Use a laser level for precision. Avoid placing above radiators or in direct sunlight to prevent warping.
Mount Steel Bracket (Professional Method)
For maximum strength, use a welded steel bracket similar to TimberVaults units. Attach it directly to the studs with 2.5″ screws. Slide the shelf onto the bracket. Secure with additional screws through the back panel. This method supports heavy loads and allows quick removal for maintenance.
Use Drywall Anchors Only as Backup
If you miss a stud, use heavy-duty drywall anchors such as toggle bolts. But never rely solely on anchors. Always have at least one screw per stud. Pilot holes prevent wood splitting. Recheck level after tightening all screws.
Add Dampers and Safety Chains
Install Gas Struts for Smooth Motion
Attach gas dampers, also called struts, to prevent slamming. Common in car hatches, they provide controlled opening and closing. Mount one at the far-right corner, or both for heavy shelves. Build a strut block between studs to mimic spacing. Pre-drill all holes. Leave the bottom pivot slightly loose during testing to allow fine-tuning before final tightening.
Attach Jack Chain to Limit Swing
Install a jack chain between the shelf and wall to prevent over-swinging. Use ½” sheet metal screws with flat washers to secure both ends. The chain should stop the shelf about 45° open, protecting walls and flooring. Test clearance to ensure no part hits during operation.
Secure Stored Items with Magnets
Mount 25-lb Neodymium Magnet
Inside the compartment, install a 25-lb pull-force neodymium magnet. Position it to hold a firearm’s barrel or grip when the shelf is open. Protect the magnet with rubber coating, 3M double-sided tape, or screw it down with countersunk fasteners. This keeps weapons stable and prevents noise from shifting.
Add Magnetic Baseplate for Tools
Use a magnetic baseplate with countersunk magnets covered in sticky-back foam. Place it on the bottom panel to hold knives, flashlights, or multitools. Items stay in place and are easy to reposition. Avoid foam-only linings because they look suspicious and offer no functional benefit.
Illuminate Contents with LED Lights
Install Motion-Activated LEDs
Clip-in or adhesive motion-activated LED lights turn on when the shelf opens. Place them on the compartment ceiling, under the front lip, or on a magnetic base for repositioning. These lights cost under $10 and ensure quick identification of contents in low light, critical during emergencies.
Power and Placement Tips
For battery-powered units, check every 6 months. For hardwired options, conceal wires inside the frame during construction. Avoid overly bright LEDs because subtle lighting maintains discretion.
Finish for Durability and Disguise
Sand and Distress the Wood
Sand the entire unit with 120-grit paper. Round sharp edges slightly. For an aged look, distress with a hatchet, chain, or nail to create dents and scratches. Fill imperfections with wood filler, then sand smooth. This mimics wear and helps the shelf blend into older homes.
Apply Stain and Protective Coat
Stain in two layers. Apply a dark stain such as Minwax Express to highlight distressed areas. Follow with a lighter topcoat such as Minwax Early American for depth. Finish with semi-gloss polyurethane for durability. Let dry 24 hours. Alternatively, spray flat black for an industrial look.
Add Decorative Accents
Attach diamond-plated aluminum tread to the top surface. Cut a slot for hinge clearance. Secure with small round-head screws. Use matching crown molding to blend with room trim. Display books, plants, or photos to maintain normal appearance.
Test and Maintain the Shelf
Verify All Mechanisms Work
Before final mounting, test hinge swing to ensure it clears the wall. Test lock engagement to confirm it opens reliably. Test stop blocks to verify the shelf sits flush. Test struts to ensure no slamming. Check monthly. Lubricate hinges and latches with silicone spray. Replace RFID batteries annually.
Follow Safety Best Practices
Never store loaded firearms unless legally compliant. Keep out of children’s reach. Avoid overloading and stick to design capacity. Test opening speed in low light. Store only essentials because clutter delays access.
Frequently Asked Questions About Making a Concealment Shelf
What tools do I need to build a concealment shelf?
You need a table saw, sliding compound miter saw, drill, stud finder, level, sander, and measuring tools. A Kreg Jig is optional but recommended for pocket hole reinforcement. Basic hand tools like hammers, screwdrivers, and clamps are also necessary.
How much does it cost to build a concealment shelf?
A basic build costs approximately $25–$40 for materials. Premium builds with RFID locks and steel brackets range from $100–$300. Pre-fabricated units like TimberVaults fall in this higher price range.
Can I store a loaded firearm in a concealment shelf?
You should only store loaded firearms if legally permitted in your jurisdiction. Many builders prefer storing unloaded firearms for safety. Always keep weapons out of reach of children and follow local regulations.
How do I hide the lock mechanism on my concealment shelf?
Use magnetic locks with hidden triggers embedded in decorative objects like fake books or picture frames. For RFID systems, mount the mechanism inside the cavity where it’s invisible. Mechanical latches can be installed flush with the surface.
Is a concealment shelf safer than a traditional safe?
Concealment shelves offer faster access, often in seconds compared to 5–15 seconds for traditional safes. They blend into décor and don’t advertise valuables to burglars. However, they typically offer less physical resistance to forced entry than heavy safes.
How long does it take to build a concealment shelf?
Build time ranges from 4–8 hours depending on your skill level and design complexity. Beginners can complete simpler versions in a weekend using pre-cut lumber and basic tools.
Key Takeaways for Building Your Concealment Shelf
A concealment shelf combines woodworking precision with smart security to create functional hidden storage. The most critical steps are anchoring securely into wall studs, cutting precise 45° bevels for tight joints, and installing a reliable locking mechanism that remains hidden. Whether you choose a basic magnetic lock or upgrade to RFID for firearm storage, test all mechanisms before final mounting. With proper finishing and decorative accents, your concealment shelf will look like a standard floating shelf while providing instant access to your most important valuables. Now go place it where it’s needed most.


