

You’ve seen them in modern boho apartments, minimalist bathrooms, and rustic kitchens. Elegant wooden shelves suspended by thick rope, floating mid-air like magic. But they’re not magic. They’re DIY. And making a hanging shelf is easier than you think. With just a few basic tools, affordable materials, and under an hour of time, you can build a sleek, functional shelf that adds charm and storage to any room.
This guide walks you through every step of how to make a hanging shelf using wood and rope. We cover cutting the wood and drilling precise holes, tying secure knots and achieving a level hang, plus expert tips on charring wood for durability and preventing frayed rope. Let’s build.
Choose the Right Wood for Your Shelf
Start with a solid wood board. White oak is ideal for strength and beautiful grain, but pine or poplar work well if you’re on a budget. Avoid particleboard or MDF. They’re too weak for hanging applications.
Cut your board to these standard dimensions:
• Standard shelf length: 24 inches
• Depth: 6–10 inches
• Custom option: Cut a 10-foot board into four 30-inch shelves or six 20-inch ones to save money
Buying a longer board costs about $10 new or $5 used, letting you make multiple shelves at nearly half the cost per unit.
Sand all edges and faces with 320-grit sandpaper. This prevents splinters and gives a clean finish, especially important if the shelf will be touched often. Pro tip: Round the top corners slightly with sandpaper for a softer, professional look.
Drill Precise Holes for Rope
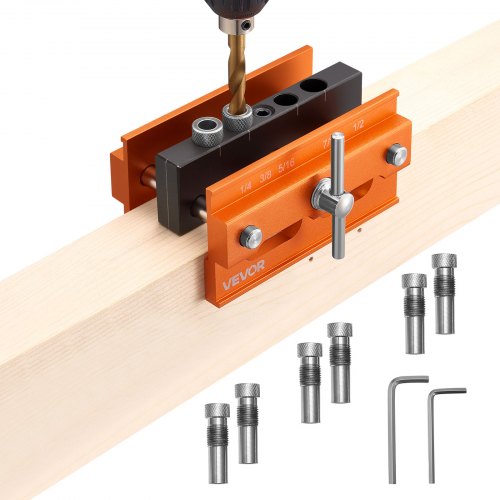
Measure ¾ inch from each corner along the top edge of the shelf and mark your drill points. This distance balances aesthetics and structural stability. Too close to the edge risks splitting. Too far in looks awkward.
If making multiple shelves, stack two boards and clamp them together. Drill through both at once using a ¾-inch Forstner bit. This ensures identical hole placement across shelves, which is critical for even hanging. A Forstner bit creates flat-bottomed, clean holes without tear-out, giving the rope a smooth path.
Warning: Drill straight down. Angled holes cause uneven tension and wobbling.
Finish the Wood for Style and Durability
You don’t need stain or sealant, but finishing enhances durability and appearance.
For a natural finish, lightly sand with fine paper and wipe clean with a dry cloth. This leaves a warm, organic appearance.
For a charred look, pass a blowtorch slowly over the surface to lightly scorch the wood. This ancient Japanese technique boosts rot resistance and adds dramatic texture. Move the torch evenly, creating a thin black layer. Don’t burn deeply or ignite the wood. After charring, let it cool, then wipe with a damp cloth to remove soot. Optionally seal with natural oil like tung oil for extra protection.
Cut and Prepare the Rope

Use 3/8-inch sisal rope. It’s strong, natural-looking, and holds knots well. Cotton or jute are alternatives, but ensure they can support at least 10 pounds.
Buy a 25-foot roll (about $5). That’s enough for several shelves. Cut two pieces per shelf, each 6–7 feet long. Longer lengths let you adjust height later and tie secure knots.
Fresh-cut rope frays quickly. Prevent this by briefly singeing the ends with a lighter or blowtorch. Pass the flame over the tip until fibers melt slightly. This fuses them into a clean, fray-resistant end. Hold the rope taut and rotate it for even treatment.
Attach Rope to Wall Mounts
Each shelf hangs from a wall-mounted hook or ceiling bracket via a metal ring. To attach the rope, tie a lark’s head knot:
- Fold one rope in half to form a loop
- Place the loop under the metal ring
- Pull the loose ends through the loop
- Tighten to secure
This knot is simple, strong, and easy to untie for adjustments. Repeat on the second rope for the other side.
Pro tip: If you don’t have a ring, tie the rope directly to a heavy-duty wall hook. But rings allow smoother rope movement and better alignment.
Thread Rope Through the Shelf

Now suspend the shelf. On one side, separate the two strands of rope. Feed one strand through the front hole and the other through the back hole. Repeat on the opposite side.
This creates a cradle that centers the shelf and prevents twisting. As you thread, keep tension even. Let the shelf hang freely while you adjust.
Hang the metal rings on wall hooks (use anchors for drywall). Let the shelf settle. Check with a level. If one side sags, loosen the knot on the low side, pull more rope through to raise it, then re-tighten and recheck. Ideal spacing between multiple shelves is 10–12 inches vertically.
Secure and Trim Rope
Once level, tie double overhand knots or figure-eight knots at the bottom ends of each rope strand. These resist slipping and add a decorative touch.
Leave ½ to 1 inch of tail for a clean fringe, or trim flush for a minimalist look. After trimming, lightly torch the rope ends again to prevent future fraying. This final seal ensures long-term neatness.
Install the Shelf on Your Wall
Use heavy-duty wall hooks or screws anchored into studs when possible. For drywall, use plastic anchors rated for at least 20 pounds.
Mounting options include a wall hook with loop, ceiling eye bolt, or decorative bracket. Ensure both sides are at the same height. Measure from the floor up.
Each shelf can safely hold 5–10 pounds. This is perfect for small potted plants, books, candles, or picture frames. Avoid heavy items like appliances or large speakers. Before loading, give the shelf a gentle tug to test stability.
Customize Your Hanging Shelf Design
This basic design is highly adaptable.
For a modern look, paint the wood white or black and use waxed cotton rope in gray or navy. For rustic charm, use reclaimed wood and leave the rope natural with long fringe. For boho flair, add macramé knots along the ropes and hang multiple shelves at staggered heights.
Functional upgrades include gluing felt pads to the shelf underside to protect walls, inserting wood plugs into unused holes for a clean backup look, or using eye bolts instead of holes for industrial style.
Troubleshoot Common Problems
If the shelf tilts, loosen the knot on the low side, pull more rope through the lark’s head knot, re-level, and re-tie. Always recheck after tying. The knot can shift slightly when tightened.
To stop rope fraying, singe ends immediately after cutting, avoid rough surfaces that abrade rope, and inspect every few months. Replace rope if you see significant wear.
To prevent wobbling, ensure both ropes are equally taut, check that wall hooks are secure, and confirm holes are aligned. A wobble-free shelf feels solid and looks professional.
Maintain Your Hanging Shelf
Dust regularly with a dry or slightly damp cloth. Avoid soaking the wood, especially if unsealed. For charred shelves, don’t scrub. Wipe gently to preserve the finish.
Inspect rope monthly for fraying, stretching, or discoloration. Retie or replace rope as needed. A small investment in maintenance prevents accidents.
One advantage of the knot-based design: you can take it down and rehang anywhere in minutes. This is ideal for renters or seasonal decor changes.
Final Thoughts on Making a Hanging Shelf
Making a hanging shelf isn’t just a DIY project. It’s a design statement. With just wood, rope, and basic tools, you’ve created a functional, stylish piece that costs less than $10 and takes under an hour to build.
You’ve learned how to cut and finish wood beautifully, drill precise aligned holes, tie reliable lark’s head and stopper knots, hang level stable shelves, and customize for any room. With options like charred finishes, colored rope, and adjustable heights, no two shelves need to look alike.
Whether you’re styling a bathroom, displaying succulents, or adding floating storage to a studio apartment, this hanging shelf delivers big impact with minimal effort. Now go build another. One for the kitchen, one for the bedroom. Once you start, you won’t want to stop.
Frequently Asked Questions About Making a Hanging Shelf
What type of wood is best for a hanging shelf?
White oak is recommended for its strength and attractive grain, but pine or poplar work well for budget projects. Avoid particleboard or MDF since they cannot support the weight and stress of hanging applications.
How much weight can a rope hanging shelf hold?
A properly constructed rope hanging shelf can hold 5–10 pounds safely. This makes it ideal for small potted plants, books, candles, and picture frames. Avoid heavier items like appliances or large speakers.
How do I keep rope from fraying?
Seal rope ends by briefly passing a flame (lighter or blowtorch) over the cut tips immediately after cutting. Hold the rope taut and rotate it for even treatment. This melts the fibers and prevents future fraying.
Can I install a hanging shelf on drywall?
Yes, use plastic anchors rated for at least 20 pounds, or mount into wall studs when possible. Heavy-duty wall hooks designed for drywall provide secure mounting points for the shelf’s weight.
How do I fix an uneven hanging shelf?
Loosen the knot on the lower side, pull more rope through to raise it, then re-tighten the knot. Check with a level and repeat until the shelf is perfectly even. The lark’s head knot allows easy height adjustment.


