

Have you ever needed a place to store your favorite hats—baseball caps, fedoras, or beanies—but found them piling up on shelves or getting crushed in drawers? A DIY hat rack is the perfect solution: functional, customizable, and surprisingly easy to build. Whether you’re a beginner with basic tools or an experienced woodworker looking for a stylish wall piece, how to make a hat rack can be tailored to your space, tools, and taste.
This guide walks you through every proven method, material option, and pro tip from real builds, covering everything from a simple rope-and-hook rack for renters to a solid oak frame for permanent display. You will learn exact dimensions, tool requirements, step-by-step assembly, and how to hide hardware for that gallery-wall look. No fluff, no guesswork—just clear, actionable steps so you can build a rack that holds up to 20 hats, fits your wall, and matches your décor in under a weekend.
Build a Solid Wood Frame Hat Rack
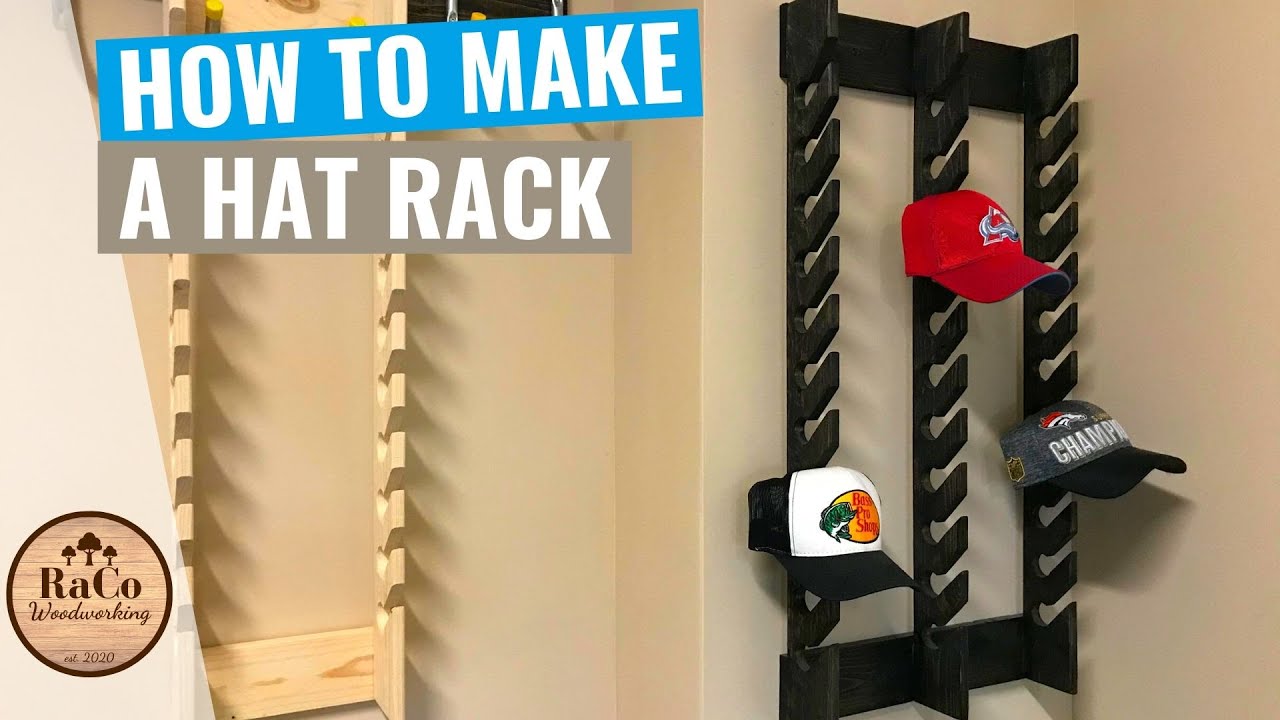
Construct a durable, high-capacity hat rack using common lumber and basic workshop tools. This design supports up to 20 hats and mounts securely to any wall.
Cut Lumber to Size
Start with two 2×4s cut to 42 inches for vertical supports and two 1×6s cut to 16 inches for top and bottom crossbars. Use pine, redwood, Douglas fir, or oak depending on durability and finish preference. Mark all pieces clearly before cutting to avoid mix-ups during assembly.
Drill Hat Holes with Forstner Bit
On each 2×4 face, mark 10 evenly spaced holes approximately 3¾ inches apart. Use a 2⅛-inch Forstner bit to drill straight through the board. This larger diameter fits wider hat crowns like fedoras and cowboy hats. Place a backer board behind the wood to prevent blowout. Drill partially from one side, flip, and finish from the other if needed.
Angle the Top for Brim Support
Set a bandsaw or jigsaw to about 15 degrees and cut the top edge of each vertical 2×4. This angled profile cradles hat brims naturally, preventing slippage and improving visual flow. Use a ¾-inch scrap block as a spacer guide to maintain consistency between cuts.
Sand and Smooth All Surfaces
Sand the entire frame starting with 120-grit paper, then finish with 220-grit. Round over sharp edges with a palm sander or sandpaper-wrapped dowel. Pay special attention to hole interiors by wrapping sandpaper around a dowel and rotating to deburr and smooth. This reduces friction when sliding hats in and out.
Assemble with Screws and Glue
Apply wood glue to the ends of the 1×6 crossbars. Position them at the top and bottom of the 2×4s, ensuring corners are square. Clamp in place. Pre-drill pilot holes to prevent splitting, then drive 1½-inch drywall screws flush. Wipe away excess glue before it dries.
Apply a Stain or Torch Finish
For a rustic look, lightly pass a propane torch over the wood surface to char it slightly (Shou Sugi Ban style). Wipe off soot with a damp cloth. Then apply a dark oil-based stain to deepen the grain. Let dry fully before mounting. Alternatively, use clear polyurethane or tung oil for a natural finish.
Create an Angled Slot Rack for Baseball Caps
Build a sleek, low-profile rack ideal for baseball caps and snapbacks. This version uses angled slots to keep hats secure and easy to access.
Mark Centerline and Hole Positions
Use a 5-inch-wide by 28-inch-long pine board. Find the centerline (2½ inches from either edge) and mark it along the length. Place hole centers every 4 inches at 4″, 8″, 12″, 16″, 20″, and 24″. These will hold six caps, but you can extend the board for more.
Offset Drilling Points Upward
Shift each mark ½ inch upward from the centerline (drill at 3½”, 7½”, etc.). This creates upward-angled slots that let hats slide in from above and rest securely on a 15-degree lip. Accuracy here ensures consistent retention across all positions.
Drill with 1½-Inch Forstner Bit
Use a 1½-inch Forstner bit to drill straight through the board at each offset point. Keep the drill bit perpendicular to the surface. Use a drill press if possible, or a guide to maintain alignment. Always use a backer board to prevent splintering on the backside.
Cut 15-Degree Angles Along Offset Lines
Set your miter saw to 15 degrees. Make shallow cuts along the upward-offset lines, stopping before exiting the back of the board. These angled notches form a retaining lip that holds caps in place while allowing easy removal.
Round Edges and Apply Finish
Use a router with a ¼-inch roundover bit to soften the front and side edges. Sand all surfaces from 120 to 220 grit. Apply your chosen finish (paint, stain, or clear coat) while protecting the hole interiors from drips.
Attach Backing Board and Hanger
Screw a 3-inch-wide by 28-inch-long backing board to the rear using 1½-inch wood screws. Pre-drill to avoid splitting. Install a sawtooth picture hanger by drawing a line 1½ inches below the top edge, aligning the hanger, and securing with small screws. Mount to a wall stud or drywall anchor rated for the load.
Construct a Two-Rail Slotted Hat Rack
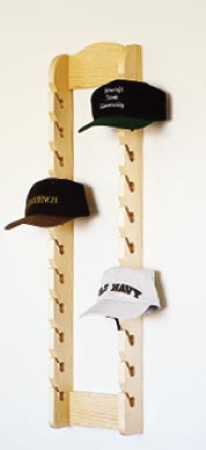
Double your storage with a modular dual-rail design. Ideal for larger collections and wider hats.
Prepare Rails and Connectors
Cut two 1×4 spruce boards to 36 inches for the main rails. Cut two (or three) 10-inch-long connector boards from the same material. These will join the rails at the ends, creating a floating shelf effect.
Drill Evenly Spaced Hat Holes
Mark and drill 1½-inch holes every 3 to 4 inches along each rail using a Forstner bit. Use a stop block or printable template to ensure perfect spacing. Drill straight through, supporting the back with scrap wood.
Cut 1-Inch Grooves for Assembly
Mark a 45-degree line along the lower edge of each rail. Use a table saw or band saw to cut a 1-inch-wide groove along this line. Insert the 10-inch connector boards into the grooves at both ends. They should fit snugly without glue, but you can reinforce with screws if desired.
Sand and Finish Before Assembly
Sand all pieces before joining. Use a roundover bit on the front and side edges of the rails. Leave the back flat for flush wall contact. Apply your chosen finish (polyurethane, paint, or oil), then let dry completely.
Assemble and Mount Securely
Slide the connector boards into the grooves and check that the frame is square. Lightly clamp and optionally glue joints. Sand any rough spots. Mount using D-rings or a cleat system for heavy-duty support. For a floating look, use a T-slotted router bit on the back to slide over a wall-mounted screw.
Build a Dowel-Joined Oak Hat Rack
Upgrade your build with precision joinery and a custom silhouette. Perfect for intermediate woodworkers.
Cut Oak Profiles to Size
Use 1×4 oak boards and cut two to 37 inches (vertical sides) and two to 10.5 inches (horizontal connectors). Label each piece to avoid confusion during joinery.
Design and Apply Full-Scale Template
Create a curved or angled brim-supporting profile in Adobe Illustrator or by hand. Print full-scale and attach it to the side pieces using spray adhesive or tape. This ensures both sides match perfectly.
Cut Profile with Jigsaw or Bandsaw
Follow the template line with a jigsaw or bandsaw. Cut slowly for smooth curves. Sand edges with 120 to 220 grit paper until smooth and symmetrical.
Install Dowel Joints for Strength
Mark joint locations where connectors meet side profiles. Use a doweling jig to drill precise, aligned holes. Apply wood glue, insert dowels, then assemble the frame. Clamp until the glue cures (usually 2 to 4 hours).
Stain and Protect the Wood
Remove any dried glue squeeze-out with a chisel or sandpaper. Test your chosen oil-based stain on a scrap piece first. Apply evenly with a brush or cloth. Let dry fully (overnight is best) before handling or mounting.
Build a Renter-Friendly Rope and Hook Rack
Construct a minimalist rack with no power tools required. This design works great for apartments where you cannot drill into walls.
Measure and Cut Rope Lengths
Determine your desired span (24 to 36 inches works well). Cut two long ropes equal to the span plus 6 to 12 inches for knots. Add a third, shorter rope (about half the span) for mid-layer depth and hardware concealment.
Install Wall Hooks Securely
Choose hook type based on your wall. For studs, use screw-in hooks. For drywall, use toggle bolts or heavy-duty anchors. For renters, use high-weight Command strips. Use a level to align hooks and space them to match your widest hat (typically 12 to 18 inches apart).
Attach and Layer Ropes
Loop ropes over hooks or tie with secure knots (bowline or clove hitch work well). Trim excess and seal synthetic ends with a lighter to prevent fraying. Add the shorter rope in the middle, offset vertically to hide clips and create visual interest.
Hang Hats to Float on Rope
Start with the top hat and clip it high so it covers the hook. Add more below, alternating clip positions to avoid bunching. Use decorative clips to enhance style. Hats appear suspended, creating an art-like display.
Choose the Right Mounting Method
Select the appropriate mounting option based on your wall type, rack weight, and desired aesthetic.
Use T-Slot for Floating Appearance
Cut a recess on the back of your wood rack using a T-slotted router bit. Mount a screw or nail to the wall. Slide the rack on and it hangs flush with no visible hardware. This is ideal for a modern, gallery-style finish.
Install Sawtooth Hangers for Simplicity
This works best for lightweight racks under 10 pounds. Position the hanger 1½ inches below the top edge. Secure with small screws. Hang on a single wall screw and level carefully to prevent tilting.
Anchor Into Studs or Drywall Safely
Always mount heavy racks into wall studs when possible. For drywall-only mounting, use anchors rated for at least 20 pounds. Test stability by gently tugging after installation.
Optimize Capacity and Spacing
Maximize storage without overcrowding your hat collection.
Space Holes 3 to 4 Inches Apart
This is the sweet spot for most hats. Use a ¾-inch scrap block as a spacing jig during layout. Consistent gaps prevent brim overlap and make hats easier to grab.
Test Fit Your Hats First
Before final drilling, slide a few hats into test holes. Adjust diameter (up to 2 inches) or spacing if needed. A fedora may need more room than a baseball cap.
Scale Up for Larger Collections
Extend board length or add a third rail to hold 30 or more hats. Maintain symmetry by centering holes and using templates for uniformity.
Apply the Right Finish for Durability
Protect your work and enhance appearance with the proper finish.
Round All Edges for Safety
Use a router with a ¼-inch roundover bit on front and side edges. Sharp corners can snag clothing or cause injury. Leave the back flat so it sits flush against the wall.
Smooth Hole Interiors
Wrap 150-grit sandpaper around a wooden dowel and rotate it inside each hole. This removes splinters and makes hat insertion smoother.
Choose the Right Finish
Clear coat (polyurethane or tung oil) protects grain and works great for pine or oak. Paint lets you match room décor, and semi-gloss provides wipeable surfaces. Torched wood adds rustic texture but must be sealed with oil afterward. Dark stain hides wear and highlights grain patterns.
Maintain Your Hat Rack for Long Life
Keep your hat rack looking great for years with simple maintenance.
Clean Wood Racks Regularly
Wipe with a dry or slightly damp cloth. Avoid harsh cleaners. Reapply oil or stain every few years if exposed to sunlight.
Inspect Rope Racks Monthly
Check for fraying, loose knots, or weakened hooks. Replace ropes or clips as needed. Synthetic fibers last longer than jute or cotton.
Tighten Screws Annually
Even well-installed racks can loosen over time. Check all screws and anchors once a year, especially in high-traffic areas.
Frequently Asked Questions About Making a Hat Rack
What is the best wood for a DIY hat rack?
Pine, spruce, and poplar are affordable and easy to work with. Oak offers superior durability and grain beauty. Redwood and Douglas fir provide natural resistance to moisture. Choose based on your budget and desired finish.
How many hats can a standard hat rack hold?
A solid wood 2×4 frame holds approximately 20 hats (10 per side). A two-rail slotted rack holds about 20 total (10 per rail). A single-rail angled slot rack holds 6 to 8 caps, depending on board length.
Do I need special drill bits for hat rack holes?
Yes, a Forstner bit is essential. Use 1½-inch bits for baseball caps and snapbacks. Use 2⅛-inch bits for wider crowns like fedoras and cowboy hats. Forstner bits create clean, flat-bottomed holes.
Can I make a hat rack without power tools?
Yes, the rope and hook method requires no power tools. You will need scissors or a utility knife, a level, and mounting hardware. This is the best option for renters or anyone without a workshop.
How do I prevent hats from falling out of angled slots?
The 15-degree angle creates a lip that holds hats in place. Make sure your offset drilling is accurate (½ inch upward from centerline). Test fit hats during construction to ensure the retention feels secure.
What is the easiest hat rack design for beginners?
The single-rail angled slot rack is the most straightforward. It uses basic tools, requires simple joinery, and provides immediate results. The 2×4 frame is also beginner-friendly if you have a drill and basic measuring tools.
Key Takeaways for Building Your Own Hat Rack
Whether you choose a rugged 2×4 frame for the garage or a floating rope display for your apartment, how to make a hat rack is a simple, rewarding project. The right hole size (1½ to 2⅛ inches depending on hat type), consistent spacing (3 to 4 inches apart), and secure mounting into studs or rated anchors are the three most critical factors for success. Always round edges for safety, smooth hole interiors for easier hat insertion, and apply a protective finish suited to your décor style. With these proven methods, you will create a functional piece that lasts and keeps your hats in perfect shape.


