
You have a metal locker with limited space, and everything piles up at the bottom. Helmets roll around, books get scuffed, and your gear looks messy. The solution is a custom locker shelf that transforms how you use that cramped metal box. And the best part? You do not need a workshop or professional tools to do it. With the right method, you can build a strong, removable shelf in under an hour with no permanent damage, no welding, just smart DIY approaches.
This guide covers three proven, real-world-tested ways to make a locker shelf using materials you likely already have or can grab cheaply. From using factory-punched holes inside lockers to repurposing magnetic knife holders from IKEA, we will walk you through each option with clear steps, safety tips, and load-testing results.
Use Factory-Punched Holes for Adjustable Shelves

Most metal lockers come with rows of pre-drilled holes along the side walls. These are designed to hold shelf pins or brackets, and by tapping into this built-in system, you can install strong, height-adjustable shelves without drilling a single new hole.
Cut and Fit MDF Shelves to Size
Start by measuring your locker interior width, depth, and height clearance. Subtract 1/4 inch from width and depth to ensure a smooth fit because metal edges are not always perfectly square. Use 3/4-inch thick MDF for a smooth, affordable shelf that is easy to cut with a circular saw or table saw.
Cut one test shelf first and slide it in before making more. This avoids errors across multiple pieces. One 4×8 sheet of MDF can yield up to 12 shelves depending on size.
Round Over Edges for Durability
Raw MDF has sharp edges that chip easily when hit by helmets, skateboards, or boots. Fix this by rounding the front edge with a router table and 3/8-inch round-over bit. This small step drastically improves impact resistance.
After routing, lightly sand the edge with 220-grit paper to remove fuzz. Wear a respirator during all cutting and sanding because MDF dust contains resin and is hazardous if inhaled.
Install Shelf Pins in Pre-Drilled Holes
Drill four holes in each shelf to match the locker hole pattern. Use a drill stop collar to prevent drilling through the MDF. A jig ensures every shelf has identical hole placement, which is critical for alignment.
Insert shelf pins into the locker factory holes. Start with just two pins tightened and leave others loose until shelves are positioned. Adjust heights as needed, then secure all pins.
Finish with Wax for Protection
MDF swells if wet. To protect it, apply a thin coat of paste wax. It darkens the surface slightly and feels greasy at first but buffs to a smooth finish. Wax repels moisture and helps hide minor scuffs.
Reapply once a year if used in humid areas. Keep liquids out of the locker. This is not waterproof, but it is durable enough for daily wear.
Build Magnetic Outer Shelves with IKEA Knife Holders
Want extra storage without touching the inside of the locker? Attach shelves to the outside using powerful magnets. This method is 100 percent removable, requires zero drilling, and supports heavy loads thanks to hidden neodymium magnets.
Repurpose Magnetic Knife Holders as Brackets
Each IKEA magnetic knife strip contains 10 neodymium magnets, rare-earth magnets strong enough to hold knives vertically. When used horizontally, they can support over 20 pounds each, making them perfect as invisible shelf brackets.
These holders have a recessed wooden back. Replace it with a custom-cut plywood piece to create a flat, attractive shelf base.
Glue Plywood Backing to Magnetic Strips
Cut a scrap piece of plywood to fit snugly into the recess of the magnetic holder. Sand and stain it to match your style. Then bond it in place with construction adhesive to create a solid shelf ledge.
Let the glue cure fully, 24 hours, before use. The adhesive ensures the wood will not shift under load even during impact testing.
Mount and Test Load Capacity
Place one magnetic bracket on each side of the locker at the same height. Use a level or tape measure to align them. The magnets grip the steel locker instantly with no screws and no damage.
Before adding real items, test the shelf by placing an unstained test board across the brackets. Punch it, jump on it, stack heavy appliances. If it holds, cut and install your final stained shelves.
Use for Bins, Baskets, or Display
These outer shelves are ideal for holding storage baskets between two lockers, displaying collectibles or tools, or adding lighting or hooks underneath. Since they are removable, you can reposition them anytime.
Create Removable Ladder Frame Shelves
:max_bytes(150000):strip_icc()/Illustration_3-ceda2476691f438ca0d714b40a7f5bc9.png)
No factory holes? No problem. Build a self-supporting ladder frame inside the locker using wood furring strips. It stands on its own, holds multiple shelves, and can be removed anytime with zero attachment to the locker.
Build a Wood Ladder Frame with Furring Strips
Use 1×2 furring strips for the vertical legs. Cut them to fit the locker height, leaving 1 to 2 inches clearance for door swing. Then cut horizontal rungs from scrap plywood at even intervals, every 8 to 10 inches works well.
Attach rungs with wood glue for strength, brad nails for alignment, and 2-inch wood screws for durability. This overbuilt frame handles heavy loads and resists wobbling.
Attach Shelves to the Frame
Cut plywood shelves to fit inside the locker. Slide them onto the rungs. For stability, brad nail the top and middle shelves to the frame.
Leave the bottom shelf unattached. This lets you remove it to store tall items like boots, cutting boards, or sports bags.
Insert and Adjust Inside Locker
Place the entire ladder-shelf unit inside the locker. It should fit snugly but slide in and out easily. No screws, no glue to the locker, just pure friction and smart design.
You can build one per locker or go modular. Once the prototype works, scale up using new furring strips and a full sheet of plywood. Total cost is under 30 dollars.
Choose the Right Method for Your Needs
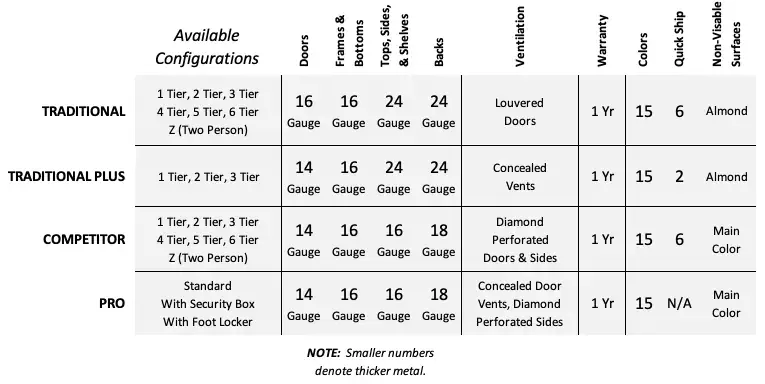
Not every shelf solution fits every situation. Your locker type, tools, and storage needs determine the best approach.
Need Adjustability? Use Factory Holes
If your locker has punched side holes, go with the MDF plus shelf pin method. It is the most flexible because shelves can be moved up or down in seconds. This is ideal for growing kids or changing gear.
Renting or Want No-Drill? Choose Magnets or Ladder Frame
Magnetic shelves and ladder frames leave zero marks. They are perfect if you cannot modify the locker or plan to move soon. Both are strong, removable, and easy to rebuild elsewhere.
Carrying Heavy Loads? Opt for Ladder or Magnets
Neodymium magnets and overbuilt wood frames handle heavy appliances, tools, or bins. MDF on pins works for medium loads, but for anything over 25 pounds, go with the ladder or external magnetic system.
Prefer a Finished Look? Stain Plywood
Raw MDF looks industrial. For a cleaner, more polished look, use sanded plywood and apply wood stain or paint. Pair it with magnetic brackets for a modern, custom appearance.
Safety, Maintenance, and Longevity Tips
Even simple projects need safe execution and care over time. Follow these best practices to keep your locker shelves functional and safe.
Always Wear a Respirator When Cutting MDF
This is not optional. MDF dust contains urea-formaldehyde resins that irritate lungs and are classified as carcinogenic with long-term exposure. Wear a NIOSH-approved respirator, safety glasses, and gloves.
Prevent Moisture Damage
MDF swells when wet. Wax helps, but avoid storing damp items directly on it. In humid environments, use plywood instead because it is naturally more resistant.
Clean and Reapply Finish Annually
Wipe shelves with a dry or slightly damp cloth. Never soak them. Re-wax MDF once a year. For stained shelves, touch up scratches with matching marker or stain pen.
Fix Chips and Loosening Fasteners
Chipped MDF edges can be sanded and re-waxed. If shelf pins loosen, tighten the screw or replace with a slightly larger one. Clean magnet surfaces if dust reduces grip.
Frequently Asked Questions About Making a Locker Shelf
Can I make a locker shelf without drilling any holes?
Yes. The magnetic outer shelf method uses neodymium magnets that grip the steel locker surface without any drilling. The ladder frame method also requires no holes because it is completely self-supporting inside the locker.
What is the strongest material for a locker shelf?
Plywood is stronger and more moisture-resistant than MDF. For heavy loads over 25 pounds, the ladder frame or magnetic outer shelf methods handle the most weight. Both have been load-tested with heavy appliances with no failure.
How do I keep MDF shelves from getting damaged by moisture?
Apply paste wax to the surface after cutting and sanding. Reapply annually. Keep liquids out of the locker and avoid storing damp items directly on the shelf. In humid environments, switch to plywood instead.
Can I adjust the shelf height later?
With the factory hole method, yes absolutely. Shelf pins insert into pre-drilled holes at any height, letting you reconfigure storage in seconds. Ladder frames can be rebuilt at different heights. Magnetic outer shelves can be repositioned by simply lifting and re-mounting the magnets.
How much does it cost to build a locker shelf?
The MDF method costs 20 to 40 dollars for a full sheet. The magnetic method can be free if you repurpose old knife holders. The ladder frame costs under 30 dollars total. All methods use affordable materials available at hardware stores.
Key Takeaways for Building Your Locker Shelf
Making a locker shelf is about reclaiming space, reducing clutter, and customizing your environment. Whether you are a parent organizing school gear, a DIYer in the garage, or a renter needing a temporary fix, these three methods give you real, tested options that work.
The MDF shelf with factory pins is best for adjustable, internal storage. The magnetic outer shelf wins for no-drill, heavy-duty, removable use. The ladder frame offers maximum flexibility and strength without modifying the locker.
All are low-cost, simple to build, and proven to last. Pick your method, gather your materials, and build a shelf that turns your metal box into smart storage today.


