
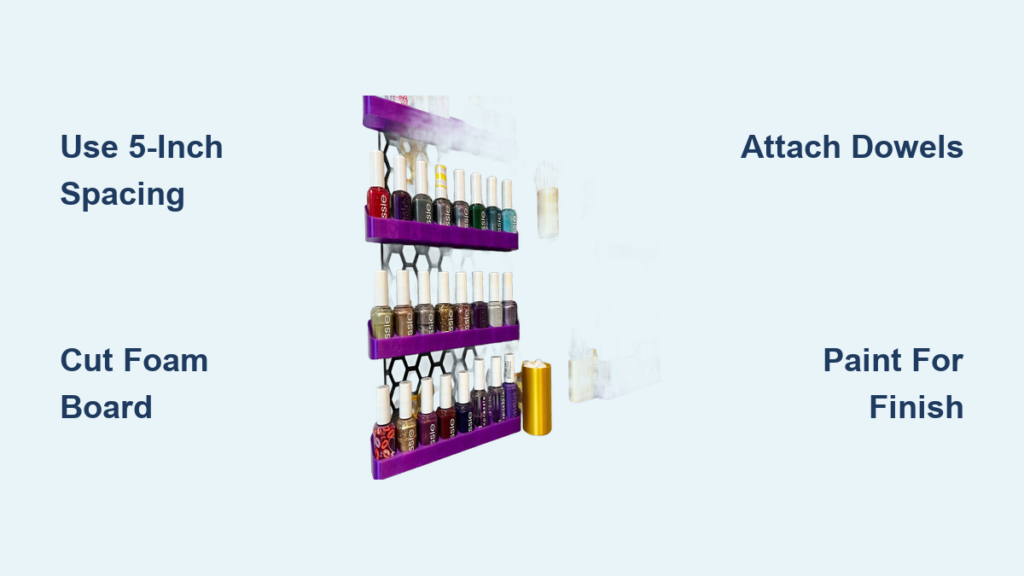
If you have ever struggled to find your favorite shade in a cluttered drawer or watched bottles tumble during a quick grab, it is time for a better solution. Learning how to make a nail polish rack transforms chaos into order without breaking the bank. Whether you are a beauty enthusiast with over 100 bottles or simply want a tidy vanity display, DIY racks offer customization, durability, and style far beyond store-bought options. From sleek wall-mounted planks to upcycled spice racks and budget-friendly foam board builds, this guide covers every proven method. You will discover exactly what materials to buy, which tools to use, and how to build a rack that fits your space, skill level, and aesthetic starting at just $3.
Choose Your Build Method Based on Skill and Budget
Five effective DIY approaches let you tailor your nail polish rack to your needs. Each method balances cost, effort, and visual impact differently so you can pick what works best for your situation.
Freestanding Wooden Shelf for Custom Results
This method works best for people who want furniture-grade results with moderate woodworking skill. You get full control over dimensions, finish, and design details.
Wall-Mounted Plank System for Space Saving
This approach is ideal for clean, space-saving vertical storage. It requires easy assembly and works well in smaller bathrooms or vanity areas.
Repurposed Spice Rack for Vintage Style
Perfect for vintage lovers on a tight budget, this method requires minimal tools and lets you transform a thrift store find into something special.
Foam Board With Dowels for Ultra-Low Cost
Great for renters or students needing portable storage, this method costs under $10 and can be assembled in an afternoon.
IKEA Hack for Quick Results
A fast, no-cut solution that is beginner-friendly. You can paint these racks in any color to match your decor.
Build a Wooden Freestanding Display Shelf

Create a sturdy rack that looks like it came from a boutique. This method gives you complete creative control over the final look.
Cut and Prepare Your Wood Panels
Start with pre-cut wood for precision, or cut your own using a miter or circular saw. Use pine, poplar, or MDF panels with these recommended dimensions.
Shelf depth should be at least 5 inches to fit most nail polish bottles. Side panels should be 12 to 24 inches tall depending on how many bottles you want to store. Shelves should be 2 to 3 inches wide and at least 5 inches deep. Sand all pieces with 120-grit paper, progressing to 220 for a smooth finish.
Assemble the Frame With Glue and Nails
Mark shelf positions on both side panels using a level for perfect alignment. Apply wood glue to joints, then clamp and attach each shelf. Reinforce with two finishing nails per shelf. Pre-drill holes to prevent splitting. Countersink nails slightly so they can be filled flush later.
Add Trim for a Polished Look
Enhance aesthetics with decorative trim around the outer edges. Miter corners at 45 degrees for seamless joints, or use square butt joints for simplicity. Secure with wood glue and brad nails. This step elevates the rack from basic to custom-crafted.
Fill, Sand, and Paint Your Rack
Seal gaps and nail holes with wood filler, smoothing with a damp finger before it dries. Sand again after drying. Wipe clean with a tack cloth. Apply 2 to 3 coats of spray paint for a drip-free, professional finish. Let dry fully between coats.
Install Hanging Hardware
For wall mounting, attach a picture-frame hanging kit with two small metal hooks at the top corners and one hook at each bottom side for anti-tilt stability. Ensure hardware supports 5 to 10 pounds when loaded. Hang using wall anchors or studs.
Mount Planks With Heavy-Duty Brackets
Maximize wall space with a minimalist, modern display using this straightforward method that works in any room.
Plan Your Shelf Layout
Measure your wall and choose plank length, typically 24 to 36 inches. Center each plank by calculating the offset: subtract plank length from wall length and divide by two. Mark this distance from each wall edge. Use a level to draw a vertical reference line to ensure all shelves align perfectly.
Attach Brackets to Planks
Use 1×6 or 1×8 wooden planks that are 5.5 inches wide. Position brackets on the back 1/8 of the plank length from each end, so about 3 inches from the edge on a 24-inch plank. Mark screw holes and secure with 1/2-inch screws. Skip the middle bracket if the span is under 36 inches.
Drill and Anchor Into the Wall
Hold the plank in place and transfer bracket marks to the wall. Drill pilot holes with a 3/16-inch bit because standard nail bits are too large and cause loose fits. Insert 1-inch plastic wall anchors, tapping gently with a hammer. Over-hammering can crack drywall.
Secure Shelves and Repeat
Fasten brackets to the wall using 3/4-inch screws. Start with the center bracket, then tighten sides. Ensure each shelf is level before final tightening. Install additional shelves 5 inches apart vertically, which is ideal for standard 4 to 5-inch nail polish bottles.
Repurpose a Thrift Store Spice Rack

Turn a $3 find into a stylish, decorative organizer with this upcycling project that adds character to any space.
Select and Prep the Rack
Find a wooden wall-mounted spice rack with open-front shelves at a thrift store. Clean thoroughly. Remove any inserts or dividers that limit bottle access.
Apply Decorative Moldings
Use an Iron Orchid Designs mold like Baroque Number 3 with paper clay for elegant detailing. Dust the mold with cornstarch, press in clay, then remove and glue directly onto the rack. No drying time is needed before attachment.
Paint and Distress for Vintage Charm
Paint the entire unit with acrylic or craft paint. Once dry, lightly sand edges and corners to create a distressed, shabby-chic look. Seal with varnish for durability and moisture resistance.
Reinforce the Back
If the rack lacks rear support, cut metal ribbon strips to fit open back areas. Staple into place at natural support points to prevent bottles from falling backward.
Assemble a Foam Board Rack With Dowels

Build a lightweight, customizable rack for under $10 using this budget-friendly method that works great in dorm rooms or apartments.
Cut and Wrap Foam Board
From a 30-by-20-inch foam board, cut the following pieces. Top and bottom frames should be 2 by 26 inches, needing 2 pieces. Side supports should be 2 by 19.5 inches, needing 2 pieces. Shelves should be 2 by 12 inches, needing 6 pieces. Score a second board at 2-inch intervals to form foldable side and back panels. Wrap all pieces in black duct tape for strength and a clean finish.
Assemble With Hot Glue
Glue top and bottom pieces to side panels. Reinforce all seams, internal and external, with continuous hot glue beads. Fill scored fold lines with glue to prevent collapse under weight.
Install Shelves and Dowel Retainers
Glue shelves in place 5 inches apart. Use the first shelf as a guide for alignment. Once set, cut 12-inch dowels that are 3/16 inch in diameter and glue them 1 inch above each shelf front to act as barriers, preventing bottles from rolling out.
Customize IKEA Spice Racks

Upgrade affordable, ready-made units in minutes with this quick method that anyone can do.
Assemble and Paint
Follow included instructions to screw together the rack, which usually takes under 10 minutes. Note that the small tool provided may cause hand fatigue. Disassemble if possible, or mask hardware, then spray-paint in a well-ventilated area. Choose bold colors like orange or rose gold for personality.
Mount With Care
Locate wall studs or use anchors. Leveling is critical because misalignment is common on first try. Use painters tape to test placement before drilling. Multiple attempts may leave several holes, so mark final spots carefully.
Scale With Multiple Units
Install racks side by side or in a vertical stack for larger collections. This method scales easily but consumes more wall space than custom planks.
Compare Methods to Find Your Best Fit
All options beat retail prices, some by hundreds of dollars. Here is how they stack up against each other.
The freestanding wood method costs $40 to $70, requires moderate skill, offers high durability, and gives you full customization control. It works best for people who want custom design.
The wall-mounted plank system costs $95 total or about $10 per shelf, requires easy skill, offers high durability, and provides moderate customization. It is best for space-saving storage.
The repurposed rack costs about $5, requires easy skill, offers medium durability, and provides high customization. It is best for vintage lovers.
The foam board method costs about $10, requires moderate skill, offers low to medium durability, and provides full customization. It is best for renters.
The IKEA hack costs about $5 per unit, requires very easy skill, offers medium durability, and provides moderate customization. It is best for quick fixes.
Optimize Design and Spacing for Function
Standard nail polish bottles are 4 to 5 inches tall. Five-inch vertical spacing prevents crowding and allows easy bottle removal. Shelf depth should be a minimum of 5 inches to prevent tipping.
Arrange bottles by color family or brand for faster selection. Consider adding felt pads under bottles to protect wood finishes and reduce noise when removing bottles.
Upgrade your rack with mirrored or wallpapered backing for visual depth. Add LED strip lights mounted under shelves for glam lighting. Use bold paint or contact paper for modern contrast.
Reinforce for Long-Term Durability
In wood builds, pre-drill nail holes and use glue plus nails for maximum strength. In foam builds, tape all surfaces and glue every joint to prevent collapse. On walls, use 3/16-inch drill bits and 1-inch anchors, and never skip pilot holes.
Inspect screws and anchors annually. Tighten any that feel loose. Avoid overloading because most shelves safely hold 5 to 10 pounds.
Maintain and Clean Your Rack
For wood and IKEA racks, wipe with a dry or slightly damp cloth and avoid soaking. Touch up paint every 2 to 3 years. Sand lightly before repainting.
For foam board racks, dust gently and do not place in humid areas like bathrooms. Keep in low-traffic zones to avoid crushing.
Customize Your Rack for Other Uses
Your nail polish rack can double as a perfume display since perfume bottles have the same height. It works well as a skincare organizer for serums and toners. You can use it as a craft supply holder for paint or markers. It makes a great office shelf for pens and notepads. Adjust depth and spacing as needed for each use.
Frequently Asked Questions About Making a Nail Polish Rack
What is the cheapest way to make a nail polish rack?
The cheapest method is the foam board rack with dowels, which costs approximately $10. You can also repurpose a thrift store spice rack for around $3 to $5.
How much space do I need between shelves for nail polish?
You should space shelves 5 inches apart vertically. This accommodates standard nail polish bottles that are 4 to 5 inches tall while allowing easy removal.
Can I make a nail polish rack without power tools?
Yes. The IKEA hack method requires only a screwdriver. The repurposed spice rack method also requires minimal tools and no power equipment.
How do I prevent my nail polish rack from sagging?
Use wood glue along with finishing nails for wooden builds. Pre-drill all nail holes to prevent splitting. For wall-mounted racks, use the correct 3/16-inch drill bit for anchors and secure into studs when possible.
What is the best paint to use on a DIY nail polish rack?
Spray paint provides the smoothest, most professional finish. Apply 2 to 3 thin coats, letting each dry completely before adding the next. Use a primer on raw wood for better adhesion.
Final Thoughts on Building Your Own Nail Polish Rack
Building your own nail polish rack is one of the most satisfying DIY projects you can tackle. The methods in this guide range from ultra-budget foam board builds at $10 to custom freestanding shelves that rival boutique furniture. Every approach delivers better value than retail options that can cost $100 or more.
Pick your method based on your skill level. Beginners should start with the wall-mounted plank system or IKEA hack for fast, reliable results. Crafters on a budget should choose foam board or the repurposed spice rack, both under $10. Design lovers will appreciate the full control of the freestanding wood method.
The key measurements to remember are 5 inches for shelf depth and 5 inches for vertical spacing between shelves. These dimensions fit standard nail polish bottles perfectly. Use a 3/16-inch drill bit for wall anchors and always pre-drill nail holes in wood to prevent splitting.
Gather your materials, choose your method, and transform your cluttered polish collection into a beautiful, organized display. Your perfect rack is waiting to be built.


