
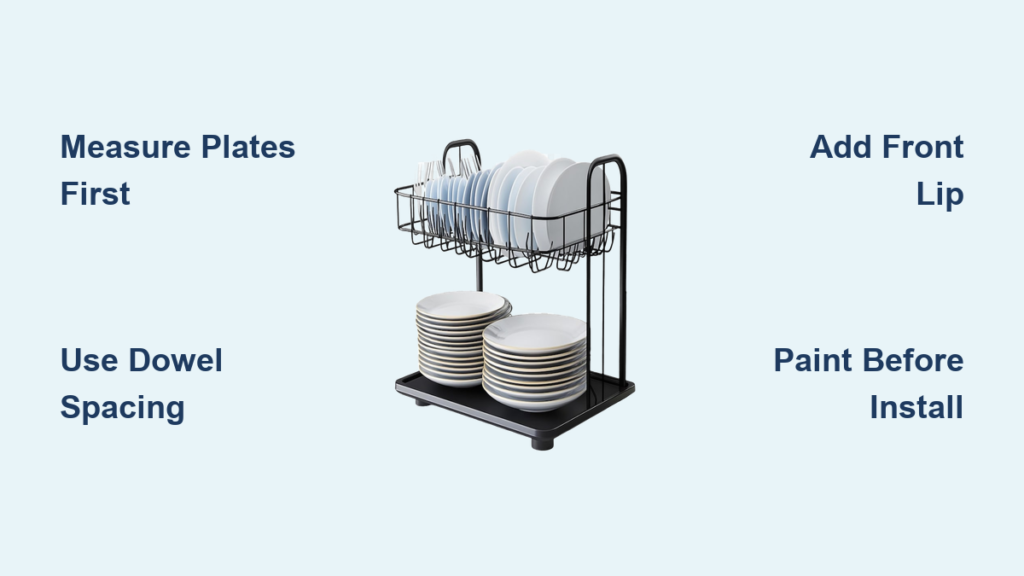
You have a kitchen full of plates but no good way to display them. Cabinets become cluttered stacks where dishes chip against each other, and wall space sits empty. A plate rack solves this problem beautifully by turning your dishware into organized, visible storage that doubles as kitchen decor. Whether you rent an apartment or own a farmhouse, building your own plate rack gives you complete control over size, style, and function.
This guide walks you through how to make a plate rack using four proven DIY designs. You will learn which materials to gather, how to measure your plates and cabinets accurately, and step-by-step construction methods for cabinet inserts, wall-mounted displays, and freestanding units. We cover common mistakes to avoid and styling tips so your finished rack looks professional and lasts for years.
Choose the Right Plate Rack Design for Your Space
Selecting a design that matches your kitchen layout and skill level ensures the project goes smoothly from start to finish.
Inside-Cabinet Dowel Rack
This design transforms unused cabinet space into vertical plate storage. You remove the cabinet doors and install a vertical dowel system inside standard upper cabinets. The rack holds plates upright, keeping them visible and within easy reach while freeing up cabinet space for other items.
Best for: Small kitchens, renters who can reinstall doors, modern or rustic aesthetics
Skill Level: Beginner to intermediate
Key Advantage: Converts closed storage into open display without sacrificing floor space
Wall-Mounted Beadboard Display
This creates a statement piece on large walls. Built like a picture frame with staggered shelves and beadboard backing, this rack adds texture and charm to your kitchen. Display collectible plates, colorful dishware, or decorative cutting boards for a curated look.
Best for: Farmhouse, shabby chic, vintage kitchen styles
Skill Level: Intermediate
Key Advantage: Functions as both storage and functional wall art
Freestanding Countertop Unit
No drilling or permanent mounting required. This portable rack stands on legs and can be moved anywhere in your kitchen or home. It works perfectly for renters or anyone with limited wall space.
Best for: Apartments, temporary setups, gift projects
Skill Level: Beginner-friendly
Key Advantage: Fully customizable and completely removable
Reclaimed Wood Vintage Rack
For those who love character and uniqueness. Use barn wood or salvaged lumber to build a one-of-a-kind rack with scalloped edges, gold cup hooks, and an aged finish. Each piece tells a story and cannot be replicated by store-bought options.
Best for: Collectors, vintage enthusiasts, rustic decor lovers
Skill Level: Intermediate
Key Advantage: Unique, timeless appearance with minimal hardware
Gather Materials and Tools
Using quality supplies ensures your plate rack is durable and looks professional when finished.
Essential Materials by Build Type
• Lumber (1×4, 1×2): 4 ft for cabinet builds, 8–10 ft for wall units, 6 ft for freestanding
• Round Dowels (¼”–3/8″): 12–13.5″ long depending on your plate size
• Square Dowels: 1×1.5″ cut to cabinet width minus clearance
• Beadboard Panel: 23½” × 20″ for wall-mounted builds
• Front Lip/ Gallery Rail: ¾” to 1″ strip attached to shelf fronts
• Wood Glue: Standard carpenter’s glue for all joins
• Brad Nails (1¼”): For fastening shelves and rails
• Finish: Paint, stain, or dark wax depending on your style
Must-Have Tools
• Miter Saw: For precise dowel and board cuts
• Drill with Bits: ¼”, 5/16″, and 3/8″ bits for pilot and final holes
• Kreg Jig (optional): Creates hidden pocket screws for strong joints
• Nail Gun or Hammer: Fastens shelves and rails securely
• Sander: 120–220 grit for smoothing edges before finishing
• Level: Critical for wall-mounted builds
• Measuring Tape and Square: Ensures accurate cuts
• Clamps: Holds pieces during glue-up
• Gaffer’s Tape: Bundles dowels for efficient cutting
Pro Tip: Many hardware stores offer free basic cuts. Ask if they can crosscut your lumber to size before you leave the store.
Measure Your Plates and Cabinet First
Accurate measurements prevent costly mistakes. Follow this three-step process before cutting any wood.
Step 1: Measure Your Plates
Measure your plates at their widest diameter. Most dinner plates measure 10–11 inches with edge thickness around ¾ inch. Use these numbers to calculate your dowel spacing and length.
Dowel spacing:
• 1.5 inches on center creates tight, efficient stacking
• 2 inches on center provides roomier, more decorative spacing
Dowel length formula: Plate space + 1.5 inches insertion depth = total length
Example: 12-inch plate space + 1.5 inches = 13.5-inch dowel length
Step 2: Measure Your Cabinet
For built-in racks, measure the exact interior width between side walls. Subtract ⅛ to ¼ inch from this measurement to allow easy insertion. Account for face frames, which create dead space at the sides.
Step 3: Plan Shelf Spacing for Wall Units
Standard spacing between shelves is 16 inches. Adjust based on your items. Small plates need 12–14 inches between shelves. Large platters require 18–20 inches.
Warning: Always create a cardboard mockup and test the fit before cutting expensive lumber. Skipping this step causes fit problems that require rebuilding the entire rack.
Build an Inside-Cabinet Dowel Rack

This project transforms a standard cabinet into efficient vertical plate storage in under a day.
Cut All Dowel Pieces
Cut four square dowels to your cabinet width minus ⅛ inch. Cut round dowels to your calculated length. Bundle up to four round dowels together using gaffer’s tape and cut them simultaneously with your miter saw for efficiency.
Drill Accurate Holes
Mark hole locations on your square rails at your chosen spacing interval. Draw a centerline down each rail to ensure accuracy. Use an awl to mark each exact spot before drilling.
Drill sequence:
1. Start with a ¼-inch bit for a pilot hole
2. Follow with a 5/16-inch or 3/8-inch bit matching your dowel diameter
3. Never stack square dowels together while drilling, as this causes misalignment
Dry Fit Before Gluing
Insert all round dowels into their holes. Check for a rattle-free fit. Ream holes slightly if they are too tight. Ensure the entire structure stands square before proceeding.
Glue and Assemble
Apply a small amount of wood glue to each end of the round dowels. Insert them into the square rails. Let the assembly dry completely for at least four hours before sanding smooth.
Add Connecting Dowels
For tight spaces, cut ½-inch-long dowels to join two rack halves. Drill shallow holes at corners using a taped drill bit as a depth stop. Do not glue these connecting pieces, as this allows disassembly for easier cabinet insertion.
Finish Before Installing
Paint or stain the entire rack before installation. This provides easier access and much cleaner results. A popular approach paints the frame white while using an accent color for the back wall.
Install Inside Cabinet
- Place one rack half against the cabinet back
- Insert connecting dowels to attach the second half
- Align the front edge with the cabinet face frame
- Trace square dowel positions on the cabinet bottom
- Remove the rack and pre-drill holes in the cabinet base
- Reinsert and screw upward from below into the rack
- Place the existing shelf on top of the rack
- Pre-drill with a countersink bit, then screw downward from the shelf into the rack top
Build a Wall-Mounted Beadboard Rack
This design creates a stunning focal point with charm and structural integrity.
Cut and Assemble Shelves
Cut six shelves from 1×4 pine lumber. Create two shelves at 20 inches, one at 4 inches, and one at approximately 15 inches for the top. Rip a ½-inch strip from each board to create the front lip. Attach the lip using wood glue and brad nails.
Build the Frame
Construct a rectangular perimeter frame. Fasten all corners securely with screws or nails. Use a framing square to ensure corners are perfectly square.
Attach to Beadboard Back
Use a pre-cut 23½ × 20-inch beadboard panel. Position your frame on the panel. Secure with three screws at the top and two screws at the bottom. Ensure the wall behind is solid, using studs or appropriate backing.
Finish Before Mounting
Paint the back of the beadboard to match your wall color, such as Sherwin-Williams Agreeable Gray. Paint the frame and shelves in high-gloss white. No anchors are needed when mounting into solid wood studs.
Hang on Wall
Locate wall studs using a stud finder. Use 2-inch screws driven directly into the studs for maximum hold. The unit remains removable simply by unscrewing it.
Style Like a Pro
Arrange items thoughtfully across shelves. The top shelf works well with a cutting board and landscape print. The middle shelf showcases a multi-colored board in an ornate white frame. The bottom shelf displays rope-detail or tied-design boards for added texture.
Budget Note: Total cost runs approximately $50 when using leftover materials from other projects.
Make a Freestanding Countertop Rack
This portable design works perfectly for renters or kitchens with no available wall space.
Build the Base Box
Construct a cabinet-like box from 1×4 pine lumber. Size it based on your desired plate capacity. Ensure the design remains vertical and stable to avoid a top-heavy appearance.
Add Decorative Feet
Attach four drawer pulls upside-down as legs. Screw them securely from inside the base. Vintage-style pulls add charm and character to the finished piece.
Install Dowel Racks
Use the same method as the cabinet build. Install two racks spaced vertically. Use ⅜-inch dowels with 2-inch spacing. Glue the ends and allow proper drying time.
Decorate Creatively
You have complete artistic freedom. Paint the entire unit one color, use coordinating colors per section, apply a crackle finish, or add stenciled designs. Decoupage and hand-painting also work beautifully.
Use or Gift
This functional piece works anywhere in your home. Display angled plates for visual impact. It makes an excellent handmade gift for housewarmings or holidays.
Craft a Reclaimed Wood Vintage Rack

This project delivers unmatched character that store-bought items cannot replicate.
Prep Reclaimed Barn Wood
Source aged wood with natural texture and patina. Cut two boards for the base and join them using a Kreg jig for a wider shelf. Sand lightly to preserve the natural imperfections that give reclaimed wood its charm.
Cut Scalloped Top Edge
Draw a freehand curve along the top board. Cut with a jigsaw and sand smooth for a soft, inviting contour.
Create Shelf Lip
Use a table saw at a shallow depth to create a 1-inch-thick ridge on the shelf edge. Alternatively, attach a separate trim strip with glue and nails.
Install Dowels with Template
Use ¼-inch dowel rods, 12 inches long, spaced at 2 inches on center. Pre-drill holes in a spare board to use as a template for consistent drilling.
Add Gold Cup Hooks
Install antique brass cup hooks on the bottom shelf for hanging mugs or towels. This adds functionality and enhances the vintage aesthetic.
Finish with Dark Wax
Apply Annie Sloan Dark Wax using a lint-free cloth. Wipe off excess and allow it to cure. No additional sealant is needed, as the wax ages beautifully over time.
Avoid Common DIY Mistakes
Even experienced builders encounter these issues. Learn to dodge them before starting your project.
Misaligned Dowels
Cause: Stacking square dowels while drilling multiple holes
Solution: Drill one dowel at a time for accurate alignment
Rack Will Not Fit in Cabinet
Cause: No clearance allowance built into measurements
Solution: Cut side rails ⅛ to ¼ inch shorter than the interior cabinet width
Gaps on Warped Walls
Cause: Gluing panel before assessing wall flatness
Solution: Build the entire rack off-wall first. Trim the panel narrower and hide gaps with cove moulding
Plates Slide Off Shelves
Cause: Missing front barrier or gallery rail
Solution: Always add a lip or gallery rail to every shelf
Painting After Installation
Cause: Trying to paint in place after mounting
Solution: Paint all parts before assembly and installation for professional results
Overloading the Rack
Cause: Too many plates per slot exceeding weight limits
Solution: Limit each dowel set to 3–5 plates maximum
Style Your Plate Rack for Maximum Impact
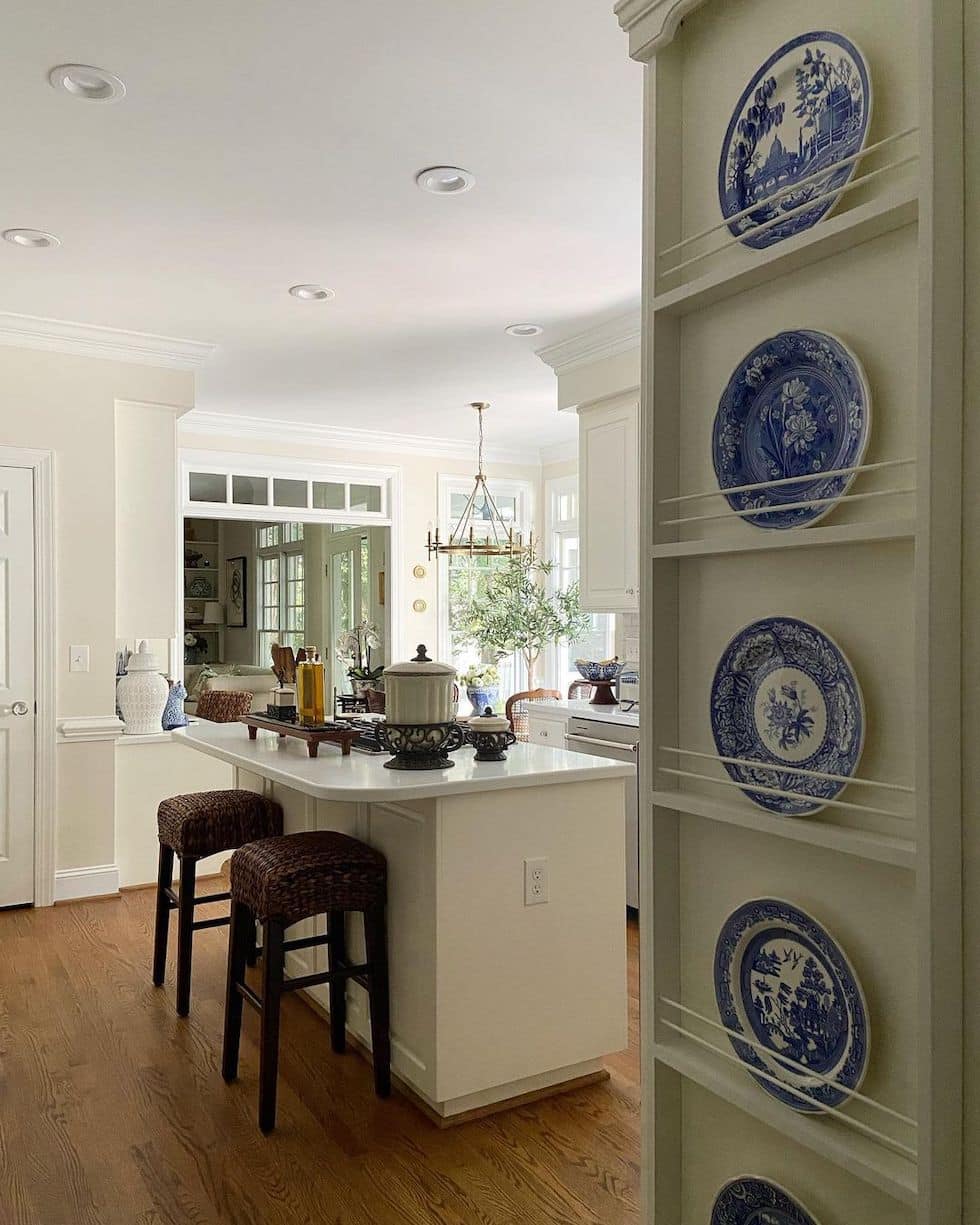
Transform functional storage into kitchen art with thoughtful styling choices.
Angle Plates for Visual Drama
Shift one spindle slightly backward to tilt plates forward. This creates visual interest but reduces capacity by one plate per row.
Mix Textures and Objects
Combine plates with cutting boards, framed prints, and decorative objects. Use themed art such as landscape images or botanical prints. Add rope-detail or tied-design boards for depth and texture.
Use Lighting
Install a picture light above the rack for ambient lighting. Low-voltage LED strips provide subtle glow without heat concerns.
Coordinate Colors
Match the back panel to your wall color for a seamless look. Contrast stain and paint for farmhouse charm. Pull accent colors from your existing kitchen decor.
Pro Tip: Curate like a gallery display. Avoid clutter and keep the arrangement clean and intentional.
Ensure Strength and Safety
Build to last by following structural best practices.
Use Dual Fastening
Always combine wood glue with screws or nails. This dual method creates bonds far stronger than glue alone.
Prevent Sagging
For shelves spanning more than 24 inches, add center support or use thicker lumber. Solid wood resists sag better than particleboard or engineered wood products.
Secure Mounting Properly
Wall units must screw into studs or solid backing. Cabinet racks use both upward screws from the base and downward screws from the shelf above.
Limit Load Capacity
Never exceed 3–5 plates per dowel set. Heavy stoneware requires reinforced construction.
Key Takeaways for Building Your Plate Rack
Measure your cabinet and plates with precision before making any cuts. Accuracy prevents costly rebuilds and ensures a perfect fit.
Build and finish all components off-site. Painting before installation provides easier access and much cleaner results.
Always use glue combined with screws or nails. This dual fastening method ensures strength and longevity.
Add front lips and back rails to every shelf. These elements prevent plates from sliding off and tipping backward.
Style your rack intentionally. A well-curated plate rack becomes a focal point that enhances your entire kitchen.
Choose a design that matches your space and skill level. Inside-cabinet racks suit small kitchens. Wall-mounted displays work best in larger spaces. Freestanding units offer portability for renters.
Now you know how to make a plate rack that is functional, beautiful, and uniquely yours. Whether clearing cabinet clutter or showcasing heirloom dishware, this project brings both order and artistry to your kitchen. Pick your design, gather your tools, and start building today.
Frequently Asked Questions About Making a Plate Rack
What is the best wood for building a plate rack?
Select pine or common pine boards work well for most projects. Reclaimed barn wood suits vintage designs. Choose hardwoods like oak or maple for extra durability in heavy-use situations.
How much does it cost to build a DIY plate rack?
Costs range from $100 to $250 depending on size and materials. Using reclaimed wood or leftover materials from other projects reduces costs significantly. A simple countertop version may cost as little as $50.
How long does it take to build a plate rack?
Simple versions take 3–5 hours. Detailed builds require 6–8 hours. Large wall-mounted units may take a full day including finishing time.
Can I build a plate rack without power tools?
Yes. Many hardware stores will cut lumber to size for free. You can assemble using hand tools like a hammer, screwdriver, and hand drill. Pre-cut components make this entirely possible for beginners.
What is the ideal dowel spacing for dinner plates?
Use 1.5-inch spacing for standard dinner plates around 10–11 inches. Larger decorative plates need 2-inch spacing. Adjust based on your specific plate diameters.
How do I prevent plates from sliding off the shelves?
Add a front lip or gallery rail to every shelf. This creates a raised edge that keeps plates securely in place. Back rails also help prevent rear tipping.


