Every angler knows the frustration of tangled lines, bent rod tips, or reels knocked loose by clutter. A DIY rod rack solves these problems affordably and permanently, especially when you build it yourself. For under $25 and a few hours of work, you can create a custom fishing rod storage system that outperforms commercial models costing $200. Whether you’re storing bass rods, offshore trolling gear, or surfcasters, a well-built rack keeps your rods safe, organized, and ready to fish.
This guide walks you through how to make a rod rack step by step, using basic tools and affordable pine boards. You’ll learn two proven designs, one ceiling-mounted and one wall-mounted, plus material choices, hole spacing tips, and expert tricks like glow-in-the-dark finishes for dark garages. By the end, you’ll have everything needed to build a rack that fits your space, protects your gear, and lasts for years.
Choose Your Rod Rack Design

Selecting the right design depends on your available space and how you want to access your rods. Both designs work well, but each serves different needs.
Single-Board Ceiling Mount
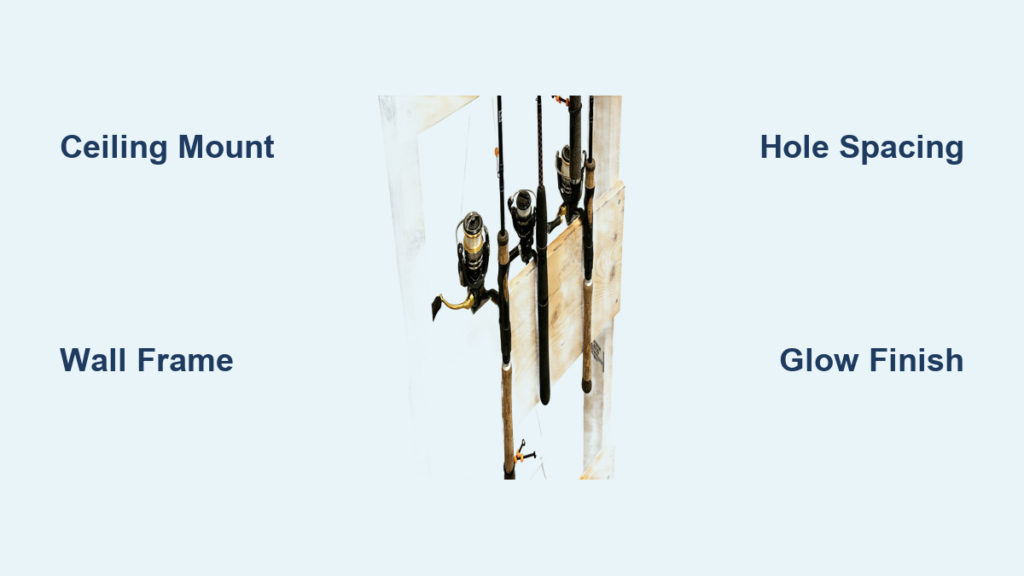
This design uses one sturdy board mounted across ceiling joists, with rods hanging vertically through drilled holes with access slots for easy insertion. It’s ideal for maximizing garage space and keeping rods out of high-traffic areas. The simple construction makes it perfect for long offshore or surf rods that clutter floor space when leaned against walls.
Best for: Anglers with limited wall space, offshore or surf rods, or anyone wanting invisible overhead storage.
Two-Tier Wall Frame
This frame-style rack uses top and bottom boards to cradle rod butts securely. The top board has full holes while the bottom board has shallow recesses to support handles. It’s more complex than the single-board version but offers superior stability and a clean, display-style appearance.
Best for: Tackle rooms, workshops, or anyone wanting a professional-looking rack with full rod support.
Gather Materials and Tools

Having the right materials and tools before starting ensures a smooth building process. Here’s everything you need.
Essential Materials
Two 1×4 pine boards, 42 inches long (or 1150mm), form the main structure. Adjust length based on how many rods you need to store. Wood screws, 2 inches long, secure the assembly and mounting. Metal L-brackets or joist hangers reinforce ceiling attachment points. Protective finish such as spar urethane, polyurethane, or glow-in-the-dark clear coat prevents moisture damage and boosts visibility in dark garages.
Pro Tip: Buy an 8-foot board, cut it into two 42-inch pieces, and save scraps for future projects.
Recommended Wood Types
Pine works perfectly for most indoor, dry garage installations. It’s cheap, easy to drill, and lightweight. Hardwood like oak or maple offers greater durability for heavy use or commercial applications. Pressure-treated lumber resists moisture and rot, making it the best choice for humid garages or coastal areas where saltwater equipment is stored.
Required Tools
A jigsaw handles cutting boards to length and shaping corners. A drill with a 2-inch hole saw drills rod handle holes through the board. A 44mm hole saw works as an alternative for slightly smaller holes that fit most rods. A 24mm spade bit removes center wood in recessed designs. A chisel cleans out recessed holes for a flat bottom. An orbital sander smooths edges and hole interiors quickly. A C-clamp secures boards during cutting. A measuring tape, pencil, and straight edge ensure accurate layout.
No table saw? No problem. A jigsaw and drill are all you need for this project.
Cut and Prepare the Boards
Cut Boards to Length
Measure and mark two 42-inch lengths on your 1×4 pine board. Clamp the board securely with a C-clamp before cutting. Use a jigsaw with a fine-tooth blade for clean cuts. Sand cut edges smooth after cutting.
Tip: Measure twice, cut once. Misaligned cuts ruin hole alignment and waste materials.
Round the Corners
Trace a quarter-circle at each corner using a cup or pipe as a guide. Cut with the jigsaw along the arc. Sand smooth. Rounded corners prevent snagging on clothing or gear and give the rack a professional appearance.
Mark and Drill Rod Holder Holes
Space Holes Evenly
Start measuring 3 inches from the edge of the board. Space subsequent holes 4 to 5 inches apart. A 42-inch board typically holds 6 to 8 rods with proper spacing.
Tight spacing at 4 inches works well for standard rods. Wider spacing at 5 inches accommodates big reels or surf rods with bulky handles.
Drill the Holes
Stack both boards together and clamp them securely. Use a 2-inch hole saw or 44mm bit to drill through both boards at once. This ensures perfect alignment between top and bottom mounting positions. Let the pilot bit mark the bottom board for recess placement in two-tier designs.
Warning: Keep hands clear of the drill bit. Let the drill do the work without forcing it.
Add Rod Access Slots (Single-Board Design)
Cut Angled Entry Slots
Above each hole, mark a 1 to 2 inch angled slot. The angle should match how the rod naturally enters the hole when you’re inserting it. Cut the slot with the jigsaw, then sand edges smooth.
Why angled?: Easier to slide rod tips in and out without lifting them high overhead. Vertical slots require awkward straight-in insertion that most anglers find frustrating.
Test Fit Before Mounting
Insert an actual rod to check the fit. Adjust slot angle or width if needed. Ensure the rod tip clears the board properly and the handle fits snugly in the hole.
Create Bottom Board Recesses (Two-Tier Design)

Drill Shallow Holes
Use the same 44mm hole saw to drill 10mm deep into the bottom board. This creates a circular ledge that supports the rod butt securely.
Remove Center Wood
Use a 24mm spade bit to drill out the center wood from the recess. Chisel out the remaining ring for a flat, smooth bottom that cradles the rod butt evenly.
Pro Move: Chiseling is oddly satisfying and ensures a flush fit with no wobble or rolling.
Sand Recesses Thoroughly
Smooth all edges and flat surfaces inside each recess. Run your hand along every surface. No splinters allowed when your expensive rods will rest here.
Sand All Surfaces (Do Not Skip This)
Rough wood scratches rod blanks, reel seats, and expensive finish. A smooth rack protects your $300 rod from damage.
Use 120-grit sandpaper on all faces, edges, holes, and slots first. Follow with 220-grit for an ultra-smooth finish. Focus extra attention on hole interiors and access slots where rods contact the wood. Wipe away all dust with a dry cloth before applying finish.
Power tip: An orbital sander cuts sanding time in half. Hand sanding works but takes significantly longer.
Apply Protective Finish
Choose the Right Finish
Polyurethane enhances wood grain and provides basic protection for indoor, dry garages. Spar urethane resists moisture and UV, making it ideal for humid or coastal areas. Glow-in-the-dark clear coat lets you find rods instantly in dark garages, a feature Saltwater anglers particularly love.
Application Tips
Stir the finish gently rather than shaking it to avoid bubbles. Apply 2 to 3 even coats using a brush or foam pad. Sand lightly between coats with 220-grit. Let dry fully for 24 hours before mounting the rack.
Avoid sticky finishes. They attract dust and can damage rod wraps over time.
Mount the Rod Rack
Ceiling Mount (Single-Board Design)
Locate ceiling joists using a stud finder or knock test. Mark joist positions with pencil. Never mount into drywall alone because it cannot support the weight.
Hold the board level across at least two joists. Pre-drill pilot holes if desired, though pine is soft enough for direct screwing. Use 2-inch wood screws to secure the board. Use L-brackets or joist hangers for extra strength and stability. Double-check level before final tightening.
Safety First: Overhead racks must hold 20 pounds or more. Secure into joists every 16 inches for proper weight distribution.
Wall Mount (Two-Tier Frame)
Assemble the frame by attaching vertical side boards to top and bottom rails. Pre-drill all screw holes with a 2mm bit to prevent splitting. Use wood glue plus screws for extra strength.
Secure the frame into wall studs or use heavy-duty anchors. Ensure the frame is plumb and level. Test stability before loading rods.
Tip: Mount frequently used rods at shoulder height for easy access.
Optimize Hole Spacing and Capacity
How Many Rods Fit
A 42-inch board holds 8 rods at 4-inch spacing or 6 rods at 5-inch spacing. A 60-inch board holds 12 rods at 4-inch spacing or 9 rods at 5-inch spacing. Need more capacity? Build a second rack or go longer, up to 8 feet.
Hole Diameter Guide
Standard spinning and baitcasting rods fit 2-inch holes. Large-handle trolling rods need 2.25-inch holes. Compact rods work well with 1.75-inch or 44mm holes.
Test with your actual rods before finalizing hole placement and diameter.
Prevent Common Mistakes
Mounting into drywall only causes the rack to pull down and damages your ceiling. Always anchor into wood joists or wall studs.
Skipping sanding results in scratched rods and splinters in your hands. Sand every surface, especially hole interiors where rods make contact.
Uneven hole spacing creates a crooked appearance and awkward rod placement. Measure and mark all holes before drilling.
Forcing rods into tight holes cracks wood and damages rod wraps. Test fit first and enlarge holes slightly if needed.
Upgrade and Customize Your Rack
Add Glow Finish
Paint the rack with Rust-Oleum Clear Glow-in-the-Dark. Charge it with a flashlight and find rods in seconds, even in complete darkness.
Label Rod Types
Use small tags or colored tape to identify rod categories. Green tags for bass rods, blue for inshore, red for offshore makes organization simple.
Expand for More Rods
Build a 60-inch or 72-inch rack for larger collections. Create a second version for 12 to 20 rods. Install multiple racks in staggered rows for maximum capacity.
Integrate with Tackle Storage
Add pegboard below the rack for pliers, line, and tools. Mount stackable bins for lures. Use over-door hooks for nets or vests.
Maintain Your Rod Rack
Annual Inspection Checklist
Tighten any loose screws or brackets. Check for wood warping or splitting. Reapply finish every 2 to 3 years, especially in humid areas. Clean dust from holes and slots regularly.
Cleaning Tips
Wipe the rack with a dry cloth monthly. Use a slightly damp cloth if needed, then dry immediately. Avoid chemical cleaners that degrade the finish.
Pro Tip: Store rods tip-up to prevent guide wear and line memory issues.
Frequently Asked Questions About Making a Rod Rack
How much does it cost to build a DIY rod rack?
Building a DIY rod rack costs under $25 in materials. This includes pine boards, screws, brackets, and finish. If you already own basic tools like a drill and jigsaw, your only expense is materials.
What is the best wood for a rod rack?
Pine works best for most indoor installations because it’s inexpensive and easy to drill. Hardwood like oak or maple suits high-use applications. Pressure-treated lumber is essential for humid garages or coastal areas.
How many rods can a 42-inch rod rack hold?
A 42-inch board holds 6 to 8 rods depending on spacing. At 4-inch spacing, you fit 8 rods. At 5-inch spacing, you fit 6 rods with more room for large reels.
Can I mount a rod rack on drywall?
Never mount a rod rack into drywall alone. It cannot support the weight and will pull out. Always secure into ceiling joists or wall studs for safe, secure mounting.
Do I need special tools to make a rod rack?
No special tools are required. A jigsaw and drill with a hole saw handle all the major cuts. These basic tools cost under $50 and remain useful for many future projects.
How do I protect my rod rack from moisture?
Apply spar urethane or marine-grade finish to protect against moisture, especially in humid garages or coastal installations. Reapply finish every 2 to 3 years for continued protection.
Key Takeaways for Building Your DIY Rod Rack
Building a DIY rod rack delivers professional-grade storage for under $25, a fraction of commercial rack prices. Two proven designs suit different needs: the single-board ceiling mount maximizes space in small garages, while the two-tier wall frame provides superior support and a clean display appearance. Choosing the right hole spacing, typically 4 to 5 inches apart, and diameter, usually 2 inches, ensures a snug fit for your specific rods.
The project requires only basic tools, most DIYers already own a jigsaw and drill. Taking time to sand thoroughly and apply proper finish protects your investment and prevents damage to expensive rod blanks and reel seats. Adding customization like glow-in-the-dark finish or color-coded labels transforms a simple storage solution into a personalized fishing headquarters.
With a few basic tools and under $25 in materials, you’ve created a professional-grade rod storage system that protects your gear, saves space, and makes getting ready to fish faster than ever. Whether you’re a weekend warrior or a tournament angler, your rods deserve better than leaning in a corner. Now you’ve built them a home.