

You are tired of digging through deep kitchen cabinets, only to find expired spices or forgotten jars. The solution is a slide-out shelf that brings everything forward with a simple pull. Whether you are upgrading a pantry, organizing under the sink, or maximizing bathroom vanity space, learning how to make a slide-out shelf transforms cluttered storage into smart, accessible systems. This guide walks you through every step, from measuring your cabinet to choosing the right slides and building a durable, smooth-gliding shelf.
With DIY methods starting under $10, you will save hundreds compared to pre-made units while customizing fit and function. You will learn how to adapt shelves for face-frame or frameless cabinets, build angled pantry versions for better visibility, and construct full custom cabinets with integrated pull-outs. We cover material specs, mounting techniques, and pro tips like using spacers for perfect alignment and jigs for repeatable results.
Measure Your Cabinet Opening Correctly
Before cutting any wood, measure your cabinet accurately. Even small errors cause binding or misalignment that ruins the final result.
Calculate the Correct Shelf Width
Measure the inner width at shelf height at three points: front, middle, and back. Cabinets are rarely perfectly square, so use the smallest measurement.
• Subtract ½ inch per side (1 inch total) for slide clearance
• Example: 25.5-inch internal width means you cut the shelf to 24.5 inches wide
• Always measure after installing shims in face-frame cabinets, never assume uniform dimensions
Match Depth to Standard Slide Lengths
For framed cabinets, measure from the back of the face frame to the back wall. For frameless cabinets, measure from the front edge to the back wall, minus ½ inch.
Choose the nearest standard depth below your measurement. Standard options include 11¾ inches, 13¾ inches, up to 31¾ inches in 2-inch increments. Always allow ¼-inch clearance for smooth operation.
Account for Height Clearance
Allow ⅛-inch to ¼-inch clearance above and below the shelf to avoid binding. L-brackets raise base-mounted slides by 5/8 inch, so account for this in your placement planning. If the shelf scrapes the top or bottom when pulled, recheck your height and slide alignment.
Choose the Right Mounting Style for Your Cabinet

Your cabinet type determines how slides attach. Pick the method that matches your specific setup.
Face-Frame Cabinets Need Spacers
Face-frame cabinets feature a visible ¾-inch wood frame around the opening. The slides will not mount flush, so fill the gap with ¾-inch plywood shims attached with construction adhesive and brad nails.
Secure shims at the front, back, and center for heavy loads. This creates a solid mounting surface that prevents wobble and ensures the shelf supports weight evenly.
Frameless Cabinets Mount Directly
Frameless cabinets have no face frame, so slides attach directly to the inner side walls. Deduct ¼-inch per side if door hinges protrude into the opening. Use a 32mm hole system with a spacer jig for precise alignment.
Alternatively, remove L-brackets and mount slides directly to the wall if space is tight.
Half Shelves Use Rear Brackets
For cabinets with a shallow upper shelf (9 to 12 inches deep), attach the slide front to the face frame and the rear to the half shelf with two L-brackets. Reinforce particleboard with hardwood blocks or install a full stationary shelf to prevent sagging.
No Existing Shelf? Try Rear Sockets or Side Mounts
For cabinets without a shelf, you have two options. Rear-mount sockets attach slides to the cabinet back wall. Plastic sockets provide ¾-extension, while metal ball-bearing sockets offer full extension. This works best for light loads like bathroom storage.
Side-mount with spacers requires exact inside width measurement. Use ½-inch to 1½-inch spacers secured with pozilock screws. Reinforce side walls with wood strips for heavy-duty use.
Pick the Best Slide Type for Your Needs
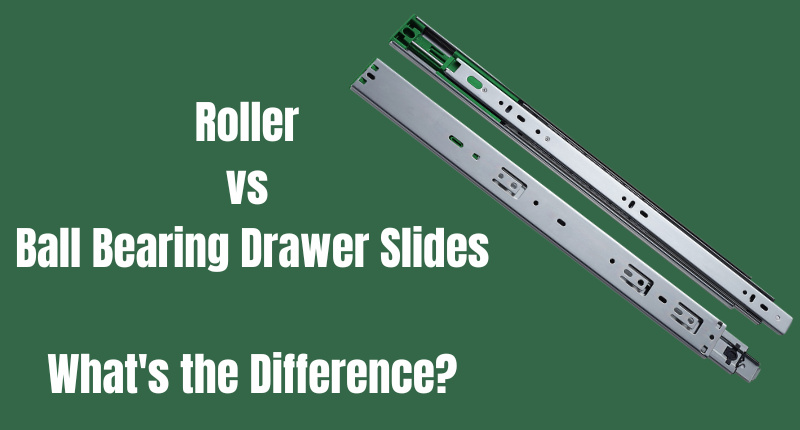
Not all drawer slides are equal. Match the type to your load requirements, depth, and desired finish quality.
Roller Slides: Budget Option
Roller slides cost approximately $7 per pair and handle 50 to 75 pounds. They provide ¾ extension and work best for light-duty use like spice racks or linens. Avoid these for heavy loads, as they wear out faster than ball-bearing models.
Ball-Bearing Slides: Heavy-Duty Choice
Ball-bearing slides cost approximately $16 per pair and handle 75 to 100+ pounds. They provide full extension and work best for pots, appliances, and garage tools. This is the recommended upgrade for kitchens and pantries.
Undermount Soft-Close: Premium Pick
Undermount soft-close slides cost $25 to $40 per pair and handle 80 to 100 pounds. They provide full extension and mount to the underside of the shelf, offering a clean look and silent closing. This is the top choice for custom builds and high-end finishes.
Match Slide Length to Cabinet Depth
For 18 to 20-inch deep cabinets, use 18 or 20-inch slides. For 21 to 22-inch deep cabinets, use 22-inch slides. For 24-inch deep cabinets, use 24-inch slides. Use a 1-inch spacer jig when installing undermount slides to avoid hinge interference.
Build a Simple Shelf Conversion for Under $10
Turn an existing shelf into a pull-out quickly and cheaply with this conversion method.
Remove and Reuse the Old Shelf
Take out fixed or adjustable shelves. Sand and clean them for reuse as the pull-out base. This saves money on materials and uses what you already have.
Install Shims for Proper Alignment
Cut ¾-inch plywood strips to match the face frame recess. Attach them at the front, back, and middle with brad nails. Ensure the surface is flat and level before proceeding.
Trim the Shelf for Correct Clearance
Measure the inner width with shims installed. Subtract 1 inch total (½-inch per side). Cut the shelf to size with a circular saw or table saw. For example, a 21-inch opening means cutting the shelf to 20 inches wide.
Mount Bottom-Mount Slides
Use 22-inch euro bottom corner-mount slides (approximately $7 per pair). Position the wheel side toward the cabinet rear. Mark mounting lines with a 22-inch level. Screw slides to the cabinet bottom and shelf underside.
If slides bind, check for a warped shelf or uneven mounting.
Add a Back Lip for Security
Attach a 1×2 strip to the back edge with wood glue and screws. This prevents cans and bottles from falling off the shelf when you pull it out. The total cost is approximately $10 for slides, screws, and minimal materials.
Construct a Custom Shelf Box for Durability
For strength, durability, and a professional look, build a custom plywood box.
Cut Plywood Components Correctly
Use ¾-inch Baltic Birch or birch plywood for stability. For a 25.5-inch wide cabinet, cut the bottom to 19.5 × 23 inches. Cut sides to 2 × 19.5 inches (two pieces). Cut front and back to 2 × 24.5 inches (two pieces).
The reason for smaller dimensions is subtracting 1.5 inches (two ¾-inch sides) and slide thickness from the opening.
Assemble with Glue and Screws
Apply wood glue and instant adhesive to joints. Attach sides to the bottom first, then attach front and back. Reinforce with brad nails or pocket screws. Use a Kreg Jig for hidden, strong pocket-hole joints that look professional.
Finish with Danish Oil
Sand edges progressively: 80 grit then 150 grit. Apply Watco Medium Walnut Danish oil. Wipe off excess after 5 to 10 minutes. Let cure for 24 hours. This creates a warm, natural finish that highlights the plywood edges beautifully.
Install Polywall or Melamine Liner
Use ¼-inch wood-grain melamine or Polywall for durability. Cut width to groove-to-groove plus 1 inch. Cut depth to shelf depth minus material thickness. Apply construction adhesive, press into place, and smooth with a taping knife. This hides imperfections and creates a wipe-clean surface.
Build an Angled Pantry Shelf for Better Visibility
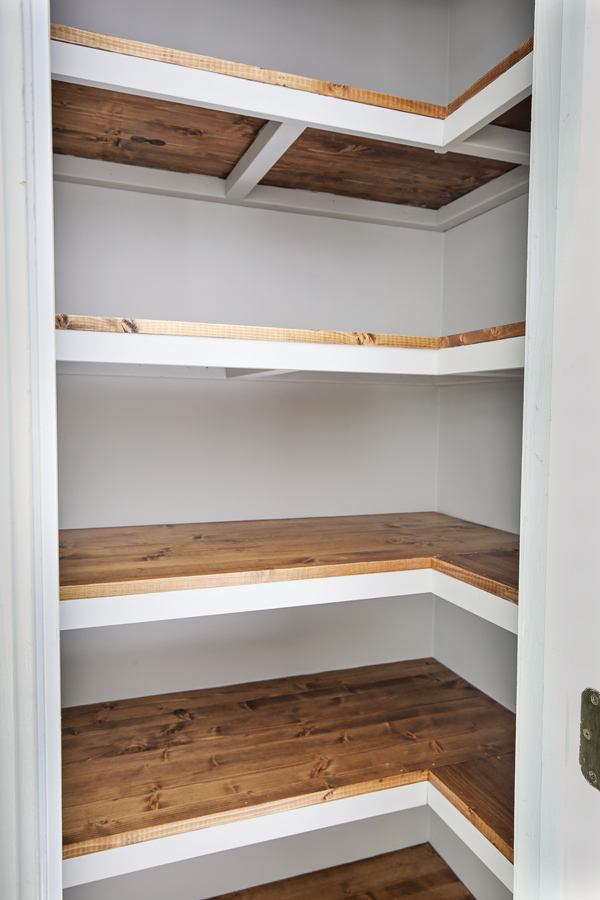
Angled pantry shelves with a sloped front improve visibility and access to stored items.
Cut Side Panels with Grooves
Cut side panels to 7 × 21 inches from 5/8-inch Baltic Birch. Use a table saw with a dado blade to cut ¼-inch grooves on long edges for the bottom panel. Leave ½-inch clearance on each side for undermount slides.
Create a Sloped Jig for Precision
Mark 2¾ inches from the back edge, then mark 6 to 7 inches forward. Nail ¾-inch scrap wood to form a template. Clamp to the table saw fence and cut both side panels at the same angle. The result is a front that sits lower (2¾ inches) and back that sits higher (7 inches), so items roll forward for easy access.
Assemble the Frame and Insert Bottom
Cut the front to 2¾ × 23 15/16 inches and the back to 6¼ × 23 15/16 inches. Nail together with 1½-inch finish nails. Insert ¼-inch melamine bottom into grooves. Staple across the back edge to lock in place. Use the bottom to square the frame by tapping into alignment before adding front staples.
Sand and Round Over Edges
Remove staples with a sanding block. Use an ⅛-inch roundover bit on a router for a smooth top edge. Sand progressively: 80 grit, then 150 grit. The bottom remains exposed melamine, so no extra finish is needed.
Install Soft-Close Undermount Slides
Use 24-inch full-extension, soft-close guides. Use a 1-inch spacer jig to maintain hinge clearance. Mark and install mounting blocks one at a time. The shelf clicks into place with smooth, silent operation.
Build a Full Custom Cabinet for New Installations
For new installations or complete kitchen remodels, build an entire cabinet with integrated pull-outs.
Assemble the Cabinet Box
Cut ¾-inch plywood for two sides (23 inches deep × 34½ inches tall), one bottom (28½ inches wide × 23 inches deep), and three support strips. Mark 3½ inches up and 4½ inches in on front corners. Cut toe-kick notches with a jigsaw. Assemble with pocket holes and 1¼-inch screws.
The face frame should overhang sides by ¾ inch for easier slide access.
Add Face Frame and Back Panel
Build the face frame from 1×2 pre-primed pine. Attach with wood glue and pocket screws, flush to the inside. Cut ¼-inch back panel to size and staple in place.
Install Pull-Out Shelves
Mount two pairs of 20-inch ball-bearing slides, inset ¾ inch from the front. Bottom pair sits flush with cabinet bottom. Top pair sits approximately 14 inches up. Build drawer boxes with ¾-inch plywood sides and ¼-inch plywood bottoms, assembled with pocket screws. Mount boxes onto slides.
Install and Finish the Cabinet
Fill holes, sand, prime, and paint. Level in place with shims. Secure to wall studs through back supports and to adjacent cabinets via face frames. Attach a ¾-inch plywood toe-kick front, painted to match. Add a countertop and secure it.
This project takes 6 to 8 hours for an intermediate builder.
Prevent Common DIY Mistakes
Avoid these errors that ruin function and finish in your slide-out shelf project.
Wrong Slide Length Wastes Space
Using 22-inch slides in a 24-inch deep cabinet loses valuable space. Always match slide length to cabinet depth, or go one size shorter for added clearance.
Over-Tightening Screws Weakens Mounts
Stripped holes in particleboard weaken mounts significantly. Pre-drill pilot holes and use hardwood blocks for reinforcement.
Uneven Slide Installation Causes Binding
One side higher than the other means the shelf binds or derails. Use a level and spacer jig for perfect alignment on both sides.
Ignoring Door Clearance Damages Shelves
If the door hits the shelf when opening, install white plastic door protectors on shelf sides. Request extra protectors for wide shelves with multiple doors.
Maintain Your Shelf for Long Life
A well-built shelf lasts decades with minimal maintenance.
Lubricate Slides Annually
Spray silicone lubricant on ball-bearing tracks every year. Avoid oil-based lubes because they attract dust and debris.
Check Screws Every Six Months
Tighten loose slide screws and bracket connections. Inspect for warping, especially in humid areas like bathrooms and kitchens.
Never Overload the Shelf
Check slide specifications because most handle 75 to 100 pounds. Heavy loads like dog food and appliances need ball-bearing or undermount slides. Overloading causes sagging, derailment, and premature failure.
Save Big By Building Instead of Buying
DIY slide-out shelves save significant money compared to pre-made units.
A shelf conversion costs approximately $10 per shelf, while commercial equivalents like Rev-A-Shelf cost $104. That is $94 saved per shelf. A custom box build costs $30 to $60, compared to $85 to $104 commercially, saving $25 to $74. An angled pantry shelf costs $50 to $80 versus $95 or more commercially, saving $15 to $45.
Building 11 shelves saves over $900. You also get custom fit, better materials, and full control over the design.
Frequently Asked Questions About Making Slide-Out Shelves
What is the cheapest way to make a slide-out shelf?
The cheapest method is converting an existing shelf. Remove your current shelf, add plywood shims for face-frame cabinets, trim the shelf to size, and mount bottom-mount drawer slides. Total cost is approximately $10 for slides and fasteners.
What type of drawer slides are best for kitchen cabinets?
Ball-bearing slides or undermount soft-close slides are best for kitchens. Ball-bearing slides handle 75 to 100+ pounds and provide full extension. Undermount soft-close slides offer premium operation with silent closing and clean aesthetics.
How much clearance do I need for slide-out shelves?
Allow ½-inch per side (1 inch total) for width clearance. Allow ¼-inch depth clearance. Allow ⅛ to ¼-inch height clearance above and below the shelf. Always measure after installing shims, never assume cabinet dimensions are uniform.
Can I install slide-out shelves in a face-frame cabinet?
Yes. Face-frame cabinets require ¾-inch plywood shims to create a flush mounting surface. Attach shims with construction adhesive and brad nails at the front, back, and center before mounting slides.
How much weight can slide-out shelves hold?
Standard roller slides hold 50 to 75 pounds. Ball-bearing slides hold 75 to 100+ pounds. Undermount soft-close slides hold 80 to 100 pounds. Check manufacturer specifications and upgrade to heavier-duty slides for appliances or heavy items.
Key Takeaways for Building Slide-Out Shelves
Slide-out shelves solve the universal problem of inaccessible deep cabinet storage. With accurate measurement, the right slides, and proper construction, you can build durable, smooth-gliding shelves for any cabinet in your home.
The three main build tiers are budget conversion (approximately $10, reuse existing shelf), custom box build (durable, attractive finish for $30 to $60), and angled or soft-close pantry shelf (premium ergonomic design for $50 to $80). Measure twice, cut once, and always subtract 1 inch total width for clearance.
Start with a simple shelf conversion to learn the basics, then scale up to custom builds as your skills improve. The savings are substantial, and the convenience of pull-out access transforms how you use your space.


