
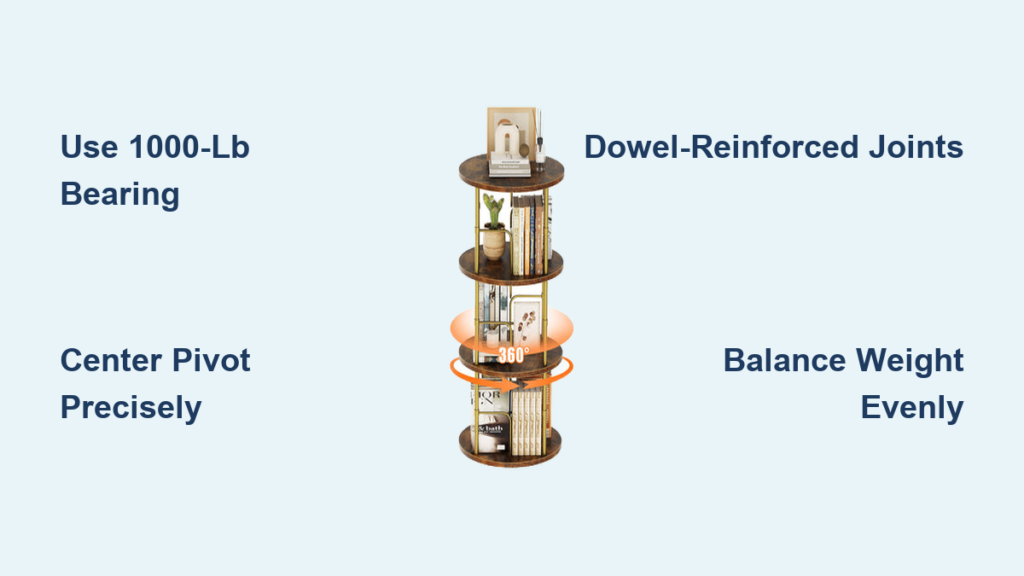
Have you ever struggled to reach items tucked into a corner shelf? A swivel shelf solves that problem by rotating a full 360 degrees, giving you instant access to every side. Whether you’re storing books, toys, kitchen spices, or display collectibles, a DIY rotating shelf maximizes space and minimizes clutter. This guide walks you through building a heavy-duty swivel shelf using one sheet of plywood and a 1,000-pound-rated lazy-susan bearing. You’ll learn precise joinery techniques, centering methods, and finishing steps to create a smooth-spinning, durable unit that outperforms standard shelving.
Design a Stable Rotating Shelf
A successful swivel shelf starts with smart design. The most effective version is a freestanding rotating bookshelf built from a single 4×8 ft sheet of ¾” plywood. This design uses vertical dividers and horizontal shelves assembled into a square or rectangular frame that rotates on a central base. Because it’s self-contained and balanced, it won’t tip or wobble when spun.
Choose the Right Configuration
Opt for a square footprint to ensure even weight distribution. A 24″×24″ base works well for most spaces. Avoid tall, narrow profiles because they increase the risk of tipping during rotation. If you need more height, add shelves incrementally but keep the center of gravity low.
Key configuration points to remember:
• Use ¾” plywood for sufficient strength
• Keep width and depth nearly equal
• Build upward in proportion to base size
• Maintain low center of gravity
Plan for 360-Degree Access
Your shelf must rotate freely without hitting walls, furniture, or baseboards. Allow at least 2 to 3 inches of clearance on all sides. Measure your intended space before cutting materials. If placing in a corner, ensure the rotation path clears both walls and any adjacent furniture.
Label your panels during assembly to maintain orientation. This helps during flipping and reassembly, especially when using pocket-hole joinery on specific edges.
Select High-Capacity Swivel Hardware

The lazy-susan turntable is the core of your swivel shelf. Choosing the right hardware determines how smoothly the shelf spins and how long it lasts.
Pick a 1,000-Lb Rated Lazy-Susan Bearing
Choose a turntable rated for at least 1,000 pounds, even if your shelf won’t carry that much. This ensures smooth rotation under load and extends the life of the mechanism. These heavy-duty bearings consist of two interlocking plates: one attaches to the bottom of the shelf, the other to the floor or base.
Look for these features when selecting your bearing:
• Central mounting bolt for pivot point
• Multiple peripheral screw holes for secure attachment
• Ball-bearing mechanism for smooth spinning
• 8″ to 12″ diameter to fit within shelf base
Avoid Under-Sized Turntables
Smaller hardware may seem sufficient but will bind or fail under moderate loads. Never use undersized hardware for full bookcases or toy storage. The 1,000-lb rating provides a safety margin and prevents wear over time. Check that the bearing’s diameter fits within your shelf base without interfering with shelf supports or joints.
Cut Plywood Panels with Curved Corners
Sharp corners catch on clothes and create hazards. Instead, round all four corners of each shelf, top, and bottom panel for a cleaner look and safer operation.
Mark Smooth Curves Using a Tape Guide
To draw a consistent curve, use a flexible tape measure as a bending template. Lay the tape flat, bend it into a smooth arc about 2″ radius, and clamp both ends. Trace the curve onto each corner. Repeat for all panels to maintain uniformity.
Cut Clean Edges with a Top-and-Bottom Blade
Use a jigsaw with a top-and-bottom cutting blade to minimize chipping on both faces of the plywood. Standard blades cut only from the top, causing splintering on the backside. A reverse-tooth blade cuts cleanly on both sides, preserving your finish. Cut slowly along the traced line, letting the blade do the work.
Sand and Prep All Edges
After cutting, lightly sand all edges with 120-grit sandpaper to remove splinters and smooth transitions. Wipe down each piece with a tack cloth to remove dust before assembly. This ensures better glue adhesion and a cleaner finish.
Reinforce Joints with Dowels and Glue
Dowels add rigidity and prevent racking, which is the side-to-side wobble that ruins swivel shelves over time.
Drill 5/8″ Holes for Alignment
Use 48 pieces of 5/8″ dowel, spaced 2 inches apart, along the joint lines between shelves and dividers. Mark hole locations ½ inch from the edge of each mating surface. Use a 5/8″ Forstner bit to drill flat-bottomed holes to a depth just shy of full penetration, about ¾”. This prevents blowout on the opposite face.
Insert Dowels with Wood Glue
Apply a small amount of PVA wood glue inside each hole. Insert the dowel and tap it flush using a rubber mallet. Never use a metal hammer, which can split the wood. Alternate dowel direction on each shelf level to stagger joint strength and improve load distribution.
Pro Tip: Dowels work best when combined with pocket-hole screws. Dowels handle shear forces while screws provide clamping pressure.
Assemble Frame with Pocket-Hole Joinery
Pocket-hole joinery creates strong, hidden connections that look clean from all visible angles.
Set Up Kreg Jig for Vertical Drilling
Use a Kreg Jig 720 set to vertical mode to drill pocket holes on the edges of shelves and dividers. Drill holes on two opposite edges of each shelf and matching divider ends. Do not drill on all four sides because one corner must remain free for the central bearing.
Build One Side First with Spacers
Start by attaching the first divider to the back panel using wood glue and clamps. Check for a perfect 90° angle with a framing square before driving in pocket-hole screws. Use 13-inch scrap boards as spacers between shelves to maintain consistent height. Position each shelf, apply glue to the divider edge, then secure with screws.
Flip and Complete the Opposite Side
Once one side is fully assembled, carefully flip the unit. Align the second divider with your labeled shelves. Recheck squareness, clamp in place, then secure with glue and screws. Attach the bottom panel next, using pocket screws through the dividers. Finally, mount the top panel for full rigidity.
Warning: A misaligned frame will bind on the swivel base. Take time to square it now.
Install the Swivel Base Precisely

The base installation determines whether your shelf spins smoothly or drags and wobbles.
Find the Exact Center Point
With the shelf upside down on a drop cloth, draw two diagonal lines from corner to corner across the bottom panel. Their intersection is the true center. This is where the lazy-susan hardware must align. Mark the point clearly because any deviation will cause wobbling or uneven rotation.
Drill a 5/8″ Center Through-Hole
Use the same 5/8″ Forstner bit to drill a clean, straight hole through the center of the bottom panel. This allows the pivot bolt of the lazy-susan to pass through. Clear sawdust from the hole and surrounding area. Position the rotating plate of the hardware over the center, aligning its screw holes with the panel.
Secure Hardware to Shelf Base
Attach the top half of the lazy-susan to the shelf using 5/8″ wood screws. Drive them evenly into all provided holes to prevent warping or tilt. Do not attach the base plate to the floor yet. First, test-fit the assembly by placing the shelf on a flat surface. Spin it gently to check for smoothness.
Balance and Mount the Final Unit
Proper mounting and loading ensure years of trouble-free operation.
Attach Base to Floor or Subfloor
Position the fixed half of the lazy-susan on the floor where the shelf will live. Use a level to confirm the surface is flat. If not, shim the base or choose another location because an uneven floor causes binding. Secure the base plate with appropriate fasteners. Then, lower the shelf onto it and insert the central pivot bolt. Tighten just enough to allow smooth rotation because over-tightening increases friction.
Load Evenly for Smooth Spinning
Distribute weight radially around the shelf. Avoid piling everything on one side. A balanced load spins effortlessly while an unbalanced one drags or wobbles. Test rotation with light items first. Gradually add books or toys while checking for resistance.
User Tip: Shelves built with precise joinery and balanced loads report “smooth as glass” spinning, even when fully loaded.
Finish for Durability and Style
A proper finish protects the wood and makes the shelf look professional.
Fill Holes and Seal Seams
Use paintable caulk to fill all pocket holes. Smooth with a finger or putty knife before it dries. This creates a seamless surface for painting. Seal any gaps between panels with caulk or wood filler. Sand lightly with 220-grit paper after drying for a professional look.
Prime and Paint
Even if you don’t plan to paint, apply two coats of primer. It seals the wood, evens out the surface, and improves durability. Choose a durable paint like semi-gloss latex for easy cleaning. Apply two coats, sanding lightly between. Let dry fully before moving the shelf into place.
Note: A painted finish resists stains and wear, ideal for kids’ rooms or high-traffic areas.
Maintain Smooth Rotation Long-Term
Regular maintenance keeps your swivel shelf spinning like new for years.
Check Screws and Alignment Annually
Over time, vibration and loading can loosen screws. Once a year, inspect all fasteners, especially those on the base hardware and divider joints. Re-tighten as needed but don’t over-torque because this can strip plywood.
Lubricate Bearing if Accessible
Some lazy-susan units have removable caps or service points. If yours does, apply a silicone-based lubricant annually. Avoid oil-based lubes because they attract dust and degrade over time. Wipe the base clean with a dry cloth to remove debris that could impede rotation.
Customize for Different Uses
The same principles apply to smaller versions for different applications.
Build Smaller Versions for Desks or Kitchens
Use ½” plywood and a 100 to 200 lb turntable for spice racks, desk organizers, or bathroom caddies. Scale down dimensions proportionally. A 12″×12″ unit with three small shelves works perfectly on countertops.
Try Motorized Rotation
For a high-tech twist, integrate a low-RPM gear motor with a timer or motion sensor. Mount it discreetly under the base to automate rotation. Ensure the motor torque exceeds the shelf’s loaded resistance. Use a slip-clutch mechanism to prevent damage if the shelf hits an obstacle.
Alternative Materials: Replace plywood with solid hardwood for a decorative look, but expect higher cost and more complex joinery.
Key Takeaways for Building a Swivel Shelf
A well-built swivel shelf transforms forgotten corners into functional storage. The success of your project hinges on three critical factors. First, use a 1,000-pound-rated lazy-susan bearing to ensure smooth, durable rotation. Second, build a square, dowel-reinforced frame using pocket-hole joinery to prevent wobbling. Third, center the hardware precisely using diagonal measurements for balanced spinning.
Balance your loads radially around the center and check base levelness before final mounting. Whether for books, toys, or kitchen essentials, this DIY project delivers big value with smart design and careful execution. Start with quality materials, take your time with alignment, and enjoy a rotating shelf that serves your space for years to come.
Frequently Asked Questions About Making a Swivel Shelf
What is the best wood for building a swivel shelf?
¾” plywood is the best choice for most swivel shelf projects. It offers excellent strength, resists warping, and is affordable. You can use solid hardwood for decorative pieces, but it requires more advanced joinery skills and costs significantly more.
How much clearance does a swivel shelf need?
Allow 2 to 3 inches of clearance on all sides to ensure free rotation. Measure your space carefully before building. If placing in a corner, account for both walls and any nearby furniture that could obstruct the rotation path.
Can I use a smaller lazy-susan bearing for a lightweight shelf?
Avoid using bearings rated below 200 pounds, even for smaller projects. Smaller bearings will wear out quickly and may bind under normal loads. The 1,000-pound rating provides a safety margin that ensures longevity and smooth operation.
How do I know if my swivel shelf is balanced?
A balanced shelf spins with minimal effort and no wobbling. Test by loading items evenly around all sides. If the shelf drags or shakes to one side, redistribute the weight. The diagonal measurement trick during assembly also helps ensure proper balance.
Do swivel shelves work on carpeted floors?
Swivel shelves work on carpet but may not spin as smoothly. The bearing compresses into carpet fibers, creating friction. Use a harder base material like plywood under the bearing, or choose a location with harder flooring for best results.
How long does it take to build a swivel shelf?
Expect to spend 6 to 8 hours on a complete project if you have intermediate woodworking skills. This includes cutting and sanding (1 to 2 hours), joinery and assembly (3 to 4 hours), finishing (1 to 2 hours), and hardware installation (1 hour). Plan for additional drying time between glue and finish coats.


