
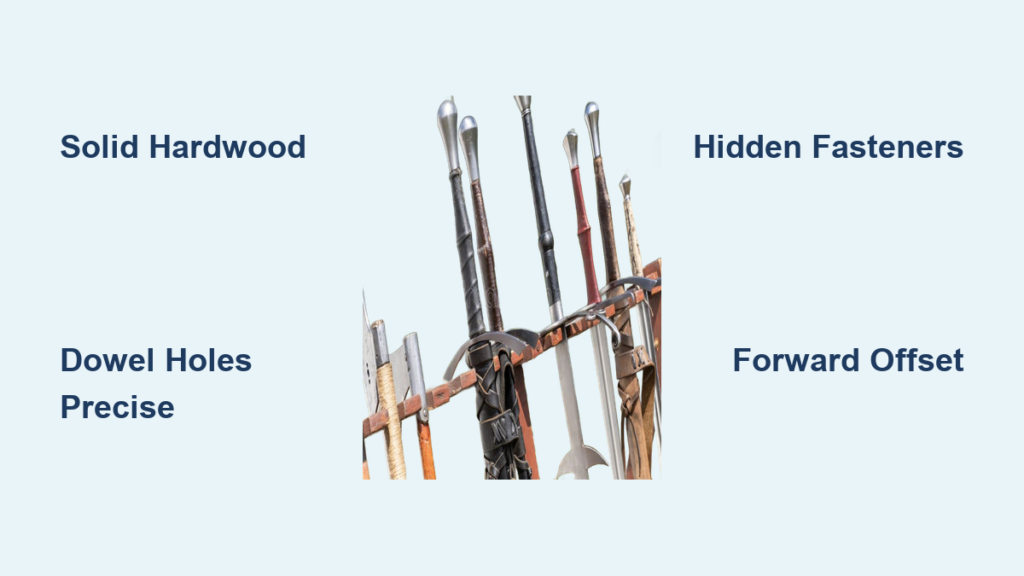
You have invested years collecting katanas, longswords, or cinematic replicas, and now it is time to display them with pride. A well-built sword rack protects your collection, enhances your space, and showcases the craftsmanship of your blades. Commercial racks made from particle board often fail under the weight of real steel, warp over time, or look cheaply made. This guide walks you through every step to build your own solid wood sword rack using time-tested woodworking techniques or modern CNC fabrication. You will learn how to select the right hardwood, cut precise dowel holes, assemble hidden-fastener joinery, and mount your rack securely to display swords beautifully for decades.
Choose the Right Wood for Your Sword Rack
Select Solid Hardwood for Maximum Strength
Choose solid hardwoods like oak for your sword rack because they offer superior durability and beautiful grain patterns. Oak resists warping, supports heavy blades up to five pounds or more each, and ages gracefully over time. Avoid softwoods such as pine unless you are displaying lightweight props or decorative replicas only. Plywood works acceptably if edge-banded and reinforced, but solid wood ensures maximum longevity and visual appeal that particle board cannot match.
Avoid Particle Board Completely
Commercial sword racks frequently use particle board, which chips easily and fails under the weight of real steel blades. Replacing particle board with solid oak or similar hardwood dramatically improves structural integrity and appearance. Your DIY build should outlive any store-bought version by decades, making the investment in quality materials well worth it.
Pick Your Sword Rack Style
Wall-Mounted Picture Frame Design
Build a picture-frame-style rack measuring forty-eight inches long, ideal for holding five to six swords vertically. This design frames artwork beautifully by providing a twenty-six-inch interior cavity. Mount the rack securely to wall studs using heavy-duty anchors, with side panels connected by one-by-two crosspieces for structural stability.
Table-Top Three-Tier Stand
For smaller spaces, craft a compact stand measuring fourteen and three-quarters inches wide by eleven inches high by three inches deep. This unit holds a traditional Japanese sword set with the katana at the bottom, wakizashi in the middle, and tanto at the top. Its low center of gravity prevents tipping when properly weighted and positioned.
Cut and Shape the Frame Pieces
Template-Based Symmetry Method
To ensure both side panels match perfectly, follow this mirror-symmetry technique. Clamp a prototype or printed PDF template to your workpiece. Use a jigsaw to rough-cut just outside the marked line. Refine the curves with a four-by-thirty-six belt sander. Use a flush-cut router bit to duplicate the shape precisely from the first finished piece, guaranteeing perfect symmetry and professional results.
CNC Fabrication for Precision
If you have access to a CNC router, the process becomes even more precise. Download design files in DXF, SVG, AI, or VCarve format. Open the files in VCarve software and set up your toolpaths. Use a one-quarter-inch downcut bit for clean profile cuts. Optionally apply a forty-five-degree chamfer bit for modern, beveled edges. Digital files allow full scalability, so you can resize the design to fit any sword length or wall space.
Drill Perfect Dowel Holes
Install Half-Inch Blade Support Dowels
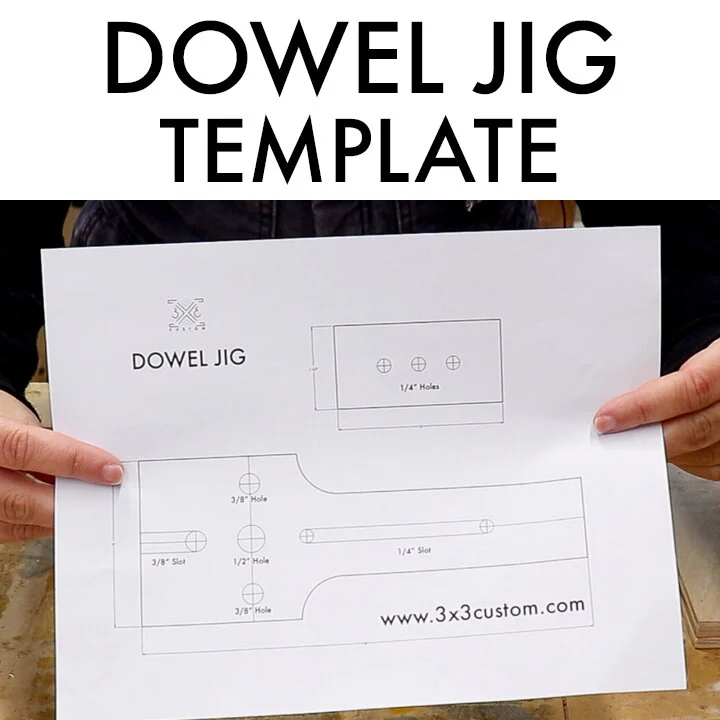
Use one-half-inch hardwood dowels to cradle each blade near the guard. These supports act as stable cradles that prevent swords from slipping or falling. Drill holes at consistent angles and depths in both side panels to ensure proper alignment across the entire rack.
Build an Acrylic Drilling Jig
Create a one-inch-thick cast acrylic jig with a hole sized exactly for your dowel diameter. Insert the one-half-inch dowel into the jig. Drill one side of the hole completely. Flip the jig and complete the through-hole. This flip-drilling method ensures perfect centering on every single hole. Repeat this process for all twelve holes needed for your rack configuration.
Add Quarter-Inch Retaining Pins
Insert one-quarter-inch dowels through the ends of the one-half-inch supports to act as retaining pins. These small pins lock the blade cradles in place while remaining nearly invisible once the rack is assembled. They prevent the supports from sliding out during normal use.
Prepare and Install the Crosspieces
Cut One-by-Two Lumber to Width
Trim two pieces of one-by-two dimensional lumber to span perfectly between your side panels. Square the ends for tight joints and better load distribution across the entire frame. Both pieces should be equal in length for visual symmetry.
Stagger Heights for Shorter Swords
Position the top crosspiece lower than the bottom crosspiece. This staggered arrangement allows tanto and wakizashi hilts, which sit closer to the wall, to clear the front edge without tilting. Proper tiering prevents blade contact with the wall and ensures each sword hangs at the correct angle.
Assemble with Hidden Fasteners
Use Pocket Screws for a Clean Appearance
Attach crosspieces to side panels using a pocket-hole jig. This method hides all screws inside the joint, giving the rack a seamless, high-end appearance. Check that the frame is perfectly square before final tightening to ensure proper alignment.
Reinforce Joints When Needed
For extra strength, especially with long spans or heavy loads, reinforce joints with wood glue and additional dowels or biscuits. This added reinforcement ensures your rack can handle the combined weight of multiple heavy swords without loosening over time.
Round or Chamfer the Edges
Apply Quarter-Inch Round-Over for Safety
Use a one-quarter-inch round-over bit on all front-facing edges only. Set the bit height using scrap wood to achieve a smooth profile with a one-quarter-inch curve, three-quarter-inch flat center, and one-quarter-inch curve. Feed material against the bit rotation to avoid tear-out. Rounded edges feel safer when handling and reflect light attractively.
Alternative Forty-Five-Degree Chamfer
For a sharper, modern look, use a forty-five-degree chamfer bit instead. This creates clean beveled edges that highlight the geometric precision of your build. Chamfered edges work particularly well with contemporary interior design schemes.
Mount the Rack Correctly
Locate Studs or Use Wall Anchors
Before mounting, locate wall studs using a stud finder. If no studs align with your mounting points, use heavy-duty wall anchors rated for fifty pounds or more each. Never rely on drywall alone to support the weight of steel swords.
Add Forward Offset During Installation
Position the first side panel with a one-sixteenth to one-eighth inch forward offset from the wall. This gap prevents swords from scraping against the wall and allows blades to hang freely without pressure on the hilt. Use washers as temporary spacers during installation to maintain consistency.
Align Second Panel with Precision Marks
Transfer alignment marks from the first panel to the wall. This ensures both sides are level and parallel. Mount each panel independently for maximum stability and strength.
Apply Finish for Beauty and Protection
Stain with Honey-Oak Finish
Brush on light honey-oak stain to enhance the wood’s natural grain. Wipe off excess stain and let it dry completely before handling. This warm tone complements traditional Japanese decor and aged steel blades beautifully.
Seal with Your Preferred Topcoat
Choose a protective finish based on your needs. Tung oil provides a natural look with moderate protection and requires reapplication every few years. Polyurethane offers the most durable finish, ideal for homes with children or pets. Linseed oil gives a soft sheen with a traditional feel. Wax finish looks smooth and authentic but requires more frequent maintenance. Always finish all surfaces, including the back and edges, to prevent moisture imbalance.
Arrange Swords Safely
Follow Tiered Placement Rules
For wall-mounted racks, place heavier swords at the bottom for optimal balance. The traditional order from bottom to top is katana, wakizashi, then tanto. For table-top stands, position the tanto at the top tier, wakizashi in the middle, and katana at the bottom.
Verify No Wall Contact Occurs
Ensure no part of any blade touches the wall. The forward offset and staggered beams should provide full clearance. Test with actual swords before final mounting to verify proper spacing and alignment.
Upgrade Your Sword Rack
Add Felt-Lined Cradles
For valuable or sharp blades, glue felt strips into dowel contact points. This prevents scratches and reduces vibration when inserting or removing swords. Felt lining also protects polished blade finishes from accidental damage.
Install LED Accent Lighting
Mount small LED spotlights above or below the rack to highlight your collection. Use warm-white LEDs for a museum-like glow that showcases your blades beautifully. Lighting adds drama and visual interest to any sword display.
Plan for Future Expansion
Leave room for expansion by designing modular sections or saving digital files for future builds. Document your building process for reference or sharing with others who might want to build similar racks.
Maintain Your Sword Rack
Clean and Inspect Annually
Wipe down your rack monthly with a dry cloth to remove dust. Every year, check dowels and joints for wear, re-tighten wall anchors, and reapply finish if the wood appears dry or dull.
Control Environmental Conditions
Keep the rack away from direct sunlight, which fades wood and finish. Avoid bathrooms or basements where moisture causes swelling. Position the rack away from heating vents that cause drying and cracking. Ideal conditions maintain stable temperature and forty to sixty percent humidity.
Final Tips for Building Like a Pro
Start with a prototype using scrap wood or MDF to verify hole spacing, sword clearance, and visual balance before cutting expensive hardwood. Invest in a drilling jig because the precision it provides pays for itself in professional results. Misaligned dowels ruin the look and function, so do not skip this tool. Hide every fastener using pocket screws or internal joinery to keep the design clean and upscale. Scale your design for any sword, whether you own a three-foot katana or a five-foot nodachi. You can legally sell physical racks built from purchased digital files, but never resell or share the digital files themselves.
Frequently Asked Questions About Making a Sword Rack
What is the best wood type for a sword rack?
Solid hardwoods like oak provide the best strength and durability. Oak resists warping, supports heavy blades, and looks beautiful with a finish. Avoid particle board and softwoods like pine for real steel swords.
How do I ensure my swords do not touch the wall?
Mount the rack with a one-sixteenth to one-eighth inch forward offset from the wall. This gap allows swords to hang freely without the blade pressing against the wall surface. Staggered crosspiece heights also help shorter swords clear the front edge.
Can I build a sword rack without special tools?
Yes, you can build a sword rack using basic tools like a jigsaw, drill, and pocket-hole jig. A template and bandsaw work for curved profiles. The project is intermediate in difficulty but achievable with careful measurement and basic woodworking skills.
How many swords can a wall-mounted rack hold?
A standard forty-eight-inch rack holds five to six swords comfortably. The exact capacity depends on sword width and your preferred spacing between each blade.
What finish protects a sword rack best?
Polyurethane offers the most durable protection for high-traffic areas. Tung oil provides a natural look with moderate protection. For traditional aesthetics, linseed oil or wax work well but require more frequent reapplication.
Key Takeaways for Building a Sword Rack
Building a quality sword rack requires selecting solid hardwoods like oak rather than particle board, using precise dowel systems with retaining pins for secure blade support, and incorporating hidden fasteners like pocket screws for a clean, professional appearance. The wall-mounted design should include a forward offset to prevent blade contact with the wall, while staggered crosspieces accommodate shorter swords like tanto and wakizashi. Apply a protective finish like polyurethane or tung oil and maintain stable environmental conditions to ensure your rack lasts for generations while showcasing your collection beautifully.


