
Thick shelves add instant sophistication and strength to any room, whether you are organizing a bathroom, displaying books, or building a custom media unit. The key to success is not just using thick material, but smart construction that combines real or faux thickness with structural integrity. This guide covers everything you need to know about how to make a thick shelf that looks premium, holds heavy loads, and lasts for years. You will learn how to choose the right materials, reinforce weak points, create the illusion of mass, and mount shelves securely.
Choose the Right Material for Your Shelf
Solid Wood for Real Strength
Solid wood is the gold standard for thick shelves. Hardwoods like oak, maple, or poplar in 1 inch or 1¼ inch thickness offer unmatched stiffness and durability. They resist sagging under heavy loads and accept advanced joinery like dadoes or sliding dovetails. A 1¼ inch solid wood shelf can span up to 40 inches without noticeable deflection, which is ideal for bookshelves or media units. While more expensive and heavier than plywood, solid wood provides a clean natural edge and long-term reliability.
Pro Tip: Mill solid wood slightly oversized and flatten it on a jointer or with a hand plane for a smoother finish before installation.
Plywood for Stability and Cost Savings
Plywood is stable, affordable, and widely available, which makes it perfect for longer spans when reinforced. Standard ¾ inch plywood works well for shelves under 30 inches, but beyond that, sag becomes a real issue. For thicker builds, use Baltic birch up to 1⅛ inches from specialty suppliers, or laminate two layers of ½ inch or ¾ inch plywood together. Avoid relying on raw plywood edges because they need edging or facing to look finished.
Warning: Inter-ply slippage can occur over time under load, especially with lower-grade plywood. Reinforce with solid wood edging or metal inserts for heavy-duty use.
MDF and Trim for Visual Depth
MDF is not load-bearing, but it is excellent for backing and painting. Use ¼ inch MDF as a bottom panel in built-in units for a smooth, paint-ready surface. Pair it with ¾ inch plywood top and 1×3 or 1×4 primed pine trim to create a layered, 2½ inch thick shelf. The trim adds visual mass and hides raw edges, giving a custom-built look without full solid wood cost.
Build Real Thickness with Lamination
Glue Two Layers of Plywood Together
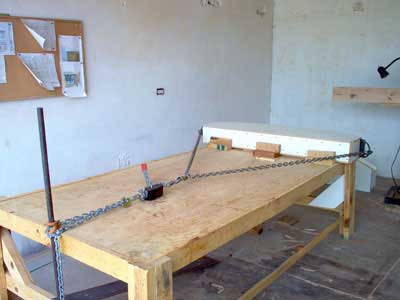
To make a true 1 inch thick shelf, glue two sheets of ½ inch plywood together. This increases stiffness quadratically because doubling thickness gives roughly four times the resistance to sag. Use Titebond III or Lee Valley 2002 Cabinetmaker’s Glue for long open time and strong bond. Apply a thin, even layer to avoid slippage during clamping.
Step-by-Step Process:
1. Cut both layers slightly oversized.
2. Align grain direction for stability.
3. Clamp with even pressure across the surface.
4. Let cure for 24 hours.
5. Trim to final size with a table saw or router.
Pro Tip: Orient both pieces with the crown (slight bow) facing up. This pre-compensates for future sag under load.
Use Solid Wood Edging for Extra Rigidity
Glue solid wood strips (like 1×2 or 1×3) to the front and back edges of a plywood shelf. This dramatically increases stiffness. Tests show a 60 inch ¾ inch plywood shelf with 2 inch solid wood edging deflects only ¼ inch under 190 pounds.
How to Reinforce:
1. Rabbet the plywood edge (¼ inch) to increase glue surface.
2. Clamp and glue the strip in place.
3. Reinforce with brad nails or biscuit joints.
4. Sand and finish flush.
This method works best for 40 inch spans or heavier loads where full solid wood is too costly.
Create Faux Thickness for Floating Shelves
Build a Hollow Box Shelf
Fake thickness without the weight or cost by building a hollow box structure. Use ¾ inch plywood for the base, then add a ¾ inch solid wood fascia to the front. This creates a 1½ inch thick appearance while keeping the shelf lightweight and easy to mount.
Example: A 12 inch deep floating shelf uses 11¼ inch deep plywood plus ¾ inch fascia for full 12 inch depth with a chunky front. The thick front edge mimics solid wood while allowing hidden internal supports.
Install Hidden Cleat Supports
Floating shelves rely on invisible brackets. Use 1×2 boards cut and mounted to wall studs. The back support should be 2 inches shorter than shelf length, and side supports should be 1 inch shorter than shelf depth.
Mounting Steps:
1. Find studs with a stud finder.
2. Mark level lines for supports.
3. Screw side supports into studs.
4. Attach back support between them.
5. Slide shelf over supports. Friction holds it in place.
Critical Fit: Cut the shelf ¼ inch narrower than the wall opening to allow easy sliding. If no stud is available, use heavy-duty drywall anchors but limit load to 20 to 30 pounds.
Reinforce Long Spans with Metal

Insert Steel Square Tubing
For spans over 40 inches, add internal metal reinforcement. Rip two parallel dadoes (½ inch wide by ½ inch deep) into one layer of ½ inch plywood, positioned 4 inches from front and back edges. Insert ½ inch square steel tubing into the dadoes.
Assembly Process:
1. Apply epoxy into dadoes (this bonds and stiffens).
2. Insert steel tubes.
3. Glue second plywood layer on top with pocket screws.
4. Clamp until cured.
Result: Massive increase in stiffness. This method has been tested on 40 inch shelves with zero sag under heavy loads.
Alternative: Use aluminum tubing to reduce weight, though steel offers superior rigidity.
Pro Caution: This requires precise cutting. Test fit first with scrap wood before committing to your final material.
Maximize Strength with Smart Design
Know Your Span Limits
Sag is the enemy of thick shelves. Follow these max span guidelines:
| Material | Max Span |
|---|---|
| ¾ inch Plywood | 30 inches |
| 1 inch Solid Wood | 36 inches |
| 1¼ inch Solid Wood | 40 inches |
| ¾ inch Plywood plus Edge Banding | 60 inches |
Rule of Thumb: Beam strength is proportional to thickness squared. A 1 inch shelf is approximately four times stiffer than a ½ inch shelf.
Real-World Test: A 36 inch ¾ inch plywood shelf began sagging within a year under books and binders. Reinforcement is essential for any shelf expected to hold significant weight.
Add Mid-Span and End Supports
For built-in shelves, boost rigidity with mid-span blocking (vertical 1×2 between cleats at center), center back support (extra cleat in middle of long back panel), and through-bolted ends (screw through cabinet sides into shelf ends). These prevent twisting and reduce deflection, especially in wide units.
Mount Shelves Securely
Use Wall Cleats for Built-Ins
Cleats provide strong, level support for built-in shelves. Use 1×2 boards mounted horizontally to wall studs.
Installation Steps:
1. Mark shelf height on both walls.
2. Apply construction adhesive in dots to cleat.
3. Level and screw cleat into studs with 2 inch screws.
4. Repeat for each shelf level.
Pro Tip: Use a laser level or long bubble level to ensure perfect alignment across wide walls.
Anchor All Heavy Shelves to Studs
Never rely on drywall alone. Always screw into wall studs for shelves holding more than 20 pounds. Use 3 inch construction screws for floating shelf supports or heavy built-ins.
If Studs Do Not Align: Install a horizontal backing board between studs, then attach cleats to it.
Assemble with Precision
Layer Components for 2½ Inch Thickness
In bathroom built-ins, combine materials to hit the popular 2½ inch thickness. Attach ¼ inch MDF bottom to cleat with 1 inch brad nails. Secure ¾ inch plywood top over MDF with 1¼ inch brad nails. Install mid-span blocking for rigidity. Nail 1×3 primed pine face trim to cleats and blocking.
Final Thickness Calculation: Cleat (¾ inch) plus MDF (¼ inch) plus Plywood (¾ inch) plus Trim (¾ inch) equals approximately 2½ inches.
Pro Finish: Caulk all seams and corners for a seamless, high-end look.
Use Pocket Holes for Hidden Joints
For box-style shelves, use a pocket hole jig to join sides and front/back panels. This avoids visible screws and strengthens the frame. Clamp and glue joints first, then reinforce with pocket screws.
Finish for a Professional Look
Prep and Paint Like a Pro
Thick shelves deserve a flawless finish. Start by filling nail holes with wood filler, then sand smooth with 120 to 220 grit paper. Wipe away dust before painting.
Recommended Product: Beyond Paint in Licorice (black). This all-in-one product serves as primer, paint, and finish. No sanding or stripping is needed. It is UV-stable so it will not fade, and it cures to a durable, washable surface.
Application: Apply 1 to 2 coats with a high-quality brush or roller. Use painter’s tape to protect adjacent surfaces.
Design Match: Black shelves complement black tile or modern bathrooms beautifully.
Caulk Seams for Seamless Appearance
Run a bead of paintable caulk along all joints, especially where trim meets wall or cabinet. Smooth with a damp finger. Once dry, paint over it. This hides gaps and creates a built-in look.
Style and Organize Effectively
Add Storage Baskets
Woven or fabric baskets (available at most home stores) fit perfectly on thick shelves. They keep toiletries, books, or toys organized and add texture to the design. This approach works especially well in bathrooms, kids’ rooms, or living areas where function meets style.
Match Shelf Depth to Space
In tight areas like bathrooms, optimize every inch. A 9¾ inch deep shelf fits neatly beside a toilet without crowding. Use the full wall height to create vertical storage with multiple thick shelves.
Pro Tip: Cut floating shelves ¼ inch shorter than wall width for easy installation.
Test and Trust Your Build
Validate Load Capacity
Before loading a shelf, test its strength. Place 9 gallons of paint (approximately 90 pounds) on a 60 inch reinforced shelf and expect only 1/32 inch to 1/16 inch deflection. A 190 pound person standing on the same shelf caused ¼ inch sag, which is still within safe limits.
Conclusion: Edge banding and proper support make plywood shelves surprisingly strong.
Monitor for Long-Term Sag
Even well-built shelves can sag over time. Inspect annually, especially in humid environments. If you notice downward bowing, consider adding a center support or replacing with solid wood.
Choose the Best Method by Use Case
Bathroom Toiletry Shelf (4 Feet Wide)
Use cleat-mounted, layered construction. Combine ¾ inch plywood plus ¼ inch MDF plus 1×3 face trim for 2½ inch thickness. Paint with washable black paint and caulk all seams. This works because of compact depth (9¾ inches), strong support, and easy cleaning.
Bookshelf (36 Inch Span)
Choose 1 inch solid wood for best performance with heavy books. Alternatively, use ¾ inch plywood plus 2 inch solid wood edging on front and back for a cost-effective, strong option. Avoid bare ¾ inch plywood because it will sag within a year.
Floating Shelf (12 Inches Deep)
Build a hollow box with ¾ inch plywood base plus ¾ inch solid wood fascia. Support with hidden 1×2 cleats into studs. This creates a lightweight, modern look. Cut shelf ¼ inch narrower than wall space for easy fit.
Built-In Media Unit (40 Inch Span)
Use 5/4 solid wood (1¼ inches) for maximum strength. Alternatively, laminated ½ inch plywood with steel square tubing and epoxy provides experimental but ultra-stiff results. Always anchor to studs and add mid-span support.
Light Decorative Shelf
Design a faux-thick floating shelf with minimal support using ¾ inch plywood plus ¾ inch fascia. Use a hidden 1×2 cleat and limit load to 20 to 30 pounds. This is ideal for displaying small decor, photos, or plants.
Frequently Asked Questions About Making Thick Shelves
What is the strongest material for a thick shelf?
Solid wood in 1¼ inch thickness (5/4) offers the strongest performance for heavy loads. Hardwoods like oak, maple, or poplar resist sagging better than plywood and accept advanced joinery. For a cost-effective alternative, laminate two layers of ½ inch plywood together or add solid wood edge banding to ¾ inch plywood.
How do I make a shelf look thicker without using full-thickness material?
Build a hollow box shelf using ¾ inch plywood for the base and add a ¾ inch solid wood fascia to the front. This creates the appearance of a thick shelf while keeping weight low and cost down. The chunky front edge mimics solid wood while allowing hidden internal supports.
What is the maximum span for a thick shelf without sagging?
A ¾ inch plywood shelf should not exceed 30 inches. A 1 inch solid wood shelf can span up to 36 inches. A 1¼ inch solid wood shelf reaches 40 inches. With solid wood edge banding on both front and back, a ¾ inch plywood shelf can span up to 60 inches with minimal deflection.
Can I use metal to reinforce a thick shelf?
Yes. Insert ½ inch square steel tubing into dadoes cut into plywood layers. This dramatically increases stiffness for spans over 40 inches. Apply epoxy around the tubes and glue a second plywood layer on top. Aluminum tubing offers a lighter alternative with slightly less rigidity.
How do I mount a thick floating shelf securely?
Find wall studs with a stud finder. Mount 1×2 support boards into studs, with the back support 2 inches shorter than shelf length and side supports 1 inch shorter than shelf depth. Cut the shelf ¼ inch narrower than the wall opening so it slides over the supports easily. Use 3 inch construction screws into studs.
How thick should a bathroom shelf be?
A 2½ inch thickness is common for bathroom built-ins. Achieve this by layering ¾ inch plywood, ¼ inch MDF bottom, and 1×3 face trim. This provides visual mass, hides hardware, and creates a custom-built look that fits well in tight spaces.
Key Takeaways for Making Thick Shelves
Building a thick shelf is about engineering, not just appearance. Whether you use solid wood, laminated plywood, or a hollow box with hidden supports, the goal is strength, stability, and style. Follow these proven methods to create shelves that look custom-made, hold heavy loads, and stand the test of time.
The most important factors are choosing the right material for your span length, reinforcing with edge banding or metal when needed, and always anchoring to wall studs. For 30 inch or shorter spans, ¾ inch plywood works with proper support. For 36 to 40 inch spans, use 1 inch solid wood or add solid wood edging to plywood. For anything over 40 inches, consider metal reinforcement or laminated construction.
With the right materials, smart reinforcement, and a professional finish, you can master how to make a thick shelf for any room in your home. Start with a clear plan, choose your materials based on load requirements, and do not skip the reinforcement step. Your shelves will look great and perform flawlessly for years.


