
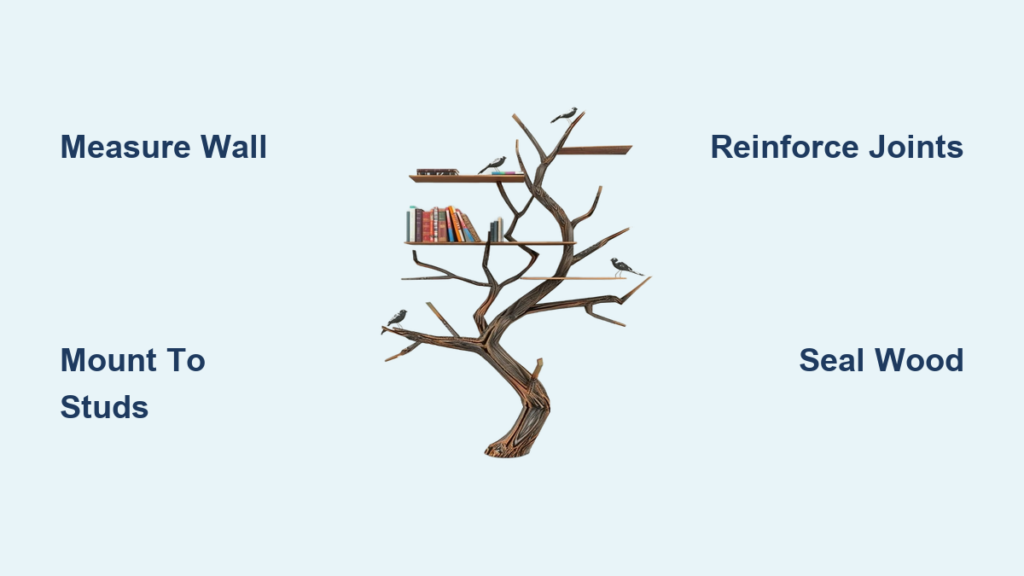
Imagine transforming a blank wall into a living piece of art where books, plants, and memories grow like branches on a tree. A tree shelf does exactly that: it merges function and nature, turning storage into sculpture. Whether you are building in a nursery, living room, or reading nook, this project adds warmth, vertical storage, and a touch of whimsy to any space. And the best part? With basic tools and some creativity, you can build one yourself.
This guide walks you through every step from design to wall mounting using accessible materials and proven techniques. You will learn how to choose the right wood, reinforce joints for safety, and finish with style. Whether you are a seasoned DIYer or tackling your first woodworking project, this comprehensive tree shelf tutorial gives you everything you need to create a stunning, secure, and personalized wall feature.
Design Your Tree Shelf First
Before cutting any wood, plan your tree shelf with purpose and precision. A thoughtful design ensures balance, safety, and visual harmony.
Define the Shelf Purpose
Your shelf function shapes its structure. Consider these common uses:
For books, use 8 to 12 inch deep shelves and sturdy hardwood or three-quarter inch plywood to support weight. For decor, six to eight inch shelves suffice for lightweight items like photos or succulents. For kids rooms, round all edges, add color, and consider themed labels like animals or letters. For pets, integrate low level perches for cats to climb and rest.
Choose a Style That Fits Your Space
Match your interior with one of these popular styles. Rustic uses reclaimed or live edge wood with natural finish. Modern features clean lines, white or black paint, and optional LED lighting. Whimsical includes painted leaves, rainbow shelves, and hanging vines, perfect for nurseries. Industrial combines metal pipe trunk wrapped in wood veneer.
Measure and Map Your Wall
Accurate measurements prevent costly mistakes. Record wall height, width, and ceiling clearance. Check for obstructions like doors, windows, and outlets. Use a stud finder to locate wall studs, which is critical for safe mounting. Sketch your layout on graph paper or use SketchUp for a 3D preview.
Tall ceilings call for a floor to ceiling design. Low ceilings benefit from wider spreading branches for visual balance.
Select the Right Materials

Choosing quality materials ensures durability, safety, and a polished look.
Pick Your Wood Type
Different woods serve different purposes. Pine works well for painted finishes and budget builds, but sand and condition it before staining. Baltic birch plywood offers clean, modern designs and resists warping. Oak, maple, and walnut provide beautiful natural finishes and handle heavy loads, though they cost more. Reclaimed wood delivers a rustic, eco friendly look, but inspect it carefully for nails and rot. MDF provides crisp painted edges but requires good sealing since it is sensitive to moisture.
Gather Essential Hardware
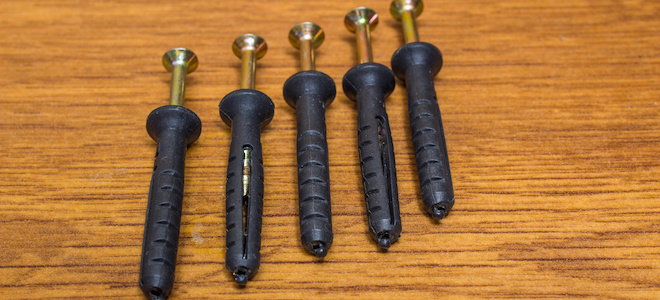
You will need wood screws in one and a quarter inch for joints and two and a half to three inch sizes for mounting. Wood glue like Titebond II or III reinforces all joints. Wall anchors matter for hollow walls, but use lag screws for studs whenever possible. L-brackets or cleats provide extra support under long shelves. Clamps hold pieces firmly during glue up.
Finish Supplies for a Pro Look
Sandpaper in 80-grit handles rough shaping, 120 to 180-grit smooths surfaces, and 220-grit provides final polishing. Wood conditioner prevents blotching on softwoods. Stain or paint requires primer first on MDF or pine. Polyurethane sealant needs two to three coats in matte or satin finish for kids rooms. Tack cloth removes dust before finishing.
Eco friendly builders can repurpose wood from old furniture or pallets. Just clean and sand thoroughly before use.
Tools You Will Need
You do not need a full workshop. These essentials cover the job. A measuring tape and square ensure accurate cuts. A pencil and level mark and align pieces. A jigsaw cuts curved branches. A circular or miter saw handles straight trunk cuts. A power drill with bits creates pilot holes and drives screws. An orbital sander smooths surfaces. A stud finder locates wall studs. Safety gear includes gloves, glasses, and a dust mask.
No jigsaw? Use a bandsaw or scroll saw instead. For straight cuts, a table saw works best.
Build the Tree Shelf in 8 Steps
Follow this proven sequence to assemble a strong, beautiful tree shelf.
Step 1: Create Full-Size Templates
Sketch your tree design on cardboard or scrap plywood. Include trunk, branches, and shelf positions. Cut out templates with a utility knife or jigsaw. Label and number each piece for easy assembly.
Lay templates on the floor to test proportions and branch flow before moving forward.
Step 2: Cut the Wood Pieces
Transfer template outlines to your wood with a pencil. Cut the trunk eight inches wide by 60 to 84 inches tall or to fit your ceiling. Make branches 12 to 24 inches long, three to six inches wide, and three quarter inch thick. Cut branch ends at a 10 to 15 degree angle to mimic natural taper. Use a jigsaw for curves and a circular saw for straight cuts.
Always clamp wood securely and cut slowly to avoid splintering.
Step 3: Dry-Fit All Components
Lay out all pieces on the floor. Check alignment, spacing, and visual balance. Adjust branch angles or lengths if needed. Simulate weight by placing books on shelves.
Fix fit issues now before applying glue and screws.
Step 4: Assemble the Tree Structure
Apply wood glue to joint areas where branches meet the trunk. Clamp pieces and let glue set for 30 to 60 minutes. Reinforce with two and a half inch wood screws driven through the trunk into shelves. For heavy shelves, add L-brackets or wooden cleats underneath.
Drive screws from the back to hide fasteners for a cleaner look.
Step 5: Sand All Surfaces
Start with 80 to 120-grit to remove saw marks. Switch to 180 to 220-grit for a smooth, child safe finish. Round all corners and edges, especially in kids rooms. Wipe with a tack cloth to remove dust before finishing.
Step 6: Stain or Paint
For staining, apply wood conditioner especially on pine. Use a brush or cloth to apply stain with the grain. Wait five to 15 minutes, then wipe off excess. Let dry 24 hours before sealing.
For painting, apply primer first. Use two to three thin coats, sanding lightly with 220-grit between each. Let each coat dry fully.
Use a sponge or rag to create bark-like texture on the trunk for creative flair.
Step 7: Seal for Protection
Apply two to three coats of polyurethane. Lightly sand with 220-grit between coats. Seal all sides including edges and undersides. Let cure 24 to 48 hours before mounting.
Optional LED strip lights add ambient glow under shelves.
Step 8: Mount Securely to the Wall
This is the most critical step. Safety depends on it. Hold the shelf against the wall and use a level to align the trunk. Use a stud finder to locate wall studs. Mark screw points on the trunk at top and bottom. Attach L-brackets to the back of the trunk. Drill pilot holes into studs, then secure with lag screws. If no studs align, use heavy-duty toggle bolts rated for shelf weight.
Never rely on drywall anchors alone. They cannot support heavy loads.
Freestanding option: Attach a wide wooden base to the trunk bottom for floor stability.
Avoid These Common Mistakes
Even experienced builders make errors. Here is how to dodge them.
Skipping the Stud Check
Mounting into drywall without hitting studs risks collapse. Always use a stud finder. Confirm stud location with a small test hole. Mark stud centers before drilling.
Poor Joint Reinforcement
Branches under load can pull away if not reinforced. Always glue and screw joints. Add cleats or brackets for shelves over 12 inches long. Never rely on glue-only connections.
Overloading Outer Shelves
Weight on the far end of a branch increases leverage stress. Place heavier items on lower, central shelves. Limit overhang to 10 to 12 inches beyond trunk. Test load with books before final mounting.
Ignoring Finish Protection
Unsealed wood stains, warps, and wears quickly. Seal with polyurethane or lacquer. Reapply every one to two years in high-use areas. Dust regularly with a microfiber cloth.
Upgrade Your Tree Shelf
Take your design to the next level with these creative enhancements.
Add Nature-Inspired Details
Attach laser-cut wooden leaves to branch ends with screws. Paint colorful leaves on the wall behind the shelf. Hang fabric butterflies, felt birds, or vines for whimsy. Carve or burn names, dates, or quotes into the trunk.
Install LED Lighting
Use battery-powered or plug-in LED strips. Stick under shelves for a floating effect. Choose warm white for cozy spaces and cool white for modern looks.
Build Themed Shelves
A rainbow shelf features branches painted in spectrum order with books organized by spine color. A learning shelf labels shelves with letters, numbers, or animals. A pet perch shelf designs lower branches as cat steps or lounging platforms.
Create 3D Depth
Laminate the trunk by gluing two three-quarter inch boards together for one and a half inch depth. This adds shadow and strength. Textured paint using rag-rolling or sponging mimics bark. An ombre effect gradients from dark brown at the base to light tan at the top.
Safety and Long-Term Care
A beautiful shelf must also be safe and durable.
Weight Limits and Placement
Each shelf holds 10 to 20 pounds depending on wood and support. Place books and heavy decor closer to the trunk. Avoid hanging items from branch ends unless structurally reinforced.
Stability Checks
Inspect screws and anchors every six to 12 months. Re-tighten loose hardware immediately. Ensure the trunk remains plumb, meaning vertically straight.
Maintenance Tips
Dust weekly with a soft cloth. Touch up paint or sealant in worn areas. Keep away from direct sunlight and moisture to prevent warping.
If you have children or pets, never design climbable branches unless built as a full climbing structure.
Alternative: Easy Renter-Friendly Tree Shelf
No tools? No problem. Try this no-build method using store-bought shelves.
Use Ready-Made Branching Shelves
Buy two identical branching wall shelves from retailers like IKEA or SpryInterior. Remove base plates so they can be mounted flat to the wall. Stack them with a four-inch gap between units. Align and mount both to wall studs using included hardware. Paint the gap bright white to visually close the space.
This approach works perfectly for renters, beginners, or quick nursery updates.
When to Buy Instead of Build
Not every project should be DIY. Consider a custom tree shelf if you lack tools or workspace, want pre-cut numbered parts, prefer artisan finishes or personalization, or need renter-safe mounting options.
Brands like SpryInterior offer high-quality customizable designs with clear instructions, perfect for those who want the look without the labor.
Frequently Asked Questions About Making a Tree Shelf
What is the best wood for a tree shelf?
Pine works well for painted finishes and budget builds. Baltic birch plywood offers stability and warp resistance. Hardwoods like oak, maple, or walnut handle heavy loads and look beautiful with natural finishes. Choose based on your budget, weight needs, and desired look.
How much weight can a tree shelf hold?
Each shelf typically supports 10 to 20 pounds depending on wood thickness, joint strength, and wall anchoring. Place heavier items on lower shelves closer to the trunk to minimize leverage stress.
Do I need to mount a tree shelf to wall studs?
Yes. Mounting to wall studs is critical for safety. Never rely on drywall anchors alone for the main structure. Use a stud finder to locate studs and secure with lag screws or heavy-duty toggle bolts rated for the expected load.
Can I make a tree shelf without power tools?
Yes. Use hand tools like a handsaw, screwdriver, and sandpaper. However, power tools make curved cuts and assembly much faster. A basic kit including a jigsaw and drill is affordable and widely available.
How long does it take to build a tree shelf?
A beginner can complete the project over a weekend. Plan for one day to design and cut, one day for assembly and finishing, and another day for mounting and curing. The actual build time is approximately six to 10 hours.
Key Takeaways for Building Your Tree Shelf
A tree shelf is more than storage. It is a statement piece that transforms any room. With careful planning, strong joints, and secure mounting, your DIY tree shelf will stand tall for years holding books, memories, and a little piece of nature.
Remember these core principles. Measure twice and cut once. Always mount to wall studs for safety. Glue and screw every joint for durability. Seal all surfaces to protect your investment. Whether you build from scratch or adapt store-bought units, this project brings creativity and function together in one unforgettable wall feature.
Start with a simple design if this is your first build. You can always add complexity and decorations later. The best tree shelf is one that fits your space, matches your style, and safely holds what matters most.


