
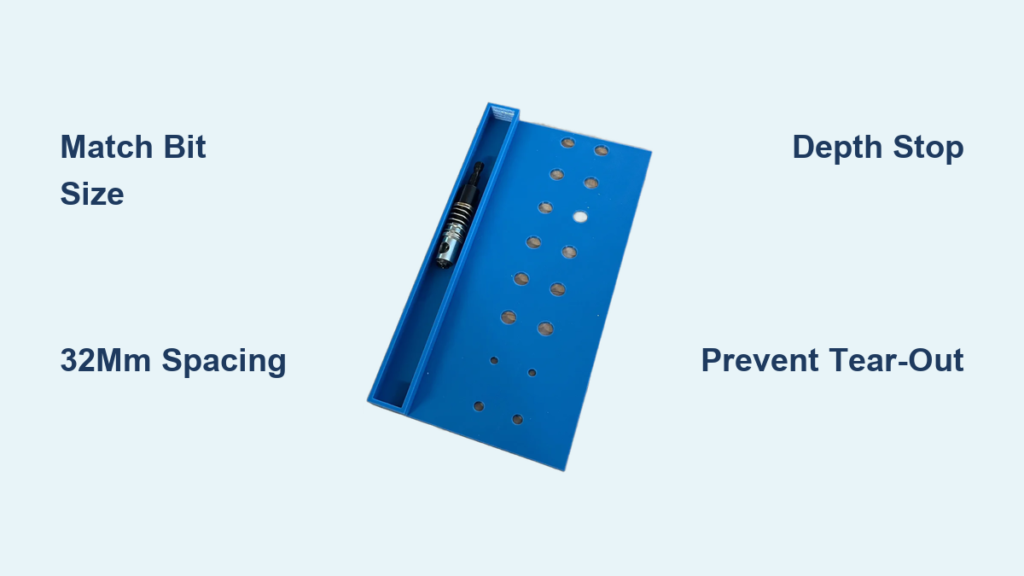
You’ve picked out the perfect shelves, but they won’t stay level. The culprit? Poorly drilled shelf pin holes. Getting these holes right, aligned evenly spaced, and the correct depth is essential for shelves that sit flat and adjust smoothly. Whether you’re building cabinets from scratch, modifying a bookcase, or upgrading a ready-to-assemble unit, how to make shelf holes accurately is a skill that separates DIYers from pros.
This guide walks you through every step of drilling shelf pin holes with precision. You’ll learn how to match drill bits to pins, use the 32mm system for perfect spacing, prevent tear-out in laminates, and choose the best jig. From handheld drills to CNC routers, we cover the tools, techniques, and pro tips used by cabinetmakers worldwide.
Match Drill Bit to Shelf Pin Size
The drill bit must match the shelf pin diameter precisely. Even a small mismatch causes loose shelves or pins that won’t insert. Always verify pin size with calipers or a ruler if packaging is missing.
Use Exact Diameter for Secure Fit
Common standards for shelf pin holes include quarter inch and 5mm sizes. Quarter inch is standard in North American cabinetry, while 5mm is standard in European and IKEA furniture. Never substitute between these sizes because a quarter inch bit creates a loose fit for a 5mm pin, and a 5mm bit creates a tight fit in a quarter inch hole.
Test Fit Before Final Drilling
Drill a test hole in scrap wood first. Insert the pin to check the fit. If the pin is too loose, your bit is too big. If the pin won’t fit at all, your bit is too small or dull. Adjust bit size or sharpen before drilling cabinet panels.
Follow the 32mm System for Perfect Spacing
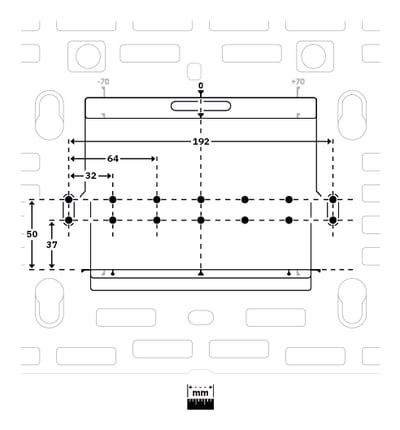
The 32mm system is the global standard for adjustable shelving and cabinet hardware. This spacing ensures compatibility with European hinges, drawer slides, and modular systems from brands like Blum, Grass, and IKEA.
Position First Hole at 37mm from Top
The topmost hole should be 37mm from the top edge of the cabinet side. This offset leaves room for European hinge mounting, top rail clearance, and structural integrity. Mark this point first, then space remaining holes 32mm apart down the panel.
Align Holes on 32mm Centers
Holes spaced 32mm apart vertically enable reconfigurable storage. This system allows you to reuse jigs and hardware across projects, making it ideal for both DIY and professional builds.
Set the Correct Hole Depth

Most cabinets use three-quarter inch thick material. Drill holes to three-quarter inch depth to hold pins securely without breaking through the back. Never drill all the way through the panel because it weakens the structure and ruins the finish.
Use a Depth Stop for Accuracy
Prevent over-drilling with one of these reliable methods. A stop collar clamped on the bit at the three-quarter inch mark provides the highest reliability. A tape flag wrapped at the depth mark works but requires careful visual alignment. A wood block stop clamped to the bit offers good accuracy and serves as a handle. Test depth on scrap wood and adjust before final drilling.
Prevent Tear-Out in Laminated Panels
Materials like melamine, MDF, and particleboard chip easily. Solve this by applying painter’s tape over the drilling spot, marking the hole center through the tape, and drilling slowly with a sharp bit. The tape stabilizes surface fibers and reduces blowout significantly.
Use Sharp Brad-Point Bits
Standard twist bits wander and tear edges. Brad-point bits feature a self-centering tip, clean entry and exit, and precision control in handheld use. Recommended brands include Montana, Freud, and Bosch. For CNC or router use, downcut bits press material down to minimize top-surface chipping.
Choose the Right Drill Bit Type
Selecting the correct bit type affects hole quality significantly. The right bit reduces tear-out and improves accuracy.
Brad-Point Bit for Most Materials
Brad-point bits are ideal for solid wood, plywood, MDF, particleboard, and laminates. They provide clean, accurate holes with minimal tear-out and maintain accuracy in both handheld and drill press use.
Festool Centrotec Self-Centering Bit
This bit features a rotating tip that won’t mar finished surfaces. It’s great for high-end cabinetry, pre-finished panels, and precision work where surface protection matters.
CNC Router Bits for Production
For production shops, use downcut bits with these specifications. Use 5mm or quarter inch diameter, downcut rotation, quarter inch shank, and three-quarter inch cutting height. Downcut bits reduce chipping on laminated tops.
Use a Jig for Consistent Alignment

A jig ensures consistent hole spacing and alignment. Both DIY and commercial options work well.
Hardwood Drilling Jig DIY
Create a reusable jig from 2-inch wide hardwood scrap. Cut it 10 to 20 inches long, mark a center line lengthwise, and label the bottom end clearly. Mark drilling points every inch from 10 to 20 inches up. Clamp the jig so the bottom aligns with the cabinet base and the front edge is three-quarter inch from the cabinet front. Use a quarter inch brad-point bit with a depth stop.
Pegboard Template for Full-Height Grids
Use pegboard with 1-inch or 32mm grid as a drilling guide. Cut it to cabinet side height and label both top and front clearly. Circle the holes you need to drill to avoid counting errors. Clamp to the panel edge and drill through selected holes. Use the same template on both sides and start from the same end to ensure shelves sit level.
Commercial Jigs Kreg and Craig
The Kreg Shelf Pin Jig comes pre-set for three-quarter inch material and includes a depth stop, guide bushings, and set pin. Its indexing system lets you drill the first hole, insert the pin, and slide down to repeat. The Craig Shelf Pin Jig features six hardened bushings and an offset design for front and back rows. It accepts both quarter inch and 5mm bits. Craig jigs work best for high-volume projects and face-frame cabinets.
Drill Perpendicular Holes for Level Shelves
Angled holes cause shelves to tilt, pins to bind, and uneven weight distribution. Use jigs with guide bushings to maintain a 90-degree angle. Clamp a square as a visual guide or use a drill press for perfect perpendicularity. Handheld drilling requires a steady hand and full-speed bit contact.
Material-Specific Drilling Tips
Different materials require different approaches. Solid wood benefits from drilling with the grain and using a sharp brad-point bit. Plywood requires downcut router bits and lower RPM to prevent delamination. MDF generates fine, hazardous dust, so use a dust extractor and carbide-tipped bits at moderate speed. Particleboard chips easily, so pre-test your bit and apply painter’s tape. Laminated panels need tape, slow feed rate, and a sharp bit to prevent surface chipping.
Avoid Common Mistakes
Always mark orientation labels on your jig and cabinet. Label top, bottom, front, and back to prevent flipping mistakes that ruin alignment. Start from the same end on both sides, beginning from either top or bottom, to ensure matching hole positions. Stagger holes in shared walls by offsetting them half to three-quarter inch to prevent structural weakness and overlapping holes. Drill before assembly when possible because flat panels offer unobstructed edges and better visibility.
Frequently Asked Questions About Making Shelf Holes
What size drill bit do I need for shelf pin holes?
Use a quarter inch bit for North American standard pins or a 5mm bit for European and IKEA standard pins. Always match the bit exactly to your pin diameter for a secure fit.
How deep should shelf pin holes be drilled?
Drill holes three-quarter inch deep for standard three-quarter inch cabinet material. Use a depth stop to prevent drilling through the back panel, which weakens the cabinet.
What is the 32mm system for shelving?
The 32mm system is the global standard spacing for adjustable shelf pin holes. Holes are spaced 32mm apart vertically, starting 37mm from the top edge. This system ensures compatibility with European hardware and modular components.
Can I drill shelf holes in assembled cabinets?
Yes, use a hardwood jig or commercial shelf pin jig for post-assembly drilling. These jigs fit inside cabinets and allow you to drill accurately even in tight spaces.
How do I prevent tear-out when drilling melamine?
Apply painter’s tape over the drilling area before starting. Use a sharp brad-point bit and maintain a slow feed rate. The tape stabilizes surface fibers and produces cleaner holes.
What is the best jig for DIY shelf hole drilling?
A simple hardwood jig costs under five dollars and provides excellent results. Kreg and Craig commercial jigs offer faster indexing but cost more. Choose based on your project volume and budget.
Key Takeaways for Making Shelf Holes
Creating accurate shelf holes ensures your shelves stay level, secure, and adjustable. Whether you use a simple hardwood jig or a commercial tool, the key is consistency. Focus on correct size, depth, spacing, and alignment for professional-quality results every time.
Follow the 32mm system using sharp brad-point bits and apply painter’s tape on laminated surfaces. Label all jigs and cabinet sides to prevent orientation mistakes. Test your setup on scrap wood before drilling final pieces. For rentals, consider non-invasive alternatives like adhesive supports or freestanding risers if permanent drilling isn’t allowed.
Now you’re ready to drill shelf holes like a cabinetmaker. Precise, clean, and perfectly aligned holes will give you storage that functions beautifully for years to come.


