

Painting a cube organizer is one of the easiest and most impactful DIY projects you can do to elevate your space. Whether you are refreshing an old IKEA Kallax, upcycling a thrifted unit, or customizing a plain particleboard shelf, paint transforms it into a stylish piece that looks built-in. With the right prep and tools, you can achieve a smooth, durable finish in under three hours with no professional skills required. This guide walks you through every step so your organizer looks polished and lasts for years.
You will learn how to choose the right paint, prepare the surface properly, apply smooth coats, customize the back panel, and seal for long-lasting protection. We will also cover styling tips, cost breakdown, and real user experiences to ensure your project succeeds the first time.
Gather Supplies and Prepare Your Workspace
Clear and Protect the Area
Work in a well-ventilated space with good lighting. Lay down a drop cloth or old sheet to protect floors from drips and spills. Remove all contents from the cube organizer and disassemble any detachable parts like adjustable shelves or backing panels before starting.
Collect All Necessary Supplies
Having everything ready prevents interruptions. You will need paint, a soft-bristle brush or foam roller, sandpaper, a tack cloth, and a drop cloth. Optional items include primer, sealer, and felt pads. Gather these items before beginning your project.
Working efficiently starts with preparation, so do not skip this step.
Clean and Prep the Cube Organizer Surface
Wipe Down Thoroughly
Dust, oils, and grime block paint adhesion. Use a slightly damp cloth to wipe all surfaces including the front, sides, top, interior, and edges. Let the organizer dry completely before moving on.
Sand Only If Necessary
If using regular latex paint on glossy laminate, lightly sand with 120 to 220 grit paper to create tooth for the paint to grip. Focus on edges and smooth faces. Skip sanding if using specialty no-prep paint like DecoArt Americana Satin Enamel.
Remove Dust After Sanding
Use a tack cloth or dry microfiber rag to wipe away all sanding residue. Any leftover dust will show up under the paint and ruin the smooth finish.
Select the Best Paint for Your Cube Organizer
Pick a Durable Formula
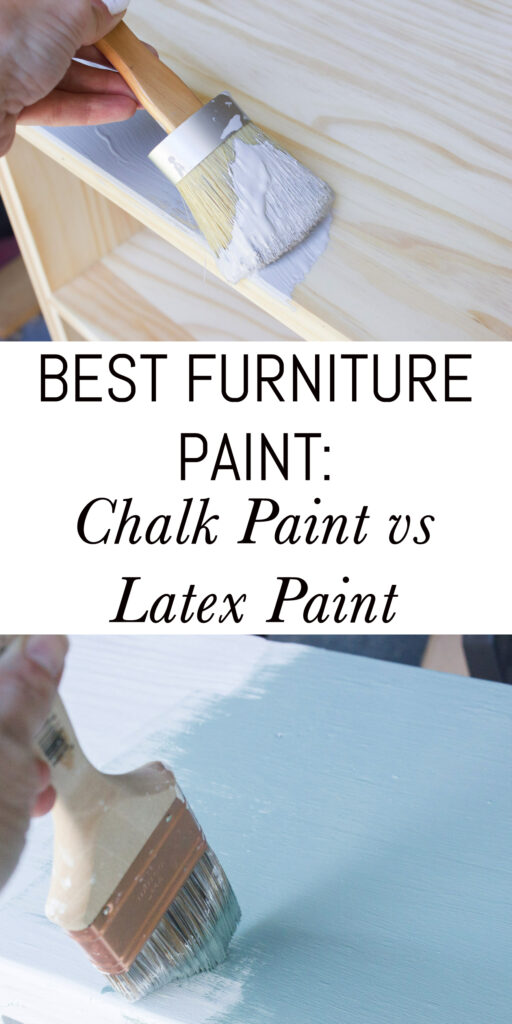
Not all paints work on laminate or particleboard. Use enamel paint for a hard, wipeable finish. Chalk-style paint with a bonding agent offers good adhesion but may need sealing. Self-priming paint eliminates the need for a separate primer. No-sand, no-prime paint is ideal for beginners. Avoid standard wall paint because it chips easily on furniture.
Choose a Flattering Color
Popular choices include crisp white to brighten small rooms, soft gray for a neutral modern look, taupe gray to blend with wood tones, smoke grey for a sophisticated subtle appearance, and black or navy for a bold dramatic statement. Test colors in your room is natural light because gray can look blue or green depending on the lighting.
Mix Custom Colors (Optional)
Create unique shades by blending white with black for custom grays. Add beige or brown to warm up cool tones. Mix small batches first and test on a hidden area before committing to the full project.
One user achieved a warm taupe by combining white, black, and a touch of beige, perfect for their sunlit dining room.
Apply Paint for a Smooth, Professional Finish
Use the Right Tools
For a streak-free finish, use a foam roller for flat surfaces to achieve smooth, even coverage. Use a soft-bristle brush for corners, edges, and details. Avoid coarse brushes because they leave visible marks.
Paint in Thin, Even Coats
Apply paint in long, steady strokes following the direction of the grain if visible. Keep a wet edge to prevent lap marks. Light colors over white typically need 1 to 2 coats while dark or bright bases like black or pink require 2 to 3 or more coats. Let each coat dry 15 to 20 minutes before reapplying.
Sand Between Coats (Optional)
For ultra-smooth results, lightly sand with 220 grit or higher after the first coat. Wipe clean with a tack cloth before the next layer. This step removes dust nibs and brush marks for a professional appearance.
Pro Tip: One project took just 2.5 hours total including drying time, proving this project is beginner-friendly and fast.
Allow Paint to Cure Properly
Wait Before Use
Drying is not the same as curing. While paint may feel dry in minutes, it needs 3 to 7 days to fully harden, especially enamel. During this time, avoid placing heavy items inside the organizer. Do not slide objects across surfaces and keep the unit away from moisture. Curing ensures long-term scratch and wear resistance.
Add Style with a Custom Back Panel

Remove Cardboard Backing
Most cube organizers have a thin cardboard back held in with small nails. Gently pry it off using the claw of a hammer or a flat tool.
Decorate for a Designer Touch
Add visual interest by using wrapping paper, scrapbook paper, fabric, or wallpaper samples. Cut to size using scissors or a craft knife.
Attach Without Warping
Use double-sided tape or dry adhesive. Avoid wet glues like Mod Podge because they can warp cardboard. Apply evenly and smooth out bubbles with a credit card.
Reattach Securely
Slide the decorated panel back into the groove or secure with finishing nails or wire brads using a hammer. This hides wall flaws and adds polish when viewed from angles.
A styled back elevates the look, especially if the unit is used as a room divider or placed away from the wall.
Seal Painted Cube Organizer for Durability
Apply a Clear Topcoat
Even durable paint benefits from sealing, especially in high-traffic areas like kids rooms or entryways. Use water-based polycrylic for a clear, low-odor finish. Use clear satin varnish for a tougher finish with a slight amber tint. Avoid oil-based sealers unless necessary because they can yellow over time.
Application Tips
Use a brush or foam applicator and apply 1 to 2 thin coats. Lightly sand between coats if needed and let cure fully before use. Sealing protects against moisture, scratches, and cleaning wipes.
Protect Floors with Felt Pads
Add Felt Pads
Protect hardwood, tile, or laminate floors by sticking felt furniture pads to the bottom edges or legs. This prevents scuffing, adds cushioning, and makes it easier to slide the unit. Replace felt pads every 6 to 12 months or when worn.
Style and Position Your Painted Cube Organizer
Match Your Room Aesthetic
Painted cube organizers blend into any decor. Use white or gray with black baskets for a modern look. Add natural fiber bins, plants, and woven textures for boho style. Leave some cubes empty for negative space in minimalist spaces. Use labeled bins and colorful supplies on display for craft rooms.
Use Room-Specific Ideas
In the living room, use it for books, photo frames, and plants. In the bedroom, use it as a nightstand alternative with a jewelry tray. For entryways, store shoes, hooks, and a key bowl. In kids rooms, use it for toy bins and rotating book displays. In offices, use it for file boxes, supplies, and printer stands.
Maximize Light and Space
Place the organizer horizontally under a railing or window to avoid blocking sunlight. Or stand it vertically to draw the eye upward in small rooms.
One user styled theirs horizontally under a dining nook railing, achieving a perfect fit with zero light loss.
Create Custom Storage Bins for Your Organizer
Dress Up Cardboard Boxes
Turn plain boxes into chic organizers by wrapping them with wrapping paper or fabric. Use double-sided tape for clean edges and slide them into cubes for hidden, coordinated storage.
Try Fabric or Woven Baskets
Slip-in bins add texture and function. Seagrass baskets provide a natural, airy look. Fabric cubes offer a soft, cozy feel. Labeled bins work great for kids toys or craft supplies. Mix materials for visual depth by contrasting a neutral unit with bold-patterned bins.
Paint Laminate Cube Organizers Successfully
Can You Paint Laminate? Yes With Care
Laminate is slick and non-porous, so adhesion is tricky, but it is totally doable. The best methods are using no-sand, no-prime paint or sanding plus bonding primer plus enamel paint.
Avoid Common Mistakes
Do not use water-heavy cleaners or wet sanding because they can swell particleboard. Skip regular wall paint because it peels off laminate. Never skip cleaning because grease is the number one cause of paint failure.
The phrase the power of paint says it all: a $10 makeover can mimic a $500 built-in.
Maintain Your Painted Cube Organizer
Clean Gently
Wipe with a damp cloth and avoid harsh scrubbing or abrasive cleaners. Never soak the unit.
Touch Up as Needed
Keep leftover paint for repairs. Fix chips or scratches with a small brush.
Reapply Sealer
In high-use areas, refresh the topcoat every 1 to 2 years to maintain protection.
Avoid Humid Areas
Do not place the organizer in bathrooms or damp basements unless fully sealed on all sides.
Cost and Time Breakdown for Painting a Cube Organizer
Budget Breakdown
Total cost can be under $30. Paint costs $10 to $15 for an 8-ounce bottle that covers 4 to 8 cubes. A foam roller costs $8 to $12. Sandpaper costs $5. Felt pads cost $5. Wrapping paper costs as little as $1 at dollar stores.
Time Investment
Prep takes about 30 minutes. Painting takes 45 to 60 minutes with drying between coats. Sealing and styling takes 30 minutes. Total active time is approximately 2.5 hours. Curing takes 3 to 7 days as passive time.
This project is fast, affordable, and beginner-friendly.
Real Results: What Users Experience
Users report an easy process with no-sand paint. They achieve smooth finishes using foam rollers. Dark bases get full coverage in 2 to 3 coats with no peeling after months of use. Cleaning is easy with just a damp cloth.
One painted black Kallax required three coats for opacity but now looks like high-end cabinetry.
Final Tips for Successfully Painting a Cube Organizer
Key Takeaways

Use the right paint, specifically enamel or no-prep formula. Clean first because dirt is the enemy of adhesion. Skip sanding only if your paint allows it. Apply thin, even coats and let patience beat rushing. Seal the paint to add durability and wipeability. Decorate the back panel because it is a small step with big impact. Style with bins to combine function and beauty.
With minimal effort and cost, painting a cube organizer delivers maximum return. It is not just about color; it is about transforming cheap, generic storage into a custom, long-lasting piece that fits your home perfectly. Whether you are a first-time painter or seasoned DIYer, this project proves that the power of paint is real, fast, and totally worth it.
Frequently Asked Questions About Painting a Cube Organizer
Do I need to sand my cube organizer before painting?
Sand if using regular latex paint on glossy laminate to create tooth for the paint to grip. Skip sanding if using specialty no-prep paint like DecoArt Americana Satin Enamel, which adheres to slick surfaces without abrasion.
What type of paint works best on laminate cube organizers?
Enamel paint provides a hard, wipeable finish that works well on laminate. Self-priming paint eliminates the need for separate primer. No-sand, no-prime paint is ideal for beginners because it requires no prep work.
How many coats of paint does a cube organizer need?
Light colors over white typically need 1 to 2 coats. Dark or bright bases like black or pink require 2 to 3 or more coats for full opacity. Let each coat dry 15 to 20 minutes before reapplying.
How long does it take for painted cube organizer to cure?
Paint feels dry in minutes but needs 3 to 7 days to fully cure and harden, especially enamel formulas. Avoid placing heavy items inside during this curing period to prevent scratches and damage.
Can I use a painted cube organizer in a bathroom?
Avoid humid areas like bathrooms or damp basements unless the organizer is fully sealed on all sides. Moisture can damage the paint finish and cause peeling over time.
How do I maintain a painted cube organizer?
Clean with a damp cloth and avoid harsh scrubbing or abrasive cleaners. Keep leftover paint for touch-ups. Reapply sealer every 1 to 2 years in high-use areas to maintain protection.