
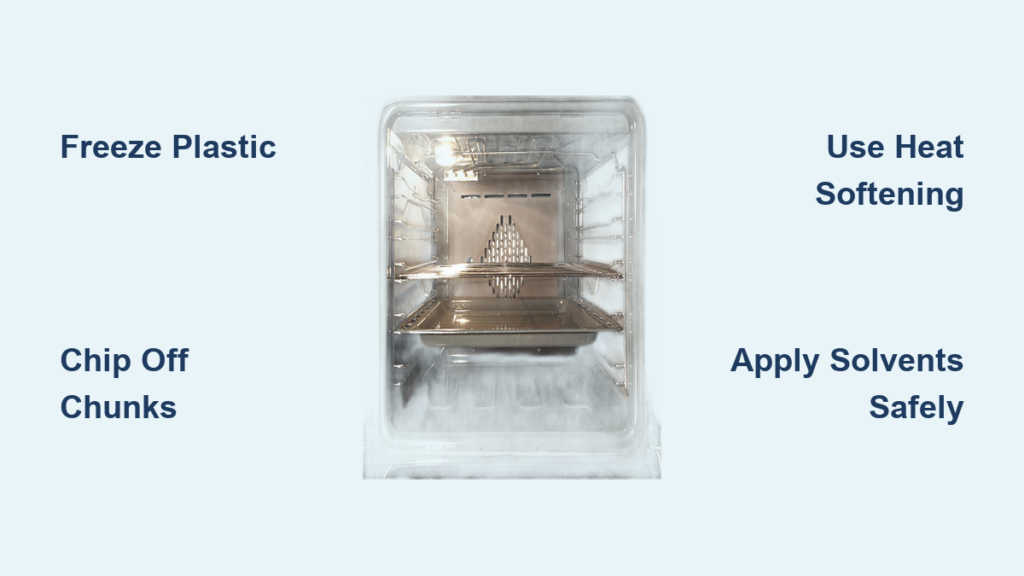
You turn on your oven, only to be met with acrid smoke and a strange, waxy mess glued to your oven rack. Melted plastic can ruin a cook and compromise your appliance, whether it came from a forgotten container, a misplaced utensil, or warped foil. The good news is that you can safely remove melted plastic from oven racks using proven mechanical, thermal, and chemical methods. This guide delivers a step-by-step action plan based on verified user experiences and safety-tested protocols. Whether the plastic is brittle, sticky, or burned on, you will learn how to remove it without damaging chrome plating, triggering toxic fumes, or risking fire.
Immediate Safety Steps When Melted Plastic Occurs
Turn Off Oven and Ventilate Immediately
If you catch melting in progress, shut off the oven right away. Do not open the door widely because this feeds oxygen and increases fumes. Instead, crack it slightly to let smoke escape while turning off the heat. Open all nearby windows and turn on the range hood exhaust at full speed. Use portable fans to blow air outdoors and leave the room if you feel dizzy or nauseous because burning plastic releases harmful gases like benzene and dioxins. Wait for the oven and racks to cool completely before touching. Hot plastic can smear, making cleanup harder, and increases burn risk.
Remove Racks for Safer Treatment
If possible, pull out the oven racks. This lets you work outside the oven cavity, reducing exposure and protecting interior surfaces. Wear nitrile gloves and safety goggles because even cooled plastic can harbor irritants. Place racks on a protected surface like cardboard, a sink, or outdoors. Working in a well-ventilated area is essential throughout the entire cleanup process.
Evaluating the Plastic Damage
Identify Plastic Type and Adhesion Level
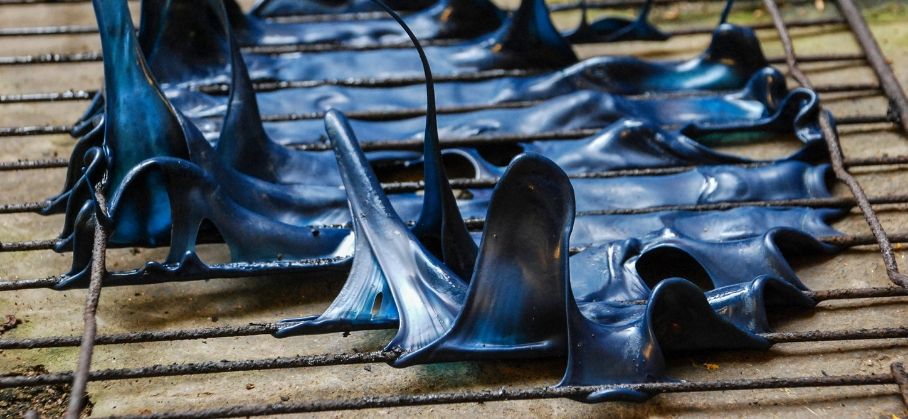
You will not need a lab test, just a quick visual check. Brittle, flaky plastic is fully cooled and hardened, making it easy to chip off. Sticky, waxy residue is partially melted and responds well to heat or solvents. Blackened, fused patches indicate burned plastic and may require high heat or replacement. Thicker deposits likely came from dense plastics like polypropylene, common in food containers, while thin films may be plastic wrap or bags.
Check for Secondary Contamination
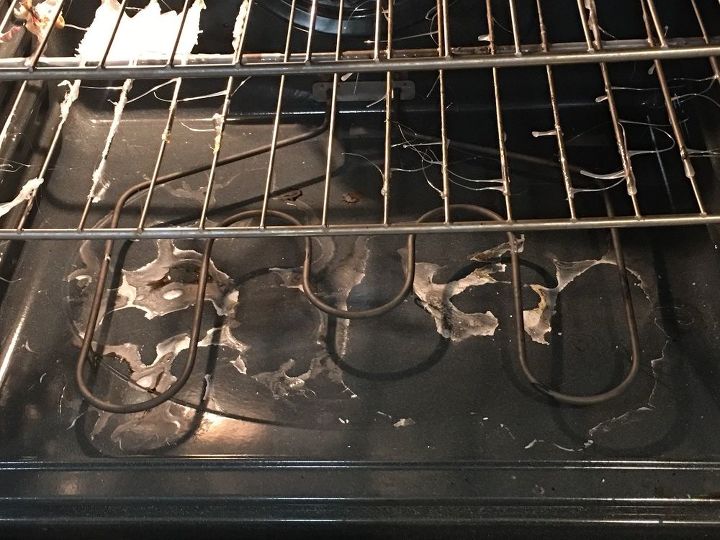
Inspect the oven floor, heating element, and walls. Plastic often drips and re-solidifies in hard-to-reach spots. If the oven has a self-cleaning cycle, it can help clean the interior after manual rack cleaning, but never rely on it as the first step. Look for chrome peeling or pitting, which compromises the non-stick surface and may lead to rust. Warping could mean overheating damage and may prevent the rack from fitting properly after cleaning.
Mechanical Removal Techniques
Chip Off Large Plastic Chunks
Start with dry, mechanical removal because it is safe, effective, and requires no chemicals. This method is ideal for brittle or thick plastic. You will need needle-nose pliers, a flathead screwdriver, and a utility knife. Grip an edge of the plastic with pliers and gently twist or pull to break off large pieces. Use a knife or screwdriver to pry off stubborn flakes. One user removed 90% of plastic in 30 minutes using only pliers, proving this method can be sufficient alone.
Freeze Plastic for Easy Removal
Cold makes plastic contract and become brittle, perfect for clean chipping. For removable racks, place them in a freezer for 6 to 12 hours, then immediately scrape with a wooden spoon, butter knife, or plastic scraper. For non-removable racks or oven walls, fill a heavy-duty bag three-quarters full with ice and press directly over the plastic for 10 to 30 minutes. Scrape while the plastic is still cold. An alternative is to leave racks outside overnight if temperatures are below 32 degrees Fahrenheit. Avoid metal scrapers on self-cleaning ovens because they can damage the catalytic coating.
Use Abrasive Tools for Remaining Residue
After chunk removal, scrub remaining film with a BBQ wire brush, copper scrub pad like Chore Girl, or crumpled aluminum foil. Scrub in circular motions with light pressure and test on a hidden area first. Warning: avoid steel wool on coated racks because it can leave particles that rust.
Heat-Based Softening Methods
Warm Racks to Loosen Sticky Plastic
Low heat softens plastic without reigniting fumes. This method works only for electric ovens. Set the oven to 150 to 200 degrees Fahrenheit and heat racks inside for 5 to 10 minutes. Place foil on the lower rack to catch drips and keep the door slightly open for ventilation. After heating, wrap aluminum foil around your fingers to protect from heat, then wipe or peel softened plastic off with a wooden tool. Stop immediately if smoke appears.
Use a Hair Dryer for Spot Treatment
For small areas or non-removable racks, set a hair dryer to low heat and blow air directly at the plastic for 1 to 2 minutes. Lift the softened plastic with a wooden spatula. Avoid overheating because melting plastic can drip and re-adhere to other areas.
Try Boiling Water on Metal Racks
For removable metal racks only, place the rack in a sink or outdoors and pour boiling water from a kettle or pot over the plastic. Wait 1 to 2 minutes, then the plastic softens and lifts. Wipe with a wooden spoon or sponge. Do not use this method on glass doors or enamel surfaces because thermal shock can crack them.
Chemical Solutions for Stubborn Residue
Apply Mineral Spirits in Electric Ovens Only
Mineral spirits dissolve waxy, sticky residues effectively. Never use this in gas ovens because flammable vapors can cause explosion. Wear nitrile gloves and work in a well-ventilated area. Apply mineral spirits with a cloth or brush and let it sit for 15 to 30 minutes. Wipe or scrape off dissolved plastic. Key point: the power must be off and the oven must be cool. Do not use near gas lines.
Follow with Acetone or Nail Polish Remover
After mineral spirits, use acetone to degrease and remove solvent residue. Soak a cloth and wipe the rack, but do not soak it. Acetone evaporates quickly, so work in sections. Wash thoroughly with soapy water afterward. Avoid acetone on painted or plastic-coated parts because it can damage finishes.
Try WD-40 for Light Adhesion
WD-40 penetrates and loosens sticky films. Spray it on the residue, wait 5 to 10 minutes, then wipe with a cloth or scrub with a sponge. You must wash off completely with dish soap because residue can smoke when heated.
Use Peanut Butter as Final Touch
Surprisingly, peanut butter has been used to loosen sticky films. Spread a thick layer, wait 10 to 15 minutes, then scrub with a copper pad or steel wool. Wash thoroughly afterward. This works best for final cleanup after bulk removal, not as a primary solution.
Final Cleaning and Deodorizing
Scrub with Baking Soda Paste
Baking soda is natural, non-toxic, and effective on light residue. Make a paste using 3 parts baking soda to 1 part water. Apply to remaining film, wait 5 to 10 minutes, then scrub with a sponge or crumpled foil. Rinse and dry. This is safe for metal, glass, and enamel surfaces.
Wipe with Vinegar Solution
For final polish, use a 50/50 white vinegar and water solution. Spray on, wait a few minutes, then wipe with a soft cloth. This removes mineral deposits and neutralizes odors.
Self-Cleaning Cycle as Last Resort
Burn Off Residual Plastic Safely
If traces remain, run a self-cleaning cycle if your oven has one. The temperature reaches about 900 degrees Fahrenheit, burning plastic to ash. One cycle eliminated persistent odors after mechanical cleanup. But expect heavy smoke, possible flames, and a red-hot oven interior. Ventilate aggressively by opening windows and running fans. Remove pets and children from the area and do not leave the cycle unattended because fire risk exists. Use a foil deflector to guide smoke into the range hood. Run only after removing bulk plastic to reduce smoke and make the cycle safer.
Clean Ash After the Cycle
Once the oven has cooled, remove ash from the bottom drip pan and wipe the interior with a damp cloth. Inspect for remaining residue that may need additional treatment.
Oven-Type-Specific Guidelines
Electric Ovens
The best methods are freezing, low-heat softening, mineral spirits with power off, and self-cleaning cycle. Tools safe to use include copper pads, wooden scrapers, and wire brushes.
Gas Ovens
Avoid flammable solvents like mineral spirits near gas lines. Instead, use the ice bag method with a scraper, boiling water for racks only, or WD-40 that is washed off thoroughly. Check whether the bottom panel can be removed for better access.
Self-Cleaning Ovens
The interior has fragile coating, so use only non-abrasive tools. Allowed items include plastic scrapers, wooden spoons, and baking soda paste. Never use metal scrapers, steel wool, or acetone on interior walls.
Post-Cleaning Procedures
Rinse and Dry Thoroughly
After all treatments, wash racks with hot, soapy water, rinse completely, then dry with a towel to prevent rust. Inspect every wire and corner because even tiny bits can smoke during the next use. Run the oven empty at 300 degrees Fahrenheit for 15 minutes as a smell test. No odor means the rack is clean. Persistent smell means repeat cleaning or replace the rack.
When to Replace the Rack
Signs Replacement Is Needed
Consider replacement if chrome is peeling or pitted, if plastic fused into metal pores, if the rack is warped or bent, or if odor persists after multiple cleanings. Standard racks cost about $22, while heavy-duty chrome racks cost about $33. They are available on eBay, Amazon, or appliance parts sites.
Preventing Future Meltdowns
Keep Plastics Away from the Oven
Store plastic utensils, containers, and wraps at least 3 feet from the oven. Use oven-safe labels on cooking tools. Set auto-shutoff alarms to prevent accidental overheating. Teach kids and guests that plastic does not belong in the oven. Consider installing a lockout control or unplugging the oven when not in use if cognitive issues exist.
Key Takeaways for Removing Melted Plastic from Oven Racks
Removing melted plastic is a one-time emergency, not routine maintenance. Start with mechanical removal by chipping off large chunks and freezing to make plastic brittle. Escalate to heat-based softening or chemical solvents only when necessary, and always prioritize ventilation and safety. For electric ovens, mineral spirits work well, but never use flammable solvents in gas ovens. Test your oven after cleaning by running it empty to confirm no odor remains. If damage is severe or odor persists, replacement racks are affordable and easily sourced.
Frequently Asked Questions About Removing Melted Plastic from Oven Racks
Can I use a self-cleaning cycle to remove melted plastic?
Yes, but only as a last resort after manual removal. The extreme heat burns plastic to ash but produces heavy smoke and possible flames. Run it only after removing bulk plastic and ensure aggressive ventilation.
Is it safe to use mineral spirits on gas ovens?
No. Never use mineral spirits in gas or propane ovens because they are flammable and can cause explosions. Use this method only in electric ovens with the power off.
How long should I freeze oven racks to remove melted plastic?
Freeze removable racks for 6 to 12 hours. For non-removable areas, apply an ice bag for 10 to 30 minutes. Scrape immediately while the plastic is cold and brittle.
Will melted plastic damage the chrome coating on my oven rack?
It can. Scraping with metal tools or using abrasive pads excessively may damage chrome plating. Use plastic scrapers, wooden tools, or copper pads instead of steel wool or metal scrapers.
What is the fastest way to remove melted plastic from oven racks?
The fastest effective method is to freeze the rack for several hours, then chip off plastic with pliers. One user reported removing 90% of plastic in 30 minutes using only this freezing and chipping technique.


