
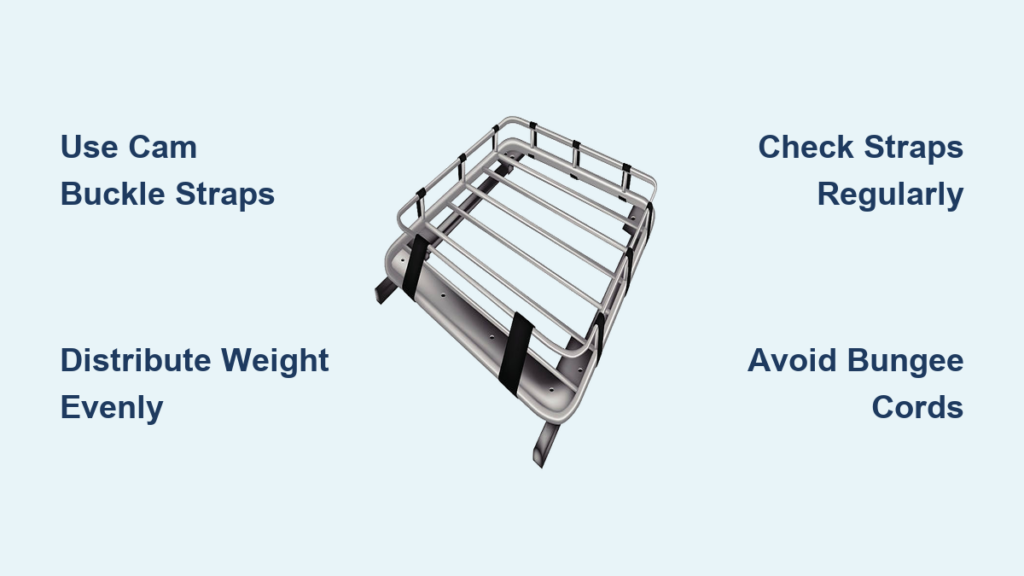
You’ve loaded your gear onto the roof rack and are ready to hit the road. But that nagging thought creeps in: is everything actually secure? A loose strap can turn a road trip into a dangerous situation. Every year, unsecured rooftop loads cause accidents, vehicle damage, and costly fines. Learning how to secure a roof rack properly isn’t optional, it’s essential for your safety and everyone on the road.
This guide walks you through every step to lock down cargo like a pro. You’ll discover the right straps to use, how to distribute weight correctly, and which techniques work best for different gear types. No guesswork, just actionable steps that keep your load stable at any speed.
Identify Your Roof Rack Type
Your securing method depends entirely on what roof setup your vehicle has. Taking a moment to identify it first saves time and prevents mistakes later.
Naked Roof Solutions
If your vehicle has no crossbars, you cannot attach gear directly. But you still have reliable options. A rooftop cargo bag sits directly on the roof and straps down through door gaps. Foam pads with straps work as a temporary solution. Route straps through open door frames, then close the doors on the strap ends to lock them in place. Never over-tighten this method, as it can damage door seals or dent the roof.
Crossbar Systems
Crossbars provide the most secure attachment points for rooftop cargo. They allow direct connection of straps, tie-downs, and dedicated mounts. They also enable even weight distribution across your vehicle’s roof structure. Always check your vehicle owner’s manual for the maximum roof load capacity, and verify rack manufacturer specs for crossbar spacing requirements.
Cargo Baskets and Roof Boxes
A cargo basket lifts cargo above the roof surface, reducing scratches and water pooling while providing multiple tie-down points. Pair a basket with a cargo bag for the best protection. Roof boxes offer weatherproof, lockable storage, but remember that internal contents must still be secured to prevent shifting during travel.
Choose the Right Securing Equipment
The wrong tie-down method fails under vibration and wind lift. Selecting appropriate equipment is half the battle.
Cam Buckle vs. Ratchet Straps
Cam buckle straps work well for soft bags, boards, and light gear. They offer good tension control with low risk of damage if used correctly. Ratchet straps provide excellent tension for heavy items like steel pipes or timber, but they can dent rails or crack crossbars if over-tightened. For most rooftop applications, cam buckle straps are the better choice.
Why Bungee Cords Fail
Never use bungee cords for roof rack securing. They stretch under load, degrade quickly in sunlight, and loosen progressively during your drive. The temporary security they provide is an illusion that puts your gear and other drivers at risk.
Recommended Products
For general use, Riverside 15-foot Heavy Duty Straps offer UV-resistant polyester webbing with 600 to 1,000 pound capacity. For heavy cylindrical loads, consider Quin Paramax rope with a transom knot technique, which creates four points of contact for superior grip.
Load Weight and Balance Correctly

Even the best straps fail if weight distribution is wrong. Understanding load limits protects your vehicle and ensures stable handling.
Check Weight Limits First
Your vehicle’s roof load limit appears in the owner’s manual. Most passenger cars support 50 to 75 kilograms, while SUVs can handle up to 150 kilograms. Exceeding these limits risks roof deformation, suspension damage, and loss of control during cornering. Always weigh your cargo before loading rather than guessing.
Distribute Weight Evenly
Place the heaviest items low and centered between the roof rails. Balance weight side-to-side to prevent uneven suspension loading and poor steering response. Minimize front and rear overhang whenever possible. If overhang is unavoidable, mark the ends with high-visibility flags as required by local laws.
Secure Specific Gear Types
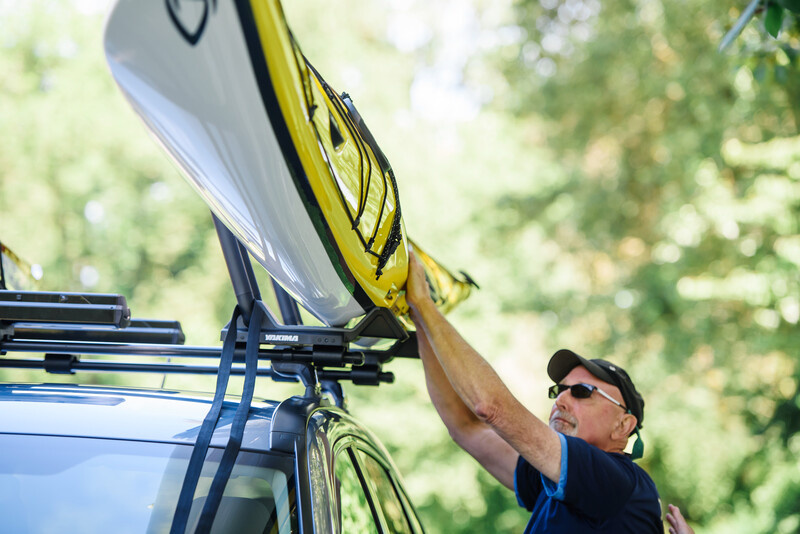
Different equipment requires different securing methods. Using the wrong technique risks damage to your gear and creates safety hazards.
Surfboards and SUPs
Place the board deck-down on padded crossbars with the nose pointing backward so fins help grip the straps. Run two cam buckle straps across the width, feeding them under the crossbars. Pull tight until straps lie flat against the hull with no movement allowed. Perform the shake test before driving. SUPs catch more wind than surfboards, so tighten extra carefully and consider a dedicated SUP attachment system.
Kayaks
Mount kayaks cockpit-down and bow-forward to prevent water accumulation and improve aerodynamics. Use bar covers to protect the hull, then strap at the front, middle, and rear. Ensure straps run flat along the hull, never on bulkheads. Add front and rear safety straps anchored to the chassis for large kayaks to prevent uplift at highway speeds. Check strap tension every two hours on long trips.
Bikes and Skis
Never strap bikes directly to roof bars. Use a dedicated mount like the Yakima FrontLoader, which holds the bike in a tray with the front wheel attached. For skis and snowboards, use a roof box or dedicated ski mount rather than straps. These protect equipment from damage and eliminate the risk of straps pressure-warpng rocker or camber zones.
Master Proper Strapping Techniques
How you route straps matters as much as the straps themselves. These techniques create maximum stability.
Two-Strap Method for Cargo Bags
Run the first strap front-to-back across the load. Run the second strap over the rear section to prevent backward slippage. Use built-in loops on cargo bags for better anchor points. Running straps through these loops greatly improves security compared to strapping only over the bag surface.
Diagonal Cross-Strapping
For enhanced stability, route straps diagonally from front-left to rear-right in a crisscross pattern. This resists shifting in multiple directions simultaneously. An alternative method involves ladder routing, strapping over, under, and over across the bars in sequence.
Transom Knot for Long Loads
For poles, ladders, or pipes, the transom knot offers unmatched grip. Create a stopper knot to prevent slippage, then wrap the object three times around the rack. Form an anchor loop by passing the end over, behind, and into the loop. Build the transom knot as a constrictor variation with two slipped ends. Use a marlin spike to pull the standing portion for maximum tension, then finish with two half hitches to lock. This technique creates four points of contact that resist vibration and wind lift.
Protect Vehicle and Gear
Skipping padding or over-tightening causes damage that ruins both your vehicle and cargo.
Always Use Bar Covers
Place foam padding between straps and your roof, and between gear and crossbars. Dakine Aero Rack Pads offer pre-formed foam sleeves, or use pool noodles cut lengthwise and slid over bars as a DIY alternative. This prevents scratches, paint chips, and strap chafing.
Avoid Over-Tightening
Too much force dents aluminum rails, cracks crossbar joints, and damages roof seals. Tighten until snug, then give one extra pull. Stop there. For delicate gear like foam boards or composite kayaks, less tension is safer.
Check and Maintain During Your Trip
A secure load at home often loosens on the highway. Regular inspection prevents disaster.
Pre-Drive Checklist
Before moving, confirm all buckles are locked, no sharp edges are cutting straps, cargo does not block rear visibility, and perform the shake test with no movement allowed.
Mid-Journey Rechecks
Stop every two to three hours or every 100 miles to re-tighten straps. Webbing stretches and settles during the first 20 miles, so check again shortly after starting. Inspect for wear, shifting, or damage each time.
Drive Safely with Roof Cargo
Your driving must adapt when carrying rooftop loads. Reduced speed and increased awareness keep everyone safe.
Speed Recommendations
Drive below 65 to 70 miles per hour with roof cargo. Higher speeds dramatically increase wind lift, vibration, and detachment risk. Listen for flapping or rattling sounds, which signal instability.
Aerodynamic Concerns
Flat objects like SUPs act as wings at speed, generating lift. High loads increase rollover risk and can reduce fuel economy by up to 25 percent. Pack low, streamline the shape, and use a roof box when possible.
Legal and Safety Consequences
Ignoring proper securing methods creates legal liability and real danger.
Fines and Liability
Many states fine drivers for unsecured loads, with California starting at 200 dollars. A 50-pound object flying off at 60 miles per hour hits with over 1,000 pounds of force, creating serious danger for other drivers. Dropping debris can lead to civil liability.
Accident Prevention
A shifting load affects steering, braking, and cornering stability. Respect the physics of wind forces on rooftop cargo. The consequences of failure are severe.
Key Takeaways for Securing Your Roof Rack
Securing a roof rack properly comes down to using the right equipment, applying correct techniques, and staying vigilant throughout your trip. Choose cam buckle straps over bungee cords, always use padding between gear and bars, and distribute weight evenly within your vehicle’s limits. Cross-strapping and the transom knot for long loads create redundancy that prevents failure. Check tension after the first 20 miles and regularly throughout your journey. Drive at reduced speeds and listen for signs of instability. Following these steps ensures your gear arrives safely, your vehicle stays protected, and your journey stays accident-free.
Frequently Asked Questions About Securing Roof Racks
What is the best way to secure a roof rack?
The best method uses cam buckle straps with proper padding, diagonal cross-strapping, and the shake test before driving. For heavy or long loads, add ratchet straps or the transom knot technique for extra holding power.
How often should I check my roof rack straps while driving?
Check strap tension every two to three hours or every 100 miles. Always re-check after the first 20 miles, as webbing stretches and settles quickly during initial travel.
Can I use bungee cords to secure roof rack cargo?
Never use bungee cords. They stretch under load, degrade in sunlight, and loosen progressively during travel, creating a serious safety hazard.
What is the maximum speed for driving with a roof rack?
Most manufacturers recommend keeping speeds below 65 to 70 miles per hour. Higher speeds increase wind lift and vibration, raising the risk of load detachment.
How do I know if my roof rack load is secure enough?
Perform the shake test by firmly grabbing the cargo and shaking it. If any movement occurs, re-tighten the straps. Re-check after driving the first 20 miles.
Do I need special equipment to secure a kayak on a roof rack?
Use bar covers to protect the hull, plus two to four cam buckle straps. For highway travel, add front and rear safety straps anchored to the chassis to prevent uplift. Consider a dedicated kayak carrier for easiest loading.


