

A once-perfectly level floating shelf slowly tilting downward is a common household frustration. You notice it first in the corner of your eye, a slight dip at the front edge, books leaning forward, or decor sliding toward the wall. This sag is not just cosmetic. It signals structural stress, improper installation, or material failure. The good news is that how to stop a floating shelf sagging is a solvable problem with the right diagnosis and fixes. Whether your shelf sags from weak brackets, drywall anchors, or warped MDF, targeted repairs can restore stability and prevent future issues.
This guide breaks down every cause, fix, and prevention strategy so you can build or repair a floating shelf that stays level for years. You will learn how to diagnose the root cause, upgrade your hardware, reinforce mounting points, choose stronger materials, and maintain your shelves for the long haul.
Diagnose the Cause First
Before tightening screws or buying new hardware, identify why the shelf is sagging. A misdiagnosis leads to wasted effort and recurring problems. Take five minutes to inspect the shelf systematically before attempting any repairs.
Check for Loose Screws and Anchors
Loose hardware is the easiest fix but often overlooked. Use a screwdriver or hex key to test all bracket screws, both wall-mounted and shelf-attached. If a screw spins freely or wobbles, the anchor or stud connection has failed. Replace stripped screws with high-grade steel #10 or #12 structural screws. Never reuse old fasteners.
Test Wall Flatness with a Level
An uneven wall can make a properly mounted shelf appear to sag. Place a 24-inch or 48-inch spirit level vertically and horizontally behind the shelf. Look for gaps between the level and wall surface. If the wall dips or bulges, shimming the bracket may be required.
Confirm Stud Engagement
Floating shelves mounted only in drywall will sag under load. Use a stud finder or knock-test method to locate wall studs, typically 16 inches or 24 inches apart. If bracket screws are not anchored into wood studs, drywall compression will cause gradual sagging. Plastic expansion anchors cannot support long-term torque. Only use metal toggle bolts as a last resort.
Weigh the Load
Overloading is a silent shelf killer. Remove all items and weigh them collectively. Most standard floating shelves support 25 to 50 pounds. A stack of books, electronics, or kitchenware often exceeds this. Heavier loads require stud mounting and reinforced brackets.
Inspect the Shelf for Warping
Some sag comes from the shelf slab itself. Remove the shelf and lay it on a flat surface. Look for bowing, especially in the center. MDF and particleboard shelves often warp permanently under load and cannot be salvaged.
Upgrade to Heavy-Duty Brackets

Replacing weak hardware is the most effective way to stop sagging for good. Standard two-prong brackets concentrate stress at two small contact points, inviting failure.
Install Full-Length Support Systems
Standard two-prong brackets are widely used in mass-market floating shelves. They consist of a short metal rod inserted into the wall with minimal depth, typically 2 to 4 inches into the shelf. Load is concentrated at two small contact points, creating high leverage stress. Forward weight generates a moment force that pulls the shelf down and away from the wall. These brackets are generally rated for 30 to 50 pounds total, regardless of shelf length.
Choose Hovr or Rail-Style Brackets
Hovr bracket systems use interlocking aluminum rails that span the entire shelf length. They distribute weight evenly, eliminating leverage stress. These systems are rated for 150 pounds per stud. A 36-inch shelf on two studs supports 300 pounds. Shelf Expression guarantees zero sag with this system and offers a lifetime warranty. Full-length brackets prevent the front edge from rotating downward under load, fixing the core physics of sag.
Steel or aluminum rail alternatives are available in custom lengths for heavy-duty use. They require precise installation but deliver maximum rigidity. These are ideal for kitchens, bathrooms, and home offices with heavy loads.
Anchor Into Studs or Add Blocking
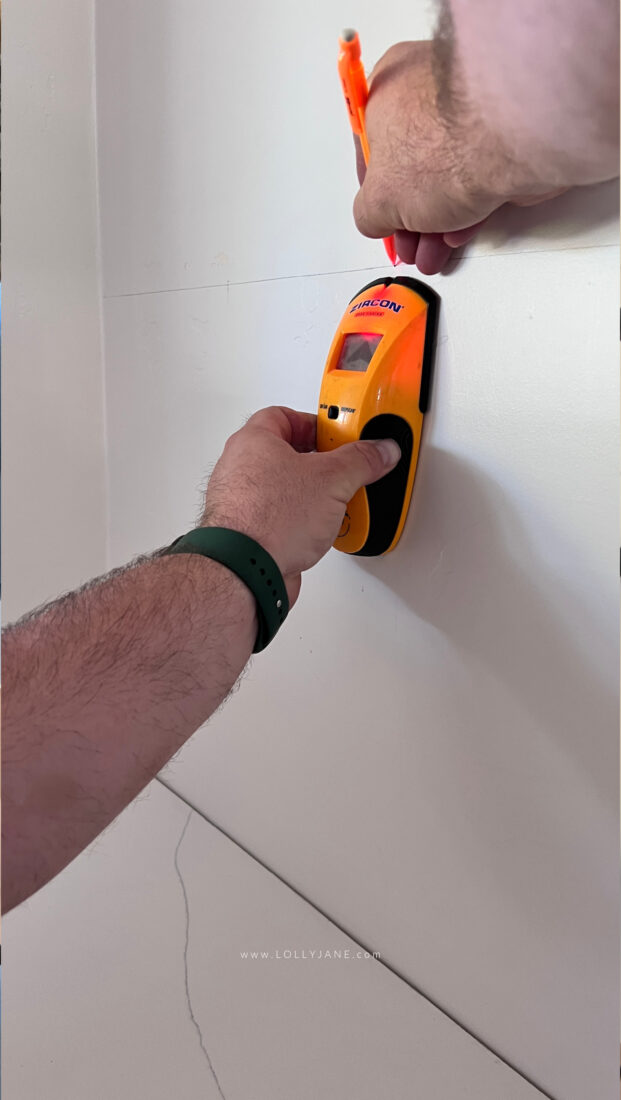
Mounting into wall studs is non-negotiable for heavy or long shelves. If your shelf is currently in drywall, remounting is essential.
Remount Brackets into Wall Studs
Remove the shelf and bracket. Locate studs using a stud finder or magnetic sensor. Mark bracket holes over stud centers. Secure with 2.5-inch #10 wood screws, providing 150 to 200 pounds pull-out strength per screw. Reinstall the shelf and check level. Custom-cut shelves to match stud spacing, 16 inches or 24 inches, for optimal support.
Install Horizontal Blocking
If studs do not align with bracket holes, create solid backing. Cut 2×4 or 2×6 blocking to fit between studs at shelf height. Secure both ends with 3-inch structural screws. Mount the bracket directly into the solid wood, treated like a stud. This method is stronger than any drywall anchor.
Replace Weak Shelf Material
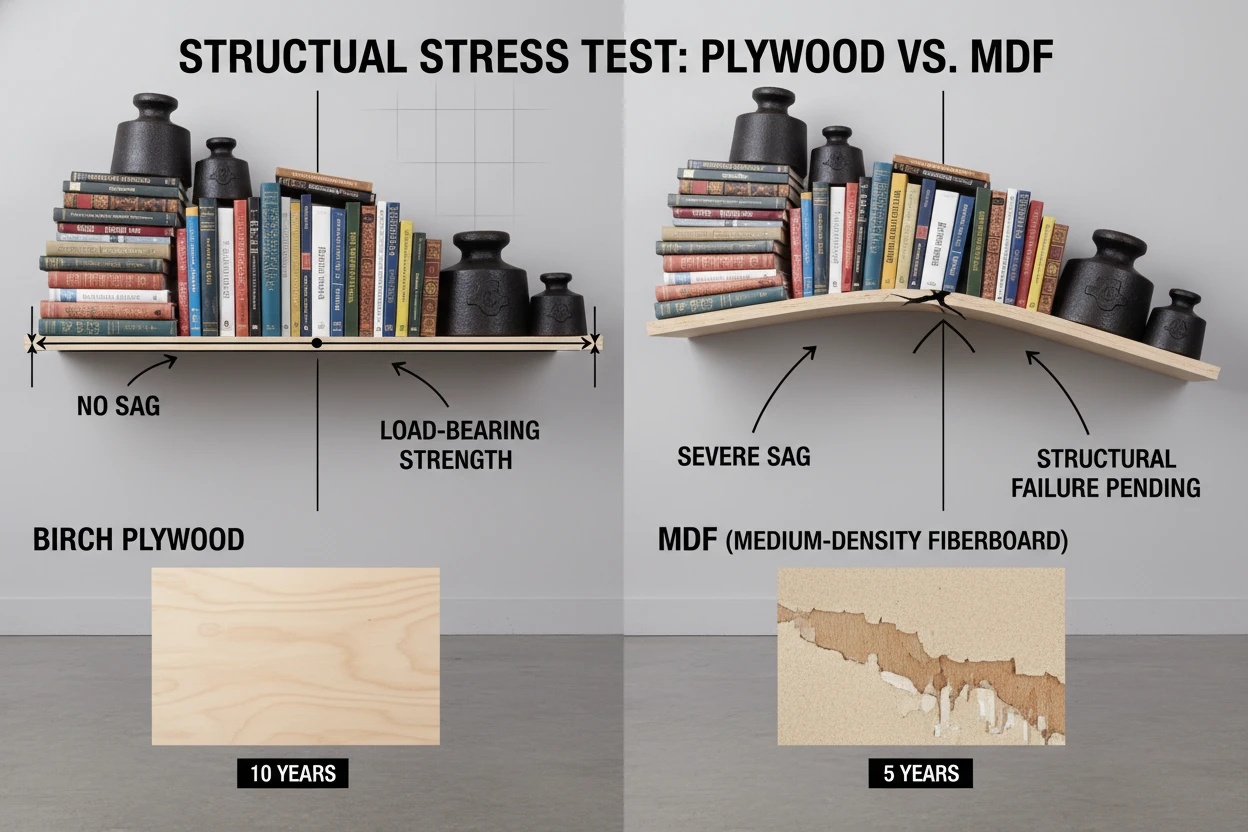
Even the best bracket cannot save a sagging slab. The shelf slab must resist flexing and warping. Weak materials contribute directly to sagging.
Avoid MDF for Heavy or Deep Shelves
MDF begins to flex at 40 pounds and permanently bows above 50 pounds for 3/4-inch thick, 36-inch span. It absorbs moisture, leading to swelling and deformation. Poor screw retention means threads strip easily. Avoid MDF for shelves over 8 inches deep or intended for heavy use.
Choose Stronger Materials
Solid hardwood is the best choice. Oak, maple, walnut, or birch in 1-inch thickness or more supports 150 pounds on a 36-inch span with proper bracketing. It resists warping and holds screws securely. It is ideal for kitchens, bathrooms, and high-use areas.
Premium plywood serves as a budget-friendly alternative. Use 3/4-inch void-free core with hardwood veneer. It is stable, paintable, and resists warping better than MDF. It is suitable for mid-weight loads.
Follow Thickness Guidelines
Shelf depth determines minimum thickness requirements. For 6 to 8 inch depth, use 3/4-inch thickness. For 10 to 12 inch depth, use 1-inch thickness. For 12 inches or deeper, use 1.25 to 1.5-inch thickness. Deeper shelves increase leverage. Thicker material is required to resist bending.
Fix Wall and Bracket Alignment Issues
Even strong hardware fails if the bracket is not level. Uneven walls or bowed studs cause brackets to sit at an angle.
Shim Behind the Bracket
Place wood or plastic shims between bracket and wall. Aim for a slight upward tilt, 1 to 2 degrees. When loaded, gravity will level the shelf. Trim excess with a utility knife for a clean finish. Folded gift cards, rigid cardboard, or thin scrap wood work in a pinch.
Repair Severely Bowing Walls
For major wall irregularities, apply joint compound or plaster repair to fill dips. Sand smooth and prime before remounting. This ensures full bracket contact with the wall.
Use the Right Anchors
If you cannot hit studs, use only high-strength metal anchors. Never use plastic.
Install Toggle Bolts
Snap-Toggle or winged toggles expand behind drywall for superior hold. Capacity is 50 to 100 pounds per anchor in 3/4-inch drywall. Hole size must be 9/16 inch for wing expansion. This is critical. Thread the screw into the toggle first, insert through bracket, then tighten until snug. Do not overtighten.
Try Taggler Toggle-Style Anchors
Metal sleeve bends into a duck-beak shape behind the wall. Hole size is 5/16 inch. They are less bulky than toggle bolts, easier to install in tight spaces. They are stronger than plastic anchors and suitable for mid-weight shelves.
Reinforce Long Shelves
Shelves over 36 inches need extra support to prevent center sag.
Add Mid-Span Support Brackets
Install an additional bracket at the center. Use the same hardware and anchoring method as end supports. This prevents deflection even with strong end brackets.
Use Continuous Backer Board
For multiple shelves or built-in looks, install a horizontal 1×4 or plywood backer board across multiple studs. Secure with 3-inch screws into each stud. Mount all brackets into the solid backer. This distributes load and adds rigidity.
Reverse or Replace Warped Shelves
If the shelf slab itself is bent, it must be corrected or swapped.
Flatten with Counter-Pressure
This works best on solid wood or plywood, not MDF. Place the shelf bowed side up on a flat surface. Apply even weight across the center and edges. Use books, bricks, or sandbags. Leave for 24 to 72 hours. Check progress and reapply if needed. Severe warps may not fully recover. Replacement is often better.
Replace the Shelf Slab
Cut a new slab from solid hardwood for best strength and appearance. Use 3/4-inch or thicker plywood for stable, paint-grade options. Only use MDF for light, dry-area use. Finish to match existing decor and ensure tight fit on bracket.
Prevent Future Sagging
Stop the problem before it starts with smart planning and installation.
Choose the right bracket system. Avoid standard prong brackets for anything heavier than photos or trinkets. Invest in full-length rail systems like Hovr for long-term reliability. These eliminate leverage stress and distribute load evenly.
Mount into studs whenever possible. Always plan shelf placement around stud locations. Use a laser level to align bracket holes with stud centers. Secure every available hole with 2.5-inch wood screws.
Distribute weight evenly. Place heavier items closer to the wall to reduce leverage. Avoid clustering books or decor at the front edge. Stay within 50 pounds unless using reinforced hardware.
Tighten set screws. After sliding shelf onto bracket, tighten set screws on the bottom. These prevent forward movement and reduce stress on wall anchors. Check and retighten annually.
Inspect every 6 to 12 months. Look for new sag, wobble, or loose screws. Retighten hardware and re-level if needed. Catch small issues before they become failures.
Key Takeaways for Fixing Your Floating Shelf
Stopping a floating shelf from sagging comes down to three things: strong brackets, solid anchoring, and proper materials. The weakest link, whether a plastic anchor, drywall-only mount, or MDF shelf, will fail under load. Upgrade to full-length support systems, anchor into studs or blocking, and use solid hardwood or premium plywood slabs.
With the right approach, your floating shelves can stay level, safe, and functional for decades. Whether repairing a sag or installing new ones, prioritize structure over speed. A truly floating shelf should not droop at all.
Frequently Asked Questions About Floating Shelf Sagging
Why does my floating shelf start sagging after a few months?
Sagging typically occurs because the shelf is mounted in drywall rather than wall studs, uses weak standard prong brackets, or is made from MDF material. Over time, the weight of books, decor, or electronics overcomes the mounting system. The solution is to upgrade to heavy-duty brackets anchored directly into wall studs.
Can I fix a sagging floating shelf without removing it?
You can sometimes tighten loose screws or add shims behind the bracket to correct minor sagging. However, if the shelf is sagging significantly, the hardware or material likely needs replacement. Full repair usually requires removing the shelf to access the bracket and wall mounting points.
What is the best bracket system for heavy loads?
The Hovr bracket system or full-length rail-style brackets provide the best support. These distribute weight across the entire shelf length rather than at two contact points. They are rated for 150 pounds per stud and can support 300 pounds on a 36-inch shelf with proper installation.
How much weight can a floating shelf really hold?
Standard prong brackets support 30 to 50 pounds total. Heavy-duty full-length systems support 150 pounds per stud. A 36-inch solid hardwood shelf with proper bracketing supports 150 pounds or more. Always account for the weight of items plus the shelf itself.
Is MDF safe for floating shelves?
MDF is not recommended for heavy or deep shelves. It begins to flex at 40 pounds and permanently bows above 50 pounds on a 36-inch span. It absorbs moisture, swells, and has poor screw retention. Use solid hardwood or premium plywood for durable, sag-resistant shelves.
How do I know if my shelf is sagging because of the wall or the bracket?
Place a level on the shelf. If the front edge dips below the rear, it is sagging. Then hold a level against the wall behind the shelf. If the wall is uneven, the issue may be alignment rather than structural failure. Check that brackets are anchored into studs and that screws are tight.


